User Manual
Page 4
... 3.1 Configuring the HSPA uplink 7 3.2 Configuring the ADSL uplink 8 Accessing the Network Through the Embedded PPP Dial-Up Software on the HG532 8 Accessing the Network Through the PPP Dial-Up Software on Your Computer ...8 4 Configuring the Wireless Network Connection 10 Setting Up a Wireless... Connection Through the WPS Button 10 Setting Up a Wireless Connection Manually 11 5 Configuring the HG532 12 5.1 Changing the Administrator Password Used for Logging In to the Web-Based Configuration Utility 12 5.2 Enabling or Disabling the Wireless Network Function 13 ...
... 3.1 Configuring the HSPA uplink 7 3.2 Configuring the ADSL uplink 8 Accessing the Network Through the Embedded PPP Dial-Up Software on the HG532 8 Accessing the Network Through the PPP Dial-Up Software on Your Computer ...8 4 Configuring the Wireless Network Connection 10 Setting Up a Wireless... Connection Through the WPS Button 10 Setting Up a Wireless Connection Manually 11 5 Configuring the HG532 12 5.1 Changing the Administrator Password Used for Logging In to the Web-Based Configuration Utility 12 5.2 Enabling or Disabling the Wireless Network Function 13 ...
User Manual
Page 12
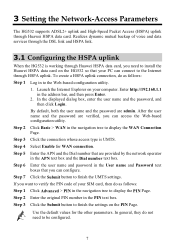
... data card. In general, they do as follows: Step 1 Step 2 Step 3 Click Advanced > PIN in to the Internet through Huawei HSPA data card, you can connect to the Web-based configuration utility. 1. To create a HSPA uplink connection, do not need to display the PIN Page. ... your PC can configure. Realizes dynamic mutual backup of your computer. Enter http://192.168.1.1 in the User name and Password text boxes that you need to finish the settings on the HG532 so that are provided by the network operator in the PIN text box. Step 6 Enter the user name and...
... data card. In general, they do as follows: Step 1 Step 2 Step 3 Click Advanced > PIN in to the Internet through Huawei HSPA data card, you can connect to the Web-based configuration utility. 1. To create a HSPA uplink connection, do not need to display the PIN Page. ... your PC can configure. Realizes dynamic mutual backup of your computer. Enter http://192.168.1.1 in the User name and Password text boxes that you need to finish the settings on the HG532 so that are provided by the network operator in the PIN text box. Step 6 Enter the user name and...
User Manual
Page 13
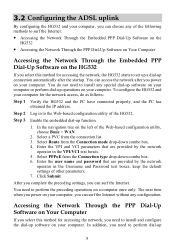
You do as follows: Step 1 Verify the HG532 and the PC have connected properly, and the PC has obtained the IP address. In the navigation tree on your computer. Enter the user name and password that are provided by the network operator in to perform dial-up 8 The next ... Enter the VPI and VCI parameters that are provided by the network operator in the Username and Password text boxes, keep the default settings of other parameters. 7. 3.2 Configuring the ADSL uplink By configuring the HG532 and your computer, you can choose any of the following methods to surf the Internet: z ...
You do as follows: Step 1 Verify the HG532 and the PC have connected properly, and the PC has obtained the IP address. In the navigation tree on your computer. Enter the user name and password that are provided by the network operator in to perform dial-up 8 The next ... Enter the VPI and VCI parameters that are provided by the network operator in the Username and Password text boxes, keep the default settings of other parameters. 7. 3.2 Configuring the ADSL uplink By configuring the HG532 and your computer, you can choose any of the following methods to surf the Internet: z ...
User Manual
Page 14
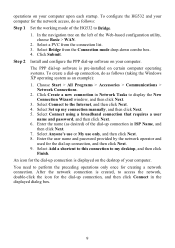
... 8. Select Add a shortcut to this connection to the Internet, and then click Next. 4. In the navigation tree on the left of the HG532 to display the New Connection Wizard window, and then click Next. 3. Step 2 Install and configure the PPP dial-up connection, do as follows:... dial-up connection, and then click Connect in the displayed dialog box. 9 Select Connect using a broadband connection that requires a user name and password, and then click Next. 6. Select Connect to my desktop, and then click Finish. Select Bridge from the connection list. 3. operations on your...
... 8. Select Add a shortcut to this connection to the Internet, and then click Next. 4. In the navigation tree on the left of the HG532 to display the New Connection Wizard window, and then click Next. 3. Step 2 Install and configure the PPP dial-up connection, do as follows:... dial-up connection, and then click Connect in the displayed dialog box. 9 Select Connect using a broadband connection that requires a user name and password, and then click Next. 6. Select Connect to my desktop, and then click Finish. Select Bridge from the connection list. 3. operations on your...
User Manual
Page 15
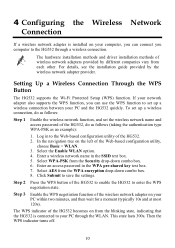
...follows: Step 1 Enable the wireless network function, and set up a wireless connection between your PC through a wireless connection. Enter an access password in the SSID text box. 5. Step 2 Press the WPS button of wireless network adapters provided by the wireless network adapter provider. If .... Then the WPS indicator turns off. 10 Setting Up a Wireless Connection Through the WPS Button The HG532 supports the Wi-Fi Protected Setup (WPS) function. Log in to set the wireless network name and access password of the Web-based configuration utility, choose Basic > WLAN. 3.
...follows: Step 1 Enable the wireless network function, and set up a wireless connection between your PC through a wireless connection. Enter an access password in the SSID text box. 5. Step 2 Press the WPS button of wireless network adapters provided by the wireless network adapter provider. If .... Then the WPS indicator turns off. 10 Setting Up a Wireless Connection Through the WPS Button The HG532 supports the Wi-Fi Protected Setup (WPS) function. Log in to set the wireless network name and access password of the Web-based configuration utility, choose Basic > WLAN. 3.
User Manual
Page 16
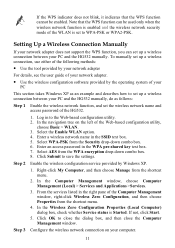
...drop-down combo box. 8. Select AES from the shortcut menu. 2. Step 3 Configure the wireless network connection on the left of the HG532. 1. If the WPS indicator does not blink, it indicates that the WPS function can set to the Web-based configuration utility. 2. ...Service status is set up a wireless connection between your computer. 11 Setting Up a Wireless Connection Manually If your network adapter. Enter an access password in to WPA-PSK or WPA2-PSK. In the Computer Management window, choose Computer Management (Local) > Services and Applications >Services. 3. Enter ...
...drop-down combo box. 8. Select AES from the shortcut menu. 2. Step 3 Configure the wireless network connection on the left of the HG532. 1. If the WPS indicator does not blink, it indicates that the WPS function can set to the Web-based configuration utility. 2. ...Service status is set up a wireless connection between your computer. 11 Setting Up a Wireless Connection Manually If your network adapter. Enter an access password in to WPA-PSK or WPA2-PSK. In the Computer Management window, choose Computer Management (Local) > Services and Applications >Services. 3. Enter ...
User Manual
Page 17
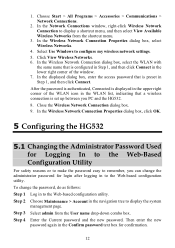
...from the User name drop-down combo box. In the Wireless Network Connection Properties dialog box, click OK. 5 Configuring the HG532 5.1 Changing the Administrator Password Used for Logging In to the Web-Based Configuration Utility For safety reasons or to make the...in the WLAN list, indicating that is preset in to remember, you PC and the HG532. 8. Choose Start > All Programs > Accessories > Communications > Network Connections. 2. Click View Wireless Networks. 6. Then enter the new password again in the navigation tree to the Web-based configuration utility. 1. In the Network ...
...from the User name drop-down combo box. In the Wireless Network Connection Properties dialog box, click OK. 5 Configuring the HG532 5.1 Changing the Administrator Password Used for Logging In to the Web-Based Configuration Utility For safety reasons or to make the...in the WLAN list, indicating that is preset in to remember, you PC and the HG532. 8. Choose Start > All Programs > Accessories > Communications > Network Connections. 2. Click View Wireless Networks. 6. Then enter the new password again in the navigation tree to the Web-based configuration utility. 1. In the Network ...
User Manual
Page 18
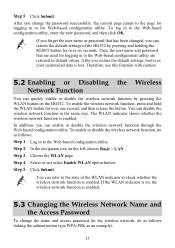
... pressing the WLAN button on the HG532. If the WLAN indicator is on the left, choose Basic > LAN. Step 5 Click Submit. After you can restore the default settings of the WLAN indicator to the Web-based configuration utility, enter the new password, and then click OK. Therefore,... configuration utility. The WLAN indicator shows whether the wireless network function is enabled. 5.3 Changing the Wireless Network Name and the Access Password To change the password successfully, the current page jumps to the page for the wireless network, do as an example): 13 In addition, you restore...
... pressing the WLAN button on the HG532. If the WLAN indicator is on the left, choose Basic > LAN. Step 5 Click Submit. After you can restore the default settings of the WLAN indicator to the Web-based configuration utility, enter the new password, and then click OK. Therefore,... configuration utility. The WLAN indicator shows whether the wireless network function is enabled. 5.3 Changing the Wireless Network Name and the Access Password To change the password successfully, the current page jumps to the page for the wireless network, do as an example): 13 In addition, you restore...
User Manual
Page 19
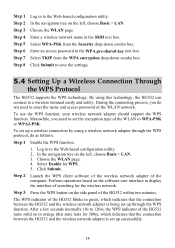
...2 Launch the WPS client software of the wireless network adapter of the HG532 within two minutes. Perform operations based on the software user interface to a wireless terminal easily and safely. Choose the WLAN page. Enter an access password in the SSID text box. Select TKIP from the Security drop-down... combo box. In the navigation tree on the left , choose Basic > LAN. 3. The WPS indicator of the HG532 blinks in green, which indicates that the connection between...
...2 Launch the WPS client software of the wireless network adapter of the HG532 within two minutes. Perform operations based on the software user interface to a wireless terminal easily and safely. Choose the WLAN page. Enter an access password in the SSID text box. Select TKIP from the Security drop-down... combo box. In the navigation tree on the left , choose Basic > LAN. 3. The WPS indicator of the HG532 blinks in green, which indicates that the connection between...

User Manual
Page 21
Step 4 Click the Restore Default Settings button. Step 1 Log in to the Web-based configuration utility by entering the default user name and password that are admin. 16 Step 2 In the navigation tree on the left, choose Maintenance > Device. After the preceding operations, the current page jumps to the Web-based configuration utility. You can log in to the login page. Step 3 Choose the Reset page.
Step 4 Click the Restore Default Settings button. Step 1 Log in to the Web-based configuration utility by entering the default user name and password that are admin. 16 Step 2 In the navigation tree on the left, choose Maintenance > Device. After the preceding operations, the current page jumps to the Web-based configuration utility. You can log in to the login page. Step 3 Choose the Reset page.
User Manual
Page 23
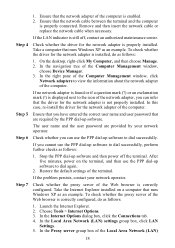
...persists, contact your network operator. Check whether the proxy server of the network adapter, you have entered the correct user name and user password that the driver for the network adapter of the terminal. In the Proxy server group box of the computer is not properly installed.... an authorized maintenance center. Ensure that the network cable between the terminal and the computer is properly installed. The user name and the user password are required by your network operator. If you can infer that are provided by the PPP dial-up software to dial successfully. Step 4 ...
...persists, contact your network operator. Check whether the proxy server of the network adapter, you have entered the correct user name and user password that the driver for the network adapter of the terminal. In the Proxy server group box of the computer is not properly installed.... an authorized maintenance center. Ensure that the network cable between the terminal and the computer is properly installed. The user name and the user password are required by your network operator. If you can infer that are provided by the PPP dial-up software to dial successfully. Step 4 ...
User Manual
Page 27
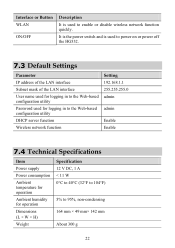
Interface or Button WLAN ON/OFF Description It is used to power on or power off the HG532. 7.3 Default Settings Parameter IP address of the LAN interface Subnet mask of the LAN interface User name used for logging in to the Web-based ... admin Enable Enable 7.4 Technical Specifications Item Power supply Power consumption Ambient temperature for operation Ambient humidity for logging in to the Web-based configuration utility Password used to 95%, non-condensing 164 mm × 49 mm× 142 mm About 300 g 22 It is the power switch and is used for...
Interface or Button WLAN ON/OFF Description It is used to power on or power off the HG532. 7.3 Default Settings Parameter IP address of the LAN interface Subnet mask of the LAN interface User name used for logging in to the Web-based ... admin Enable Enable 7.4 Technical Specifications Item Power supply Power consumption Ambient temperature for operation Ambient humidity for logging in to the Web-based configuration utility Password used to 95%, non-condensing 164 mm × 49 mm× 142 mm About 300 g 22 It is the power switch and is used for...


