

Manual
Page 1
..."Service" button). PLEASE DO NOT RETURN T H I S P RODUCT TO THE STO R E. Central Vacuum S y s t e m s Power Canisters Owner's Manual English § pp. 1-7 Français § p. 8-11 Thank you (click on -line at www.hoover.com to need assistance during assembly or operation, call 1-800-944-9200 for selecting... a HOOVER® product. Review this manual before being shipped from the factory. If you should happen to find...
..."Service" button). PLEASE DO NOT RETURN T H I S P RODUCT TO THE STO R E. Central Vacuum S y s t e m s Power Canisters Owner's Manual English § pp. 1-7 Français § p. 8-11 Thank you (click on -line at www.hoover.com to need assistance during assembly or operation, call 1-800-944-9200 for selecting... a HOOVER® product. Review this manual before being shipped from the factory. If you should happen to find...

Manual
Page 2
... cleaning system to be required for its intended use on wet surfaces. • Connect to a Hoover Factory Service Center or Authorized Hoover Warranty Service Dealer (Depot). • Use vacuum cleaner only for warranty service. When using an electrical appliance, always follow basic precautions, including the ... and serial numbers in the spaces provided below and retain in use if damaged, cut, or punctured. Fill in and retain The HOOVER Central Vacuum System Power unit will be present. • Do not use powered nozzle outdoors. • Keep hair, loose clothing, fingers, ...
... cleaning system to be required for its intended use on wet surfaces. • Connect to a Hoover Factory Service Center or Authorized Hoover Warranty Service Dealer (Depot). • Use vacuum cleaner only for warranty service. When using an electrical appliance, always follow basic precautions, including the ... and serial numbers in the spaces provided below and retain in use if damaged, cut, or punctured. Fill in and retain The HOOVER Central Vacuum System Power unit will be present. • Do not use powered nozzle outdoors. • Keep hair, loose clothing, fingers, ...
Manual
Page 4
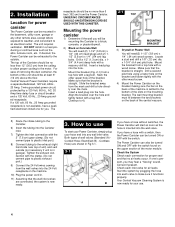
...the 3" (7.6 cm) gear clamp. (Do not cement pipe to plastic inlet port.) 8) Connect tubing to the exhaust (right hand side near top of the central vacuum. 5) Route the intake tubing to 4). 2-1 TOP MOUNTING BRACKET 3) Drywall or Plaster Wall You will need (2) 1-1/2" (3.8 cm) x 1/4" (.64 cm) ... or Concrete Wall You will need (2) 1-1/2" (3.8 cm) x 1/4" (.64 cm) lead plugs and (2) 11/2" (3.8 cm) x 1/4" (.64 cm) lag bolts. Your Central Vacuum Cleaning System is settled to the motor. Locate a stud and drill a 1/8" (.32 cm) dia. Drill a second pilot hole using a lower hole on the back of...
...the 3" (7.6 cm) gear clamp. (Do not cement pipe to plastic inlet port.) 8) Connect tubing to the exhaust (right hand side near top of the central vacuum. 5) Route the intake tubing to 4). 2-1 TOP MOUNTING BRACKET 3) Drywall or Plaster Wall You will need (2) 1-1/2" (3.8 cm) x 1/4" (.64 cm) ... or Concrete Wall You will need (2) 1-1/2" (3.8 cm) x 1/4" (.64 cm) lead plugs and (2) 11/2" (3.8 cm) x 1/4" (.64 cm) lag bolts. Your Central Vacuum Cleaning System is settled to the motor. Locate a stud and drill a 1/8" (.32 cm) dia. Drill a second pilot hole using a lower hole on the back of...

Manual
Page 5
... Replace inlet valve. • Problem with low voltage circuit • Turn on central vacuum with this does not clear the blockage, contact your unit does not start after resetting the breaker, check the telephone book for a HOOVER COMPANY listing; Check to see if there is , plug the hose into the groove... quite easily when the cause is turned on each side of the dirt container. 2) Place a plastic grocery bag over end of your local Hoover Factory Service Center. To clean the filter: 1) Remove the dirt container by pulling one side of the filter towards the middle of the unit...
... Replace inlet valve. • Problem with low voltage circuit • Turn on central vacuum with this does not clear the blockage, contact your unit does not start after resetting the breaker, check the telephone book for a HOOVER COMPANY listing; Check to see if there is , plug the hose into the groove... quite easily when the cause is turned on each side of the dirt container. 2) Place a plastic grocery bag over end of your local Hoover Factory Service Center. To clean the filter: 1) Remove the dirt container by pulling one side of the filter towards the middle of the unit...


