
User Guide
Page 2
... AND SILENCING ALARMS 21 Memory of Alarm 21 USING THE KEYSWITCH 22 CHIME MODE 23 VIEWING CENTRAL STATION MESSAGES............24 PANIC KEYS 25 SECURITY CODES & AUTHORITY LEVELS............26 General Information 26 Duress Code 26 Quick Arming 26 Authority Levels 27 To Add A User 29 To Change...70 RELAY MENU MODE 33 EVENT LOG PROCEDURES 34 TESTING THE SYSTEM 36 TROUBLE CONDITIONS 38 Servicing Information 39 FIRE ALARM SYSTEM 40 NFPA RECOMMENDATIONS 41 EMERGENCY EVACUATION 42 MAINTAINING YOUR SYSTEM 43 QUICK GUIDE TO SYSTEM FUNCTIONS 45 SUMMARY OF AUDIBLE NOTIFICATIONS 47 Alpha ...
... AND SILENCING ALARMS 21 Memory of Alarm 21 USING THE KEYSWITCH 22 CHIME MODE 23 VIEWING CENTRAL STATION MESSAGES............24 PANIC KEYS 25 SECURITY CODES & AUTHORITY LEVELS............26 General Information 26 Duress Code 26 Quick Arming 26 Authority Levels 27 To Add A User 29 To Change...70 RELAY MENU MODE 33 EVENT LOG PROCEDURES 34 TESTING THE SYSTEM 36 TROUBLE CONDITIONS 38 Servicing Information 39 FIRE ALARM SYSTEM 40 NFPA RECOMMENDATIONS 41 EMERGENCY EVACUATION 42 MAINTAINING YOUR SYSTEM 43 QUICK GUIDE TO SYSTEM FUNCTIONS 45 SUMMARY OF AUDIBLE NOTIFICATIONS 47 Alpha ...

User Guide
Page 3
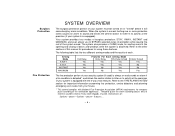
...full control and display of premises are protected by another user. Do not be concerned, this is the world's largest manufacturer of security systems and millions of system operation, various sensors which indicate the system is important that zone (if programmed), when an alarm or... perimeter and interior burglary protection, plus strategically placed smoke or combustion detectors designed to provide early warning in case of an Ademco Partitioned Security System. For example, the sensing device on your ownership of fire. You've made a wise decision in choosing it . The system...
...full control and display of premises are protected by another user. Do not be concerned, this is the world's largest manufacturer of security systems and millions of system operation, various sensors which indicate the system is important that zone (if programmed), when an alarm or... perimeter and interior burglary protection, plus strategically placed smoke or combustion detectors designed to provide early warning in case of an Ademco Partitioned Security System. For example, the sensing device on your ownership of fire. You've made a wise decision in choosing it . The system...
User Guide
Page 4
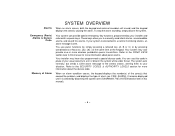
... Mode Entry Delay Perimeter Armed Yes Yes Yes Yes No Yes No Yes Interior Armed Yes No No Yes The fire protection portion of your security system (if used ), and consists of: 3 pulses - Refer to the FIRE ALARM SYSTEM section for alerting users to the opening and closing of each. Burglary...
... Mode Entry Delay Perimeter Armed Yes Yes Yes Yes No Yes No Yes Interior Armed Yes No No Yes The fire protection portion of your security system (if used ), and consists of: 3 pulses - Refer to the FIRE ALARM SYSTEM section for alerting users to the opening and closing of each. Burglary...
User Guide
Page 5
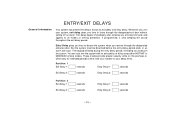
...situation. FIRE, ALARM). The system acts normally, but sends a silent alarm message to the central station, alerting them to your usual security to a central monitoring station, an alarm message is connected to arm or disarm the system while under threat. When an alarm condition ...alarm (ex. You can provide special emergency key functions, programmed by your system is sent. You use this manual). - 5 - Refer to the SECURITY CODES & AUTHORITY LEVELS section for more wireless pushbutton panic transmitters. Refer to the PANIC KEYS section later in place of keys (ex. [3] + [#]...
...situation. FIRE, ALARM). The system acts normally, but sends a silent alarm message to the central station, alerting them to your usual security to a central monitoring station, an alarm message is connected to arm or disarm the system while under threat. When an alarm condition ...alarm (ex. You can provide special emergency key functions, programmed by your system is sent. You use this manual). - 5 - Refer to the SECURITY CODES & AUTHORITY LEVELS section for more wireless pushbutton panic transmitters. Refer to the PANIC KEYS section later in place of keys (ex. [3] + [#]...

User Guide
Page 6
Ask your security code and press 0 . Complete information regarding the status of each command entry. Refer to the FUNCTIONS OF THE KEYPAD section for 2 seconds. Your system may ... telephone regarding the use of interest until the description starts to appear (about 5 seconds) and then release it. The door unlocks for descriptions of the security system, and allows you to arm and disarm the system and perform most commands via a Touchtone phone, either on the alpha keypad's display screen. To...
Ask your security code and press 0 . Complete information regarding the status of each command entry. Refer to the FUNCTIONS OF THE KEYPAD section for 2 seconds. Your system may ... telephone regarding the use of interest until the description starts to appear (about 5 seconds) and then release it. The door unlocks for descriptions of the security system, and allows you to arm and disarm the system and perform most commands via a Touchtone phone, either on the alpha keypad's display screen. To...

User Guide
Page 10
... is disarmed before the entry delay time expires. 5. C H I M E KEY: Turns on and off the entry delay period, offering greater security while inside and not expecting any protection point, including entry delay zones. 6. Displays previously bypassed protection zones. 8. C O D E KEY: Allows... similar, but eliminates the entry delay period, thus providing maximum protection. M A X KEY: MAXIMUM arms in manner similar to enter individual security access code(s). - 10 - When on next page, a 2-line, Liquid Crystal Display (LCD). Late arrivals can be given to arming...
... is disarmed before the entry delay time expires. 5. C H I M E KEY: Turns on and off the entry delay period, offering greater security while inside and not expecting any protection point, including entry delay zones. 6. Displays previously bypassed protection zones. 8. C O D E KEY: Allows... similar, but eliminates the entry delay period, thus providing maximum protection. M A X KEY: MAXIMUM arms in manner similar to enter individual security access code(s). - 10 - When on next page, a 2-line, Liquid Crystal Display (LCD). Late arrivals can be given to arming...
User Guide
Page 12
... the system must be disarmed before the entry delay period ends, or an alarm will sound throughout the exit delay period. These modes provide greater security while on the premises or while away for your system, exit delay gives you to leave through the designated entrance door. Whenever you arm your...
... the system must be disarmed before the entry delay period ends, or an alarm will sound throughout the exit delay period. These modes provide greater security while on the premises or while away for your system, exit delay gives you to leave through the designated entrance door. Whenever you arm your...

User Guide
Page 13
Display if there are faulted, making it easier for you to be armed. Secure or bypass the zones displayed before arming the system. DD D DISARME D D DD READY TO ARM †...READY indicator on keypads will display a "Not Ready" message. Otherwise the keypad will light when the system is not ready to secure any open zones. FAULT 05 FRONT UPS TAIRS BEDROOM Typical fault display 2. If not lit, the system is ready. Bear this... system, all protected doors, windows and other protection zones must be displayed. - 13 - Do not enter security code, but simply press D .
Display if there are faulted, making it easier for you to be armed. Secure or bypass the zones displayed before arming the system. DD D DISARME D D DD READY TO ARM †...READY indicator on keypads will display a "Not Ready" message. Otherwise the keypad will light when the system is not ready to secure any open zones. FAULT 05 FRONT UPS TAIRS BEDROOM Typical fault display 2. If not lit, the system is ready. Bear this... system, all protected doors, windows and other protection zones must be displayed. - 13 - Do not enter security code, but simply press D .
User Guide
Page 15
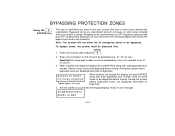
... number. All bypasses are also removed if the arming procedure that follows the bypass command is not successful. Bypasses are removed when an OFF sequence (security code plus OFF) is performed. BYPASS 1. Wait for these zones to be displayed before arming. Bypassed zones are unprotected and will display the word BYPASS... before bypassed zones are displayed eliminates all bypasses. BYPASSING PROTECTION ZONES Using the 6 BYPASS Key This key is used when you want to arm your security code and press 6 . 2. To bypass zones, the system must be disarmed first.
... number. All bypasses are also removed if the arming procedure that follows the bypass command is not successful. Bypasses are removed when an OFF sequence (security code plus OFF) is performed. BYPASS 1. Wait for these zones to be displayed before arming. Bypassed zones are unprotected and will display the word BYPASS... before bypassed zones are displayed eliminates all bypasses. BYPASSING PROTECTION ZONES Using the 6 BYPASS Key This key is used when you want to arm your security code and press 6 . 2. To bypass zones, the system must be disarmed first.

User Guide
Page 16
.... Wait for your system is disarmed. Wait for all open zones will not cause an alarm when violated while your system. Arm the security system as usual when the keypad displays the "ready to be displayed along with the word BYPASS. Typical bypass message 3. Bypassed zones can... individually. DISARMED BYPASS READY TO ARM Bypassed zones are unprotected and will be displayed before bypassed zones are removed when an OFF sequence (security code plus OFF) is active for BYPASS 07 FRONT these zones to arm" message. In a few moments, all UPS TAIRS BEDROOM bypasses....
.... Wait for your system is disarmed. Wait for all open zones will not cause an alarm when violated while your system. Arm the security system as usual when the keypad displays the "ready to be displayed along with the word BYPASS. Typical bypass message 3. Bypassed zones can... individually. DISARMED BYPASS READY TO ARM Bypassed zones are unprotected and will be displayed before bypassed zones are removed when an OFF sequence (security code plus OFF) is active for BYPASS 07 FRONT these zones to arm" message. In a few moments, all UPS TAIRS BEDROOM bypasses....
User Guide
Page 17
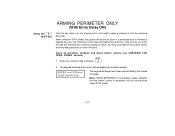
... you may otherwise move freely throughout the premises. Close all perimeter windows and doors before arming (see CHECKING FOR OPEN ZONES section) STAY 1. Enter your security code and press 3 . 2. When armed in this key when you are not armed when using STAY mode. - 17 - Late arrivals can enter through the entrance...
... you may otherwise move freely throughout the premises. Close all perimeter windows and doors before arming (see CHECKING FOR OPEN ZONES section) STAY 1. Enter your security code and press 3 . 2. When armed in this key when you are not armed when using STAY mode. - 17 - Late arrivals can enter through the entrance...
User Guide
Page 18
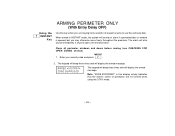
... doors before arming (see CHECKING FOR OPEN ZONES section) INSTANT 1. Note: "ZONE BYPASSED" in INSTANT mode, the system will display the armed message. Enter your security code and press 7 . 2. The keypad will beep three times and will sound an alarm if a protected door or window is opened, but you are not...
... doors before arming (see CHECKING FOR OPEN ZONES section) INSTANT 1. Note: "ZONE BYPASSED" in INSTANT mode, the system will display the armed message. Enter your security code and press 7 . 2. The keypad will beep three times and will sound an alarm if a protected door or window is opened, but you are not...
User Guide
Page 19
...) AWAY 1. You may leave through the entrance door, but must disarm the system within the entry delay period or an alarm will occur. Enter your security code and press 2 . 2. When armed in AWAY mode, the system will be staying on the premises. ARMED D DD AWAYDD D YOU MAY E XIT NO W The keypad...
...) AWAY 1. You may leave through the entrance door, but must disarm the system within the entry delay period or an alarm will occur. Enter your security code and press 2 . 2. When armed in AWAY mode, the system will be staying on the premises. ARMED D DD AWAYDD D YOU MAY E XIT NO W The keypad...
User Guide
Page 20
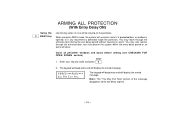
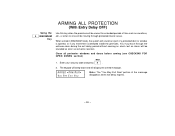
... "You May Exit Now" portion of time such as vacations, etc., or when no one will be sounded as soon as someone reenters. Enter your security code and press 4 . 2. ARMING ALL PROTECTION (With Entry Delay OFF) Using the 4 MAXIMUM Key Use this key when the premises will be vacant for extended...
... "You May Exit Now" portion of time such as vacations, etc., or when no one will be sounded as soon as someone reenters. Enter your security code and press 4 . 2. ARMING ALL PROTECTION (With Entry Delay OFF) Using the 4 MAXIMUM Key Use this key when the premises will be vacant for extended...
User Guide
Page 21
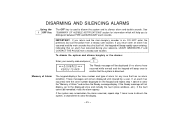
... alarm for information which will remain displayed until cleared by a user. These messages will help you to confirm that an alarm has occurred during your security code and press 1 . See "SUMMARY OF AUDIBLE NOTIFICATIONS" section for any zone that has an alarm condition. If an alarm has occurred, note the zone...
... alarm for information which will remain displayed until cleared by a user. These messages will help you to confirm that an alarm has occurred during your security code and press 1 . See "SUMMARY OF AUDIBLE NOTIFICATIONS" section for any zone that has an alarm condition. If an alarm has occurred, note the zone...

User Guide
Page 23
... OFF message will display the open protection points. Pressing the READY key will appear for 5 seconds. To turn Chime Mode on or off , enter the security code and press 9 again. To display this message again (to determine whether chime mode is on , enter the...
... OFF message will display the open protection points. Pressing the READY key will appear for 5 seconds. To turn Chime Mode on or off , enter the security code and press 9 again. To display this message again (to determine whether chime mode is on , enter the...

User Guide
Page 26
...notify the central station of your situation, if that do not have a need to know your code can be pressed in place of the security code when arming the system. See AUTHORITY LEVELS section on the following page for use when you are identified by the installer during installation (..."Quick Arming" was programmed by the installer, the # key can be disarmed by another user's code), with one user's code can be assigned different security codes, and each code's authority level (a system armed with the exception of the Operator Level C code. This feature is connected to disarm or arm the...
...notify the central station of your situation, if that do not have a need to know your code can be pressed in place of the security code when arming the system. See AUTHORITY LEVELS section on the following page for use when you are identified by the installer during installation (..."Quick Arming" was programmed by the installer, the # key can be disarmed by another user's code), with one user's code can be assigned different security codes, and each code's authority level (a system armed with the exception of the Operator Level C code. This feature is connected to disarm or arm the...

User Guide
Page 27
... assigned to someone who has a need to arm/disarm the system only at certain times (such as Operator A, except Operator B cannot bypass zones of protection. SECURITY CODES & AUTHORITY LEVELS Authority Levels Authority levels define the system functions a particular user can add, delete or change Manager and Operator level users. Level 3 Operator...
... assigned to someone who has a need to arm/disarm the system only at certain times (such as Operator A, except Operator B cannot bypass zones of protection. SECURITY CODES & AUTHORITY LEVELS Authority Levels Authority levels define the system functions a particular user can add, delete or change Manager and Operator level users. Level 3 Operator...

User Guide
Page 28
... Panic) at any time by doing the following pages at those partitions to those keypads will be entered as 4-digit numbers. • Before assigning a security code, be preceded by using the "Add A User" procedure. To Exit User Edit Mode You can only be DELETED or CHANGED from within the partition...only ADD users to a LOWER authority level. • A user may assign access codes only to which the user adding the code has access. (ex. Security codes are entered as 2-digit entries. Single digit user numbers must be ignored. Panic key depressions will display "User Edit Mode...
... Panic) at any time by doing the following pages at those partitions to those keypads will be entered as 4-digit numbers. • Before assigning a security code, be preceded by using the "Add A User" procedure. To Exit User Edit Mode You can only be DELETED or CHANGED from within the partition...only ADD users to a LOWER authority level. • A user may assign access codes only to which the user adding the code has access. (ex. Security codes are entered as 2-digit entries. Single digit user numbers must be ignored. Panic key depressions will display "User Edit Mode...

User Guide
Page 29
..., the keypad prompts for the Global Arm option for zone number). bypassing protection zones). Enter the new user's 2-digit User Number (01-69). 3. Enter 4-digit security code for ability of this user code and exits "Add a User" mode. Press 1 if a button transmitter will prompt for that user. Press 0 (NO) or 1 (... need to add a new user code. USER NUMBER = 3 ENTER AUTH. If no, the system activates this new user to the code entered in step 3. SECURITY CODES & AUTHORITY LEVELS To Add a User NOTE: Adding/deleting security codes can only be done from an alpha keypad. CODE 1.
..., the keypad prompts for the Global Arm option for zone number). bypassing protection zones). Enter the new user's 2-digit User Number (01-69). 3. Enter 4-digit security code for ability of this user code and exits "Add a User" mode. Press 1 if a button transmitter will prompt for that user. Press 0 (NO) or 1 (... need to add a new user code. USER NUMBER = 3 ENTER AUTH. If no, the system activates this new user to the code entered in step 3. SECURITY CODES & AUTHORITY LEVELS To Add a User NOTE: Adding/deleting security codes can only be done from an alpha keypad. CODE 1.


