
Owner's Manual
Page 3
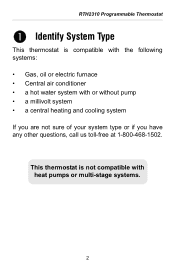
This thermostat is not compatible with or without pump • a millivolt system • a central heating and cooling system If you are not sure of your system type or if you have any other questions, call us toll-free at 1-800-468-1502. RTH2310 Programmable Thermostat Identify System Type 1. This thermostat is compatible with the following systems: • Gas, oil or electric furnace • Central air conditioner • a hot water system with heat pumps or multi-stage systems. 2
This thermostat is not compatible with or without pump • a millivolt system • a central heating and cooling system If you are not sure of your system type or if you have any other questions, call us toll-free at 1-800-468-1502. RTH2310 Programmable Thermostat Identify System Type 1. This thermostat is compatible with the following systems: • Gas, oil or electric furnace • Central air conditioner • a hot water system with heat pumps or multi-stage systems. 2
Owner's Manual
Page 4
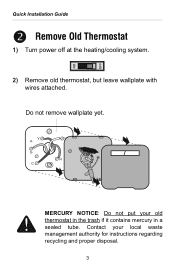
MERCURY NOTICE: Do not put your local waste management authority for instructions regarding recycling and proper disposal. 3 Quick Installation Guide Remove Old Thermostat 2. 1) Turn power off at the heating/cooling system. 2) Remove old thermostat, but leave wallplate with wires attached. Contact your old thermostat in the trash if it contains mercury in a sealed tube. Do not remove wallplate yet.
MERCURY NOTICE: Do not put your local waste management authority for instructions regarding recycling and proper disposal. 3 Quick Installation Guide Remove Old Thermostat 2. 1) Turn power off at the heating/cooling system. 2) Remove old thermostat, but leave wallplate with wires attached. Contact your old thermostat in the trash if it contains mercury in a sealed tube. Do not remove wallplate yet.
Owner's Manual
Page 11
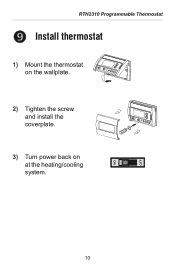
RTH2310 Programmable Thermostat Install thermostat 8. 1) Mount the thermostat on the wallplate. 2) Tighten the screw and install the coverplate. 3) Turn power back on at the heating/cooling system. 10
RTH2310 Programmable Thermostat Install thermostat 8. 1) Mount the thermostat on the wallplate. 2) Tighten the screw and install the coverplate. 3) Turn power back on at the heating/cooling system. 10

Owner's Manual
Page 12
DISPLAY DESCRIPTION OPTIONS 1 Temperature display °C or °F Time display 12 h or 24 h Early Start 2 On or Off Heating cycles per hour 3 2, 3, 4, 5 or 6 4 Cooling cycles per hour 3 2, 3, 4, 5 or 6 5 1 Default settings are shown in U.S.A. Quick Installation Guide System ...Printed in bold and underlined. 2 See page 3 of Operating Manual. 3 Use the system switch to switch between the two parameters. 4 For optimal heating control, use the setting that matches your system as follows: 2=30 min (steam, gravity), 3=20 min (hot water, 90%+ high-efficiency furnace),...
DISPLAY DESCRIPTION OPTIONS 1 Temperature display °C or °F Time display 12 h or 24 h Early Start 2 On or Off Heating cycles per hour 3 2, 3, 4, 5 or 6 4 Cooling cycles per hour 3 2, 3, 4, 5 or 6 5 1 Default settings are shown in U.S.A. Quick Installation Guide System ...Printed in bold and underlined. 2 See page 3 of Operating Manual. 3 Use the system switch to switch between the two parameters. 4 For optimal heating control, use the setting that matches your system as follows: 2=30 min (steam, gravity), 3=20 min (hot water, 90%+ high-efficiency furnace),...


