Honeywell HD3C Support and Manuals
Get Help and Manuals for this Honeywell item
View All Support Options Below
Free Honeywell HD3C manuals!
Problems with Honeywell HD3C?
Ask a Question
Free Honeywell HD3C manuals!
Problems with Honeywell HD3C?
Ask a Question
Popular Honeywell HD3C Manual Pages
Brochure - Page 1

...8226; 1/3" Sony Interline CCD
• Standard resolution color: 350 TV lines
• Single model for inconspicuous installation in color Digital Signal Processing (DSP) technology. HD3C
www.honeywellvideo.com
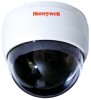
STANDARD RESOLUTION COLOR INDOOR MINI-DOME CAMERA
Honeywell's HD3C indoor color dome camera encompasses the latest in virtually any application. The compact surface mount or flush...
Brochure - Page 2

... mm)
2.78" (70.5 mm)
Ordering HD3C HD3CX
1/3" CCD Standard Resolution Color Dome Camera, Off White Housing, 350 TVL, 2.8 - 10 mm VFAI, NTSC 1/3" CCD Standard Resolution Color Dome Camera, Off White Housing, 350 TVL, 2.8 - 10 mm VFAI, PAL
NOTE: Honeywell reserves the right, without notification, to make changes in product design or specifications.
1.61" (41.0 mm)
2.46" (62...
User Manual - Page 5

... 7
Installation 8 Removing the Dome Cover 9 Mounting the Camera 10 Preparing the Mounting Surface (Surface or Flush Mount 10 Connecting the Wiring 11 4S Electrical Junction Box 12 Surface Mount 13 Flush Mount 14 Adjusting the Camera Position 15 Optional Camera Settings 16 Attaching the Dome Cover 18 Routine Maintenance 19 Product Dimensions 20
Warranty and Service 21
Specifications...
User Manual - Page 7

...8226; One mounting template
If any parts are missing or damaged, contact the dealer you install the HD3 Series 3 Inch Dome Camera. The HD3 packing box should include, in commercial and residential environments. Keep this guide for indoor installations in addition to this guide carefully before you purchased the camera from or call Honeywell Customer Service (see p. 27 for contact information...
User Manual - Page 8

... transmitters
• Close to fluorescent lamps or objects reflecting light • Under unstable light sources (may cause flickering)
8 Cautions and Operating Notes
Power Supply This dome camera can operate on 24 VAC or 12 VDC.
User Manual - Page 9

Installation
The HD3 is a fully-integrated enclosure with camera and lens.
Document 800-00788 Rev C
9
07/08
Note See Figure 7 for an explanation of the camera board settings.
User Manual - Page 10

Set the dome (and liner) aside. Gently turn the dome cover counter-clockwise (#5 on Figure 1) to unlock, and pull free of the two notches (#3) in the housing (#1). Remove the inner liner (#4) by gently pulling it free of the housing. Figure 1 Dome Cover Removal
1 2
3
4
Legend
1 Camera housing
2 Security screw
3 Notches (x2)
5
4 Inner liner
5 Dome cover
10
If required...
User Manual - Page 16

...; as this may cause the internal cables to the desired view. 3. Adjust the camera carrier to twist and disconnect or break.
16 If required, loosen the screw that locks the gimbal assembly in place. Adjusting the Camera Position
Figure 6 Camera Position Adjustment
B C
A
2
Legend
1
1 Focus lever (top) sets focus
2
Zoom lever (bottom) sets focal length
A Tilt rotation...
User Manual - Page 17

... Adjustment Functions
1
2
H L+ -
4
6 5
Document 800-00788 Rev C 07/08
3
1234 5678
= ON = OFF
Legend
1
LEVEL adjustment pot (Iris level)
2
V Phase adjustment pot (24 VAC only)
3
Mode setting DIP switches (see page 18)
4 Monitor out
5 Camera mounting holes (x3)
6 Setscrew
17 Their functions are described after Figure 7. Optional Camera Settings
Figure 7 shows the location of the...
User Manual - Page 18

...Not available Not available
18 L (low) makes the picture darker. DIP Switches Depending on your camera model, set the DIP switches (#3) to compensate for the iris level. Phase Adjustment Use the V Phase Adjustment...sure Switch 7 is ON to adjust the phase difference between cameras.
Note Please use the supplied DC Iris and Line lock adjustment tool to adjust picture brightness and ...
User Manual - Page 19

... of view and image settings, follow Figure 8 to the base with the three dome tabs (#4) on the unit. 4. Turn the dome gently clockwise until the liner clicks into place. 3. Attach the inner liner (#3) to wipe the dome cover clean and remove
fingerprints. 2. Align the dome cover (#5) with the security screw.
Figure 8 Dome Installation
1
2
3
Legend
1 Camera housing
2 Security screw...
User Manual - Page 20

..., dry cloth. Routine Maintenance
• The dome cover is an optical part.
Use a soft, dry cloth to avoid damaging the surface finish.
20 For more stubborn stains, use volatile solvents such as alcohol, benzene or thinners to remove any fingerprints or dust.
• Clean the camera housing with a small quantity of neutral detergent...
User Manual - Page 22

... may be obtained for assistance or to request a Return Merchandise Authorization (RMA) number. Call 1.800.796.CCTV (North America only). Warranty and Service
Subject to the terms and conditions listed on the Product warranty, during the warranty period Honeywell will repair or replace, at its sole option, free of the problem available for the technical...
User Manual - Page 26

HD3C/HD3CH/HD3D HD3CX/HD3CHX/HD3DX Mounting Template
26
User Manual - Page 28

...or new editions to this publication may be reproduced by any consequences resulting from Honeywell Video Systems. The information in this publication may be accurate in all respects...written permission from the use thereof. No part of this publication is subject to incorporate such changes. Rev C - 07/08
© 2008 Honeywell International Inc. www.honeywellvideo.com +1.800.796.CCTV...
Honeywell HD3C Reviews
We have not received any reviews for Honeywell yet.