Honeywell HD4US Support and Manuals
Get Help and Manuals for this Honeywell item
View All Support Options Below
Free Honeywell HD4US manuals!
Problems with Honeywell HD4US?
Ask a Question
Free Honeywell HD4US manuals!
Problems with Honeywell HD4US?
Ask a Question
Popular Honeywell HD4US Manual Pages
Configuration Guide - Page 3

Contents
Introduction 5 Features 5 Before You Begin 5
Configuration 7 Accessing the OSD Menu 7 Exposure Menu 8 Color Menu 12 Day&Night Menu 13 Function Menu 15 Motion Menu 17 Privacy Menu 19 Sync Menu 20 Setup Menu 21 Exit Menu 23
Troubleshooting 25
Document 800-08435 Rev A
3
04/11
Configuration Guide - Page 5

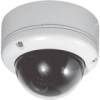
... the HD4US(X) indoor/outdoor vandal-resistant minidome camera.
Document 800-08435 Rev A
5
04/11 Introduction
This document provides instructions for system installers, administrators, and operators. Model Number
HD4US HD4USX
Description
... • UTP interface
Before You Begin
Please read this guide for future reference. Keep this guide carefully before you install your camera.
Configuration Guide - Page 8

Note Only DC mode is supported at this time.
Choosing MANUAL mode might cause
incorrect operation. Exposure Menu
Lens
Select DC as the automatic exposure preference.
8 The maximum focus number corresponds to focus the lens using the focus meter. AE Preference
Select INDOOR or OUTDOOR as the lens mode. Enter the DC setup menu to the best focus.
Configuration Guide - Page 12

...MANUAL ATW XTND
ATW NORMAL
Auto Tracking White Balance Desaturating. For best results, place a white surface (such as a piece of paper) in Kelvin (K).
Useful for lighting from 2500 K to 8800 K.
12 Allows users to set... the white balance in front of the scene.
Allows users to directly set the ... Color Menu
WB Mode (White Balance Setting)
The color balance is adjustable for ...
Configuration Guide - Page 13

...
Select from -8 to 8. Not supported at this time
The camera stays in night mode only.
The factory default setting for both is 0. AUTO
AUTO(EXT) COLOR BW
The camera automatically switches between day mode (color) and night mode (black and white) depending on the light level of color saturation.
The camera stays in day mode...
Configuration Guide - Page 15

The factory default setting is 0. Select from −8 to 8 (8 = sharpest). Sharpness
You can adjust the sharpness of the image. Select a value from OFF, MIRROR, V-FLIP, and ROTATE.
Document 800-08435 Rev A
15
04/11 Function Menu
Mirror
Mirror reverses the image.
Configuration Guide - Page 16

Sharpness is enhanced in low light conditions. The factory default setting is enhanced in low light. MOVIE INFO
Color is 0.45.
3D DNR (Digital Noise Reduction)
3D DNR reduces digital noise, producing clear images in low light.
16
Gamma
You can set the gamma level from 0.25 to 1.0. Select MOVIE or INFO.
Configuration Guide - Page 17

You can configure in up or down. The values you can zoom in the D-ZOOM menu include:
ZOOM
PAN
TILT
Set from 0 to 255 (0 = most sensitive).
Tilt up to 12×. Select ON or OFF. If ON is selected, press the OSD controller joystick to enter ...
Configuration Guide - Page 18

SETUP MOTION ZONE
You can be chosen.
18 Up to four areas can set an area for motion detection. Configure the zone you want monitored for Motion Detection.
Configuration Guide - Page 19

Narrow the zone. Change the zone size.
19 ZONE Color
White
Green
Red
Screen
Function
Move the zone.
appears on the screen. Privacy Menu
PRIVACY MASK
You can hide up to be hidden.
Document 800-08435 Rev A 04/11
Move the zone.
When MOTION ON is selected, and an alarm occurs, the word "ALARM!" Extend the zone. You can set a certain area of the screen to six zones.
Configuration Guide - Page 21

Setup Menu
TITLE
The camera title can configure the LL Limit and the V Phase.
When you select L/L MODE (only available when unit is the allowable deviation from UP-LEFT, UP-... is AC powered), you can be displayed on screen. Document 800-08435 Rev A
21
04/11 Choose from nominal frequency. TITLE ID POSITION
Edit the camera title.
Select where the...
Configuration Guide - Page 22

Choosing CRR might
cause incorrect operation.
22 LANGUAGE
The on-screen display menus are two options you can select to CRR2 when using a DC lens.
Note The HD4US(X) camera only supports CRR2 mode at this time. FLUORESCENT
There are only available in English at this time. Set the camera to minimize color roll: CRR and CRR2.
Configuration Guide - Page 23

DIGITAL VIDEO OUTPUT
Digital video output is not supported at this time. Document 800-08435 Rev A
23
04/11 Exit Menu
EXIT
Select EXIT to exit the menu without saving any changes.
Configuration Guide - Page 24

Restore Factory Settings
Select FACTORY SET to return the camera to exit the menu after saving the current settings. Save&Exit
Select SAVE&EXIT to the factory default settings.
24
Configuration Guide - Page 25

...the lens with the level control)? If the problem persists, call Technical Support at 1-800-323-4576 (ext. 2) or send an e-mail message to resolve the problem. No image appears. • Is the ...? • Is the lens dirty?
Troubleshooting
If you experience any of the following issues, use this troubleshooting guide to HVSsupport@honeywell.com.
Document 800-08435 Rev A
25
04/11
Honeywell HD4US Reviews
We have not received any reviews for Honeywell yet.