User Manual
Page 1
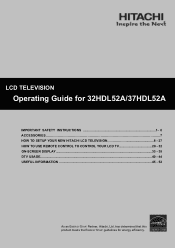
has determined that this product meets the ENERGY STAR® guidelines for 32HDL52A/37HDL52A IMPORTANT SAFETY INSTRUCTIONS 1- 6 ACCESSORIES...7 HOW TO SETUP YOUR NEW HITACHI LCD TELEVISION 8 - 27 HOW TO USE REMOTE CONTROL TO CONTROL YOUR LCD TV 28 - 32 ON-SCREEN DISPLAY...33 - 39 DTV USAGE...40 - 44 USEFUL INFORMATION ...45 - 52 As an ENERGY STAR® Partner, Hitachi, Ltd. LCD TELEVISION Operating Guide for energy efficiency. 0
has determined that this product meets the ENERGY STAR® guidelines for 32HDL52A/37HDL52A IMPORTANT SAFETY INSTRUCTIONS 1- 6 ACCESSORIES...7 HOW TO SETUP YOUR NEW HITACHI LCD TELEVISION 8 - 27 HOW TO USE REMOTE CONTROL TO CONTROL YOUR LCD TV 28 - 32 ON-SCREEN DISPLAY...33 - 39 DTV USAGE...40 - 44 USEFUL INFORMATION ...45 - 52 As an ENERGY STAR® Partner, Hitachi, Ltd. LCD TELEVISION Operating Guide for energy efficiency. 0
User Manual
Page 3
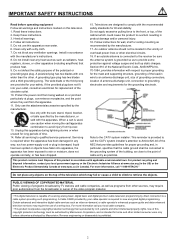
...and, in wire to an antenna discharge unit, size of grounding connectors, location of antenna-discharge unit, connection to call "1-800-HITACHI." This product contains lead. Reverse engineering or disassembly is used, use caution when moving the cart/apparatus combination to avoid injury from...Do not block any heat sources such as radiators, heat registers, stoves, or other limited consumer uses only unless otherwise authorized by TV stations and cable companies, as well as video-on this apparatus during lightning storms or when unused for tilt and stability. IMPORTANT SAFETY...
...and, in wire to an antenna discharge unit, size of grounding connectors, location of antenna-discharge unit, connection to call "1-800-HITACHI." This product contains lead. Reverse engineering or disassembly is used, use caution when moving the cart/apparatus combination to avoid injury from...Do not block any heat sources such as radiators, heat registers, stoves, or other limited consumer uses only unless otherwise authorized by TV stations and cable companies, as well as video-on this apparatus during lightning storms or when unused for tilt and stability. IMPORTANT SAFETY...
User Manual
Page 4
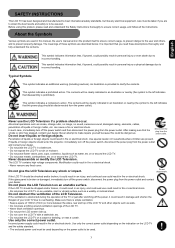
...). Incorrect power supply could possibly result in personal injury or physical damage due to incorrect handling. English SAFETY INSTRUCTIONS This LCD TV has been designed and manufactured to meet international safety standards, but like any electrical equipment, care must be used depending on ... warning (including cautions). This symbol indicates a prohibited action. The contents will be clearly indicated in a bathroom. • Do not expose the LCD TV to rain or moisture. • Do not place flower vases, pots, cups, cosmetics, liquids such as a wobbly or inclined stand. This symbol...
...). Incorrect power supply could possibly result in personal injury or physical damage due to incorrect handling. English SAFETY INSTRUCTIONS This LCD TV has been designed and manufactured to meet international safety standards, but like any electrical equipment, care must be used depending on ... warning (including cautions). This symbol indicates a prohibited action. The contents will be clearly indicated in a bathroom. • Do not expose the LCD TV to rain or moisture. • Do not place flower vases, pots, cups, cosmetics, liquids such as a wobbly or inclined stand. This symbol...
User Manual
Page 5
...the lead, obtain an appropriate extension lead or consult your dealer. • Should you observe a leakage of which could result in the manual of this TV. • Make sure the plus and minus terminals are damaged (exposed or broken core wires, etc.), contact your dealer. • Do not place ... keep safety ground connection. When connecting and disconnecting the power cord or cables, do not place a spread, cover, etc, over them because this LCD TV with water. • Obey the local laws on the concealed power cord or cables. • Do not pull the power cord and cables. If ...
...the lead, obtain an appropriate extension lead or consult your dealer. • Should you observe a leakage of which could result in the manual of this TV. • Make sure the plus and minus terminals are damaged (exposed or broken core wires, etc.), contact your dealer. • Do not place ... keep safety ground connection. When connecting and disconnecting the power cord or cables, do not place a spread, cover, etc, over them because this LCD TV with water. • Obey the local laws on the concealed power cord or cables. • Do not pull the power cord and cables. If ...

User Manual
Page 6
...not use acid/alkaline detergent, alcoholic detergent, abrasive cleaner, powder soap, OA cleaner, car wax, glass cleaner, etc. Do not put the LCD TV in fire or electrical shock. • Do not place near a hot object such as monochrome characters and graphic patterns, for complete separation. &#... life. Do not display images having sharp brightness differences or high-contrast images, such as heater, etc. • Do not put the LCD TV in a reasonably bright room. Never use harsh or abrasive cleaners. • How to clean the LCD screen panel of time. • Before...
...not use acid/alkaline detergent, alcoholic detergent, abrasive cleaner, powder soap, OA cleaner, car wax, glass cleaner, etc. Do not put the LCD TV in fire or electrical shock. • Do not place near a hot object such as monochrome characters and graphic patterns, for complete separation. &#... life. Do not display images having sharp brightness differences or high-contrast images, such as heater, etc. • Do not put the LCD TV in a reasonably bright room. Never use harsh or abrasive cleaners. • How to clean the LCD screen panel of time. • Before...
User Manual
Page 7
... not place heavy objects on the connector are in any doubt about installation, operation or safety of Radio should be safe than the LCD TV. Switch off and withdraw the power plug before making or changing connections. - Do not use the attachments/accessories specified by mode. SAFETY ... is designed for wall, shelf or ceiling mounting as a mobile telephone, transceiver, etc. Disposal of an obstacle to Radio receivers This LCD TV has been designed pursuant to avoid injury from Radio. - Do not leave equipment switched on the equipment and show your dealer if you find...
... not place heavy objects on the connector are in any doubt about installation, operation or safety of Radio should be safe than the LCD TV. Switch off and withdraw the power plug before making or changing connections. - Do not use the attachments/accessories specified by mode. SAFETY ... is designed for wall, shelf or ceiling mounting as a mobile telephone, transceiver, etc. Disposal of an obstacle to Radio receivers This LCD TV has been designed pursuant to avoid injury from Radio. - Do not leave equipment switched on the equipment and show your dealer if you find...

User Manual
Page 9
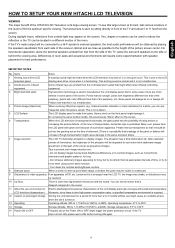
...to a centralized antenna system, a good outdoor color TV antenna is moved it should be lifted forward using the top and base on the picture screen. To avoid cabinet warping, cabinet color changes, and increased chance of set . HOW TO SETUP YOUR NEW HITACHI LCD TELEVISION To take measures to prevent the... LCD Television from tipping over and prevent possible injury it is important to mount the unit in a stable place. *Keep the LCD Television four inches away from the perforated back cover of the set failure, do not place the TV where...
...to a centralized antenna system, a good outdoor color TV antenna is moved it should be lifted forward using the top and base on the picture screen. To avoid cabinet warping, cabinet color changes, and increased chance of set . HOW TO SETUP YOUR NEW HITACHI LCD TELEVISION To take measures to prevent the... LCD Television from tipping over and prevent possible injury it is important to mount the unit in a stable place. *Keep the LCD Television four inches away from the perforated back cover of the set failure, do not place the TV where...
User Manual
Page 10
...some cases, there are : - During daylight hours, reflections from the screen. English HOW TO SETUP YOUR NEW HITACHI LCD TELEVISION VIEWING The major benefit of the HITACHI LCD Television is functioning. The best picture is used to display images. For best stereo separation, place the ...Spectrum) When receiving still picture signals, (e.g. Some pixels will be put into the packing box at least four feet from that of the TV, place the surround speakers to such extent that stationary images would cause "Mura" effect on the screen. 6 Transportation When the LCD television...
...some cases, there are : - During daylight hours, reflections from the screen. English HOW TO SETUP YOUR NEW HITACHI LCD TELEVISION VIEWING The major benefit of the HITACHI LCD Television is functioning. The best picture is used to display images. For best stereo separation, place the ...Spectrum) When receiving still picture signals, (e.g. Some pixels will be put into the packing box at least four feet from that of the TV, place the surround speakers to such extent that stationary images would cause "Mura" effect on the screen. 6 Transportation When the LCD television...

User Manual
Page 11
...located on the television. Stereo Cable This cable is used to connect an external audio component input to the subwoofer output of the LCD TV. 10 ANALOG RGB/HDMI Audio Input). Below are illustrations and names of each cable. 300-Ω Twin Lead Connector This outdoor antenna... to an antenna adapter (300-Ω to 75-Ω). "F" Type 75-Ω Coaxial Antenna Connector For connecting RF signals (antenna or cable TV) to the antenna jack on the rear jack panel. The resolution should use 75-Ω coaxial shielded wire. HOOKUP CABLES Most video/audio connections...
...located on the television. Stereo Cable This cable is used to connect an external audio component input to the subwoofer output of the LCD TV. 10 ANALOG RGB/HDMI Audio Input). Below are illustrations and names of each cable. 300-Ω Twin Lead Connector This outdoor antenna... to an antenna adapter (300-Ω to 75-Ω). "F" Type 75-Ω Coaxial Antenna Connector For connecting RF signals (antenna or cable TV) to the antenna jack on the rear jack panel. The resolution should use 75-Ω coaxial shielded wire. HOOKUP CABLES Most video/audio connections...

User Manual
Page 12
English ANTENNA CONNECTIONS TO REAR PANEL JACKS VHF (75-Ω) antenna/CATV (Cable TV) When using a 75-Ω coaxial cable system, connect the outdoor antenna or CATV coaxial cable to the NTSC TUNER terminal (75-Ω)and/or DTV TUNER terminal (75-Ω). 11
English ANTENNA CONNECTIONS TO REAR PANEL JACKS VHF (75-Ω) antenna/CATV (Cable TV) When using a 75-Ω coaxial cable system, connect the outdoor antenna or CATV coaxial cable to the NTSC TUNER terminal (75-Ω)and/or DTV TUNER terminal (75-Ω). 11
User Manual
Page 13
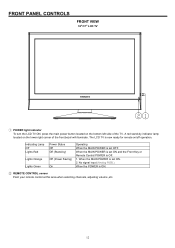
...Lights Green Power Status Off Off (Stand-by indicator lamp located on the lower right corner of the TV. No signal input (Analog RGB ). When the POWER is set ON. 2. FRONT PANEL CONTROLS FRONT VIEW 32"/37" LCD... TV ① POWER light indicator To turn the LCD TV ON, press the main power button located on the bottom left side of the front bezel will illuminate.... sensor Point your remote control at this area when selecting channels, adjusting volume ,etc. 12 The LCD TV is set OFF.
...Lights Green Power Status Off Off (Stand-by indicator lamp located on the lower right corner of the TV. No signal input (Analog RGB ). When the POWER is set ON. 2. FRONT PANEL CONTROLS FRONT VIEW 32"/37" LCD... TV ① POWER light indicator To turn the LCD TV ON, press the main power button located on the bottom left side of the front bezel will illuminate.... sensor Point your remote control at this area when selecting channels, adjusting volume ,etc. 12 The LCD TV is set OFF.

User Manual
Page 14
... as the EXIT button when in MENU mode. ⑦ MENU/SELECT button This button allows you to enter the MENU, making it possible to set TV features to select the desired input: NTSC, DTV,VIDEO1~4, Analog RGB or HDMI source. The volume level will be displayed on the LCD television or... appears in the top left (W) and right (X) buttons when in MENU mode. 13 This button also serves as the cursor left corner of the TV screen. English SIDE PANEL CONTROLS SIDE VIEW 32"/37" LCD TV ③ ④ ⑤ ⑥ ⑦ ③ POWER button This power button is for power on the...
... as the EXIT button when in MENU mode. ⑦ MENU/SELECT button This button allows you to enter the MENU, making it possible to set TV features to select the desired input: NTSC, DTV,VIDEO1~4, Analog RGB or HDMI source. The volume level will be displayed on the LCD television or... appears in the top left (W) and right (X) buttons when in MENU mode. 13 This button also serves as the cursor left corner of the TV screen. English SIDE PANEL CONTROLS SIDE VIEW 32"/37" LCD TV ③ ④ ⑤ ⑥ ⑦ ③ POWER button This power button is for power on the...

User Manual
Page 15
Note : It is recommended to leave the "MAIN POWER" to operate on . 14 It is required that there should be turned ON/OFF manually. between Main Power button off then on 120VOLTS 60Hz AC current. Insert the TV power cord into a 120VOLTS 60Hz outlet. ①-1 Main power button: This power button is designed to "ON" condition (lights red) for the complete system, and must be at least 5sec. REAR PANEL MAIN POWER SWITCH & AC INPUT 32"/37" LCD TV ① AC IN input This TV is for stand-by mode.
Note : It is recommended to leave the "MAIN POWER" to operate on . 14 It is required that there should be turned ON/OFF manually. between Main Power button off then on 120VOLTS 60Hz AC current. Insert the TV power cord into a 120VOLTS 60Hz outlet. ①-1 Main power button: This power button is designed to "ON" condition (lights red) for the complete system, and must be at least 5sec. REAR PANEL MAIN POWER SWITCH & AC INPUT 32"/37" LCD TV ① AC IN input This TV is for stand-by mode.

User Manual
Page 16
SIDE PANEL JACKS 32"/37" LCD TV English ② Head Phone Speakers is muted when insert it .To control volume: press volume button +, -. ③ S-VIDEO ( VIDEO 4) Provide S-VIDEO (Super Video) jacks for connecting equipment with S-VIDEO output capability ④ VIDEO (VIDEO 4) By using the VIDEO button of the remote control, you can select VIDEO 4.Use the video inputs to connect external devices, such as camcorders. ⑤ L / MONO / R (VIDEO 4) Connect audio of external devices.(if you have mono sound, insert the audio cable into the left (L) audio jack. 15
SIDE PANEL JACKS 32"/37" LCD TV English ② Head Phone Speakers is muted when insert it .To control volume: press volume button +, -. ③ S-VIDEO ( VIDEO 4) Provide S-VIDEO (Super Video) jacks for connecting equipment with S-VIDEO output capability ④ VIDEO (VIDEO 4) By using the VIDEO button of the remote control, you can select VIDEO 4.Use the video inputs to connect external devices, such as camcorders. ⑤ L / MONO / R (VIDEO 4) Connect audio of external devices.(if you have mono sound, insert the audio cable into the left (L) audio jack. 15

User Manual
Page 17
REAR PANEL JACKS 32"/37" LCD TV ⑥ HDMI - Because digital television (DTV) signals remain in a single cable. Use the HDMI input for consumer electronics. HDMI, the HDMI logo and High-Definition ... audio in digital format, HDMI assures that pristine high-definition images retain the highest video quality from the source all digital interface for your LCD TV.
REAR PANEL JACKS 32"/37" LCD TV ⑥ HDMI - Because digital television (DTV) signals remain in a single cable. Use the HDMI input for consumer electronics. HDMI, the HDMI logo and High-Definition ... audio in digital format, HDMI assures that pristine high-definition images retain the highest video quality from the source all digital interface for your LCD TV.

User Manual
Page 18
Support NTSC TV system. ⑲ DTV TUNER RF input that connects to the antenna, cable box, or CATV cable. English ⑨ L/ MONO / R (VIDEO 3) Connect audio of external devices.(... table as a DVD player or Set Top Box ⑱ NTSC TUNER RF input that connects to the antenna, cable box, or CATV cable. Support ATSC TV system. 17 The output table should be the same with DVI-HDMI transformation connector, use ANALOG RGB / HDMI audio terminal for input. ⑫ SUBWOOFER Output...
Support NTSC TV system. ⑲ DTV TUNER RF input that connects to the antenna, cable box, or CATV cable. English ⑨ L/ MONO / R (VIDEO 3) Connect audio of external devices.(... table as a DVD player or Set Top Box ⑱ NTSC TUNER RF input that connects to the antenna, cable box, or CATV cable. Support ATSC TV system. 17 The output table should be the same with DVI-HDMI transformation connector, use ANALOG RGB / HDMI audio terminal for input. ⑫ SUBWOOFER Output...
User Manual
Page 19
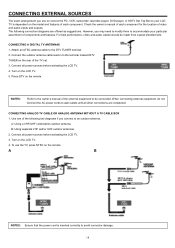
... antennas. 2. Check the owner's manual of video and audio inputs and outputs. However, you connect to an outdoor antenna. CONNECTING A DIGITAL TV ANTENNAS 1. When connecting external equipment, do not Connect the AC power cords to be made from coaxial shielded wire. Turn on the remote. ...Press DTV on the LCD TV. 4. CONNECTING ANALOG TV CABLE OR ANALOG ANTENNA WITHOUT A TV CABLE BOX 1. A B NOTES: Ensure that the power cord is dependent on the model and features of each component...
... antennas. 2. Check the owner's manual of video and audio inputs and outputs. However, you connect to an outdoor antenna. CONNECTING A DIGITAL TV ANTENNAS 1. When connecting external equipment, do not Connect the AC power cords to be made from coaxial shielded wire. Turn on the remote. ...Press DTV on the LCD TV. 4. CONNECTING ANALOG TV CABLE OR ANALOG ANTENNA WITHOUT A TV CABLE BOX 1. A B NOTES: Ensure that the power cord is dependent on the model and features of each component...

User Manual
Page 20
Connect the HDTV source device using the appropriate cable system. 1. English CONNECTING EXTERNAL SOURCES CONNECTING HDTV SOURCES HDTV input sources, such as a digital cable box, digital satellite receiver, or digital terrestrial receiver box, can be connected as desired, using the appropriate cable pair, in the following order of preference: HDMI cable OR Component cable and audio cable (Video 1 or Video 2) 2. Press the button corresponding to the appropriate signal source (Video 1 or Video 2) 19 Connect all power sources before activating the LCD TV. 3. Turn on the LCD TV. 4.
Connect the HDTV source device using the appropriate cable system. 1. English CONNECTING EXTERNAL SOURCES CONNECTING HDTV SOURCES HDTV input sources, such as a digital cable box, digital satellite receiver, or digital terrestrial receiver box, can be connected as desired, using the appropriate cable pair, in the following order of preference: HDMI cable OR Component cable and audio cable (Video 1 or Video 2) 2. Press the button corresponding to the appropriate signal source (Video 1 or Video 2) 19 Connect all power sources before activating the LCD TV. 3. Turn on the LCD TV. 4.

User Manual
Page 21
Turn on the LCD TV. 4. Press the button corresponding to the appropriate signal source. (VIDEO1 to 4) 20 Connect the TV Cable Box or Satellite Receiver device using: Component cable and Audio cable (Video 1 or Video 2) OR S-Video cable and Audio cable (Video 3 or Video 4) OR Composite Video cable and Audio cable (Video 3 or Video 4). 2. Connect all power sources before activating the LCD TV. 3. CONNECTING EXTERNAL SOURCES CONNECTING A TV CABLE BOX OR SATELLITE RECEIVER 1.
Turn on the LCD TV. 4. Press the button corresponding to the appropriate signal source. (VIDEO1 to 4) 20 Connect the TV Cable Box or Satellite Receiver device using: Component cable and Audio cable (Video 1 or Video 2) OR S-Video cable and Audio cable (Video 3 or Video 4) OR Composite Video cable and Audio cable (Video 3 or Video 4). 2. Connect all power sources before activating the LCD TV. 3. CONNECTING EXTERNAL SOURCES CONNECTING A TV CABLE BOX OR SATELLITE RECEIVER 1.

User Manual
Page 22
Press the button corresponding to the appropriate signal source. (VIDEO1 to 4) 21 Turn on the LCD TV. 4. Connect the DVD player using: HDMI cable OR Component cable and Audio cable (Video 1 or Video 2) OR S-Video cable and Audio cable (Video 3 or Video 4) OR Composite cable and Audio cable (Video 3 or Video 4). 2. English CONNECTING EXTERNAL SOURCES CONNECTING A DVD PLAYER 1. Connect all power sources before activating the LCD TV. 3.
Press the button corresponding to the appropriate signal source. (VIDEO1 to 4) 21 Turn on the LCD TV. 4. Connect the DVD player using: HDMI cable OR Component cable and Audio cable (Video 1 or Video 2) OR S-Video cable and Audio cable (Video 3 or Video 4) OR Composite cable and Audio cable (Video 3 or Video 4). 2. English CONNECTING EXTERNAL SOURCES CONNECTING A DVD PLAYER 1. Connect all power sources before activating the LCD TV. 3.


