Video Port Guide
Page 1
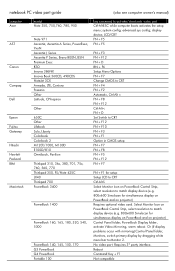
...setup Setup LCD to CRT Ctrl-Alt-S Select Monitor Icon on PowerBook Control Strip, select resolution to match display device (e.g. 800x600 Simulscan for simultaneous display on PowerBook and on projector) Control Panel folder, PowerBook Display folder, activate Video Mirroring, warm reboot. notebook PC ...activates the setup menu; display device; Select Monitor Icon on PowerBook Control Strip, select resolution to match display device (e.g. 800x600 Simulscan for simultaneous display on PowerBook and on projector) Requires optional video card. No video port. advanced sys config;
...setup Setup LCD to CRT Ctrl-Alt-S Select Monitor Icon on PowerBook Control Strip, select resolution to match display device (e.g. 800x600 Simulscan for simultaneous display on PowerBook and on projector) Control Panel folder, PowerBook Display folder, activate Video Mirroring, warm reboot. notebook PC ...activates the setup menu; display device; Select Monitor Icon on PowerBook Control Strip, select resolution to match display device (e.g. 800x600 Simulscan for simultaneous display on PowerBook and on projector) Requires optional video card. No video port. advanced sys config;
User Guide
Page 37
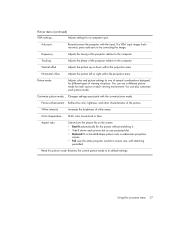
... the color, lightness, and other characteristics of the projector relative to one projected dot. • Reduced fits a standard-shape picture onto a widescreen projection screen. • Full uses the entire projector resolution screen size, with stretching permitted. Picture mode Adjusts ...color and picture settings to the computer. Auto-sync Resynchronizes the projector with the current picture mode. Horizontal offset Adjusts the picture left...
... the color, lightness, and other characteristics of the projector relative to one projected dot. • Reduced fits a standard-shape picture onto a widescreen projection screen. • Full uses the entire projector resolution screen size, with stretching permitted. Picture mode Adjusts ...color and picture settings to the computer. Auto-sync Resynchronizes the projector with the current picture mode. Horizontal offset Adjusts the picture left...
User Guide
Page 44
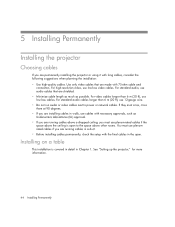
... Before installing cables permanently, check the setup with the final cables in the open to power or network cables. See "Setting up the projector," for more information. 44 Installing Permanently Use only video cables that are running cables above a dropped ceiling, you must use plenum-rated ... to the space above the ceiling is covered in detail in walls, use cables with necessary approvals, such as possible. For high-resolution video, use audio cables that are made with long cables, consider the following suggestions when planning the installation: • Use high-quality...
... Before installing cables permanently, check the setup with the final cables in the open to power or network cables. See "Setting up the projector," for more information. 44 Installing Permanently Use only video cables that are running cables above a dropped ceiling, you must use plenum-rated ... to the space above the ceiling is covered in detail in walls, use cables with necessary approvals, such as possible. For high-resolution video, use audio cables that are made with long cables, consider the following suggestions when planning the installation: • Use high-quality...
User Guide
Page 57
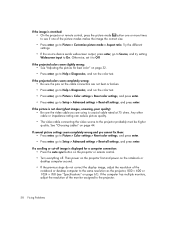
...screen is 1.2 to 10 m (4 to 33 ft) from the projector. • Check the projection lens to see if it needs cleaning. • For a computer connection, set the display resolution as the computer to the same resolution as the projector, 800 × 600 or 1024 × 768 (see "...Specifications" on top of the projector. • Move the projector closer to or farther from the screen. • On the projector or remote control, press the picture...
...screen is 1.2 to 10 m (4 to 33 ft) from the projector. • Check the projection lens to see if it needs cleaning. • For a computer connection, set the display resolution as the computer to the same resolution as the projector, 800 × 600 or 1024 × 768 (see "...Specifications" on top of the projector. • Move the projector closer to or farther from the screen. • On the projector or remote control, press the picture...
User Guide
Page 58
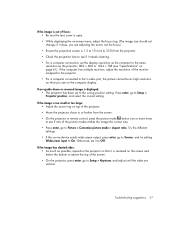
...are not bent or broken. • Press enter, go to Picture > Customize picture mode > Aspect ratio. If the computer has multiple monitors, adjust the resolution of the picture modes makes the image the correct size. • Press enter, go to Help > Diagnostics, and run the color test. If the ...on the notebook or desktop computer second. • If the previous steps do not correct the display image, adjust the resolution of the notebook or desktop computer to the same resolution as the projector, 800 × 600 or 1024 × 768 (see if one of the monitor assigned to Off. Try the...
...are not bent or broken. • Press enter, go to Picture > Customize picture mode > Aspect ratio. If the computer has multiple monitors, adjust the resolution of the picture modes makes the image the correct size. • Press enter, go to Help > Diagnostics, and run the color test. If the ...on the notebook or desktop computer second. • If the previous steps do not correct the display image, adjust the resolution of the notebook or desktop computer to the same resolution as the projector, 800 × 600 or 1024 × 768 (see if one of the monitor assigned to Off. Try the...
User Guide
Page 61
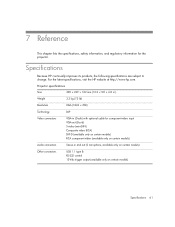
For the latest specifications, visit the HP website at http://www.hp.com. 7 Reference This chapter lists the specifications, safety information, and regulatory information for component-video input VGA-out (D-sub) S-video (mini-DIN) Composite...connectors USB 1.1 type B RS-232 control 12-Vdc trigger output (available only on certain models) Specifications 61 Projector specifications Size 309 × 229 × 102 mm (12.2 × 9.0 × 4.0 in.) Weight 3.3 kg (7.3 lb) Resolution XGA (1024 × 768) Technology DLP Video connectors VGA-in (D-sub) with optional cable for the...
For the latest specifications, visit the HP website at http://www.hp.com. 7 Reference This chapter lists the specifications, safety information, and regulatory information for component-video input VGA-out (D-sub) S-video (mini-DIN) Composite...connectors USB 1.1 type B RS-232 control 12-Vdc trigger output (available only on certain models) Specifications 61 Projector specifications Size 309 × 229 × 102 mm (12.2 × 9.0 × 4.0 in.) Weight 3.3 kg (7.3 lb) Resolution XGA (1024 × 768) Technology DLP Video connectors VGA-in (D-sub) with optional cable for the...
User Guide
Page 63
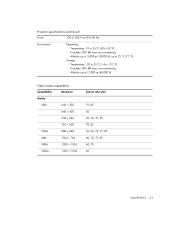
Projector specifications (continued) Power 100 to 240 V at 50 to 60 Hz Environment Operating: Temperature: 10 to 35 °C (50 to 95 °F) Humidity: 80% RH ...: -20 to 55 °C (-4 to 131 °F) Humidity: 80% RH max, non-condensing Altitude: up to 12,000 m (40,000 ft) Video mode compatibility Compatibility Resolution Analog VGA 640 × 350 640 × 400 640 × 480 720 × 400 SVGA 800 × 600 XGA 1024 × 768 SXGA 1280 ×...
Projector specifications (continued) Power 100 to 240 V at 50 to 60 Hz Environment Operating: Temperature: 10 to 35 °C (50 to 95 °F) Humidity: 80% RH ...: -20 to 55 °C (-4 to 131 °F) Humidity: 80% RH max, non-condensing Altitude: up to 12,000 m (40,000 ft) Video mode compatibility Compatibility Resolution Analog VGA 640 × 350 640 × 400 640 × 480 720 × 400 SVGA 800 × 600 XGA 1024 × 768 SXGA 1280 ×...