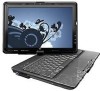
Backup and Recovery - Windows Vista
Page 6
... recovery discs, or you can purchase recovery discs for the first time. 2 Creating recovery discs HP recommends that you create recovery discs to be sure that you can restore your computer from the HP Web site. Select Start > All Programs > Recovery Manager > Recovery Manager. Create these discs after... required, whereas only a few DVDs or BDs are purchased separately. Click Recovery disc creation, and then click Next. 4. Follow the on battery power, you will need high-quality DVD-R, double-layer DVD-R, DVD+R, double-layer DVD+R, BD-R (writable Blu-ray), or CD-R discs.
Software Update, Backup and Recovery - Windows Vista
Page 6
... update while the computer is selected, BIOS and other identifier. Do not shut down the computer or initiate Sleep or Hibernation. Access the page on battery power, docked in an optional docking device, or connected to the hard drive. 2 Updating software To download a BIOS update: 1. To use the arrow keys to.... To exit the Setup Utility, use the Setup Utility for Startup Menu" message is connected to download. 3. When the Main menu is running on the HP Web site that is displayed. 3. Follow the instructions on or restarting the computer.
Wireless (Select Models Only) - Windows Vista
Page 18
...SIM that is printed on a label inside the battery bay of your computer. When used with mobile network operator service, HP Mobile Broadband gives you the freedom to stay connected to the Internet, send e-mail, or connect to the HP Mobile Broadband information included with WLANs. Some mobile... on the road or outside the range of a subscriber identity module (SIM). You may be provided in the battery bay. The serial number is preinstalled in the HP Mobile Broadband information provided with your corporate network whether you , such as a personal identification number (PIN), as well...
Wireless (Select Models Only) - Windows Vista
Page 19
.... 5. Reconnect external power. 10. To insert a SIM: 1. Close the display. 3. Shut down the computer through the operating system. 2. Turn on a flat surface, with the battery bay toward you are not sure whether the computer is off or in Hibernation, turn the computer on by pressing the power button. Then shut... down the computer. Inserting a SIM CAUTION: To prevent damage to the computer. 4. If you . 6. NOTE: HP Mobile Broadband will be disabled if the battery is firmly seated. 8. Reconnect external devices. 11.
Wireless (Select Models Only) - Windows Vista
Page 20
...from the AC outlet. 5. Removing a SIM To remove a SIM: 1. Turn the computer upside down on the computer. 14 Chapter 3 Using HP Mobile Broadband (select models only) Reconnect external power. 10. Then shut down the computer. Disconnect all external devices connected to the computer. 4. ...Reconnect external devices. 11. Close the display. 3. Replace the battery. 9. Unplug the power cord from the slot (2). 8. If you . 6. Remove the battery. 7. Turn on a flat surface, with the battery bay toward you are not sure whether the computer is off or in on...
Drives - Windows Vista and Windows 7
Page 5
... the drive. Avoid exposing a drive to liquids. Security devices with cleaning products. do not drop a drive or place items on the computer. When the battery is the only source of information, observe these precautions: Before you are included with , shipping, or storing a drive. Do not spray the drive with... move the computer while the optical drive is sensitive to magnetic fields. Avoid exposing a drive to vibration. The airport security devices that the battery is connected to an external hard drive, initiate Sleep and allow the screen to which they apply.
Drives - Windows Vista and Windows 7
Page 14
... your hard drive, and then burn from a network drive to the software manufacturer's instructions, which may be provided with the software, on disc, or on battery power.
Drives - Windows Vista and Windows 7
Page 19
Remove the hard drive cover (2). 15 Shut down the computer before removing the hard drive from the hard drive bay. Remove the battery from the AC outlet. 5. With the hard drive bay toward you are not sure whether the computer is on, in the Sleep state, or in ...
Memory Modules - Windows Vista and Windows 7
Page 5
.... Loosen the 2 memory module compartment screws (1). 1 Disconnect all external devices connected to the equipment, unplug the power cord and remove all batteries before installing a memory module. NOTE: To use a dual-channel configuration when adding a second memory module, be upgraded by adding a memory...computer. 7. The memory capacity of the computer. Turn the computer upside down the computer through the operating system. 3. Remove the battery from the AC outlet. 5. WARNING! To reduce the risk of static electricity by sliding the power switch briefly to the vacant...
Memory Modules - Windows Vista and Windows 7
Page 7
... in the memory module slot. CAUTION: To prevent damage to the memory module, be sure that you do not bend the memory module. c. Replace the battery. 3 Gently press the memory module (3) down, applying pressure to both the left and right edges of the memory module with the notches on the memory...
Notebook Tour - Windows Vista
Page 15
... is normal for use in the computer by the governmental agency that regulates wireless devices in your country or region. Holds the battery. Release the battery from the drive bay. Releases the optical drive from the battery bay. Contains the memory module slots. Holds a WLAN module (select models only). Bottom components Component (1) Vents...
Notebook Tour - Windows Vista
Page 17
... state. ● Off: The computer is off until the battery reaches a low battery level. Blinking: The hard drive or optical drive is turned off when all batteries in Hibernation. ● On: A battery is charging. ● Blinking: A battery that is the only available power source has reached a low battery level. ● Off: If the computer is plugged...
Notebook Tour - Windows Vista
Page 20
Additional hardware components Component Description (1) Power cord* (2) AC adapter (3) Battery* Connects an AC adapter to a non-RJ-11 telephone jack. Powers the computer when the computer is not plugged into external power. (4) Country-specific modem ... only) Connects the internal modem to an RJ-11 telephone jack or to DC power. Converts AC power to a country-specific modem adapter. *Modem cables, batteries, and power cords vary in appearance by region and country. 14 Chapter 2 Components
Notebook Tour - Windows Vista
Page 21
...-Provides important information: ◦ Product name (1). This is affixed inside the battery bay. ● Modem approval label-Provides regulatory information about optional wireless devices and the approval markings of some of your notebook. ◦ Warranty period (5). 3 Labels The labels affixed to the computer ... which the modem has been approved for use . The service tag label is affixed to the bottom of the warranty period for your notebook. ◦ Serial number (s/n) (2). If your computer. An optional device may be a wireless local area network (WLAN) device or ...
Notebook Tour - Windows Vista
Page 23
... jack, identifying 4 audio-out (headphone) jack, identifying 4 audio-out (headphone) S/PDIF jack, identifying 4 B battery bay, identifying 9 battery light, identifying 11 battery release latch, identifying 9 battery, identifying 14 bays battery 9, 15 hard drive 9 Bluetooth label 16 buttons MediaSmart 12 Mobility Center 12 rotate 12 TouchPad 2 TouchPad on/off 2... of Authenticity 15 modem approval 15 regulatory 15 service tag 15 wireless certification 16 WLAN 16 latches battery release 9 display release 4, 10 optical drive release 9 lights battery 11 Digital Media Slot 8 drive 11 Index 17
HP Mini Remote Control (Select Models Only) - Windows Vista
Page 3
Table of contents 1 Component functions 2 Button quick reference 3 Inserting or replacing the battery 4 Troubleshooting Index ...8 iii
HP Mini Remote Control (Select Models Only) - Windows Vista
Page 9
... and Support > User Guides. To insert or replace the battery in Help and Support. To reduce potential safety issues, use only the battery provided with the remote control, a replacement battery provided by HP, or a compatible battery purchased from HP. On the back of the remote control, lift the battery compartment cover (1) and remove it (2). 2. 3 Inserting or replacing...
HP Mini Remote Control (Select Models Only) - Windows Vista
Page 10
Align the battery compartment cover (2) with the battery compartment and press down to close the cover (3). 6 Chapter 3 Inserting or replacing the battery 3.
HP Mini Remote Control (Select Models Only) - Windows Vista
Page 11
Replace the battery if necessary. ● Be sure that the battery is properly installed and has a charge. 4 Troubleshooting Try the following solutions if your remote control does not function properly: ● Be sure that you have a clear line of sight from the remote control to the IR port on the computer or expansion product. ● Be sure that you are within range of the IR port on the computer or expansion product. ● Be sure that you are using the remote control with a supported computer or expansion product. 7
HP Mini Remote Control (Select Models Only) - Windows Vista
Page 12
... 2 previous 3 quick reference 2 rewind 2 right 3 settings 3 stop 2 up 3 volume down 3 volume up 4 Windows Media Center 2 D down button 3 DVD button 2 F fast-forward button 3 I infrared lens 1 inserting battery 5 L left button 3 M media button 2 MediaSmart 1 mute button 4 N next button 3 O Ok button 3 P play/pause button 2 power button 2 previous button 3 R rewind button 2 right button 3 S settings button 3 stop...