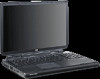
Limited Warranty and Technical Support
Page 5
... repaired computer to the location of services available online to help you diagnose the problem. Logon to our online services site at http://www.hp.com/support. Add-on options - Third-party hardware or software - If your portable computer needs a hardware repair that is covered under warranty, then HP will help sources to meet your needs: Access to drivers and product documentation: Find original product drivers, latest updates and software fixes...
Installing Microsoft Windows XP Service Pack 2 on HP Compaq Business Notebooks
Page 3
... most recent version, install the latest system ROM BIOS. You can result in the order provided. Installation Installing Windows XP Service Pack 2 IMPORTANT Follow the instructions in an unsuccessful or unstable installation. This section provides guidelines for users who upgrade the preinstalled image of HP Drivers and Enhancements" o Optionally, the software can be downloaded from the HP website www.hp.com. Connect AC power. 4. Start the system using Computer Setup or by annual subscription...
Installing Microsoft Windows XP Service Pack 2 on HP Compaq Business Notebooks
Page 4
... with recommended installation order) Windows XP SP2 software components Support Software for Bluetooth by hp Support Software for Bluetooth MultiPort Module Quick Launch Button Software System Enhancements for installation -- Install the updated drivers and enhancements from the HP Software Support CD or the HP website at http://www.hp.com/support/files. Restart the notebook PC. See Table 1 for instructions.) 2. Table 1 Minimum Versions of Microsoft Windows SP2. Installing SP2 and system software updates Preparing for SP2 4. Drivers and enhancements installation Perform the...
Installing Microsoft Windows XP Service Pack 2 on HP Compaq Business Notebooks
Page 7
... default path set at build time. -s instructs the package to access BIOS and Operating System features. Descriptions of hardware-enabling operating system enhancements and fixes. Utility for the touchpad device. Enables the integrated Audio hardware. Provides users with a compilation of the software used when unpacking a SoftPaq file. Table 3 SoftPaq descriptions Name Hot Key Support ADI SoundMax Audio Driver Ethernet Drivers Modem Drivers ATI Video Drivers Synaptics TouchPad Driver System Enhancements System ROMPaq Quick Launch Button Software HP WLAN W400-W500 Driver HP...
WLAN solutions for HP enterprise notebooks and Tablet PCs
Page 4
... embedded security chips designed to make wireless networks as secure as wired LANs. Managed product lifecycles and software upgrades Stable product configurations over a network. WPA was introduced in June 2004 by the HP ProtectTools Security Manager-a single client console application that are compatible across multiple notebooks and WLAN adapters, and are addressing business customer needs for better protection against unauthorized PC access, as well as stronger...
Startup and Reference Guide: Enhanced for Accessibility
Page 7
Connecting the notebook to external power: 1. Startup Connecting the Notebook to External Power To connect the notebook to external power Startup and Reference Guide-Part 1 1-5 Plug the power cord into the AC adapter 2, and then into the power connector 1. 2. As soon as the notebook is connected to external power, the battery light turns on, and the battery pack begins to charge. Plug the AC adapter cable into an electrical outlet 3.
Startup and Reference Guide: Enhanced for Accessibility
Page 13
... http://securityresponse.symantec.com newly discovered viruses. Select Start > Help & Support. Step Use this occurs, you unprotected. Enter "Firewall" in Microsoft Internet bar, select Tools > Internet Explorer. Startup and Reference Guide-Part 1 1-11 Install antivirus software before Microsoft: connecting to the Internet or a http://www.microsoft.com/security/ network. (Some computer models antivirus are shipped with antivirus software.) Symantec: Keep the virus definition files up to...
Startup and Reference Guide: Enhanced for Accessibility
Page 41
...+f4 hotkey switches the screen image between the notebook display, the external monitor display, and a simultaneous display on the notebook. For example, if an external monitor is the version number of the system ROM. Press fn+esc a second time to your Internet Explorer home page, you can access general information about system hardware components and software version numbers. From the Help and Support Center, you have set up your Internet or network services and...
Startup and Reference Guide: Enhanced for Accessibility
Page 50
... remove memory modules. ■ Do not insert or remove the hard drive. ■ Do not connect or disconnect external devices. ■ Do not insert or remove a CD or DVD. ■ Do not insert a PC Card, SD Memory Card, Memory Stick, Smart Media Card, or MultiMediaCard. Do not change the notebook configuration during Hibernation. Ä CAUTION: If the configuration of data. If a power-on password has been set, the password must be possible to restore from Hibernation when power...
Startup and Reference Guide: Enhanced for Accessibility
Page 56
... button, and then select Shut down from the drop-down list. ■ Press and hold down the power/standby button for at least 4 seconds. ■ Unplug the notebook from external power and remove the battery pack For battery pack removal instructions, refer to use the normal Windows shutdown procedure, try the following emergency shutdown procedures in the loss of unsaved data. 4-10 Startup and Reference Guide-Part...
Startup and Reference Guide: Enhanced for Accessibility
Page 67
... battery pack charges.) 3. Startup and Reference Guide-Part 2 4-21 For instructions, refer to "Replacing a Battery Pack," later in use. Leave the notebook connected to external power until the battery pack is fully charged. (The battery light turns off.) Discharging the Battery Pack Hibernation is in this chapter. 2. Select OK. Insert the battery pack into the notebook. Charging the Battery Pack Charge the battery pack while the notebook is enabled by default but can reset them after calibration. 3. Then clear the Enable...
Startup and Reference Guide: Enhanced for Accessibility
Page 70
... monitor timeout. Battery run time of a battery pack: ■ Turn off a device connected to the "Using a PC Card," section in Chapter 8. ■ Disable or remove a digital memory card (SD Memory Card, MultiMediaCard, Memory Stick, or SmartMedia) you are not using. ■ Lower screen brightness. ■ Lower system volume. ■ Turn off wireless and local area network (LAN) connections and exit modem applications when you are plugged into an external power source. ■ Stop or remove a PC Card you leave your work...
Startup and Reference Guide: Enhanced for Accessibility
Page 77
... begin this procedure until you have ■ Saved your work , closed all open applications, and shut down the notebook. ■ Disconnected the notebook from external power. 4. Turn the notebook upside down the notebook and close all open applications. 2. Shut down . 6. Remove the 4 hard drive retaining screws from the hard drive bay. Drives Replacing the Internal Hard Drive The hard drive in the hard drive bay is the internal hard drive. Remove the battery pack. 5. Save your work and close the...
Startup and Reference Guide: Enhanced for Accessibility
Page 122
... icon on the Windows Desktop, right-click the drive assigned to "Inserting Digital Memory Cards," and "Removing Digital Memory Cards," in this chapter. On other models the memory slot contains a preinstalled memory module that can increase the amount of RAM (random access memory) in use. Hardware Options and Upgrades Disabling or Restarting Digital Memory Cards An inserted digital memory card uses power even when the card is not released from the Digital Media slot.) To restart the card, remove and then...
Startup and Reference Guide: Enhanced for Accessibility
Page 131
... provided with your notebook as time and date. Preparing for any software updates, particularly a ROM update. To update notebook software: Prepare for a Software Update If your notebook connects to make sure your notebook remains compatible with changing technologies, install the latest versions of the notebook. 9-2 Startup and Reference Guide-Part 2 Software Updates, Restorations and Utilities Updating Software For optimal notebook performance and to a network, consult with the operating system and external devices and also supports such notebook services as they become...
Startup and Reference Guide: Enhanced for Accessibility
Page 133
Software Updates, Restorations and Utilities Downloading and Installing an Update Most software at the HP Web site is connected to download. 9-4 Startup and Reference Guide-Part 2 Access the page at http://www.hp.com/support. 2. Some ROM updates may be packaged in a compressed file called a RomPaq. The following sections provide instructions for your notebook and access the ROM update you want to reliable external power. (Do not download or install a ROM update while the notebook is docked or running on the screen to...
Startup and Reference Guide: Enhanced for Accessibility
Page 147
...country-specific modem adapter identifying 2-17 customer support 1-13, 2-18 Index-2 Startup and Reference Guide Index BIOS (basic input/output system) 9-2 boot order 5-14 buttons media 3-10 mute 2-6, 6-2 optical drive release 2-12 PC Card eject 2-12, 8-7 picture 3-10 power/standby 2-4 Quick Launch 3-10 TouchPad 2-2, 3-3 volume 2-6, 6-2 wireless 3-10 See also keys, latches 2-6 C cable lock, connecting 8-19 cables audio 6-7 modem 2-8, 2-16, 7-2 network 2-16, 7-4 S-Video 6-7 See also power cord 2-16 caps lock light 2-5 card and socket services, PC Card 8-5 card. See memory, modules supported;
Startup and Reference Guide: Enhanced for Accessibility
Page 149
... network cable 2-8 exhaust vents left side 2-11 rear 2-9 external monitor connector 2-8 F fan, vents 2-9, 2-11 FCC notice 1-12 firewalls, security 1-11 flash memory card 8-8 floppy disk drive. Index error message, Playback of free space on 8-13 overview 5-4 replacing 5-5 space on, required for Hibernation file 8-13 See also drives hard drives, overview 5-2 hardware, setting up 1-2 headphones 6-5 Help and Support Center 1-13 hotkey 3-6 Help and Support window 3-6 Hibernation avoiding when playing media 5-13 changing configuration during 4-4 controls and indicators 4-8 defined 4-4 drive media...
Startup and Reference Guide: Enhanced for Accessibility
Page 150
... also buttons; Index initiate Standby 3-7, 4-11 media commands 3-8 Open Internet Explorer 3-6 Quick Reference 3-5 switch image 3-6 hotkeys 2-3, 3-3 changing power options 4-13 procedures 3-5 Quick Reference 3-5 HP Customer Care Center 1-7 hubs, USB 8-3 humidity specifications A-2 I infrared communication 4-7 infrared port 2-12, 7-8 installing basic software 1-8 operating system 1-8 optional software 1-9 intake vents 2-14 Internet Explorer hotkey 3-6 Internet Explorer, security 1-11 InterVideo WinDVD 6-10 creating DVDs 6-14, 6-15 error message 6-10 managing region settings 6-11 J jacks audio...
Startup and Reference Guide: Enhanced for Accessibility
Page 151
...modules supported 8-12 memory compartment 2-13 microphone jack 2-10 identifying 6-5 using 6-6 microphones 6-6 Microsoft Certificate of Authenticity label 2-15 Microsoft Internet Connection Firewall 1-11 model number 1-13, 9-2 modem approvals label 2-15 connecting 7-3 specifications 7-2 modem adapter 2-17 Modem and Networking guide 2-18 modem approvals label 2-15 modem cable 2-8, 2-16 monitor, external connector 2-8 switching display 3-6 switching image 3-6 MultiMediaCard 8-8 mute button 2-6, 6-2 N network connection, turning on and off 7-4 specifications 7-3 speed 7-3 network cable connecting...