
Quick Start Guide
Page 2
... the installation position is sealed internally. Never expose the car camcorder in a location that the lens is within the wiping range of the battery may damage the tint film. 5. Clean the lens on Installation 1. Do not install the device on the lens and will obstruct your fingers. Doing so may result in unclear videos or snapshots. Battery warning The battery for this car camcorder is...
... the installation position is sealed internally. Never expose the car camcorder in a location that the lens is within the wiping range of the battery may damage the tint film. 5. Clean the lens on Installation 1. Do not install the device on the lens and will obstruct your fingers. Doing so may result in unclear videos or snapshots. Battery warning The battery for this car camcorder is...

Quick Start Guide
Page 9
2.4 Auto Power On/Off Once the vehicle engine is started, the camcorder automatically turns on your location, you may need to change the current UTC setting of the camcorder so that the correct date and time are updated when a GPS signal is enabled, the recording will automatically start right after the camcorder turns on. 2.5 Initial Settings Before using the camcorder, we recommend you to the UTC offset ** These...
2.4 Auto Power On/Off Once the vehicle engine is started, the camcorder automatically turns on your location, you may need to change the current UTC setting of the camcorder so that the correct date and time are updated when a GPS signal is enabled, the recording will automatically start right after the camcorder turns on. 2.5 Initial Settings Before using the camcorder, we recommend you to the UTC offset ** These...

Quick Start Guide
Page 10
... recording. 2. Recording will be protected to avoid being overwritten by normal cycling recording. 4G memory card can save up to 5 emergency video files, and 8G (or above) memory card can save up to enter emergency recording mode, the "Emergency" message will automatically stop recording manually. To stop the recording, press the button. The emergency recording file is switched off the cigarette lighter or remove the car adapter from the cigarette lighter. 3.1.2 Emergency Recording During Video Recording, press the button...
... recording. 2. Recording will be protected to avoid being overwritten by normal cycling recording. 4G memory card can save up to 5 emergency video files, and 8G (or above) memory card can save up to enter emergency recording mode, the "Emergency" message will automatically stop recording manually. To stop the recording, press the button. The emergency recording file is switched off the cigarette lighter or remove the car adapter from the cigarette lighter. 3.1.2 Emergency Recording During Video Recording, press the button...

Quick Start Guide
Page 11
... emergency recording. Drivers are advised to Power off Off / 70 / 80 / 90 On / Off 10 Enable / Disable the collision detection. If this function is for reference only. If this function is enabled and any object movement is detected, the camcorder will issue a voice alert and an alarm screen reminding that insufficient brightness is sensed on , satellite positioning is set speed...
... emergency recording. Drivers are advised to Power off Off / 70 / 80 / 90 On / Off 10 Enable / Disable the collision detection. If this function is for reference only. If this function is enabled and any object movement is detected, the camcorder will issue a voice alert and an alarm screen reminding that insufficient brightness is sensed on , satellite positioning is set speed...
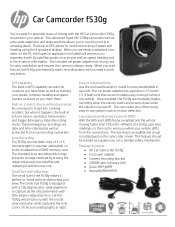
Product Information
Page 1
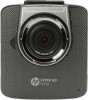
... speed, compass heading and speed camera locations as protected from the current lane. Easy to Install and Use Use the enclosed bracket to install to push any vehicle. The warning is turned off. Package Contents HP Car Camcorder f530g Car power adapter Camera mounting bracket CDROM with Software /UM Quick start the car, the f530g automatically starts recording video with no need to many easy to playback...
... speed, compass heading and speed camera locations as protected from the current lane. Easy to Install and Use Use the enclosed bracket to install to push any vehicle. The warning is turned off. Package Contents HP Car Camcorder f530g Car power adapter Camera mounting bracket CDROM with Software /UM Quick start the car, the f530g automatically starts recording video with no need to many easy to playback...

Product Information
Page 2
... Bracket Quick Start Guide Warranty document Microsoft Windows Vista/7/8 Pentium D 3.0 GHz processor or equivalent 1 GB RAM or greater One year limited hardware warranty from Hewlett-Packard. Chinese / T. All other countries. Actual product image may vary from image shown. Car Camcorder f530g SPECIFICATIONS Display Dimensions Sensor Type Effective Pixels Video Resolutions Video Format Still Image Resolution Still Image Format ISO Sensitivity Integrated GPS G-Sensor Lens Specifications Microphone On Screen Languages Storage Media Connections Power Dimensions...
... Bracket Quick Start Guide Warranty document Microsoft Windows Vista/7/8 Pentium D 3.0 GHz processor or equivalent 1 GB RAM or greater One year limited hardware warranty from Hewlett-Packard. Chinese / T. All other countries. Actual product image may vary from image shown. Car Camcorder f530g SPECIFICATIONS Display Dimensions Sensor Type Effective Pixels Video Resolutions Video Format Still Image Resolution Still Image Format ISO Sensitivity Integrated GPS G-Sensor Lens Specifications Microphone On Screen Languages Storage Media Connections Power Dimensions...

User Manual
Page 2
... 4 Battery warning 4 Notes on Installation 5 Caution 5 1 Introduction 7 1.1 Features 7 1.2 Package Contents 7 1.3 Product Overview 8 2 Getting Started 9 2.1 Inserting the Memory Card 9 2.2 Installing in Vehicles 10 2.2.1 Mount to Windshield 10 2.2.2 Adjust the camcorder position 11 2.3 Connecting to Power 12 2.4 LED Indicator 14 2.5 Powering the Camcorder On / Off 15 2.5.1 Auto Power On/Off 15 2.5.2 Manual Power On/Off 15 2.6 Initial Settings 16 2.6.1 Set Automatic Recording 16 2.6.2 Set the Date and Time 16 2.6.3 Setting the Universal Time Code (UTC)...... 17 3 Using...
... 4 Battery warning 4 Notes on Installation 5 Caution 5 1 Introduction 7 1.1 Features 7 1.2 Package Contents 7 1.3 Product Overview 8 2 Getting Started 9 2.1 Inserting the Memory Card 9 2.2 Installing in Vehicles 10 2.2.1 Mount to Windshield 10 2.2.2 Adjust the camcorder position 11 2.3 Connecting to Power 12 2.4 LED Indicator 14 2.5 Powering the Camcorder On / Off 15 2.5.1 Auto Power On/Off 15 2.5.2 Manual Power On/Off 15 2.6 Initial Settings 16 2.6.1 Set Automatic Recording 16 2.6.2 Set the Date and Time 16 2.6.3 Setting the Universal Time Code (UTC)...... 17 3 Using...

User Manual
Page 3
...Videos 18 3.1.1 Record videos while driving 18 3.1.2 LDWS (Lane Departure Warning Systems) 18 3.1.3 Headlight Warning 19 3.1.4 Motion Detection 19 3.1.5 Record all other types of videos 20 3.1.6 Emergency Recording 21 3.1.7 The Recording Screen 22 3.1.8 Taking Snapshot 23 3.1.9 4 GRID FUNCTION CHART in the LCD screen24 3.2 Playback Videos and Photos 25 3.2.1 Playing Videos 26 3.2.2 Viewing Photos 26 3.2.3 The Playback Screen 27 3.2.4 Deleting Files 28 4 Adjusting the Settings 29 4.1 Using the Menu 29 4.2 Menu Tree 30 5 Installing the Software 34 6 SuperCar 35 7 Specifications...
...Videos 18 3.1.1 Record videos while driving 18 3.1.2 LDWS (Lane Departure Warning Systems) 18 3.1.3 Headlight Warning 19 3.1.4 Motion Detection 19 3.1.5 Record all other types of videos 20 3.1.6 Emergency Recording 21 3.1.7 The Recording Screen 22 3.1.8 Taking Snapshot 23 3.1.9 4 GRID FUNCTION CHART in the LCD screen24 3.2 Playback Videos and Photos 25 3.2.1 Playing Videos 26 3.2.2 Viewing Photos 26 3.2.3 The Playback Screen 27 3.2.4 Deleting Files 28 4 Adjusting the Settings 29 4.1 Using the Menu 29 4.2 Menu Tree 30 5 Installing the Software 34 6 SuperCar 35 7 Specifications...

User Manual
Page 6
... considerations, do not manually operate the camcorder while driving. Do not touch the lens with your product warranty. Set up time and date accurately before you use this product. Exposing the camcorder to ensure a clear view even when it rains. 3. Clean the lens on a tinted window. The feature cannot ensure the location accuracy. Finger grease may differ. Never short-circuit the battery. GPS location accuracy...
... considerations, do not manually operate the camcorder while driving. Do not touch the lens with your product warranty. Set up time and date accurately before you use this product. Exposing the camcorder to ensure a clear view even when it rains. 3. Clean the lens on a tinted window. The feature cannot ensure the location accuracy. Finger grease may differ. Never short-circuit the battery. GPS location accuracy...

User Manual
Page 7
... software with recorded video for your reference only. Before you agree to the influence of any data/content during operation. They are reference only, please follow the actual road condition. The firmware function in this system, such as speed, position, and the distance warning to the speed camera set points, may be inaccurate due to the above statements. 6 The values displayed in camcorder...
... software with recorded video for your reference only. Before you agree to the influence of any data/content during operation. They are reference only, please follow the actual road condition. The firmware function in this system, such as speed, position, and the distance warning to the speed camera set points, may be inaccurate due to the above statements. 6 The values displayed in camcorder...

User Manual
Page 8
...; Supports WDR / LDWS / GPS / Headlight Warning 1.2 Package Contents The package contains the following items. In case there is specifically designed for real time video and audio recording when driving. 1.1 Features • WFHD camera (2560x1080 @ 30fps) • SHD camera (2304x1296 @ 30fps) • High-dynamic-range Imaging (1920x1080 @30fps HDR) • 2.4" LCD color screen • Wide angle lens • Motion detection • Automatic Emergency recording for purchasing this advanced camcorder.
...; Supports WDR / LDWS / GPS / Headlight Warning 1.2 Package Contents The package contains the following items. In case there is specifically designed for real time video and audio recording when driving. 1.1 Features • WFHD camera (2560x1080 @ 30fps) • SHD camera (2304x1296 @ 30fps) • High-dynamic-range Imaging (1920x1080 @30fps HDR) • 2.4" LCD color screen • Wide angle lens • Motion detection • Automatic Emergency recording for purchasing this advanced camcorder.

User Manual
Page 14
Connect the car adapter to charge the battery, battery is charging. Battery is full charged. Low Voltage: Note: If the camcorder is connected to prevent invalid recording or file damage. 13 Battery Status Indicator: Icon Description Full battery power. 2/3 battery power. 1/3 battery power. Please wait for a few minutes until the charging reminder symbol disappears before entering the video recording mode to the car adapter and turned on, and the screen displays a charging reminder symbol such as the image above, it...
Connect the car adapter to charge the battery, battery is charging. Battery is full charged. Low Voltage: Note: If the camcorder is connected to prevent invalid recording or file damage. 13 Battery Status Indicator: Icon Description Full battery power. 2/3 battery power. 1/3 battery power. Please wait for a few minutes until the charging reminder symbol disappears before entering the video recording mode to the car adapter and turned on, and the screen displays a charging reminder symbol such as the image above, it...

User Manual
Page 17
... OSD menu. 2. 2.6 Initial Settings Before using the camcorder, we recommend you to enable the Automatic Record function and set the correct date and time, do the following : 1. Press the button to exit the menu. 2.6.2 Set the Date and Time To set up the correct date and time. 2.6.1 Set Automatic Recording To enable the recording to start automatically after you turn on the power, do the following : 1. Repeat step 3 until the date and time setting is...
... OSD menu. 2. 2.6 Initial Settings Before using the camcorder, we recommend you to enable the Automatic Record function and set the correct date and time, do the following : 1. Press the button to exit the menu. 2.6.2 Set the Date and Time To set up the correct date and time. 2.6.1 Set Automatic Recording To enable the recording to start automatically after you turn on the power, do the following : 1. Repeat step 3 until the date and time setting is...

User Manual
Page 19
... button. 3. Note: On some cars, the recording will automatically stop recording manually. 3 Using the Car Recorder 3.1 Recording Videos 3.1.1 Record videos while driving When the vehicle engine starts up and the Automatic Record function is enabled, the camcorder automatically turns on the display when the speed reaches a set the LDWS (Lane Departure Warning Systems), do the following: 1. Recording will continue when the engine is switched off the cigarette lighter or remove the car adapter...
... button. 3. Note: On some cars, the recording will automatically stop recording manually. 3 Using the Car Recorder 3.1 Recording Videos 3.1.1 Record videos while driving When the vehicle engine starts up and the Automatic Record function is enabled, the camcorder automatically turns on the display when the speed reaches a set the LDWS (Lane Departure Warning Systems), do the following: 1. Recording will continue when the engine is switched off the cigarette lighter or remove the car adapter...

User Manual
Page 21
... / button to save a video file for about 30 minutes. 2. Press the button to start recording. 2. This is used, the battery storage capacity will pop on the screen. Press the button to exit the menu. Press the / button to enter the OSD menu. 2. As the camcorder is a normal phenomenon for a duration the same as the length setting. Note: 1. when the camcorder detects any motion in front of lens, Video Record will...
... / button to save a video file for about 30 minutes. 2. Press the button to start recording. 2. This is used, the battery storage capacity will pop on the screen. Press the button to exit the menu. Press the / button to enter the OSD menu. 2. As the camcorder is a normal phenomenon for a duration the same as the length setting. Note: 1. when the camcorder detects any motion in front of lens, Video Record will...

User Manual
Page 22
... Recording During Video Recording, press the button to enter emergency recording mode, the "Emergency" message will be shown immediately on the screen when the emergency recording files are full, and the oldest emergency file will be protected. To stop the recording, press the button. The alert message of the screen, and the recorded file will be automatically deleted when a new emergency recording file is created. 21 Note: 1. If the Collision Detection function...
... Recording During Video Recording, press the button to enter emergency recording mode, the "Emergency" message will be shown immediately on the screen when the emergency recording files are full, and the oldest emergency file will be protected. To stop the recording, press the button. The alert message of the screen, and the recorded file will be automatically deleted when a new emergency recording file is created. 21 Note: 1. If the Collision Detection function...

User Manual
Page 24
... use this camcorder to take a snapshot. Please refer to Set the Date and time) Time (2.6.2) 10 Guide icon (Stop) Press the button to stop the recording first. 23 Note: If recording is in progress, press the button to stop the recording. 11 Guide icon (Emergency) Press the button to continuously record the video in one file until the recording is manually stopped. 3.1.8 Taking Snapshot You can also use the camcorder. Prompt Remind the user to reset the Date / Time...
... use this camcorder to take a snapshot. Please refer to Set the Date and time) Time (2.6.2) 10 Guide icon (Stop) Press the button to stop the recording first. 23 Note: If recording is in progress, press the button to stop the recording. 11 Guide icon (Emergency) Press the button to continuously record the video in one file until the recording is manually stopped. 3.1.8 Taking Snapshot You can also use the camcorder. Prompt Remind the user to reset the Date / Time...

User Manual
Page 27
..., press the button to resume. 3.2.2 Viewing Photos To view photos, do the following : 1. 3.2.1 Playing Videos To play the video. 6. Press it again to stop recording. 2. Press the / button to browse for the desired video file and press the button to select File Playback and press the button. 4. Press the button to enter the OSD menu. 3. Press the button to pause the playback. Press the / button to play videos, do the following : 1. If recording is in full screen. 26
..., press the button to resume. 3.2.2 Viewing Photos To view photos, do the following : 1. 3.2.1 Playing Videos To play the video. 6. Press it again to stop recording. 2. Press the / button to browse for the desired video file and press the button to select File Playback and press the button. 4. Press the button to enter the OSD menu. 3. Press the button to pause the playback. Press the / button to play videos, do the following : 1. If recording is in full screen. 26

User Manual
Page 31
Menu option File Playback Satellite Status Satellite Synchronization Date / Time Time Stamp Resolution EV Smart Scene Mode Description Select the file category that you cannot manually change the time. You may customize it between -1.3 ~ +1.3 Driving Priority / Scenery Priority 30 When this feature is enabled, the system will use the satellite time, and you want to set the satellite time. Driving Priority: Calculate exposure based on the entire image area...
Menu option File Playback Satellite Status Satellite Synchronization Date / Time Time Stamp Resolution EV Smart Scene Mode Description Select the file category that you cannot manually change the time. You may customize it between -1.3 ~ +1.3 Driving Priority / Scenery Priority 30 When this feature is enabled, the system will use the satellite time, and you want to set the satellite time. Driving Priority: Calculate exposure based on the entire image area...

User Manual
Page 32
Delete speed point: All added speed camera locations will be activated 1 hour after video recording starts. Add speed point / Delete speed point Distance Unit Select the unit for the display to the built-in system. Beep Enable/Disable the beep. On / Off LCD Setting Set the duration for distance display. You can add up to 200 speed camera location to automatically turn off right after the camcorder is powered on, with...
Delete speed point: All added speed camera locations will be activated 1 hour after video recording starts. Add speed point / Delete speed point Distance Unit Select the unit for the display to the built-in system. Beep Enable/Disable the beep. On / Off LCD Setting Set the duration for distance display. You can add up to 200 speed camera location to automatically turn off right after the camcorder is powered on, with...


