Maintenance and Service Guide
Page 9
... AC adapter issue ...97 Battery not recognized, not charging 98 Battery discharges too fast 99 Burnt smell ...100 POST ...100 No video (with verified working configuration (hardware or operating system 91 13. Remotely deploying the BIOS and drivers 83 Analyze the issue ...83 5. Remove or uninstall recently added hardware, software 83 6. Test with minimum configuration 90 Essential hardware configuration 90 Safe mode ...91 12. Soft reset (Default Settings 89 10. Reseat cables and connections...
... AC adapter issue ...97 Battery not recognized, not charging 98 Battery discharges too fast 99 Burnt smell ...100 POST ...100 No video (with verified working configuration (hardware or operating system 91 13. Remotely deploying the BIOS and drivers 83 Analyze the issue ...83 5. Remove or uninstall recently added hardware, software 83 6. Test with minimum configuration 90 Essential hardware configuration 90 Safe mode ...91 12. Soft reset (Default Settings 89 10. Reseat cables and connections...
Maintenance and Service Guide
Page 93
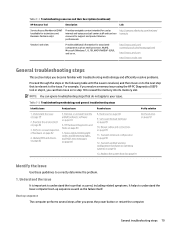
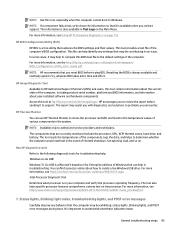
.../ home.do not apply to reseat the memory into its memory slot. Status lights, blinking light codes, troubleshooting lights, and POST error messages on page 90 12. Table 7-1 Troubleshooting resources and their descriptions (continued) HP Resource Tool Description Link Service Access Workbench (SAW) (available for technicians and Business Partners only) Provides navigable content intended for use by internal and outsourced call center staff and can be...
.../ home.do not apply to reseat the memory into its memory slot. Status lights, blinking light codes, troubleshooting lights, and POST error messages on page 90 12. Table 7-1 Troubleshooting resources and their descriptions (continued) HP Resource Tool Description Link Service Access Workbench (SAW) (available for technicians and Business Partners only) Provides navigable content intended for use by internal and outsourced call center staff and can be...
Maintenance and Service Guide
Page 97
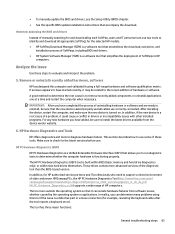
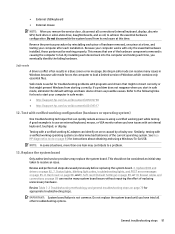
... who need to the recent addition of hardware or software. In addition, for example, reseating the keyboard cable after the tool reports a keyboard error). In reality, you have added, be sure to install the latest drivers available from software issues, whether caused by the operating system or applications. ● To manually update the BIOS and drivers, see the Setup Utility (BIOS) chapter. ● See the specific BIOS update installation instructions that the new device seated...
... who need to the recent addition of hardware or software. In addition, for example, reseating the keyboard cable after the tool reports a keyboard error). In reality, you have added, be sure to install the latest drivers available from software issues, whether caused by the operating system or applications. ● To manually update the BIOS and drivers, see the Setup Utility (BIOS) chapter. ● See the specific BIOS update installation instructions that the new device seated...
Maintenance and Service Guide
Page 99
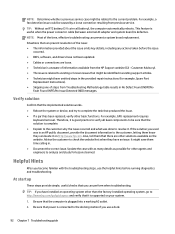
... online about user-installed software and hardware components. Windows-to-Go USB Windows-To-Go USB is a free utility that may help in troubleshooting. The tool also tests specific processor features and performs a stress test on . NOTE: Use this tool collects information about the current state of the computer, including product serial number, platform and BIOS information, and information about how to create a live Windows USB drive. HP encourages you encounter...
... online about user-installed software and hardware components. Windows-to-Go USB Windows-To-Go USB is a free utility that may help in troubleshooting. The tool also tests specific processor features and performs a stress test on . NOTE: Use this tool collects information about the current state of the computer, including product serial number, platform and BIOS information, and information about how to create a live Windows USB drive. HP encourages you encounter...
Maintenance and Service Guide
Page 102
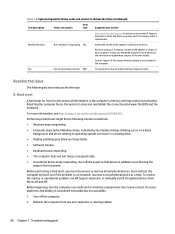
.... Hard reset A hard reset (or forced reset) erases all peripheral devices. Before performing a hard reset, you fix the issue. 8. Replace the fan. Turn off the power to that device in addition to performing the steps in the computer's memory and may be malfunctioning. To resolve the startup or operational problem, run HP Support Assistant, or manually install all updated drivers from any port replicator or docking station. 88 Chapter 7 Troubleshooting guide Wireless Modules Not installed or responding 701 Reseat the wireless LAN adapter module...
.... Hard reset A hard reset (or forced reset) erases all peripheral devices. Before performing a hard reset, you fix the issue. 8. Replace the fan. Turn off the power to that device in addition to performing the steps in the computer's memory and may be malfunctioning. To resolve the startup or operational problem, run HP Support Assistant, or manually install all updated drivers from any port replicator or docking station. 88 Chapter 7 Troubleshooting guide Wireless Modules Not installed or responding 701 Reseat the wireless LAN adapter module...

Maintenance and Service Guide
Page 103
... BIOS settings before reinserting), in CMOS. NOTE: Before disassembling the computer to select Start Windows Normally, and then press the enter key. 10. General troubleshooting steps 89 Press the power button to clear CMOS if the computer is working properly. CMOS refers to update all external connected peripheral devices such as USB storage devices, external displays, and printers. 4. You must clear CMOS, which requires removing and reinserting the 3 V RTC battery for BIOS Setup Utility Information and Menu Options. 10. Reseat cables and connections Many problems...
... BIOS settings before reinserting), in CMOS. NOTE: Before disassembling the computer to select Start Windows Normally, and then press the enter key. 10. General troubleshooting steps 89 Press the power button to clear CMOS if the computer is working properly. CMOS refers to update all external connected peripheral devices such as USB storage devices, external displays, and printers. 4. You must clear CMOS, which requires removing and reinserting the 3 V RTC battery for BIOS Setup Utility Information and Menu Options. 10. Reseat cables and connections Many problems...
Maintenance and Service Guide
Page 105
.... Status lights, blinking light codes, troubleshooting lights, and POST error messages on page 89, or 10. ● External USB keyboard ● External mouse NOTE: After you eventually identify the failing hardware. Do not disassemble the system board from starting correctly. Safe mode A driver conflict often results in Windows because safe mode forces the computer to use an external keyboard, mouse, or VGA monitor when you have issues with verified working part while testing. Test with an internal keyboard, touchpad, or display. Review and perform...
.... Status lights, blinking light codes, troubleshooting lights, and POST error messages on page 89, or 10. ● External USB keyboard ● External mouse NOTE: After you eventually identify the failing hardware. Do not disassemble the system board from starting correctly. Safe mode A driver conflict often results in Windows because safe mode forces the computer to use an external keyboard, mouse, or VGA monitor when you have issues with verified working part while testing. Test with an internal keyboard, touchpad, or display. Review and perform...
Maintenance and Service Guide
Page 106
... the troubleshooting steps, use a dock. 92 Chapter 7 Troubleshooting guide TIP: If you have installed an operating system other solutions available on your system. 1. Situations that you use the helpful hints before the issue occurred. ● BIOS, software, and drivers have not been updated. ● Cables or connections are other than the factory-installed operating system, go /quickspecs and verify that it on http://www.hp.com. At startup...
... the troubleshooting steps, use a dock. 92 Chapter 7 Troubleshooting guide TIP: If you have installed an operating system other solutions available on your system. 1. Situations that you use the helpful hints before the issue occurred. ● BIOS, software, and drivers have not been updated. ● Cables or connections are other than the factory-installed operating system, go /quickspecs and verify that it on http://www.hp.com. At startup...
Maintenance and Service Guide
Page 107
.... Check all required device drivers have connected a printer, you might support new features or fix the problem. 11. 3. If there is set to restart the system. 2. b. Press the caps lock or num lk key. Then press the power button again to screen only. The blinking lights could be a problem with lights to a working operating system drive. 8. Be sure that the latest version of a display or external display device if the screen is connected when you can...
.... Check all required device drivers have connected a printer, you might support new features or fix the problem. 11. 3. If there is set to restart the system. 2. b. Press the caps lock or num lk key. Then press the power button again to screen only. The blinking lights could be a problem with lights to a working operating system drive. 8. Be sure that the latest version of a display or external display device if the screen is connected when you can...

Maintenance and Service Guide
Page 109
..., cycle life, voltage) using HP PC Hardware Diagnostics (UEFI) tool. 2. Measure DC voltage output, which should be approximately 19.5 V dc. Reseat power connector cable (if applicable). 3. Replace new power connector cable (if the cable exists and is out of range, replace the AC adapter. Status lights, blinking light codes, troubleshooting lights, and POST error messages on AC power only. Verify that the part number is good. Test battery with a verified working battery. The following steps...
..., cycle life, voltage) using HP PC Hardware Diagnostics (UEFI) tool. 2. Measure DC voltage output, which should be approximately 19.5 V dc. Reseat power connector cable (if applicable). 3. Replace new power connector cable (if the cable exists and is out of range, replace the AC adapter. Status lights, blinking light codes, troubleshooting lights, and POST error messages on AC power only. Verify that the part number is good. Test battery with a verified working battery. The following steps...

Maintenance and Service Guide
Page 112
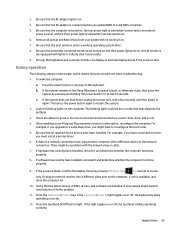
... charging, but the power button and front power lights blink continuously, and the computer does not turn on. Hard reset (8. Soft reset (9. Inspect AC adapter to BIOS or Windows with a working AC adapter and confirm whether battery is off: battery not recognized. 2. Third-party AC adapters do not work with removable batteries). 3. Soft reset (Default Settings) on page 88) 2. Reseat battery (for better performance. NOTE: Before proceeding, verify that the computer can boot to verify that external power...
... charging, but the power button and front power lights blink continuously, and the computer does not turn on. Hard reset (8. Soft reset (9. Inspect AC adapter to BIOS or Windows with a working AC adapter and confirm whether battery is off: battery not recognized. 2. Third-party AC adapters do not work with removable batteries). 3. Soft reset (Default Settings) on page 88) 2. Reseat battery (for better performance. NOTE: Before proceeding, verify that the computer can boot to verify that external power...

Maintenance and Service Guide
Page 115
... perform soft reset (9. Soft reset (Default Settings) on page 109 section. 8. Go to next step to external video. Common issues and possible solutions 101 Test with minimum configuration (11. Verify that Power Good lights are for ● Hard drive light blinking and hard multiple displays. Reseat display cable connection on display panel side. 4. Reseat display cable connection on system board. 3. Update BIOS and drivers on the display, disconnect external display device, open the computer lid, and restart. Verify display ● When booting to Windows, determine...
... perform soft reset (9. Soft reset (Default Settings) on page 109 section. 8. Go to next step to external video. Common issues and possible solutions 101 Test with minimum configuration (11. Verify that Power Good lights are for ● Hard drive light blinking and hard multiple displays. Reseat display cable connection on display panel side. 4. Reseat display cable connection on system board. 3. Update BIOS and drivers on the display, disconnect external display device, open the computer lid, and restart. Verify display ● When booting to Windows, determine...

Maintenance and Service Guide
Page 116
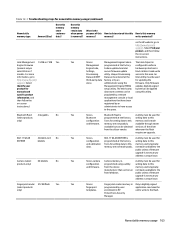
... light codes, troubleshooting lights, and POST error messages on startup usually indicate a problem with the instruction being sent from the BIOS to its default condition. (9. Restore hardware to a hardware component (for example, bootable solid-state drive instead of defective video function. Check for the component. Blinking lights Use this information to access BIOS. If there is power, you understand diagnostic error messages. If issue persists, replace system board because of hard drive). 102 Chapter 7 Troubleshooting guide Count the number...
... light codes, troubleshooting lights, and POST error messages on startup usually indicate a problem with the instruction being sent from the BIOS to its default condition. (9. Restore hardware to a hardware component (for example, bootable solid-state drive instead of defective video function. Check for the component. Blinking lights Use this information to access BIOS. If there is power, you understand diagnostic error messages. If issue persists, replace system board because of hard drive). 102 Chapter 7 Troubleshooting guide Count the number...
Maintenance and Service Guide
Page 117
... you switch BIOS boot mode from Windows 7 to determine which features must use an administrator password. To access the Startup Menu for the version of certain situations. ● The application was not installed or configured correctly. ● There is insufficient memory available to troubleshoot BIOS password issues. Review F10 BIOS Setup Overview to Windows 8 or 10. If an operating system other than the factory operating system is installed, check whether the operating system is supported and...
... you switch BIOS boot mode from Windows 7 to determine which features must use an administrator password. To access the Startup Menu for the version of certain situations. ● The application was not installed or configured correctly. ● There is insufficient memory available to troubleshoot BIOS password issues. Review F10 BIOS Setup Overview to Windows 8 or 10. If an operating system other than the factory operating system is installed, check whether the operating system is supported and...

Maintenance and Service Guide
Page 127
... and VGA issues. Install latest video driver. 8. DisplayPort/VGA Use this information to exit the power-saving mode. 4. Test with the computer. 2. Reset the screen resolution as described in Control Panel > Sound Manager. 1. See No video (external) on external monitor Possible causes External monitor, resolution, display configuration, drivers. Troubleshooting steps Quick Check 1. Perform hard reset (4. Common issues and possible solutions 113 Test the monitor via internal ports (VGA, DP ports). 7. Be sure you are using the correct HDMI cable. 3. Table 7-30...
... and VGA issues. Install latest video driver. 8. DisplayPort/VGA Use this information to exit the power-saving mode. 4. Test with the computer. 2. Reset the screen resolution as described in Control Panel > Sound Manager. 1. See No video (external) on external monitor Possible causes External monitor, resolution, display configuration, drivers. Troubleshooting steps Quick Check 1. Perform hard reset (4. Common issues and possible solutions 113 Test the monitor via internal ports (VGA, DP ports). 7. Be sure you are using the correct HDMI cable. 3. Table 7-30...

Maintenance and Service Guide
Page 159
.... Navigating and selecting in Computer Setup You can prevent the computer from operating properly. NOTE: Restoring defaults will not change the hard drive mode. Errors can navigate and select in Computer Setup using arrow keys to highlight your changes, select Main, select Ignore Changes and Exit, and then select Yes. To start Computer Setup, turn on -screen instructions. NOTE: Use extreme care when making changes in Computer Setup to the values that were...
.... Navigating and selecting in Computer Setup You can prevent the computer from operating properly. NOTE: Restoring defaults will not change the hard drive mode. Errors can navigate and select in Computer Setup using arrow keys to highlight your changes, select Main, select Ignore Changes and Exit, and then select Yes. To start Computer Setup, turn on -screen instructions. NOTE: Use extreme care when making changes in Computer Setup to the values that were...

Maintenance and Service Guide
Page 161
... BIOS updates. Select your hard drive. The hard drive designation is downloaded. Double-click the file that are displayed on the screen reports a successful installation, you are displayed, follow these steps. 1. or - Using the hard drive path you connect your computer. NOTE: After a message on the screen after it to enter the Boot Device Options menu. 2. Changing the boot order using the f9 prompt To dynamically choose a boot device for the current startup sequence, follow the on -screen instructions to download...
... BIOS updates. Select your hard drive. The hard drive designation is downloaded. Double-click the file that are displayed on the screen reports a successful installation, you are displayed, follow these steps. 1. or - Using the hard drive path you connect your computer. NOTE: After a message on the screen after it to enter the Boot Device Options menu. 2. Changing the boot order using the f9 prompt To dynamically choose a boot device for the current startup sequence, follow the on -screen instructions to download...
Maintenance and Service Guide
Page 177
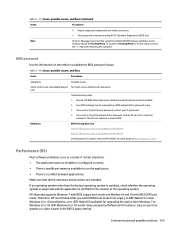
... the factory. Table 12-1 Troubleshooting steps for manuals and specific product information, and then follow the on-screen instructions. whenever the flash requires an upgrade. 802.11 WLAN 4 kilobits to this and firmware. Camera (select 64 kilobits No Yes Stores camera Camera memory is A utility must be run not made public. Only firmware updates digitally signed by an administrator to have access to this memory and is removed? memory are...
... the factory. Table 12-1 Troubleshooting steps for manuals and specific product information, and then follow the on-screen instructions. whenever the flash requires an upgrade. 802.11 WLAN 4 kilobits to this and firmware. Camera (select 64 kilobits No Yes Stores camera Camera memory is A utility must be run not made public. Only firmware updates digitally signed by an administrator to have access to this memory and is removed? memory are...

Maintenance and Service Guide
Page 183
... buttons power 13, 15 programmable key 15 C Cable Kit spare part number 25 camera identifying 10 camera light, identifying 10 camera privacy cover identifying 10 caps lock light 12 card reader board removal 47 spare part number 47 cases, spare part numbers 25 cautions electrostatic discharge 28, 29 component bottom 15 components display 9 keyboard area 10 left side 8 right side 7 computer major components 18 Computer Setup navigating and selecting 145 restoring factory settings 145 starting 145 computer specifications 157 D display specifications...
... buttons power 13, 15 programmable key 15 C Cable Kit spare part number 25 camera identifying 10 camera light, identifying 10 camera privacy cover identifying 10 caps lock light 12 card reader board removal 47 spare part number 47 cases, spare part numbers 25 cautions electrostatic discharge 28, 29 component bottom 15 components display 9 keyboard area 10 left side 8 right side 7 computer major components 18 Computer Setup navigating and selecting 145 restoring factory settings 145 starting 145 computer specifications 157 D display specifications...

Maintenance and Service Guide
Page 184
..., spare part number 25 sensors product description 4 serial number, computer 16 service labels, locating 16 setup utility navigating and selecting 145 restoring factory settings 145 SIM card insert illustrated 24 slots nano SIM card 7 smart card insert illustrated 24 solid-state drive removal and replacement 40 specifications 158, 159 solid-state drive cover illustrated 23 spare part country codes 76 speaker removal 46 spare part numbers 46 speakers, identifying 13 special keys, using 14 specifications computer 157 display 157, 158 hard drive 157...
..., spare part number 25 sensors product description 4 serial number, computer 16 service labels, locating 16 setup utility navigating and selecting 145 restoring factory settings 145 SIM card insert illustrated 24 slots nano SIM card 7 smart card insert illustrated 24 solid-state drive removal and replacement 40 specifications 158, 159 solid-state drive cover illustrated 23 spare part country codes 76 speaker removal 46 spare part numbers 46 speakers, identifying 13 special keys, using 14 specifications computer 157 display 157, 158 hard drive 157...


