HP Pavilion Multimedia Display - (English) Hewlett Packard Limited Warranty Statement 5990-5779
Page 2
...determine the type of service, as well as collateral for the retail price of the numbers listed below. You must return the defective monitor to HP (using the shipping carton that the new one -year hardware warranty, hardware repair service includes Unit Exchange, Carry-in, Send-in,... service provider. Send-In Repair Service In locations where Send-in repair service is available, HP will send you for the monitor, and will be obtained by shipping your defective monitor to you. Obtaining Hardware Warranty Repair Service For the duration of the service available in your...
...determine the type of service, as well as collateral for the retail price of the numbers listed below. You must return the defective monitor to HP (using the shipping carton that the new one -year hardware warranty, hardware repair service includes Unit Exchange, Carry-in, Send-in,... service provider. Send-In Repair Service In locations where Send-in repair service is available, HP will send you for the monitor, and will be obtained by shipping your defective monitor to you. Obtaining Hardware Warranty Repair Service For the duration of the service available in your...
User's Guide HP vs17, vs19, f1905 LCD Monitors
Page 5
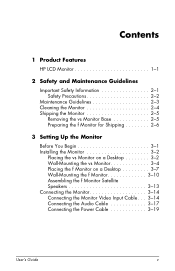
... HP LCD Monitor 1-1 2 Safety and Maintenance Guidelines Important Safety Information 2-1 Safety Precautions 2-2 Maintenance Guidelines 2-3 Cleaning the Monitor 2-4 Shipping the Monitor 2-5 Removing the vs Monitor Base 2-5 Preparing the f Monitor for Shipping 2-6 3 Setting Up the Monitor Before You Begin 3-1 Installing the Monitor 3-2 Placing the vs Monitor on a Desktop 3-2 Wall-Mounting the vs Monitor 3-4 Placing the f Monitor on a Desktop 3-7 Wall-Mounting the f Monitor 3-10 Assembling the f Monitor...
... HP LCD Monitor 1-1 2 Safety and Maintenance Guidelines Important Safety Information 2-1 Safety Precautions 2-2 Maintenance Guidelines 2-3 Cleaning the Monitor 2-4 Shipping the Monitor 2-5 Removing the vs Monitor Base 2-5 Preparing the f Monitor for Shipping 2-6 3 Setting Up the Monitor Before You Begin 3-1 Installing the Monitor 3-2 Placing the vs Monitor on a Desktop 3-2 Wall-Mounting the vs Monitor 3-4 Placing the f Monitor on a Desktop 3-7 Wall-Mounting the f Monitor 3-10 Assembling the f Monitor...
User's Guide HP vs17, vs19, f1905 LCD Monitors
Page 6
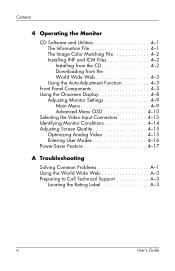
... from the World Wide Web 4-3 Using the Auto-Adjustment Function 4-3 Front Panel Components 4-5 Using the Onscreen Display 4-8 Adjusting Monitor Settings 4-9 Main Menu 4-9 Advanced Menu OSD 4-10 Selecting the Video Input Connectors 4-13 Identifying Monitor Conditions 4-14 Adjusting Screen Quality 4-15 Optimizing Analog Video 4-15 Entering User Modes 4-16 Power-Saver Feature 4-17...
... from the World Wide Web 4-3 Using the Auto-Adjustment Function 4-3 Front Panel Components 4-5 Using the Onscreen Display 4-8 Adjusting Monitor Settings 4-9 Main Menu 4-9 Advanced Menu OSD 4-10 Selecting the Video Input Connectors 4-13 Identifying Monitor Conditions 4-14 Adjusting Screen Quality 4-15 Optimizing Analog Video 4-15 Entering User Modes 4-16 Power-Saver Feature 4-17...
User's Guide HP vs17, vs19, f1905 LCD Monitors
Page 7
... Equipment by Users in Private Households in the European Union C-5 Japanese Notice C-5 Japanese Power Cord Notice C-6 Korean Notice C-6 EPA Energy Star Compliance C-6 HP Recycling Program C-7 User's Guide vii Contents B Technical Specifications HP vs LCD Monitors B-1 HP f LCD Monitors B-4 Pre-set Video Modes B-6 LCD Monitor Quality and Pixel Policy B-8 Power Cord Set Requirements B-9 C Agency Regulatory Notices Federal Communications Commission Notice. . . . .
... Equipment by Users in Private Households in the European Union C-5 Japanese Notice C-5 Japanese Power Cord Notice C-6 Korean Notice C-6 EPA Energy Star Compliance C-6 HP Recycling Program C-7 User's Guide vii Contents B Technical Specifications HP vs LCD Monitors B-1 HP f LCD Monitors B-4 Pre-set Video Modes B-6 LCD Monitor Quality and Pixel Policy B-8 Power Cord Set Requirements B-9 C Agency Regulatory Notices Federal Communications Commission Notice. . . . .
User's Guide HP vs17, vs19, f1905 LCD Monitors
Page 9
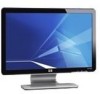
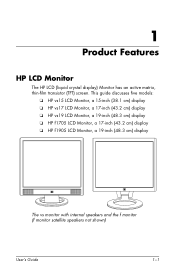
This guide discusses five models: ❏ HP vs15 LCD Monitor, a 15-inch (38.1 cm) display ❏ HP vs17 LCD Monitor, a 17-inch (43.2 cm) display ❏ HP vs19 LCD Monitor, a 19-inch (48.3 cm) display ❏ HP f1705 LCD Monitor, a 17-inch (43.2 cm) display ❏ HP f1905 LCD Monitor, a 19-inch (48.3 cm) display The vs monitor with internal speakers and the f monitor (f monitor satellite speakers not shown) User's Guide 1-1 1 Product Features HP LCD Monitor The HP LCD (liquid crystal display) Monitor has an active matrix, thin-film transistor (TFT) screen.
This guide discusses five models: ❏ HP vs15 LCD Monitor, a 15-inch (38.1 cm) display ❏ HP vs17 LCD Monitor, a 17-inch (43.2 cm) display ❏ HP vs19 LCD Monitor, a 19-inch (48.3 cm) display ❏ HP f1705 LCD Monitor, a 17-inch (43.2 cm) display ❏ HP f1905 LCD Monitor, a 19-inch (48.3 cm) display The vs monitor with internal speakers and the f monitor (f monitor satellite speakers not shown) User's Guide 1-1 1 Product Features HP LCD Monitor The HP LCD (liquid crystal display) Monitor has an active matrix, thin-film transistor (TFT) screen.
User's Guide HP vs17, vs19, f1905 LCD Monitors
Page 10
...215; 1024 factory-set resolution, plus full-screen support for lower resolutions (HP vs15 LCD Monitor: 1024 x 768) ■ Video inputs supported: ❏ VGA analog signal ❏ DVI-D (select f monitor models only) digital signal ■ VGA cable ■ Fast response time...) ■ Audio connections supported: ❏ vs monitors: Integrated stereo speakers with a computer line out connector and a headphones connector on the monitor ❏ f monitors: Satellite stereo speakers with connectors for computer line out, an HP subwoofer, and headphones ■ Integrated power supply &#...
...215; 1024 factory-set resolution, plus full-screen support for lower resolutions (HP vs15 LCD Monitor: 1024 x 768) ■ Video inputs supported: ❏ VGA analog signal ❏ DVI-D (select f monitor models only) digital signal ■ VGA cable ■ Fast response time...) ■ Audio connections supported: ❏ vs monitors: Integrated stereo speakers with a computer line out connector and a headphones connector on the monitor ❏ f monitors: Satellite stereo speakers with connectors for computer line out, an HP subwoofer, and headphones ■ Integrated power supply &#...
User's Guide HP vs17, vs19, f1905 LCD Monitors
Page 13
..., do not disable the power cord grounding feature. the power strips must be sure that the grounded power outlet you can replace your monitor. To disconnect power from the equipment, unplug the power cord from the power outlet by grasping the plug firmly. Not all power cords...). To use a different cord, use with your equipment if surge protection fails. Never pull on the cord. Ä CAUTION: To protect your monitor, as well as your computer, connect all power strips provide surge protection; 2 Safety and Maintenance Guidelines Important Safety Information The power cord is designed ...
..., do not disable the power cord grounding feature. the power strips must be sure that the grounded power outlet you can replace your monitor. To disconnect power from the equipment, unplug the power cord from the power outlet by grasping the plug firmly. Not all power cords...). To use a different cord, use with your equipment if surge protection fails. Never pull on the cord. Ä CAUTION: To protect your monitor, as well as your computer, connect all power strips provide surge protection; 2 Safety and Maintenance Guidelines Important Safety Information The power cord is designed ...
User's Guide HP vs17, vs19, f1905 LCD Monitors
Page 14
...the power cord. Safety and Maintenance Guidelines Safety Precautions ■ Use only a power source and connection compatible with this monitor, as indicated on the label/back plate of the monitor. ■ Be sure the total ampere rating of the products connected to the outlet does not exceed the current ...the ampere rating (Amps or A) for each device. ■ Install your monitor near an outlet that you can easily reach. Never disconnect the monitor by grasping the plug firmly and pulling it from the outlet. Disconnect the monitor by pulling the cord. ■ Do not allow anything to rest on...
...the power cord. Safety and Maintenance Guidelines Safety Precautions ■ Use only a power source and connection compatible with this monitor, as indicated on the label/back plate of the monitor. ■ Be sure the total ampere rating of the products connected to the outlet does not exceed the current ...the ampere rating (Amps or A) for each device. ■ Install your monitor near an outlet that you can easily reach. Never disconnect the monitor by grasping the plug firmly and pulling it from the outlet. Disconnect the monitor by pulling the cord. ■ Do not allow anything to rest on...
User's Guide HP vs17, vs19, f1905 LCD Monitors
Page 15
...To enhance the performance and extend the life of your monitor: ■ Do not open your monitor from the wall outlet before cleaning. These openings must lay the monitor face down on an unstable surface. ■ When removing the monitor base or stand, you must not be blocked or ...kind into cabinet slots or other openings. ■ Unplug your monitor cabinet or attempt to prevent it from getting scratched, defaced, or broken. If your monitor is not operating properly or has been dropped or damaged, contact your HP authorized dealer, reseller, or service provider. ■ Adjust only...
...To enhance the performance and extend the life of your monitor: ■ Do not open your monitor from the wall outlet before cleaning. These openings must lay the monitor face down on an unstable surface. ■ When removing the monitor base or stand, you must not be blocked or ...kind into cabinet slots or other openings. ■ Unplug your monitor cabinet or attempt to prevent it from getting scratched, defaced, or broken. If your monitor is not operating properly or has been dropped or damaged, contact your HP authorized dealer, reseller, or service provider. ■ Adjust only...
User's Guide HP vs17, vs19, f1905 LCD Monitors
Page 16
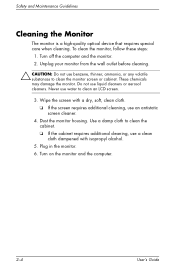
... these steps: 1. These chemicals may damage the monitor. Wipe the screen with isopropyl alcohol. 5. Turn on the monitor and the computer. 2-4 User's Guide Unplug your monitor from the wall outlet before cleaning. Ä CAUTION: Do not use benzene, thinner, ammonia, or any volatile substances to clean an LCD screen. 3. Never use a clean cloth dampened...
... these steps: 1. These chemicals may damage the monitor. Wipe the screen with isopropyl alcohol. 5. Turn on the monitor and the computer. 2-4 User's Guide Unplug your monitor from the wall outlet before cleaning. Ä CAUTION: Do not use benzene, thinner, ammonia, or any volatile substances to clean an LCD screen. 3. Never use a clean cloth dampened...
User's Guide HP vs17, vs19, f1905 LCD Monitors
Page 17
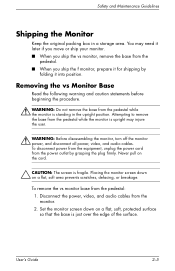
...by folding it into position. To disconnect power from the equipment, unplug the power cord from the pedestal while the monitor is fragile. To remove the vs monitor base from the monitor. 2. Disconnect the power, video, and audio cables from the pedestal: 1. User's Guide 2-5 Safety and Maintenance ...pull on the cord. Ä CAUTION: The screen is upright may need it for shipping by grasping the plug firmly. Removing the vs Monitor Base Read the following warning and caution statements before beginning the procedure. Å WARNING: Do not remove the base from the pedestal. &#...
...by folding it into position. To disconnect power from the equipment, unplug the power cord from the pedestal while the monitor is fragile. To remove the vs monitor base from the monitor. 2. Disconnect the power, video, and audio cables from the pedestal: 1. User's Guide 2-5 Safety and Maintenance ...pull on the cord. Ä CAUTION: The screen is upright may need it for shipping by grasping the plug firmly. Removing the vs Monitor Base Read the following warning and caution statements before beginning the procedure. Å WARNING: Do not remove the base from the pedestal. &#...
User's Guide HP vs17, vs19, f1905 LCD Monitors
Page 18
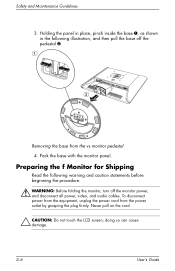
..., unplug the power cord from the vs monitor pedestal 4. Preparing the f Monitor for Shipping Read the following illustration, and then pull the base off the monitor power, and disconnect all power, video, and audio cables. Pack the base with the monitor panel. doing so can cause damage. 2-6...place, pinch inside the base 1, as shown in the following warning and caution statements before beginning the procedure. Å WARNING: Before folding the monitor, turn off the pedestal 2. 1 2 Removing the base from the power outlet by grasping the plug firmly. Never pull on the cord. &#...
..., unplug the power cord from the vs monitor pedestal 4. Preparing the f Monitor for Shipping Read the following illustration, and then pull the base off the monitor power, and disconnect all power, video, and audio cables. Pack the base with the monitor panel. doing so can cause damage. 2-6...place, pinch inside the base 1, as shown in the following warning and caution statements before beginning the procedure. Å WARNING: Before folding the monitor, turn off the pedestal 2. 1 2 Removing the base from the power outlet by grasping the plug firmly. Never pull on the cord. &#...
User's Guide HP vs17, vs19, f1905 LCD Monitors
Page 19
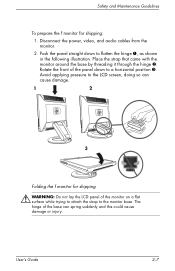
... threading it through the hinge 2. Disconnect the power, video, and audio cables from the monitor. 2. Rotate the front of the monitor on a flat surface while trying to attach the strap to the LCD screen, doing so can spring suddenly and this could cause damage or injury. The hinge... of the base can cause damage. 1 2 3 Folding the f monitor for shipping: 1. Safety and Maintenance Guidelines To prepare the f monitor for shipping Å WARNING: Do not...
... threading it through the hinge 2. Disconnect the power, video, and audio cables from the monitor. 2. Rotate the front of the monitor on a flat surface while trying to attach the strap to the LCD screen, doing so can spring suddenly and this could cause damage or injury. The hinge... of the base can cause damage. 1 2 3 Folding the f monitor for shipping: 1. Safety and Maintenance Guidelines To prepare the f monitor for shipping Å WARNING: Do not...
User's Guide HP vs17, vs19, f1905 LCD Monitors
Page 21
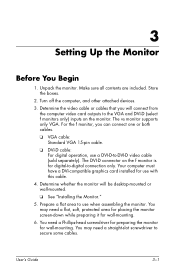
...secure some cables. 3 Setting Up the Monitor Before You Begin 1. Unpack the monitor. Store the boxes. 2. The vs monitor supports only VGA. The DVI-D connector on the monitor. You may need a flat, soft, protected area for placing the monitor screen-down while preparing it for digital...-to the VGA and DVI-D (select f monitors only) inputs on the f monitor is for wall-mounting. 6. For the f monitor, you will be desktop-mounted or wall-mounted. ❏ See "Installing the Monitor." 5. Your computer must...
...secure some cables. 3 Setting Up the Monitor Before You Begin 1. Unpack the monitor. Store the boxes. 2. The vs monitor supports only VGA. The DVI-D connector on the monitor. You may need a flat, soft, protected area for placing the monitor screen-down while preparing it for digital...-to the VGA and DVI-D (select f monitors only) inputs on the f monitor is for wall-mounting. 6. For the f monitor, you will be desktop-mounted or wall-mounted. ❏ See "Installing the Monitor." 5. Your computer must...
User's Guide HP vs17, vs19, f1905 LCD Monitors
Page 22
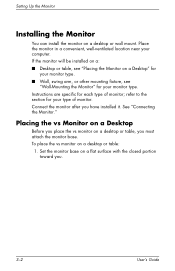
... a desktop or table, you must attach the monitor base. refer to the section for your type of monitor; Placing the vs Monitor on a Desktop Before you place the vs monitor on a desktop or table: 1. Setting Up the Monitor Installing the Monitor You can install the monitor on a Desktop" for your monitor type. ■ Wall, swing arm, or other...
... a desktop or table, you must attach the monitor base. refer to the section for your type of monitor; Placing the vs Monitor on a Desktop Before you place the vs monitor on a desktop or table: 1. Setting Up the Monitor Installing the Monitor You can install the monitor on a Desktop" for your monitor type. ■ Wall, swing arm, or other...
User's Guide HP vs17, vs19, f1905 LCD Monitors
Page 23
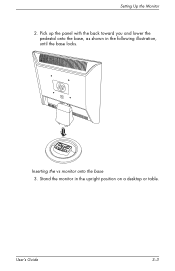
User's Guide 3-3 Stand the monitor in the following illustration, until the base locks. Inserting the vs monitor onto the base 3. Pick up the panel with the back toward you and lower the pedestal onto the base, as shown in the upright position on a desktop or table. Setting Up the Monitor 2.
User's Guide 3-3 Stand the monitor in the following illustration, until the base locks. Inserting the vs monitor onto the base 3. Pick up the panel with the back toward you and lower the pedestal onto the base, as shown in the upright position on a desktop or table. Setting Up the Monitor 2.
User's Guide HP vs17, vs19, f1905 LCD Monitors
Page 24
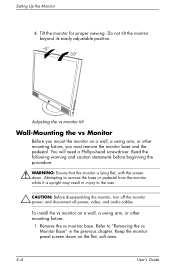
... statements before beginning the procedure. Å WARNING: Ensure that the monitor is upright may result in the previous chapter. Attempting to the user. Ä CAUTION: Before disassembling the monitor, turn off the monitor power, and disconnect all power, video, and audio cables. You ... wall, a swing arm, or other mounting fixture, you mount the monitor on a wall, a swing arm, or other mounting fixture: 1. Keep the monitor panel screen down . Setting Up the Monitor 4. Do not tilt the monitor beyond its easily adjustable position. -5º 30º Adjusting the vs...
... statements before beginning the procedure. Å WARNING: Ensure that the monitor is upright may result in the previous chapter. Attempting to the user. Ä CAUTION: Before disassembling the monitor, turn off the monitor power, and disconnect all power, video, and audio cables. You ... wall, a swing arm, or other mounting fixture, you mount the monitor on a wall, a swing arm, or other mounting fixture: 1. Keep the monitor panel screen down . Setting Up the Monitor 4. Do not tilt the monitor beyond its easily adjustable position. -5º 30º Adjusting the vs...
User's Guide HP vs17, vs19, f1905 LCD Monitors
Page 25
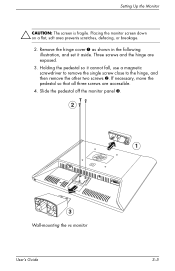
Three screws and the hinge are accessible. 4. Setting Up the Monitor Ä CAUTION: The screen is fragile. Remove the hinge cover 1 as shown in the following illustration, and set it cannot fall, use a magnetic screwdriver to ... to the hinge, and then remove the other two screws 2. Slide the pedestal off the monitor panel 3. 2 1 3 Wall-mounting the vs monitor User's Guide 3-5 If necessary, move the pedestal so that all three screws are exposed. 3. Placing the monitor screen down on a flat, soft area prevents scratches, defacing, or breakage. 2. Holding the pedestal...
Three screws and the hinge are accessible. 4. Setting Up the Monitor Ä CAUTION: The screen is fragile. Remove the hinge cover 1 as shown in the following illustration, and set it cannot fall, use a magnetic screwdriver to ... to the hinge, and then remove the other two screws 2. Slide the pedestal off the monitor panel 3. 2 1 3 Wall-mounting the vs monitor User's Guide 3-5 If necessary, move the pedestal so that all three screws are exposed. 3. Placing the monitor screen down on a flat, soft area prevents scratches, defacing, or breakage. 2. Holding the pedestal...
User's Guide HP vs17, vs19, f1905 LCD Monitors
Page 26
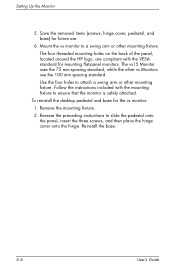
... the 75 mm spacing standard, while the other mounting fixture. Use the four holes to ensure that the monitor is safely attached. Save the removed items (screws, hinge cover, pedestal, and base) for future use the 100 mm spacing standard. The four threaded ...mounting holes on the back of the panel, located around the HP logo, are compliant with the mounting fixture to attach a swing arm or other vs Monitors use . 6. To reinstall the desktop pedestal and base for mounting flat-panel monitors. Follow the instructions included with the VESA standard for the vs...
... the 75 mm spacing standard, while the other mounting fixture. Use the four holes to ensure that the monitor is safely attached. Save the removed items (screws, hinge cover, pedestal, and base) for future use the 100 mm spacing standard. The four threaded ...mounting holes on the back of the panel, located around the HP logo, are compliant with the mounting fixture to attach a swing arm or other vs Monitors use . 6. To reinstall the desktop pedestal and base for mounting flat-panel monitors. Follow the instructions included with the VESA standard for the vs...
User's Guide HP vs17, vs19, f1905 LCD Monitors
Page 27
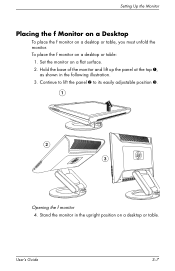
To place the f monitor on a flat surface. 2. Hold the base of the monitor and lift up the panel at the top 1, as shown in the upright position on a desktop or table, you must unfold the monitor. Set the monitor on a desktop or table: 1. Setting Up the Monitor Placing the f Monitor on a Desktop To place the f monitor on a desktop or table. User's Guide 3-7 Stand the monitor in the following illustration. 3. Continue to lift the panel 2 to its easily adjustable position 3. 1 2 3 Opening the f monitor 4.
To place the f monitor on a flat surface. 2. Hold the base of the monitor and lift up the panel at the top 1, as shown in the upright position on a desktop or table, you must unfold the monitor. Set the monitor on a desktop or table: 1. Setting Up the Monitor Placing the f Monitor on a Desktop To place the f monitor on a desktop or table. User's Guide 3-7 Stand the monitor in the following illustration. 3. Continue to lift the panel 2 to its easily adjustable position 3. 1 2 3 Opening the f monitor 4.


