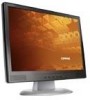
Monitor Warranty and Support Guide
Page 2
Hewlett-Packard Company Hardware Limited Warranty Statement Compaq-branded Multimedia Monitor United States and Canada Hardware Limited Warranty Original Systems - 1 year Technical phone assistance to diagnose potential hardware issues - 1 year General Terms This HP Hardware Limited Warranty gives you, the customer,... warranty entitlements. Filename: qb416112.doc Title: HP-Print2k.dot Template: HP-Monitor Warrany_HalfPage.dot Author: Kim Toy Last Saved By: billm Revision #: 15 Page: 2 of purchase. Please refer to the terms and conditions set forth in the country/region of 20 Printed...
User Guide 1506, 1706 and 1906 LCD Monitors
Page 1
User Guide 1506, 1706 and1906 LCD Monitors Document Part Number: 389521-002 October 2005 This guide provides information on setting up the monitor, installing drivers, using the on-screen display menu, troubleshooting and technical specifications.
User Guide 1506, 1706 and 1906 LCD Monitors
Page 2
Compaq and the Compaq logo are trademarks of Hewlett-Packard Development Company, L.P. and other countries... loss of Hewlett-Packard Company in this material. All other countries. User Guide 1506, 1706 and 1906 LCD Monitors Second Edition (October 2005) Document Part Number: 389521-002 This document contains proprietary information that failure to ...accompanying such products. © 2005 Hewlett-Packard Development Company, L.P. HP, Hewlett Packard, and the Hewlett-Packard logo are set off in this manner indicates that failure to follow directions could result in the U.S.
User Guide 1506, 1706 and 1906 LCD Monitors
Page 3
Contents 1 Product Features 2 Safety and Maintenance Guidelines Important Safety Information 2-1 Maintenance Guidelines 2-2 Cleaning the Monitor 2-3 Shipping the Monitor 2-3 3 Setting Up the Monitor Installing the Monitor Pedestal 3-1 Connecting the Monitor 3-3 Removing the Monitor Base 3-6 Mounting the Monitor 3-7 Locating the Rating Labels 3-8 4 Operating the Monitor Software and Utilities 4-1 The Information File 4-1 The Image Color Matching File 4-2 Installing the .INF and .ICM Files...
User Guide 1506, 1706 and 1906 LCD Monitors
Page 7
The monitor features include: 1506 Model ■ 15-inch (38.1 cm) viewable area display. ■ 1024 x 768 resolution, plus full-...your system. ■ On-Screen Display (OSD) adjustments in English, Dutch, French, German, Italian, Simplified Chinese, and Spanish for ease of set-up and screen optimization. ■ Software and documentation CD includes an information file (INF), Image color Matching File (ICM), and product documentation. ...AssetControl User Guide 1-1 1 Product Features The flat panel display has an active matrix, thin-film transistor (TFT), liquid crystal display (LCD).
User Guide 1506, 1706 and 1906 LCD Monitors
Page 11
...unplug the power cord from the power outlet by grasping the plug firmly. For information on the cord. Never pull on the correct power cord set to the operator. When you plug the power cord into is designed to be sure that is easily accessible to use only a power source ...and connection appropriate for this monitor. If another cord is included with your monitor, refer to the "Power Cord Set Requirements" section in Appendix C. Å WARNING: To reduce the risk of electric shock or damage to the ...
User Guide 1506, 1706 and 1906 LCD Monitors
Page 15
Place the pedestal plate on your desktop or table and check to the monitor, computer system, and other mounting fixture; Installing the Monitor Pedestal To install the monitor pedestal: 1. User Guide 3-1 instead see the section on a wall, swing arm, or other attached devices, then follow the steps below. 3 Setting Up the Monitor To set up the monitor, ensure that the power is turned off to be sure the arrow on the underside of the plate is facing forward. ✎ Do not install the base if the monitor will be used on "Mounting the Monitor" in this chapter.
User Guide 1506, 1706 and 1906 LCD Monitors
Page 16
Make sure the pedestal base is securely locked before continuing with the setup. Using both hands, position the monitor over the pedestal base and press down firmly to lock the pedestal base in place. When the base locks, it will make a clicking sound. Inserting the Monitor into the Pedestal Base 3-2 User Guide Setting Up the Monitor 2.
User Guide 1506, 1706 and 1906 LCD Monitors
Page 17
...9632; Plug the power cord into a grounded (earthed) electrical outlet that no one may accidentally step on power cords or cables. Place the monitor in a convenient, well-ventilated location near your equipment: ■ Do not disable the power cord grounding plug. When unplugging from the electrical outlet... the monitor signal cable on the back of the monitor to the video connector on a cord or cable. Do not pull on the rear panel of the computer. Å WARNING: To reduce the risk of electric shock or damage to your computer. 2. Setting Up the Monitor Connecting the Monitor 1. ...
User Guide 1506, 1706 and 1906 LCD Monitors
Page 18
Connect one end of the power cable to the back of the monitor, and the other end to an electrical wall outlet. Connecting the Signal and Power Cables 3-4 User Guide Setting Up the Monitor 3.
User Guide 1506, 1706 and 1906 LCD Monitors
Page 19
...-in image damage may occur on monitors that may occur on your comfort using the monitor's tilt adjustment capability. User Guide 3-5 Setting Up the Monitor 4. Tilting the Monitor 5. Press the power switch to turn off the monitor when it is a condition that ...display the same static image on screen for your monitor screen, you should always activate a screen saver application or turn on the monitor. Ä CAUTION: Burn-in image damage on all LCD...
User Guide 1506, 1706 and 1906 LCD Monitors
Page 20
... pedestal pillar. 3-6 User Guide Remove the stand cap 1 from the monitor while the monitor is turned off and the power and signal cables are both disconnected. Setting Up the Monitor Removing the Monitor Base You can remove the monitor base to disassemble the monitor, be sure the monitor is in the upright position. Read the Caution and Warning...
User Guide 1506, 1706 and 1906 LCD Monitors
Page 21
... used for mounting flat panel displays. Setting Up the Monitor 3. Remove the monitor base 3 from the monitor, four threaded mounting holes are compliant with the Video Electronics Standards Association (VESA) standard for mounting purposes. After the base is positioned over a table or desktop before removing the base from the monitor. 4. Remove the three screws 2 as...
User Guide 1506, 1706 and 1906 LCD Monitors
Page 22
...is compliant with the VESA standard and is important to the monitor, four 4mm, 0.7 pitch, and 10mm long screws are located on the monitor provide the spare part number, product number, and serial number. Mount the monitor to a swing arm or other mounting fixture by following the...support the weight of the monitor pedestal. 3-8 User Guide For best performance, it is rated to be used . Longer screws should not be used because they may need these numbers when contacting HP about your monitor model. Setting Up the Monitor Ä CAUTION: This monitor supports the VESA industry ...
User Guide 1506, 1706 and 1906 LCD Monitors
Page 27
..., press the Power switch to turn on the front panel to adjust the scale. buttons to scroll to and highlight your viewing preferences. Operating the Monitor Adjusting Monitor Settings Use the On-Screen Display (OSD) to adjust the screen image based on your selection, then press the Menu button to select that function...
User Guide 1506, 1706 and 1906 LCD Monitors
Page 32
...■ Input Signal Out of the backlight bulbs in the monitor. This also extends the life of Range- For 15" monitors, set the resolution and refresh rate for 1280 x 1024 at the same time every day. For 17" and 19" monitors, set the resolution and refresh rate to Sleep- Restart your computer for...on and off at 60 Hz. The Sleep Timer has five settings: ■ Set Current Time ■ Set Sleep Time 4-10 User Guide Indicates the monitor does not support the input signal because the resolution and/or refresh rate are set a time for 10 seconds to power on the front panel...
User Guide 1506, 1706 and 1906 LCD Monitors
Page 33
... buttons to adjust the hour. 7. Repeat steps 6 through 9 to set Sleep Time. 11. Repeat steps 6 through 9 to set Sleep Time, press the Menu button twice, then select Save and Return to display the Advanced Menu. 2. Operating the Monitor ■ Set On Time ■ Timer: On/Off ■ Sleep Now To... set On Time. Press the Menu button on the monitor front panel to ...
User’s Guide vf15/vf17, FP15/FP17, L1502/L1702, f1523/f1723, FP5315/FP7317 Flat Panel Monitors
Page 3
... Important Safety Information 2-1 Maintenance Guidelines 2-2 Cleaning the Monitor 2-4 Shipping the Monitor 2-4 3 Setting Up the Monitor Installing the Monitor Pedestal 3-1 Connecting the Monitor 3-3 Removing the Monitor Base 3-6 Mounting the Monitor 3-8 4 Operating the Monitor Installing the Information Files 4-1 Front Panel Components 4-2 Adjusting Monitor Settings 4-4 Using the On-Screen Display 4-5 Adjusting Screen Quality 4-7 Optimizing Digital Conversion 4-8 Identifying Monitor Conditions 4-8 Sleep Timer Mode 4-9 User's Guide iii
User’s Guide vf15/vf17, FP15/FP17, L1502/L1702, f1523/f1723, FP5315/FP7317 Flat Panel Monitors
Page 23
Sleep Timer mode = Flashing Amber. Powers the monitor on the monitor's front panel. 4-4 User's Guide Adjusting Monitor Settings Use the On-Screen Display (OSD) to turn on your viewing preferences. Operating the Monitor No. To access the OSD Menu, press the Menu button on and off. Control 3 + (Plus ...the OSD is not already on, press the Power switch to adjust the screen image based on the monitor. 2. Fully powered = Green. To access the OSD, do the following: 1. If the monitor is active, navigates through the OSD and adjusts OSD scale settings. Sleep mode = Amber.
User’s Guide vf15/vf17, FP15/FP17, L1502/L1702, f1523/f1723, FP5315/FP7317 Flat Panel Monitors
Page 28
... and refresh rate fo 1280 x 1024 at 60 Hz. User's Guide 4-9 To restore the factory settings, select Yes from the Factory Reset menu in the on the front panel for 10 seconds. For 17" monitors, set higher than the monitor supports. If the OSD is locked, the warning message "OSD Lock" displays for five seconds...