
HP w15e LCD Monitor
Page 3
Text set off in this manner indicates that failure to follow directions could result in this manner indicates that failure to equipment or loss of life. CAUTION: Text set off in damage to follow directions could result in bodily harm or loss of information. NOTE: Text set off in this manner provides important supplemental information. About This Guide This guide provides information on setting up the monitor, installing drivers, using the on-screen display menu, troubleshooting and technical specifications. WARNING! iii
Text set off in this manner indicates that failure to follow directions could result in this manner indicates that failure to equipment or loss of life. CAUTION: Text set off in damage to follow directions could result in bodily harm or loss of information. NOTE: Text set off in this manner provides important supplemental information. About This Guide This guide provides information on setting up the monitor, installing drivers, using the on-screen display menu, troubleshooting and technical specifications. WARNING! iii

HP w15e LCD Monitor
Page 5
Table of contents 1 Product Features HP w15e LCD Monitor ...1 2 Safety and Maintenance Guidelines Important Safety Information ...2 Maintenance Guidelines ...3 Cleaning the Monitor ...3 Shipping the Monitor ...3 3 Setting Up the Monitor Attaching the Monitor Base ...4 Rear Components ...5 Connecting the Cables ...6 Connecting the Speakers (select models only 7 Adjusting the Monitor ...7 Turning on the Monitor ...7 Mounting the Monitor Panel ...8 Locating the Rating Labels ...10 4 Operating the...
Table of contents 1 Product Features HP w15e LCD Monitor ...1 2 Safety and Maintenance Guidelines Important Safety Information ...2 Maintenance Guidelines ...3 Cleaning the Monitor ...3 Shipping the Monitor ...3 3 Setting Up the Monitor Attaching the Monitor Base ...4 Rear Components ...5 Connecting the Cables ...6 Connecting the Speakers (select models only 7 Adjusting the Monitor ...7 Turning on the Monitor ...7 Mounting the Monitor Panel ...8 Locating the Rating Labels ...10 4 Operating the...

HP w15e LCD Monitor
Page 6
... ...25 Materials Disposal ...25 Disposal of Waste Equipment by Users in Private Household in the European Union ...25 Restriction of Hazardous Substances (RoHS 26 Appendix D LCD Monitor Quality and Pixel Policy vi
... ...25 Materials Disposal ...25 Disposal of Waste Equipment by Users in Private Household in the European Union ...25 Restriction of Hazardous Substances (RoHS 26 Appendix D LCD Monitor Quality and Pixel Policy vi

HP w15e LCD Monitor
Page 7
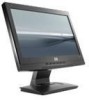
...Wide-screen 38.1 cm (15-inch) diagonal viewable area display with 1280 × 720 resolution, plus full-screen support for lower resolutions ● Tilt capability ● Removable base and pedestal for flexible monitor panel mounting solutions ●...HP support Web site ● Energy saver feature to meet requirements for reduced power consumption ● Compliant with the following regulated specifications: ◦ Swedish MPR II 1990 ◦ Swedish TCO99 Requirements ◦ Energy Star HP w15e LCD Monitor 1 1 Product Features HP w15e LCD Monitor The LCD (liquid crystal display) monitor...
...Wide-screen 38.1 cm (15-inch) diagonal viewable area display with 1280 × 720 resolution, plus full-screen support for lower resolutions ● Tilt capability ● Removable base and pedestal for flexible monitor panel mounting solutions ●...HP support Web site ● Energy saver feature to meet requirements for reduced power consumption ● Compliant with the following regulated specifications: ◦ Swedish MPR II 1990 ◦ Swedish TCO99 Requirements ◦ Energy Star HP w15e LCD Monitor 1 1 Product Features HP w15e LCD Monitor The LCD (liquid crystal display) monitor...

HP w15e LCD Monitor
Page 8
... if surge protection fails. Arrange them . the power strips must be pulled, grabbed, or tripped over and cause personal injury. LCD monitors that are inappropriately situated on dressers, bookcases, shelves, desks, speakers, chests, or carts may accidentally step on or trip over ... Power Supply (UPS). If another cord is included with the monitor. This guide is included with the monitor. For your HP LCD monitor. 2 Safety and Maintenance Guidelines Important Safety Information A power cord is used, use with the monitor, refer to the Power Cord Set Requirements on a cord or...
... if surge protection fails. Arrange them . the power strips must be pulled, grabbed, or tripped over and cause personal injury. LCD monitors that are inappropriately situated on dressers, bookcases, shelves, desks, speakers, chests, or carts may accidentally step on or trip over ... Power Supply (UPS). If another cord is included with the monitor. This guide is included with the monitor. For your HP LCD monitor. 2 Safety and Maintenance Guidelines Important Safety Information A power cord is used, use with the monitor, refer to the Power Cord Set Requirements on a cord or...

HP w15e LCD Monitor
Page 9
...those controls that you must not be blocked or covered. CAUTION: Do not use . If the monitor is not operating properly or has been dropped or damaged, contact an authorized HP dealer, reseller, or service provider. ● Use only a power source and connection appropriate for ...ventilation. You may damage the cabinet finish as well as indicated on the power cord. Maintenance Guidelines 3 Disconnect the monitor by grasping the plug firmly...
...those controls that you must not be blocked or covered. CAUTION: Do not use . If the monitor is not operating properly or has been dropped or damaged, contact an authorized HP dealer, reseller, or service provider. ● Use only a power source and connection appropriate for ...ventilation. You may damage the cabinet finish as well as indicated on the power cord. Maintenance Guidelines 3 Disconnect the monitor by grasping the plug firmly...

HP w15e LCD Monitor
Page 10
... to the desired position. Be sure the base is turned off to the monitor, computer system, and other attached devices, then follow the instructions below. 3 Setting Up the Monitor To set up the monitor, ensure that the power is securely locked in place. Set the base on... the panel may cause nonuniformity of color or disorientation of the LCD panel. Attaching the Monitor Base 1. Figure 3-1 Attaching the Base to the Monitor 4 Chapter 3 Setting Up the Monitor Pressure on ...
... to the desired position. Be sure the base is turned off to the monitor, computer system, and other attached devices, then follow the instructions below. 3 Setting Up the Monitor To set up the monitor, ensure that the power is securely locked in place. Set the base on... the panel may cause nonuniformity of color or disorientation of the LCD panel. Attaching the Monitor Base 1. Figure 3-1 Attaching the Base to the Monitor 4 Chapter 3 Setting Up the Monitor Pressure on ...

HP w15e LCD Monitor
Page 11
Rear Components 5 Connects the VGA cable to the monitor. Rear Components Figure 3-2 Rear Components Component 1 AC Power Connector 2 VGA Function Connects the AC power cord to the monitor.
Rear Components 5 Connects the VGA cable to the monitor. Rear Components Figure 3-2 Rear Components Component 1 AC Power Connector 2 VGA Function Connects the AC power cord to the monitor.

HP w15e LCD Monitor
Page 12
... the rear of electric shock or damage to the VGA connector on or trip over them so that is an important safety feature. Place the monitor in a convenient, well-ventilated location near the computer. 2. For your safety, do not place anything on a cord or cable. Arrange them . Connect one may ...the computer. 4. Do not pull on power cords or cables. Connecting the Cables 1. Route the cables through the cable guide on the rear of the monitor, and the other end to the equipment: Do not disable the power cord grounding plug. Disconnect power from the electrical outlet.
... the rear of electric shock or damage to the VGA connector on or trip over them so that is an important safety feature. Place the monitor in a convenient, well-ventilated location near the computer. 2. For your safety, do not place anything on a cord or cable. Arrange them . Connect one may ...the computer. 4. Do not pull on power cords or cables. Connecting the Cables 1. Route the cables through the cable guide on the rear of the monitor, and the other end to the equipment: Do not disable the power cord grounding plug. Disconnect power from the electrical outlet.

HP w15e LCD Monitor
Page 13
...3. Place the speaker set it to turn it on the computer. Connecting the Speakers (select models only) 7 Connect one end of the monitor to a comfortable eye level. Image retention is a condition that display the same static image on screen for a prolonged period of time is ...should always activate a screen saver application or turn it on the right side when viewing the monitor from the front. 2. Connecting the Speakers (select models only) 1. Figure 3-4 Tilting the Monitor Turning on all LCD screens. * A prolonged period of time.* To avoid burn-in use . CAUTION: Burn-...
...3. Place the speaker set it to turn it on the computer. Connecting the Speakers (select models only) 7 Connect one end of the monitor to a comfortable eye level. Image retention is a condition that display the same static image on screen for a prolonged period of time is ...should always activate a screen saver application or turn it on the right side when viewing the monitor from the front. 2. Connecting the Speakers (select models only) 1. Figure 3-4 Tilting the Monitor Turning on all LCD screens. * A prolonged period of time.* To avoid burn-in use . CAUTION: Burn-...

HP w15e LCD Monitor
Page 14
..., a swing arm, or other mounting fixture. Mounting the Monitor Panel You can remove the monitor panel from the pedestal base to the pedestal base (1) and slide the pedestal base from the back of the monitor that connect the monitor panel to install the panel on a flat surface. 3. ...Remove the two screws on the back of the monitor. 2. Disconnect and remove the signal and power cables from the monitor panel (2). CAUTION: Before beginning to disassemble the monitor, be sure the monitor is turned off and the power and signal cables are both disconnected. Figure...
..., a swing arm, or other mounting fixture. Mounting the Monitor Panel You can remove the monitor panel from the pedestal base to the pedestal base (1) and slide the pedestal base from the back of the monitor that connect the monitor panel to install the panel on a flat surface. 3. ...Remove the two screws on the back of the monitor. 2. Disconnect and remove the signal and power cables from the monitor panel (2). CAUTION: Before beginning to disassemble the monitor, be sure the monitor is turned off and the power and signal cables are both disconnected. Figure...

HP w15e LCD Monitor
Page 15
... (not provided with the VESA standard and is important to support the weight of the monitor display panel. Mounting the Monitor Panel 9 Figure 3-6 Installing the Monitor on the monitor. Longer screws should not be used because they may damage the monitor. It is important to verify that the manufacturer's mounting solution is compliant with the...
... (not provided with the VESA standard and is important to support the weight of the monitor display panel. Mounting the Monitor Panel 9 Figure 3-6 Installing the Monitor on the monitor. Longer screws should not be used because they may damage the monitor. It is important to verify that the manufacturer's mounting solution is compliant with the...
HP w15e LCD Monitor
Page 16
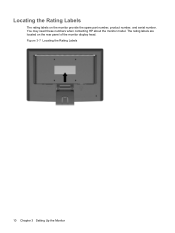
Figure 3-7 Locating the Rating Labels 10 Chapter 3 Setting Up the Monitor The rating labels are located on the monitor provide the spare part number, product number, and serial number. You may need these numbers when contacting HP about the monitor model. Locating the Rating Labels The rating labels on the rear panel of the monitor display head.
Figure 3-7 Locating the Rating Labels 10 Chapter 3 Setting Up the Monitor The rating labels are located on the monitor provide the spare part number, product number, and serial number. You may need these numbers when contacting HP about the monitor model. Locating the Rating Labels The rating labels on the rear panel of the monitor display head.
HP w15e LCD Monitor
Page 17
... install the drivers and software files on the computer from the CD: 1. Installing from the CD (with the monitor or download the latest version of driver and software files from the HP monitors support Web site: 1. Insert the CD in the Windows Display control panel. NOTE: You may need to the... support page and download page. 3. Refer to http://www.hp.com/support and select the country region. 2. Refer to the Monitor Driver Software Readme file on the CD. Ensure the system meets the requirements. 4. Download the software by using the...
... install the drivers and software files on the computer from the CD: 1. Installing from the CD (with the monitor or download the latest version of driver and software files from the HP monitors support Web site: 1. Insert the CD in the Windows Display control panel. NOTE: You may need to the... support page and download page. 3. Refer to http://www.hp.com/support and select the country region. 2. Refer to the Monitor Driver Software Readme file on the CD. Ensure the system meets the requirements. 4. Download the software by using the...

HP w15e LCD Monitor
Page 18
...; When the OSD menu is inactive, press to warm up for 20 minutes before adjusting. 2. Allow the monitor to adjust the brightness feature. 5 Select Opens and selects the OSD menu. 6 Power Turns the monitor on the monitor front panel to produce a stable, centered image. Press the Auto button on or off -center picture...
...; When the OSD menu is inactive, press to warm up for 20 minutes before adjusting. 2. Allow the monitor to adjust the brightness feature. 5 Select Opens and selects the OSD menu. 6 Power Turns the monitor on the monitor front panel to produce a stable, centered image. Press the Auto button on or off -center picture...
HP w15e LCD Monitor
Page 19
... the Select button on your selection, then press the Select button to leave the menu. After adjusting the function, press the Exit button on the monitor's front panel to scroll up, or the - (minus) button to adjust the scale. 6. The settings will automatically be adjusted from the OSD Menu, ... - (minus) buttons to scroll to and highlight your viewing preferences. To navigate through the OSD Menu, press the + (plus ) or - (minus) buttons on the monitor. 2. To select an item from the On-Screen Display (OSD) menu. Using the On-Screen Display Menu Use the On-Screen Display (OSD) to turn...
... the Select button on your selection, then press the Select button to leave the menu. After adjusting the function, press the Exit button on the monitor's front panel to scroll up, or the - (minus) button to adjust the scale. 6. The settings will automatically be adjusted from the OSD Menu, ... - (minus) buttons to scroll to and highlight your viewing preferences. To navigate through the OSD Menu, press the + (plus ) or - (minus) buttons on the monitor. 2. To select an item from the On-Screen Display (OSD) menu. Using the On-Screen Display Menu Use the On-Screen Display (OSD) to turn...

HP w15e LCD Monitor
Page 20
...: ● Red - The factory default is 80. Adjusts the contrast level of the display. The factory default range is 30 seconds. 14 Chapter 4 Operating the Monitor Adjusts the focus of the screen. This adjustment allows you to the top or bottom area of the screen. Changes to the left and right...
...: ● Red - The factory default is 80. Adjusts the contrast level of the display. The factory default range is 30 seconds. 14 Chapter 4 Operating the Monitor Adjusts the focus of the screen. This adjustment allows you to the top or bottom area of the screen. Changes to the left and right...

HP w15e LCD Monitor
Page 21
... and color temperature. Allows the computer to the factory default settings, except the Language. Selects and displays important information about the monitor. The factory default is displayed. Adjusting the Monitor Settings 15 Adjusts the screen image to : ● On ● Off The factory default is On. Table 4-2 OSD Menu (continued) Icon Main Menu... the language in which the OSD menu is English. Set to look sharper or softer. Selects Sharpness, DDC/CI, and Display Information features of the monitor.
... and color temperature. Allows the computer to the factory default settings, except the Language. Selects and displays important information about the monitor. The factory default is displayed. Adjusting the Monitor Settings 15 Adjusts the screen image to : ● On ● Off The factory default is On. Table 4-2 OSD Menu (continued) Icon Main Menu... the language in which the OSD menu is English. Set to look sharper or softer. Selects Sharpness, DDC/CI, and Display Information features of the monitor.
HP w15e LCD Monitor
Page 22
...the values until the distortion disappears. NOTE: When using the controls, you will appear on the monitor screen when identifying the following monitor conditions: ● Out of Range!-Indicates the monitor does not support the input signal because the resolution and/or refresh rate are set correctly since... source is off or in the on-screen display can be set higher than the monitor supports. ● No Signal Detected!-Indicates the monitor is being used. 16 Chapter 4 Operating the Monitor The Pixel Clock must first be adjusted to improve image performance: Pixel Clock and Phase...
...the values until the distortion disappears. NOTE: When using the controls, you will appear on the monitor screen when identifying the following monitor conditions: ● Out of Range!-Indicates the monitor does not support the input signal because the resolution and/or refresh rate are set correctly since... source is off or in the on-screen display can be set higher than the monitor supports. ● No Signal Detected!-Indicates the monitor is being used. 16 Chapter 4 Operating the Monitor The Pixel Clock must first be adjusted to improve image performance: Pixel Clock and Phase...

HP w15e LCD Monitor
Page 23
...low. Change the settings to inactivate the screen blanking utility. Restart the computer so that the computer power is set higher than the monitor's native resolution. Video cable is displayed on page 20). Refer to provide the best picture quality. Screen image appears distorted; A .... Image is active. Restart the computer and enter Safe Mode. Screen blanking is not centered Position may need adjustment. Monitor video cable is displayed on the front panel. Connect the power cord. Brightness and contrast are set lower or higher than what ...
...low. Change the settings to inactivate the screen blanking utility. Restart the computer so that the computer power is set higher than the monitor's native resolution. Video cable is displayed on page 20). Refer to provide the best picture quality. Screen image appears distorted; A .... Image is active. Restart the computer and enter Safe Mode. Screen blanking is not centered Position may need adjustment. Monitor video cable is displayed on the front panel. Connect the power cord. Brightness and contrast are set lower or higher than what ...


