ISS Technology Update, Volume 9 Number 1
Page 4
... are configured with Systems ROMPaq Firmware Upgrade for single-core operation is not present in Table 1. Operating systems and applications can configure the server such that are enabled (see Table 1). This selection range includes a minimum of one core is based on HP Core Disable technology. AMD Core Select lets administrators use the RBSU to reduce software licensing costs. ISS Technology Update Volume 9, Number 1 Quick tip: Disabling AMD...
... are configured with Systems ROMPaq Firmware Upgrade for single-core operation is not present in Table 1. Operating systems and applications can configure the server such that are enabled (see Table 1). This selection range includes a minimum of one core is based on HP Core Disable technology. AMD Core Select lets administrators use the RBSU to reduce software licensing costs. ISS Technology Update Volume 9, Number 1 Quick tip: Disabling AMD...

NAS b2000 - Quick Start Guide
Page 13
... detect the NAS B2000. Storage Requirements To protect against data loss from hard drive failure, arrays should be used to set up and administer the NAS device. • A single Ethernet connection on a switch or hub for a NAS B2000 device: • Windows-based PC running Microsoft Internet Explorer 5.5 (or later) on the same network segment as the management port or the RapidLaunch utility will be configured with fault tolerance in order for the NAS B2000 to client...
... detect the NAS B2000. Storage Requirements To protect against data loss from hard drive failure, arrays should be used to set up and administer the NAS device. • A single Ethernet connection on a switch or hub for a NAS B2000 device: • Windows-based PC running Microsoft Internet Explorer 5.5 (or later) on the same network segment as the management port or the RapidLaunch utility will be configured with fault tolerance in order for the NAS B2000 to client...
NAS b2000 - Quick Start Guide
Page 14
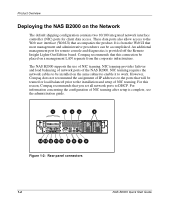
... prior to the Web user interface (WebUI) that this reason, Compaq recommends that most management and administrative procedures can be installed on the same subnet to enable it to DHCP. Product Overview Deploying the NAS B2000 on a management LAN separate from the WebUI that you set all network ports to work. These data ports also allow access to the installation and setup of NIC teaming after setup is complete, see...
... prior to the Web user interface (WebUI) that this reason, Compaq recommends that most management and administrative procedures can be installed on the same subnet to enable it to DHCP. Product Overview Deploying the NAS B2000 on a management LAN separate from the WebUI that you set all network ports to work. These data ports also allow access to the installation and setup of NIC teaming after setup is complete, see...

NAS b2000 - Quick Start Guide
Page 16
... -step instructions. Install NIC teaming software and create fault tolerant or load-balanced network ports. In either type of the administration guide. 1-6 NAS B2000 Quick Start Guide Place the NAS device into an Active Directory or Windows NT 4.0 domain for this procedure in the administration guide. 3. With the system online, create the arrays and logical volumes (LUNs) using Chapters 2 and 3 from those pools and format the virtual disks. 6. Create Virtual Replicator pools and virtual disks from this guide and in detail. 7. Read the remaining...
... -step instructions. Install NIC teaming software and create fault tolerant or load-balanced network ports. In either type of the administration guide. 1-6 NAS B2000 Quick Start Guide Place the NAS device into an Active Directory or Windows NT 4.0 domain for this procedure in the administration guide. 3. With the system online, create the arrays and logical volumes (LUNs) using Chapters 2 and 3 from those pools and format the virtual disks. 6. Create Virtual Replicator pools and virtual disks from this guide and in detail. 7. Read the remaining...

NAS b2000 - Quick Start Guide
Page 19
..., neither the users nor the administrator would have an awareness of each virtual disk must be carved out of virtual disks from one or more space. Virtual Storage Elements Virtual Replicator (VR) provides volume virtualization for the NAS device by allowing for users and on creating RAID arrays. The two management tools do not have access to manage VR disks. When using VR, the following constraints apply: • Windows 2000's Logical Volume Manager (LVM) should configure RAID arrays using ACU.
..., neither the users nor the administrator would have an awareness of each virtual disk must be carved out of virtual disks from one or more space. Virtual Storage Elements Virtual Replicator (VR) provides volume virtualization for the NAS device by allowing for users and on creating RAID arrays. The two management tools do not have access to manage VR disks. When using VR, the following constraints apply: • Windows 2000's Logical Volume Manager (LVM) should configure RAID arrays using ACU.
NAS b2000 v1 - Maintenance and Service Guide
Page 3
... Procedures ...2-4 Extending the Device from the Rack 2-4 Powering Down the Device...2-5 Removing the Device from the Rack 2-7 Hot-Plug Procedures ...2-7 Hot-Plug SCSI Hard Drive...2-7 Hard Drive Blank ...2-9 Tape Drive Blank ...2-10 Universal Hot-Plug Tape Drive (Optional 2-11 Hot-Plug Power Supply...2-12 Access Panel...2-13 Hot-Plug Fan ...2-14 Air Baffle ...2-16 PCI Shipping Bracket...2-17 PCI Riser Cage Door Latch...2-18 Expansion Slot Cover (Slots 2 and 3 2-19 Expansion Board (Slots 2 and 3)...2-20 NAS B2000 Maintenance and Service Guide...
... Procedures ...2-4 Extending the Device from the Rack 2-4 Powering Down the Device...2-5 Removing the Device from the Rack 2-7 Hot-Plug Procedures ...2-7 Hot-Plug SCSI Hard Drive...2-7 Hard Drive Blank ...2-9 Tape Drive Blank ...2-10 Universal Hot-Plug Tape Drive (Optional 2-11 Hot-Plug Power Supply...2-12 Access Panel...2-13 Hot-Plug Fan ...2-14 Air Baffle ...2-16 PCI Shipping Bracket...2-17 PCI Riser Cage Door Latch...2-18 Expansion Slot Cover (Slots 2 and 3 2-19 Expansion Board (Slots 2 and 3)...2-20 NAS B2000 Maintenance and Service Guide...

NAS b2000 v1 - Maintenance and Service Guide
Page 15
...-001 Cables 23 SCSI cable kit * - System cable (LED/CD-ROM drive or diskette drive), 50-pin 219047-001 Remote Insight Lights-Out Edition interface cable, 16- to 30-pin 241793-009 Rack-mounting Hardware 26 Rack-mounting hardware kit * - Power button/LED cable, 14-pin 219048-001 CD MultiBay cable, 50-pin 314014-006 PCI Hot Plug backplane cable 219049-001 25 Miscellaneous cable kit * - continued 1-4 NAS B2000 Maintenance and Service Guide SCSI cable, short, 68-pin 199606-018 SCSI cable, long...
...-001 Cables 23 SCSI cable kit * - System cable (LED/CD-ROM drive or diskette drive), 50-pin 219047-001 Remote Insight Lights-Out Edition interface cable, 16- to 30-pin 241793-009 Rack-mounting Hardware 26 Rack-mounting hardware kit * - Power button/LED cable, 14-pin 219048-001 CD MultiBay cable, 50-pin 314014-006 PCI Hot Plug backplane cable 219049-001 25 Miscellaneous cable kit * - continued 1-4 NAS B2000 Maintenance and Service Guide SCSI cable, short, 68-pin 199606-018 SCSI cable, long...
NAS b2000 v1 - Maintenance and Service Guide
Page 80
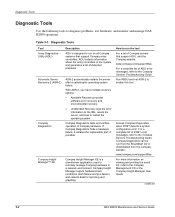
... failure. continued 3-2 NAS B2000 Maintenance and Service Guide With ASR-2, you have multiple recovery options: • Available Recovery provides software error recovery and environmental recovery. • Unattended Recovery logs the error information to the IML, resets the server, and tries to enable this tool. If Compaq Diagnostics finds a hardware failure, it isolates the replaceable part, if possible. Compaq Diagnostics can be run the tool For a list of Compaq servers that support Compaq array controllers. How to the Compaq Servers Troubleshooting Guide...
... failure. continued 3-2 NAS B2000 Maintenance and Service Guide With ASR-2, you have multiple recovery options: • Available Recovery provides software error recovery and environmental recovery. • Unattended Recovery logs the error information to the IML, resets the server, and tries to enable this tool. If Compaq Diagnostics finds a hardware failure, it isolates the replaceable part, if possible. Compaq Diagnostics can be run the tool For a list of Compaq servers that support Compaq array controllers. How to the Compaq Servers Troubleshooting Guide...
NAS b2000 v1 - Maintenance and Service Guide
Page 81
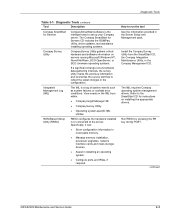
... utilities ROM-Based Setup Utility (RBSU) RBSU configures the hardware installed in installing an operating system. • Configure ports and IRQs, if required. continued NAS B2000 Maintenance and Service Guide 3-3 Specifically, it can: • Store configuration information in nonvolatile memory. • Manage memory installation, processor upgrades, network interface cards and mass storage devices. • Assist in or connected to set up your Compaq server. The IML requires Compaq operating system management drivers. Run RBSU by pressing the F9 key during POST. View events...
... utilities ROM-Based Setup Utility (RBSU) RBSU configures the hardware installed in installing an operating system. • Configure ports and IRQs, if required. continued NAS B2000 Maintenance and Service Guide 3-3 Specifically, it can: • Store configuration information in nonvolatile memory. • Manage memory installation, processor upgrades, network interface cards and mass storage devices. • Assist in or connected to set up your Compaq server. The IML requires Compaq operating system management drivers. Run RBSU by pressing the F9 key during POST. View events...

NAS b2000 v1 - Maintenance and Service Guide
Page 99
... hardware critical level. Fan (Amber) Red A primary fan has failed at least one zone. Note: * When the SCSI interlock disable switch is set to the online spare bank. Overtemperature Red (Amber) System has reached the operating system cautionary level. If the default setting is changed for troubleshooting purposes (on), the LED indicates that the PCI riser or the Smart Array 5i Controller is unseated. Connectors, LED Indicators, Switches, and Jumpers Table 4-9: System LEDs...
... hardware critical level. Fan (Amber) Red A primary fan has failed at least one zone. Note: * When the SCSI interlock disable switch is set to the online spare bank. Overtemperature Red (Amber) System has reached the operating system cautionary level. If the default setting is changed for troubleshooting purposes (on), the LED indicates that the PCI riser or the Smart Array 5i Controller is unseated. Connectors, LED Indicators, Switches, and Jumpers Table 4-9: System LEDs...

NAS b2000 v1 - Maintenance and Service Guide
Page 102
... LED Indicators, Switches, and Jumpers System Maintenance Switch The system maintenance switch is a six-position switch that identifies the operational use of the switch default to the off . Off = System configuration can be modified. Off = System is in a tower configuration. Off = RBSU controls booting from diskette is enabled and RBSU is enabled. The default setting for system configuration (Figure 4-13). Table 4-12: System Maintenance Switch Position Description Reserved Configuration lock Rack mount indicator Enable diskette boot Password disable Invalidate configuration...
... LED Indicators, Switches, and Jumpers System Maintenance Switch The system maintenance switch is a six-position switch that identifies the operational use of the switch default to the off . Off = System configuration can be modified. Off = System is in a tower configuration. Off = RBSU controls booting from diskette is enabled and RBSU is enabled. The default setting for system configuration (Figure 4-13). Table 4-12: System Maintenance Switch Position Description Reserved Configuration lock Rack mount indicator Enable diskette boot Password disable Invalidate configuration...
NAS b2000 v1 - Maintenance and Service Guide
Page 110
...Utility (ADU) access 3-2 description 3-2 Automatic Server Recovery-2 (ASR-2) access 3-2 description 3-2 NAS B2000 Maintenance and Service Guide Index B backplanes PCI Hot Plug 2-61 SCSI See SCSI backplane baffle, air airflow 2-16 installing 2-16 part number 1-3 removing 2-16 replacing 2-16 spare part number 1-3 battery disposal 2-51 installing 2-52 part number 1-5 removing 2-51 replacing 2-52 spare part number 1-5 warning 2-51 bezel, front installing 2-23 part number 1-2 removing 2-23 replacing 2-23 screws 2-23 spare part number 1-2 BIOS settings, reconfiguring 2-51 blanks hard drive See hard...
...Utility (ADU) access 3-2 description 3-2 Automatic Server Recovery-2 (ASR-2) access 3-2 description 3-2 NAS B2000 Maintenance and Service Guide Index B backplanes PCI Hot Plug 2-61 SCSI See SCSI backplane baffle, air airflow 2-16 installing 2-16 part number 1-3 removing 2-16 replacing 2-16 spare part number 1-3 battery disposal 2-51 installing 2-52 part number 1-5 removing 2-51 replacing 2-52 spare part number 1-5 warning 2-51 bezel, front installing 2-23 part number 1-2 removing 2-23 replacing 2-23 screws 2-23 spare part number 1-2 BIOS settings, reconfiguring 2-51 blanks hard drive See hard...
NAS b2000 v1 - Maintenance and Service Guide
Page 111
... Servers CD 2-1, 3-3 Compaq SmartStart for Servers software access 3-3 description 3-3 Compaq Survey Utility access 3-3 description 3-3 Compaq website xi component-level repairs x configuration lock, setting 4-20 configuring battery with RBSU 2-51 BIOS settings 2-51 connecting CD MultiBay cable 2-26, 2-58 diskette interface cable 2-25 expansion board cables 2-22, 2-32 PCI Hot Plug backplane cable 2-61 power button/LED cable 2-43, 2-59 power cables 2-42 power cords 2-13 SCSI cable, short 2-57 system cables 2-60 connectors keyboard 4-2 mouse 4-2 NICs 4-2 NAS B2000 Maintenance and Service Guide
... Servers CD 2-1, 3-3 Compaq SmartStart for Servers software access 3-3 description 3-3 Compaq Survey Utility access 3-3 description 3-3 Compaq website xi component-level repairs x configuration lock, setting 4-20 configuring battery with RBSU 2-51 BIOS settings 2-51 connecting CD MultiBay cable 2-26, 2-58 diskette interface cable 2-25 expansion board cables 2-22, 2-32 PCI Hot Plug backplane cable 2-61 power button/LED cable 2-43, 2-59 power cables 2-42 power cords 2-13 SCSI cable, short 2-57 system cables 2-60 connectors keyboard 4-2 mouse 4-2 NICs 4-2 NAS B2000 Maintenance and Service Guide

NAS b2000 v1 - Maintenance and Service Guide
Page 112
... part number 1-4 thumbscrew 2-25 diskette drive system cable connecting 2-60 disconnecting 2-60 installing 2-60 removing 2-60 replacing 2-60 diskette interface cable connecting 2-25 disconnecting 2-25 drivers crash dump analysis 4-19 PCI Hot Plug 2-7 system management 4-16 drives CD-ROM See CD-ROM drive diskette See diskette drive SCSI hard See SCSI hard drives universal hot-plug tape See universal hot-plug tape drive NAS B2000 Maintenance and Service Guide Index-3 See also SmartStart Diskette Builder utility current, rated input 5-2 D default settings SCSI interlock disable switch...
... part number 1-4 thumbscrew 2-25 diskette drive system cable connecting 2-60 disconnecting 2-60 installing 2-60 removing 2-60 replacing 2-60 diskette interface cable connecting 2-25 disconnecting 2-25 drivers crash dump analysis 4-19 PCI Hot Plug 2-7 system management 4-16 drives CD-ROM See CD-ROM drive diskette See diskette drive SCSI hard See SCSI hard drives universal hot-plug tape See universal hot-plug tape drive NAS B2000 Maintenance and Service Guide Index-3 See also SmartStart Diskette Builder utility current, rated input 5-2 D default settings SCSI interlock disable switch...
NAS b2000 v1 - Maintenance and Service Guide
Page 113
...switch 2-5 G grounding x grounding guidelines 2-1 grounding plug x guidelines See also requirements grounding 2-1 hot-plug procedures 2-7 local occupational and health safety 2-2 guides maintenance and service part number 1-5 spare part number 1-5 H hard drive bays, population 2-8 hard drive blank installing 2-9 part number 1-2 release button 2-9 removing 2-9 replacing 2-9 spare part number 1-2 hard drives, SCSI ejector lever 2-7 installing 2-8 LEDs See LEDs; SCSI hard drives populating bays 2-8, 2-9 release button 2-7 removing 2-7 replacing 2-8 SCSI IDs 2-8 hardware kit contents 1-5 NAS B2000...
...switch 2-5 G grounding x grounding guidelines 2-1 grounding plug x guidelines See also requirements grounding 2-1 hot-plug procedures 2-7 local occupational and health safety 2-2 guides maintenance and service part number 1-5 spare part number 1-5 H hard drive bays, population 2-8 hard drive blank installing 2-9 part number 1-2 release button 2-9 removing 2-9 replacing 2-9 spare part number 1-2 hard drives, SCSI ejector lever 2-7 installing 2-8 LEDs See LEDs; SCSI hard drives populating bays 2-8, 2-9 release button 2-7 removing 2-7 replacing 2-8 SCSI IDs 2-8 hardware kit contents 1-5 NAS B2000...

NAS b2000 v1 - Maintenance and Service Guide
Page 114
... 5-3 input frequency, rated 5-3 input line, rated 5-3 input power, rated 5-3 input voltage specifications 5-3 input voltage, rated 5-3 installing 2-13 LEDs 4-12 output maximum peak power 5-2 output power 5-3 output rated steady-state power 5-2 part number 1-3 populating bays 2-12 removing 2-12 replacing 2-13 spare part number 1-3 hot-plug SCSI hard drives See SCSI hard drives hot-plug tape drive See universal hot-plug tape drive humidity, relative non-operating 5-2 operating 5-2 I icons symbols on equipment 2-2 IDs, SCSI 2-8 IML See Integrated Management Log (IML) input requirements input...
... 5-3 input frequency, rated 5-3 input line, rated 5-3 input power, rated 5-3 input voltage specifications 5-3 input voltage, rated 5-3 installing 2-13 LEDs 4-12 output maximum peak power 5-2 output power 5-3 output rated steady-state power 5-2 part number 1-3 populating bays 2-12 removing 2-12 replacing 2-13 spare part number 1-3 hot-plug SCSI hard drives See SCSI hard drives hot-plug tape drive See universal hot-plug tape drive humidity, relative non-operating 5-2 operating 5-2 I icons symbols on equipment 2-2 IDs, SCSI 2-8 IML See Integrated Management Log (IML) input requirements input...

NAS b2000 v1 - Maintenance and Service Guide
Page 118
...hot-plug fans 2-15 processor power modules (PPMs) failure LEDs 4-15 installing 2-49 latches 2-49 part number 1-4 removing 2-49 NAS B2000 Maintenance and Service Guide Index replacing 2-49 slot population 2-48, 2-49 spare part number 1-4 processor sockets locations 4-3 population 2-47 processors failure LEDs 4-15 installing 2-47 locations 4-3 locking lever 2-46, 2-47 mixing speeds and types 2-47 part number 1-3 removing 2-45 replacing 2-47 spare part number 1-3 R rack stabilization 2-2 warnings 2-2 warnings and cautions 2-2 weight 2-3 rack mount indicator 4-20 rack rails, part numbers 1-4 rack...
...hot-plug fans 2-15 processor power modules (PPMs) failure LEDs 4-15 installing 2-49 latches 2-49 part number 1-4 removing 2-49 NAS B2000 Maintenance and Service Guide Index replacing 2-49 slot population 2-48, 2-49 spare part number 1-4 processor sockets locations 4-3 population 2-47 processors failure LEDs 4-15 installing 2-47 locations 4-3 locking lever 2-46, 2-47 mixing speeds and types 2-47 part number 1-3 removing 2-45 replacing 2-47 spare part number 1-3 R rack stabilization 2-2 warnings 2-2 warnings and cautions 2-2 weight 2-3 rack mount indicator 4-20 rack rails, part numbers 1-4 rack...

NAS b2000 v1 - Maintenance and Service Guide
Page 119
... power supplies, hot-plug 2-13 PPMs 2-49 processors 2-47 rear fan bracket 2-56 SCSI backplane 2-30 SCSI cable, long 2-62 SCSI cable, short 2-57 SCSI hard drives 2-8 shipping bracket, PCI 2-17 slot covers 2-20, 2-35 Smart Array 5i Controller 2-50 system board 2-55 system cables 2-60 tape drive blank 2-10 universal hot-plug tape drive 2-11 requirements drivers internal health LED 4-16 PCI Hot Plug 2-7 hot-plug procedures 2-7 input See input requirements NAS B2000 Maintenance...
... power supplies, hot-plug 2-13 PPMs 2-49 processors 2-47 rear fan bracket 2-56 SCSI backplane 2-30 SCSI cable, long 2-62 SCSI cable, short 2-57 SCSI hard drives 2-8 shipping bracket, PCI 2-17 slot covers 2-20, 2-35 Smart Array 5i Controller 2-50 system board 2-55 system cables 2-60 tape drive blank 2-10 universal hot-plug tape drive 2-11 requirements drivers internal health LED 4-16 PCI Hot Plug 2-7 hot-plug procedures 2-7 input See input requirements NAS B2000 Maintenance...
NAS b2000 v1 - Maintenance and Service Guide
Page 120
...2-62 installing 2-62 part number 1-4 removing 2-62 replacing 2-62 SCSI cable, short connecting 2-57 disconnecting 2-57 installing 2-57 part number 1-4 removing 2-57 replacing 2-57 SCSI hard drives ejector lever 2-7 installing 2-8 LEDs drive activity 4-6 online status 4-6 NAS B2000 Maintenance and Service Guide Index populating bays 2-8, 2-9 removing 2-7 replacing 2-8 SCSI IDs 2-8 SCSI IDs 2-8 SCSI interlock disable switch default settings 4-19 defined 4-19 location 4-18 SCSI ports 4-3 SCSI power cable disconnecting 2-41 location 2-41 SCSI power connector 2-41 serial connector 4-2 Server Setup...
...2-62 installing 2-62 part number 1-4 removing 2-62 replacing 2-62 SCSI cable, short connecting 2-57 disconnecting 2-57 installing 2-57 part number 1-4 removing 2-57 replacing 2-57 SCSI hard drives ejector lever 2-7 installing 2-8 LEDs drive activity 4-6 online status 4-6 NAS B2000 Maintenance and Service Guide Index populating bays 2-8, 2-9 removing 2-7 replacing 2-8 SCSI IDs 2-8 SCSI IDs 2-8 SCSI interlock disable switch default settings 4-19 defined 4-19 location 4-18 SCSI ports 4-3 SCSI power cable disconnecting 2-41 location 2-41 SCSI power connector 2-41 serial connector 4-2 Server Setup...
NAS b2000 v1 - Maintenance and Service Guide
Page 121
... keys 2-54 disconnecting cables 2-53 installing 2-55 part number 1-4 removing 2-53 replacing 2-55 spare part number 1-4 thumbscrew 2-29, 2-54 system cables connecting 2-60 disconnecting 2-60 diskette drive See diskette drive system cable installing 2-60 LED/CD-ROM drive See LED/CD-ROM drive system cable removing 2-60 replacing 2-60 system maintenance switch location 4-18 system maintenance switch settings configuration lock 4-20 enable diskette boot 4-20 invalidate configuration 4-20 password disable 4-20 rack mount indicator 4-20 system power cable NAS B2000 Maintenance and Service Guide...
... keys 2-54 disconnecting cables 2-53 installing 2-55 part number 1-4 removing 2-53 replacing 2-55 spare part number 1-4 thumbscrew 2-29, 2-54 system cables connecting 2-60 disconnecting 2-60 diskette drive See diskette drive system cable installing 2-60 LED/CD-ROM drive See LED/CD-ROM drive system cable removing 2-60 replacing 2-60 system maintenance switch location 4-18 system maintenance switch settings configuration lock 4-20 enable diskette boot 4-20 invalidate configuration 4-20 password disable 4-20 rack mount indicator 4-20 system power cable NAS B2000 Maintenance and Service Guide...


