
Part Locator
Page 1
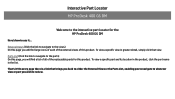
... you will find large icons of each of the external views of the replaceable parts for the HP ProDesk 400 G6 DM Here's how to use it ! On every page there is a link that view. Interactive Part Locator HP ProDesk 400 G6 DM Welcome to the interactive part locator for this product. To view a specific view in the...
... you will find large icons of each of the external views of the replaceable parts for the HP ProDesk 400 G6 DM Here's how to use it ! On every page there is a link that view. Interactive Part Locator HP ProDesk 400 G6 DM Welcome to the interactive part locator for this product. To view a specific view in the...

LED Simulator
Page 1
To identify the diagnostic codes for the HP ProDesk 400 G6 DM Here's how to navigate this platform's diagnostic codes) On this product's diagnostic error features. On every page there is also a LED diagnostic, which you ... by hovering over the information icon on the image. That's it ... Beep & LED Diagnostic (Click the link to use it ! Interactive Beep and LED Diagnostic HP ProDesk 400 G6 DM Welcome to the interactive beep and LED diagnostic viewer for an error feature, simply click that brings you back to the Welcome page.
To identify the diagnostic codes for the HP ProDesk 400 G6 DM Here's how to navigate this platform's diagnostic codes) On this product's diagnostic error features. On every page there is also a LED diagnostic, which you ... by hovering over the information icon on the image. That's it ... Beep & LED Diagnostic (Click the link to use it ! Interactive Beep and LED Diagnostic HP ProDesk 400 G6 DM Welcome to the interactive beep and LED diagnostic viewer for an error feature, simply click that brings you back to the Welcome page.

User Guide
Page 7
... ...1 Support ...1 Product documentation ...2 Product diagnostics ...2 Product updates ...3 2 Computer features ...4 Standard configuration features ...4 Front panel components ...5 Rear panel components (HP ProDesk 600 G6 DM and HP EliteDesk 800 G6 DM 6 Rear panel components (HP ProDesk 400 G6 DM 7 Rear panel components (HP 260 G4 DM) ...8 Serial number location ...8 Installing a security lock ...9 Cable lock ...9 Padlock ...9 Attaching the computer to a mounting fixture 10...
... ...1 Support ...1 Product documentation ...2 Product diagnostics ...2 Product updates ...3 2 Computer features ...4 Standard configuration features ...4 Front panel components ...5 Rear panel components (HP ProDesk 600 G6 DM and HP EliteDesk 800 G6 DM 6 Rear panel components (HP ProDesk 400 G6 DM 7 Rear panel components (HP 260 G4 DM) ...8 Serial number location ...8 Installing a security lock ...9 Cable lock ...9 Padlock ...9 Attaching the computer to a mounting fixture 10...

User Guide
Page 15
Rear panel components (HP ProDesk 400 G6 DM) 7 The specific graphics card installed and software configuration determine the behavior. When a graphics card is installed in BIOS F10 Setup. You can disable the ... the system board slots, you can use the video connectors on the graphics card or the integrated graphics on the system board. Rear panel components (HP ProDesk 400 G6 DM) Table 2-3 Identifying the rear panel components Rear panel components 1 Thumbscrew 7 USB Type-A port 2 Security lock 8 USB Type-A ports (2) 3 Optional port 4 External antenna 9 Optional board...
Rear panel components (HP ProDesk 400 G6 DM) 7 The specific graphics card installed and software configuration determine the behavior. When a graphics card is installed in BIOS F10 Setup. You can disable the ... the system board slots, you can use the video connectors on the graphics card or the integrated graphics on the system board. Rear panel components (HP ProDesk 400 G6 DM) Table 2-3 Identifying the rear panel components Rear panel components 1 Thumbscrew 7 USB Type-A port 2 Security lock 8 USB Type-A ports (2) 3 Optional port 4 External antenna 9 Optional board...

Systemboard Viewer
Page 1
That's it ... Interactive System Board Viewer HP ProDesk 400 G6 DM Welcome to the interactive System Board for the HP ProDesk 400 G6 DM Here's how to use the navigation arrows and numbered features list to review. Zoomable View (Click the link to navigate to the viewer) On ...
That's it ... Interactive System Board Viewer HP ProDesk 400 G6 DM Welcome to the interactive System Board for the HP ProDesk 400 G6 DM Here's how to use the navigation arrows and numbered features list to review. Zoomable View (Click the link to navigate to the viewer) On ...

BIOS Simulator
Page 1
Interactive BIOS simulator HP ProDesk 400 G6 DM Welcome to the interactive BIOS simulator for the HP ProDesk 400 G6 DM Here's how to use the cursor to rollover the option and the information will find thumbnail images of each of the BIOS screen. That's ...
Interactive BIOS simulator HP ProDesk 400 G6 DM Welcome to the interactive BIOS simulator for the HP ProDesk 400 G6 DM Here's how to use the cursor to rollover the option and the information will find thumbnail images of each of the BIOS screen. That's ...

BIOS Simulator
Page 4
Main Security Advanced UEFI Drivers BASIC SYSTEM INFORMATION Show Advanced System Information Product Name HP ProDesk 400 G6 Desktop Mini PC Memory Size 4096 MB System BIOS SanDisk SD9SB8W-128G-1006-20025D800449 (128 GB) SERVICE Born On Date 08/04/2020 Serial Number 8CC01404L0 SKU Number F91PVT#100 Universally Unique Identifier (UUID) CB7BC797FC811D8DCBDA6F170DC3AEE6 Asset Tracking Number 8CC01404L0 Help HP Computer Setup Item Specific Help
Main Security Advanced UEFI Drivers BASIC SYSTEM INFORMATION Show Advanced System Information Product Name HP ProDesk 400 G6 Desktop Mini PC Memory Size 4096 MB System BIOS SanDisk SD9SB8W-128G-1006-20025D800449 (128 GB) SERVICE Born On Date 08/04/2020 Serial Number 8CC01404L0 SKU Number F91PVT#100 Universally Unique Identifier (UUID) CB7BC797FC811D8DCBDA6F170DC3AEE6 Asset Tracking Number 8CC01404L0 Help HP Computer Setup Item Specific Help

BIOS Simulator
Page 24
Product Name Current Setting: HP ProDesk 400 G6 Desktop Mini PC Press the space key followed by the enter key to clear current setting
Product Name Current Setting: HP ProDesk 400 G6 Desktop Mini PC Press the space key followed by the enter key to clear current setting


