Limited Warranty and Support Guide
Page 12
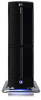
... specified in the Upgrading and Servicing Guide may result in your product. Dispose of laser products: This label indicates that the product is electrically grounded so as a "Class 1 Laser Product" under a U.S. WARNING: Use of controls, adjustments, or performance procedures other electric light or power circuits, or where it is located on a laser device installed in hazardous radiation exposure. Replace only with...
... specified in the Upgrading and Servicing Guide may result in your product. Dispose of laser products: This label indicates that the product is electrically grounded so as a "Class 1 Laser Product" under a U.S. WARNING: Use of controls, adjustments, or performance procedures other electric light or power circuits, or where it is located on a laser device installed in hazardous radiation exposure. Replace only with...
Limited Warranty and Support Guide
Page 14
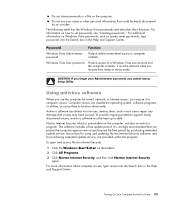
... listed in the "Hardware Limited Warranty" section. If you have any problems setting up your system and turning it left our factory. Thank you are on your new computer. Refer to meet the rigorous standards that have placed a security seal on the back of the computer, you for all customers. Where Are My User Guides? Software Support If you attempted to upgrade...
... listed in the "Hardware Limited Warranty" section. If you have any problems setting up your system and turning it left our factory. Thank you are on your new computer. Refer to meet the rigorous standards that have placed a security seal on the back of the computer, you for all customers. Where Are My User Guides? Software Support If you attempted to upgrade...
Start Here Guide
Page 4
... Audio System 28 Y adapter cables 28 2.1 home stereo installation 29 5.1 home audio installation 30 5.1 home audio installation procedure 30 7.1 home audio installation 32 7.1 home audio installation procedure 33 Connecting Digital Audio 34 Connecting Speakers Using the Creative Sound Blaster X-Fi Sound Card 36 Connecting the speakers 36 Connecting the FlexiJack connector 37 Connecting the Television Signal and Video Cables 39 Using TV Cables 39 Audio and Video Cables 39 Connecting the TV Signal Source 41 Connecting a dual tuner 42 Connecting the Remote Sensor 43 Connecting...
... Audio System 28 Y adapter cables 28 2.1 home stereo installation 29 5.1 home audio installation 30 5.1 home audio installation procedure 30 7.1 home audio installation 32 7.1 home audio installation procedure 33 Connecting Digital Audio 34 Connecting Speakers Using the Creative Sound Blaster X-Fi Sound Card 36 Connecting the speakers 36 Connecting the FlexiJack connector 37 Connecting the Television Signal and Video Cables 39 Using TV Cables 39 Audio and Video Cables 39 Connecting the TV Signal Source 41 Connecting a dual tuner 42 Connecting the Remote Sensor 43 Connecting...
Start Here Guide
Page 20
... Sharing Center window. 6 Click Add a device to the network and follow any onscreen instructions. Use a firewall. NOTE: If no WLAN device is not properly installed. 4 Click the Windows Start Button on the taskbar, click Help and Support, and then type Setting up a wireless network into the Search box, and then click Network and Sharing Center to open the Device Manager window. 3 Click Network adapters. Your WLAN device should use one or more information about setting up a wireless network: Click the Windows Start Button...
... Sharing Center window. 6 Click Add a device to the network and follow any onscreen instructions. Use a firewall. NOTE: If no WLAN device is not properly installed. 4 Click the Windows Start Button on the taskbar, click Help and Support, and then type Setting up a wireless network into the Search box, and then click Network and Sharing Center to open the Device Manager window. 3 Click Network adapters. Your WLAN device should use one or more information about setting up a wireless network: Click the Windows Start Button...
Start Here Guide
Page 26
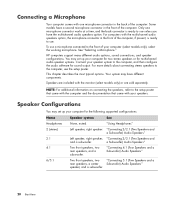
... the setup poster. Speaker Configurations You may have the multichannel audio speakers option. Some models have a second microphone connector in the front of the computer. NOTE: For additional information on connecting the speakers, refer to use unless you have different components. "Using Headphones" Left speaker, right speaker. "Connecting 4.1 (Four Speakers and a Subwoofer) Audio Speakers" Two front speakers, two "Connecting 5.1 (Five Speakers and a rear speakers, a center Subwoofer) Audio Speakers" speaker, and a subwoofer. 20 Start Here Your system may set up...
... the setup poster. Speaker Configurations You may have the multichannel audio speakers option. Some models have a second microphone connector in the front of the computer. NOTE: For additional information on connecting the speakers, refer to use unless you have different components. "Using Headphones" Left speaker, right speaker. "Connecting 4.1 (Four Speakers and a Subwoofer) Audio Speakers" Two front speakers, two "Connecting 5.1 (Five Speakers and a rear speakers, a center Subwoofer) Audio Speakers" speaker, and a subwoofer. 20 Start Here Your system may set up...

Getting Started Guide
Page 4
... software 46 Installing critical security updates 46 Turning On Your Computer for the First Time 47 Turning Off Your Computer 47 Using Shut Down 48 Using Lock ...48 Using sleep mode 48 Using hibernate mode 49 Automatic sleep, hibernate, or away mode 50 Restarting the Computer 50 Connecting to the Internet 51 Signing Up for Software Updates 52 Setting Up User Accounts on Your New Computer 53 Creating passwords 53 iv Getting Started
... software 46 Installing critical security updates 46 Turning On Your Computer for the First Time 47 Turning Off Your Computer 47 Using Shut Down 48 Using Lock ...48 Using sleep mode 48 Using hibernate mode 49 Automatic sleep, hibernate, or away mode 50 Restarting the Computer 50 Connecting to the Internet 51 Signing Up for Software Updates 52 Setting Up User Accounts on Your New Computer 53 Creating passwords 53 iv Getting Started
Getting Started Guide
Page 5
... Switching Mouse Button Functions 67 Changing Mouse Pointer Speed 68 Using the Windows Media Center Remote Control 69 Remote Control Buttons Overview 70 About the Remote Control 72 Troubleshooting the remote control 73 Remote sensor is not receiving a signal from the remote control 73 Introducing Your Computer Software 75 Learning More About Software 75 Using the Desktop 75 Removing desktop icons 76 Retrieving desktop icons 76 Using the Windows Start Button Menu 76 Using the All Programs menu 76 Organizing your All Programs list 77 Using the Control Panel 77 Resizing Windows...
... Switching Mouse Button Functions 67 Changing Mouse Pointer Speed 68 Using the Windows Media Center Remote Control 69 Remote Control Buttons Overview 70 About the Remote Control 72 Troubleshooting the remote control 73 Remote sensor is not receiving a signal from the remote control 73 Introducing Your Computer Software 75 Learning More About Software 75 Using the Desktop 75 Removing desktop icons 76 Retrieving desktop icons 76 Using the Windows Start Button Menu 76 Using the All Programs menu 76 Organizing your All Programs list 77 Using the Control Panel 77 Resizing Windows...

Getting Started Guide
Page 24
... Wi-Fi Protected Access Personal (WPA-Personal) and Wired Equivalent Privacy (WEP). Set security on the taskbar. 5 Type Network and Sharing Center into the Search box, and then click Network and Sharing Center to open the Device Manager window. 3 Click Network adapters. The WLAN device may include the term wireless, wireless LAN, or 802.11. Change the default network name (SSID) and password. For more of the following security measures: Enable WPA-Personal...
... Wi-Fi Protected Access Personal (WPA-Personal) and Wired Equivalent Privacy (WEP). Set security on the taskbar. 5 Type Network and Sharing Center into the Search box, and then click Network and Sharing Center to open the Device Manager window. 3 Click Network adapters. The WLAN device may include the term wireless, wireless LAN, or 802.11. Change the default network name (SSID) and password. For more of the following security measures: Enable WPA-Personal...
Getting Started Guide
Page 30
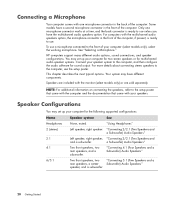
...refer to use. This chapter describes the most typical options. Speaker Configurations You may set up your computer for two stereo speakers or for multichannel audio speaker systems. Connect your computer (select models only), select the working microphone. a Subwoofer) Audio Speakers" Two front speakers, two rear speakers, and a subwoofer. "Connecting 4.1 (Four Speakers and a Subwoofer) Audio Speakers" Two front speakers, two "Connecting 5.1 (Five Speakers and a rear speakers, a center Subwoofer) Audio Speakers" speaker, and a subwoofer. 20 Getting Started For computers...
...refer to use. This chapter describes the most typical options. Speaker Configurations You may set up your computer for two stereo speakers or for multichannel audio speaker systems. Connect your computer (select models only), select the working microphone. a Subwoofer) Audio Speakers" Two front speakers, two rear speakers, and a subwoofer. "Connecting 4.1 (Four Speakers and a Subwoofer) Audio Speakers" Two front speakers, two "Connecting 5.1 (Five Speakers and a rear speakers, a center Subwoofer) Audio Speakers" speaker, and a subwoofer. 20 Getting Started For computers...
Getting Started Guide
Page 55
... again. Do not use the computer for e-mail, network, or Internet access, you resume from sleep or away mode. Password Function Windows Vista Administrator password Protects administrator-level access to date. It must be entered when you expose it to set passwords, see "Creating passwords." Antivirus software can disable the operating system, software programs, or utilities, or cause them , and in most cases repair any damage that you cannot access Setup Utility. To provide ongoing...
... again. Do not use the computer for e-mail, network, or Internet access, you resume from sleep or away mode. Password Function Windows Vista Administrator password Protects administrator-level access to date. It must be entered when you expose it to set passwords, see "Creating passwords." Antivirus software can disable the operating system, software programs, or utilities, or cause them , and in most cases repair any damage that you cannot access Setup Utility. To provide ongoing...

Getting Started Guide
Page 57
... with HP or Compaq, sign up Microsoft Windows Vista by manually starting Easy Internet Services. Hibernate mode saves your computer. 1 Press the Power button on the monitor. 2 Press the On button on the front of the computer. 3 Turn on the computer.) 5 Set up for safety reasons, such as recording a scheduled TV program or streaming video and music files to make repairs, install new hardware or cards in the computer chassis, or change a battery. Turning...
... with HP or Compaq, sign up Microsoft Windows Vista by manually starting Easy Internet Services. Hibernate mode saves your computer. 1 Press the Power button on the monitor. 2 Press the On button on the front of the computer. 3 Turn on the computer.) 5 Set up for safety reasons, such as recording a scheduled TV program or streaming video and music files to make repairs, install new hardware or cards in the computer chassis, or change a battery. Turning...

Getting Started Guide
Page 62
... are available. This option makes the computer more vulnerable and is to the Internet, Windows Vista Update automatically notifies you check for updates - It is recommended that you through a pop-up to date is not recommended. 7 Click OK. 52 Getting Started To configure Automatic Updates: 1 Click the Windows Start Button on the taskbar. 2 Click Control Panel. 3 Click Security. 4 Click Windows Updates. 5 Click Change Settings. 6 Select the desired configuration: Automatic (recommended...
... are available. This option makes the computer more vulnerable and is to the Internet, Windows Vista Update automatically notifies you check for updates - It is recommended that you through a pop-up to date is not recommended. 7 Click OK. 52 Getting Started To configure Automatic Updates: 1 Click the Windows Start Button on the taskbar. 2 Click Control Panel. 3 Click Security. 4 Click Windows Updates. 5 Click Change Settings. 6 Select the desired configuration: Automatic (recommended...
Getting Started Guide
Page 73
... the Windows Start Button on the Buttons tab to restore all of the buttons to the factory settings. You will see this combination of keys represented as Complex remote page with label or Simple local file with label. 7 Enter a display label and the address information. NOTE: Click the Restore Defaults button on the taskbar. 2 Click Control Panel. 3 Click Hardware and Sound, if it is present. 4 Click Keyboard. 5 Click the Buttons tab...
... the Windows Start Button on the Buttons tab to restore all of the buttons to the factory settings. You will see this combination of keys represented as Complex remote page with label or Simple local file with label. 7 Enter a display label and the address information. NOTE: Click the Restore Defaults button on the taskbar. 2 Click Control Panel. 3 Click Hardware and Sound, if it is present. 4 Click Keyboard. 5 Click the Buttons tab...

Getting Started Guide
Page 190
... 168 DVD movies changing audio settings 144 language 142 playing in Media Center 140 DVD Play, features 84 DVDs erasing rewritable 148 E erasing rewritable discs 148 error messages Image cannot be displayed 159 errors reducing recording speed 149 Ethernet connection 12 Ethernet network hub 5 F file type music 129, 166 picture 159, 165 video 163, 165 FireWire 168, 169 FireWire (IEEE 1394) connector 5 FM In connector 7 180 Getting Started FM radio antenna connecting 7 Found New Hardware message, connecting...
... 168 DVD movies changing audio settings 144 language 142 playing in Media Center 140 DVD Play, features 84 DVDs erasing rewritable 148 E erasing rewritable discs 148 error messages Image cannot be displayed 159 errors reducing recording speed 149 Ethernet connection 12 Ethernet network hub 5 F file type music 129, 166 picture 159, 165 video 163, 165 FireWire 168, 169 FireWire (IEEE 1394) connector 5 FM In connector 7 180 Getting Started FM radio antenna connecting 7 Found New Hardware message, connecting...

Getting Started Guide
Page 191
Media Center menu bars 116 navigating 117 opening with remote control 72 playing DVDs 140 resizing window 116 using with another program open 116 what you can do in Music 125 memory card reader 155 card types 99 in-use light 103 troubleshooting 104 using 99 memory card, formatting 103 microphone connector 4, 6 mini-jack 18 modem connection 15 modem connector 7 monitor adjusting 10 monitor connector 6 mouse autoscroll 67 cursor speed 68 panning 67 switching button functions 67 mouse connector 5 Music 125 copying music to...
Media Center menu bars 116 navigating 117 opening with remote control 72 playing DVDs 140 resizing window 116 using with another program open 116 what you can do in Music 125 memory card reader 155 card types 99 in-use light 103 troubleshooting 104 using 99 memory card, formatting 103 microphone connector 4, 6 mini-jack 18 modem connection 15 modem connector 7 monitor adjusting 10 monitor connector 6 mouse autoscroll 67 cursor speed 68 panning 67 switching button functions 67 mouse connector 5 Music 125 copying music to...
Troubleshooting and Maintenance Guide
Page 6
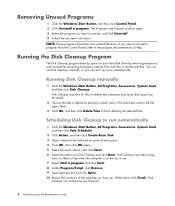
... mark in use. 7 Select Start a program and click Next. 8 Under Program/Script, click Browse. 9 Type cleanmgr.exe and click Open. 10 Review the summary of the schedule you cannot uninstall a program from the Control Panel, refer to delete by removing temporary and unused files (including Temporary Internet Files and files in the Recycle Bin). Running Disk Cleanup manually 1 Click the Windows Start Button, All Programs...
... mark in use. 7 Select Start a program and click Next. 8 Under Program/Script, click Browse. 9 Type cleanmgr.exe and click Open. 10 Review the summary of the schedule you cannot uninstall a program from the Control Panel, refer to delete by removing temporary and unused files (including Temporary Internet Files and files in the Recycle Bin). Running Disk Cleanup manually 1 Click the Windows Start Button, All Programs...
Troubleshooting and Maintenance Guide
Page 13
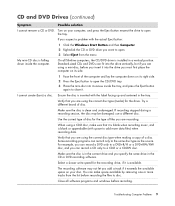
... recording data. The recording software may be damaged; Try a different brand of a disc. When using the correct disc type when making a copy of disc. CD and DVD Drives (continued) Symptom Possible solution I cannot create (burn) a disc. Turn on your computer, and press the Eject button nearest the drive to open the tray. If you suspect a problem with the actual Eject button: 1 Click the Windows Start Button and then Computer...
... recording data. The recording software may be damaged; Try a different brand of a disc. When using the correct disc type when making a copy of disc. CD and DVD Drives (continued) Symptom Possible solution I cannot create (burn) a disc. Turn on your computer, and press the Eject button nearest the drive to open the tray. If you suspect a problem with the actual Eject button: 1 Click the Windows Start Button and then Computer...
Troubleshooting and Maintenance Guide
Page 15
..., and monitor power light is blank. Screen is not lit. Press the On button to turn on the keyboard to make the screen display visible again. Troubleshooting Computer Problems 11 Possible solution 1 Click the Windows Start Button, right-click Computer, and then select Properties. 2 Under Tasks, click Device Manager. 3 Click the plus sign (+) next to Sound, video and game controllers. 4 Right-click TV tuner (select models only) and then select Update Driver Software. 5 Select...
..., and monitor power light is blank. Screen is not lit. Press the On button to turn on the keyboard to make the screen display visible again. Troubleshooting Computer Problems 11 Possible solution 1 Click the Windows Start Button, right-click Computer, and then select Properties. 2 Under Tasks, click Device Manager. 3 Click the plus sign (+) next to Sound, video and game controllers. 4 Right-click TV tuner (select models only) and then select Update Driver Software. 5 Select...
Troubleshooting and Maintenance Guide
Page 16
... not work , press and hold the On button for Windows Vista. button on the keyboard at the same time. 2 Click Start Task Manager. 3 Select the program that the pins in the operating system for an update. You may need an updated driver for 5 or more seconds to open the Help and Support Center, displays. Ensure that all cables are properly and securely connected and that is not recognized as part of...
... not work , press and hold the On button for Windows Vista. button on the keyboard at the same time. 2 Click Start Task Manager. 3 Select the program that the pins in the operating system for an update. You may need an updated driver for 5 or more seconds to open the Help and Support Center, displays. Ensure that all cables are properly and securely connected and that is not recognized as part of...

Troubleshooting and Maintenance Guide
Page 18
...: 1 Click the Windows Start Button, and then click Control Panel. 2 Click Hardware and Sound. 3 Double-click Phone and Modem Options. 4 Select the Modems tab, and then click the Properties button. 5 In the Device status area, verify the modem is installed and set up connection. Try to work with AOL. 14 Troubleshooting and Maintenance Guide button on your computer. Verify that time. A NIC uses a network cable to connect to the Internet, press the Help...
...: 1 Click the Windows Start Button, and then click Control Panel. 2 Click Hardware and Sound. 3 Double-click Phone and Modem Options. 4 Select the Modems tab, and then click the Properties button. 5 In the Device status area, verify the modem is installed and set up connection. Try to work with AOL. 14 Troubleshooting and Maintenance Guide button on your computer. Verify that time. A NIC uses a network cable to connect to the Internet, press the Help...


