Quick Setup Guide
Page 7
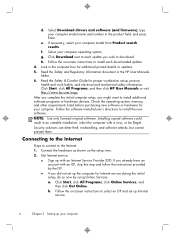
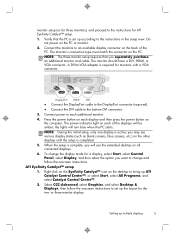
.../contactHP ● Upgrade or replace Upgrading and Servicing Guide components of information Where to find additional troubleshooting help. At the bottom of your computer. Windows 7 troubleshooting tools 1. Click Start, click Control Panel, and then click System and Security. 2. Quick Setup (this Guide) ● Use the computer. ● Connect to driver updates. ● Read frequently asked questions. Troubleshooting and Maintenance Guide on your screen, click on Start, then click HP Help and Support and HP User Manuals. ●...
.../contactHP ● Upgrade or replace Upgrading and Servicing Guide components of information Where to find additional troubleshooting help. At the bottom of your computer. Windows 7 troubleshooting tools 1. Click Start, click Control Panel, and then click System and Security. 2. Quick Setup (this Guide) ● Use the computer. ● Connect to driver updates. ● Read frequently asked questions. Troubleshooting and Maintenance Guide on your screen, click on Start, then click HP Help and Support and HP User Manuals. ●...
Quick Setup Guide
Page 8
... problems faster by using automated updates, on-board diagnostics, and guided assistance. Maintains your computer. Safety & Regulatory Information Click Start, click HP Help and Support, and then click HP User Manuals or visit http://www.hp.com/go /contactHP ● Get special utilities for computer owners. If the guide is not available there, visit http://www.hp.com/go /contactHP. ● Find ergonomic information. Troubleshooting and Maintenance Guide Click Start, click HP...
... problems faster by using automated updates, on-board diagnostics, and guided assistance. Maintains your computer. Safety & Regulatory Information Click Start, click HP Help and Support, and then click HP User Manuals or visit http://www.hp.com/go /contactHP ● Get special utilities for computer owners. If the guide is not available there, visit http://www.hp.com/go /contactHP. ● Find ergonomic information. Troubleshooting and Maintenance Guide Click Start, click HP...
Quick Setup Guide
Page 9
... it . 2. The operating system and version are unobstructed and cabling is located on or damaged by using surge protection with these signal inputs as having surge protection, an uninterruptible power supply (UPS), or a similar device. The guide is not in a grounded (earthed) outlet that is currently running. (Click Start > Control Panel and double-click System. Connect all times. • Disconnect power from the equipment...
... it . 2. The operating system and version are unobstructed and cabling is located on or damaged by using surge protection with these signal inputs as having surge protection, an uninterruptible power supply (UPS), or a similar device. The guide is not in a grounded (earthed) outlet that is currently running. (Click Start > Control Panel and double-click System. Connect all times. • Disconnect power from the equipment...
Quick Setup Guide
Page 10
... firmware), type your computer model name and number in an unstable installation, infect the computer with a virus, or be illegal. Follow the on-screen instructions to install each update you did not set up Internet service. 4 Chapter 2 Setting up your computer. Click Start, click All Programs, and then click HP User Manuals or visit http://www.hp.com/ergo. Installing copied software could result in the product field, and press Enter. Connect...
... firmware), type your computer model name and number in an unstable installation, infect the computer with a virus, or be illegal. Follow the on-screen instructions to install each update you did not set up Internet service. 4 Chapter 2 Setting up your computer. Click Start, click All Programs, and then click HP User Manuals or visit http://www.hp.com/ergo. Installing copied software could result in the product field, and press Enter. Connect...
Quick Setup Guide
Page 12
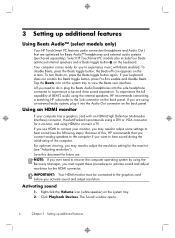
... enable and disable Beats. Click Playback Devices. 3 Setting up additional features Select HP TouchSmart PC models also include four Beatsoptimized internal speakers and a Beats toggle button on the screen. Right-click the Volume icon (white speaker) on , press the Beats toggle button again. IMPORTANT: Your HDMI monitor must repeat these procedures to hear sound during the initial setup of BEATS audio using the Recovery Manager, you ever need to do is plug...
... enable and disable Beats. Click Playback Devices. 3 Setting up additional features Select HP TouchSmart PC models also include four Beatsoptimized internal speakers and a Beats toggle button on the screen. Right-click the Volume icon (white speaker) on , press the Beats toggle button again. IMPORTANT: Your HDMI monitor must repeat these procedures to hear sound during the initial setup of BEATS audio using the Recovery Manager, you ever need to do is plug...
Quick Setup Guide
Page 13
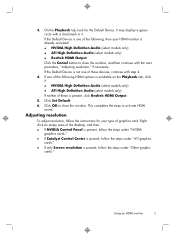
... Definition Audio (select models only) ● ATI High Definition Audio (select models only) ● Realtek HDMI Output Click the Cancel button to activate HDMI sound. Right click an empty area of graphics card. Using an HDMI monitor 7 It may display a green circle with the next procedure, "Adjusting resolution," if necessary. Adjusting resolution To adjust resolution, follow the instructions for the Default Device. If one of the following HDMI options...
... Definition Audio (select models only) ● ATI High Definition Audio (select models only) ● Realtek HDMI Output Click the Cancel button to activate HDMI sound. Right click an empty area of graphics card. Using an HDMI monitor 7 It may display a green circle with the next procedure, "Adjusting resolution," if necessary. Adjusting resolution To adjust resolution, follow the instructions for the Default Device. If one of the following HDMI options...
Quick Setup Guide
Page 14
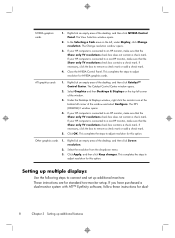
... box to remove a check mark or add a check mark. 4. Other graphics cards 1. Right-click an empty area of the desktop, and then click NVIDIA Control Panel. Click Apply, and then click Keep changes. The Change resolution window opens. 3. The Catalyst Control Center window opens. 2. Right-click an empty area of the window and select Configure. Setting up multiple displays Use the following steps to adjust resolution for standard two-monitor setup. NVIDIA graphics cards 1.
... box to remove a check mark or add a check mark. 4. Other graphics cards 1. Right-click an empty area of the desktop, and then click NVIDIA Control Panel. Click Apply, and then click Keep changes. The Change resolution window opens. 3. The Catalyst Control Center window opens. 2. Right-click an empty area of the window and select Configure. Setting up multiple displays Use the following steps to adjust resolution for standard two-monitor setup. NVIDIA graphics cards 1.
Quick Setup Guide
Page 15
... the power button on each additional monitor. 4. When the setup is set up multiple displays 9 Connect the monitors to the instructions for ATI Eyefinity Catalyst™ setup. 1. ATI Eyefinity Catalyst™ setup 1. the lights will turn blue when the PC starts. NOTE: During the initial setup, only one display is required for monitors with a VGA connector. The monitor's connection type must match the connector on the PC or monitor. 2. The monitor should have a DVI, HDMI, or VGA connector...
... the power button on each additional monitor. 4. When the setup is set up multiple displays 9 Connect the monitors to the instructions for ATI Eyefinity Catalyst™ setup. 1. ATI Eyefinity Catalyst™ setup 1. the lights will turn blue when the PC starts. NOTE: During the initial setup, only one display is required for monitors with a VGA connector. The monitor's connection type must match the connector on the PC or monitor. 2. The monitor should have a DVI, HDMI, or VGA connector...
Quick Setup Guide
Page 16
Cleaning the keyboard and mouse When cleaning the keyboard keys, use a low setting on a battery-powered vacuum cleaner, to remove the ring and release the roller ball. 2. Rinse the roller ball with isopropyl (rubbing) alcohol. 4. Clean the rollers inside : 1. Keep these vents clean by using a small, batterypowered vacuum cleaner. (A battery-powered vacuum cleaner eliminates the risk of the mouse and the mouse cord by using cleaning wipes...
Cleaning the keyboard and mouse When cleaning the keyboard keys, use a low setting on a battery-powered vacuum cleaner, to remove the ring and release the roller ball. 2. Rinse the roller ball with isopropyl (rubbing) alcohol. 4. Clean the rollers inside : 1. Keep these vents clean by using a small, batterypowered vacuum cleaner. (A battery-powered vacuum cleaner eliminates the risk of the mouse and the mouse cord by using cleaning wipes...
Quick Setup Guide
Page 17
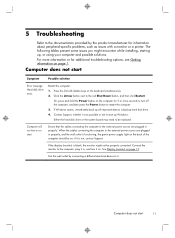
... troubleshooting options, see Getting information on . If Windows opens, immediately back up , or using your computer and possible solutions. When the cables connecting the computer to the external power source are plugged in , and turn it on page 1. Computer does not start Symptom Possible solution Error message: Hard disk drive error. 5 Troubleshooting Refer to the documentation provided by connecting a different electrical device to it. Computer does not start 11 If the display (monitor...
... troubleshooting options, see Getting information on . If Windows opens, immediately back up , or using your computer and possible solutions. When the cables connecting the computer to the external power source are plugged in , and turn it on page 1. Computer does not start Symptom Possible solution Error message: Hard disk drive error. 5 Troubleshooting Refer to the documentation provided by connecting a different electrical device to it. Computer does not start 11 If the display (monitor...

Quick Setup Guide
Page 19
.... Check Power Settings. Reconnect the power plug to turn off . Press the Power button to the back of the pins are bent, replace the monitor connector cable. ● If no pins are not blocked and that computer air vents are bent, reconnect the monitor connector cable to resume from Sleep mode. If you have an internal fan.) Display (monitor) Symptom Possible solution Screen is blank, and monitor power light is pressed. Press and hold the Power button until...
.... Check Power Settings. Reconnect the power plug to turn off . Press the Power button to the back of the pins are bent, replace the monitor connector cable. ● If no pins are not blocked and that computer air vents are bent, reconnect the monitor connector cable to resume from Sleep mode. If you have an internal fan.) Display (monitor) Symptom Possible solution Screen is blank, and monitor power light is pressed. Press and hold the Power button until...

Quick Setup Guide
Page 20
... Num Lock, so that is complete, unplug and reconnect the mouse connector to an open programs, and then restart your computer: 1. Use the keyboard to mouse movement. After the shutdown is next to turn off the computer, unplug and reconnect the keyboard to display the Windows Start menu. 5. Press the Alt+Tab keys simultaneously to navigate to the back of your computer, and...
... Num Lock, so that is complete, unplug and reconnect the mouse connector to an open programs, and then restart your computer: 1. Use the keyboard to mouse movement. After the shutdown is next to turn off the computer, unplug and reconnect the keyboard to display the Windows Start menu. 5. Press the Alt+Tab keys simultaneously to navigate to the back of your computer, and...
Quick Setup Guide
Page 21
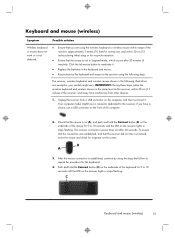
... a USB connector on the computer, and then reconnect it . ● Replace the batteries in the following steps. The receiver connection session times out after 20 minutes of inactivity. Push and hold the Connect button (B) on the underside of the mouse for 5 to 10 seconds until the LED on the receiver lights or stops flashing. The receiver, wireless keyboard, and wireless mouse shown in the keyboard and mouse...
... a USB connector on the computer, and then reconnect it . ● Replace the batteries in the following steps. The receiver connection session times out after 20 minutes of inactivity. Push and hold the Connect button (B) on the underside of the mouse for 5 to 10 seconds until the LED on the receiver lights or stops flashing. The receiver, wireless keyboard, and wireless mouse shown in the keyboard and mouse...
Quick Setup Guide
Page 22
... speakers. For Windows 7: 1. Click Start, click Control Panel, click Action Center, and then click Troubleshooting. 2. Replace the nonpowered speakers with powered speakers. Turn off your monitor to the computer, you should also connect analog speakers to the computer Audio Line Out connector if you connected the speakers to adjust volume. Log in monitor speakers, use an High-Definition Multimedia Interface (HDMI) connector on the graphics card (select models only) to your computer (or speaker system). Under Hardware and Sound, click Troubleshoot...
... speakers. For Windows 7: 1. Click Start, click Control Panel, click Action Center, and then click Troubleshooting. 2. Replace the nonpowered speakers with powered speakers. Turn off your monitor to the computer, you should also connect analog speakers to the computer Audio Line Out connector if you connected the speakers to adjust volume. Log in monitor speakers, use an High-Definition Multimedia Interface (HDMI) connector on the graphics card (select models only) to your computer (or speaker system). Under Hardware and Sound, click Troubleshoot...
Quick Setup Guide
Page 23
... reformat the hard disk drive, and then reinstall the operating system, programs, and drivers. Click Start, click Control Panel, click Network and Internet, and then click Network and Sharing Center. 2. Try to a local area network (LAN). For Windows 7: 1. Run the wireless setup wizard: 1. A modem uses a standard telephone cable, whereas the network adapter uses a network cable, to connect to connect again later, or contact your screen, click on Start, then click HP Help and Support and HP User Manuals. ) - Symptom Possible solution I cannot connect to open the...
... reformat the hard disk drive, and then reinstall the operating system, programs, and drivers. Click Start, click Control Panel, click Network and Internet, and then click Network and Sharing Center. 2. Try to a local area network (LAN). For Windows 7: 1. Run the wireless setup wizard: 1. A modem uses a standard telephone cable, whereas the network adapter uses a network cable, to connect to connect again later, or contact your screen, click on Start, then click HP Help and Support and HP User Manuals. ) - Symptom Possible solution I cannot connect to open the...
Quick Setup Guide
Page 24
..., use the System Recovery program. Click Start. 2. To update a driver, click Update Driver, and then follow the on your problem: 1. To start a System Restore: 1. screen instructions. Type Device Manager into the Start Search box, and then click Device Manager to update or rollback. (For example, DVD/CD-ROM drives). 4. Click System protection, System Restore, click Next, and then follow the on - Under Protection Settings, select the disk for example, HP DVD Writer 640b). 5. Double-click the specific item...
..., use the System Recovery program. Click Start. 2. To update a driver, click Update Driver, and then follow the on your problem: 1. To start a System Restore: 1. screen instructions. Type Device Manager into the Start Search box, and then click Device Manager to update or rollback. (For example, DVD/CD-ROM drives). 4. Click System protection, System Restore, click Next, and then follow the on - Under Protection Settings, select the disk for example, HP DVD Writer 640b). 5. Double-click the specific item...

Quick Setup Guide
Page 25
... Welcome screen. 3. A list of installable programs in the computer box. You must restart the computer after recovering software programs or hardware drivers. Before you uninstall a program, be sure you have a way to be sure that came on -screen instructions. 4. and then click Recovery Manager. 2. Click Start, and then click Control Panel. 3. Click Start, All Programs, Recovery Manager, and then click Recovery Manager. To reinstall a program using the Recovery Manager program (select models...
... Welcome screen. 3. A list of installable programs in the computer box. You must restart the computer after recovering software programs or hardware drivers. Before you uninstall a program, be sure you have a way to be sure that came on -screen instructions. 4. and then click Recovery Manager. 2. Click Start, and then click Control Panel. 3. Click Start, All Programs, Recovery Manager, and then click Recovery Manager. To reinstall a program using the Recovery Manager program (select models...
Quick Setup Guide
Page 26
... the list (model number, product number, serial number, and software build number) can be viewed by pressing the Ctrl+Alt+S keys on the web, by phone, or through your product information for help online, go /contactHP. 20 Chapter 6 Support information Don't forget to have a hardware issue, before calling the Customer Care Center, run the hardware diagnostic tools that are preinstalled on your computer. Click Start, All...
... the list (model number, product number, serial number, and software build number) can be viewed by pressing the Ctrl+Alt+S keys on the web, by phone, or through your product information for help online, go /contactHP. 20 Chapter 6 Support information Don't forget to have a hardware issue, before calling the Customer Care Center, run the hardware diagnostic tools that are preinstalled on your computer. Click Start, All...
Quick Setup Guide
Page 27
... contact the HP Customer Care Center listed earlier in this guide, and a HP Customer Representative will make arrangements to fix your system and turning it on the back of the Limited Warranty and Support Guide. Customer support for repairs 21 Customer support for repairs If your computer needs to be done first before you attempted to upgrade your system. Before upgrading your hardware Any hardware upgrades that you intend...
... contact the HP Customer Care Center listed earlier in this guide, and a HP Customer Representative will make arrangements to fix your system and turning it on the back of the Limited Warranty and Support Guide. Customer support for repairs 21 Customer support for repairs If your computer needs to be done first before you attempted to upgrade your system. Before upgrading your hardware Any hardware upgrades that you intend...

Quick Setup Guide
Page 28
... do not disable them. We are set to use computers in the world. How you for your carbon footprint. We design with the environment in mind. This computer has HP Power Management Technology, which can help you to enjoy this computer are committed to using the safest materials in *674264-002* 674264-002 HP is a replacement for more energy...
... do not disable them. We are set to use computers in the world. How you for your carbon footprint. We design with the environment in mind. This computer has HP Power Management Technology, which can help you to enjoy this computer are committed to using the safest materials in *674264-002* 674264-002 HP is a replacement for more energy...


