
Troubleshooting and Maintenance Guide
Page 2
...: September 2013 Document Part Number: 701334-002 Understanding hard disk drive space The hard disk drive on the PC. 2. Because of the different measuring systems, you may require upgraded and/or separately purchased hardware, drivers and/or software to HP and Compaq systems. The memory above 3 GB may be construed as advertised. The only warranties for HP products and services are available in all memory above 3 GB...
...: September 2013 Document Part Number: 701334-002 Understanding hard disk drive space The hard disk drive on the PC. 2. Because of the different measuring systems, you may require upgraded and/or separately purchased hardware, drivers and/or software to HP and Compaq systems. The memory above 3 GB may be construed as advertised. The only warranties for HP products and services are available in all memory above 3 GB...
Troubleshooting and Maintenance Guide
Page 3
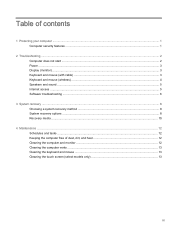
... ...2 Computer does not start ...2 Power ...3 Display (monitor) ...3 Keyboard and mouse (with cable) ...3 Keyboard and mouse (wireless) ...4 Speakers and sound ...5 Internet access ...5 Software troubleshooting ...6 3 System recovery ...8 Choosing a system recovery method 8 System recovery options ...8 Recovery media ...10 4 Maintenance ...12 Schedules and tasks ...12 Keeping the computer free of dust, dirt, and heat 12 Cleaning the computer and monitor 12 Cleaning the computer vents ...13 Cleaning the keyboard and mouse ...13 Cleaning the touch screen (select models only 13 iii
... ...2 Computer does not start ...2 Power ...3 Display (monitor) ...3 Keyboard and mouse (with cable) ...3 Keyboard and mouse (wireless) ...4 Speakers and sound ...5 Internet access ...5 Software troubleshooting ...6 3 System recovery ...8 Choosing a system recovery method 8 System recovery options ...8 Recovery media ...10 4 Maintenance ...12 Schedules and tasks ...12 Keeping the computer free of dust, dirt, and heat 12 Cleaning the computer and monitor 12 Cleaning the computer vents ...13 Cleaning the keyboard and mouse ...13 Cleaning the touch screen (select models only 13 iii
Troubleshooting and Maintenance Guide
Page 5
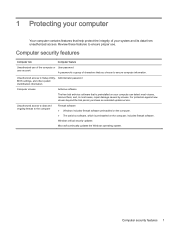
Review these features to ensure proper use of the computer or User password user account A password is a group of your computer can detect most viruses, remove them, and, in most cases, repair damage caused by viruses. Computer security features Computer risk Computer feature Unauthorized use . Unauthorized access to data and ongoing threats to Setup Utility, Administrator password BIOS settings, and other system identification information Computer viruses Antivirus...
Review these features to ensure proper use of the computer or User password user account A password is a group of your computer can detect most viruses, remove them, and, in most cases, repair damage caused by viruses. Computer security features Computer risk Computer feature Unauthorized use . Unauthorized access to data and ongoing threats to Setup Utility, Administrator password BIOS settings, and other system identification information Computer viruses Antivirus...
Troubleshooting and Maintenance Guide
Page 6
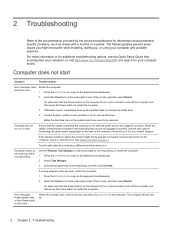
... keys on the keyboard simultaneously. 2. Error message: Invalid system disk or Non-System disk or Disk error. Ensure that is not responding, and then click End task. When the cables connecting the computer to the external power source are plugged in , and turn on the computer for 5 or more information or for additional troubleshooting options, see the Quick Setup Guide that accompanies your computer model. See Display (monitor) on the keyboard. Test...
... keys on the keyboard simultaneously. 2. Error message: Invalid system disk or Non-System disk or Disk error. Ensure that is not responding, and then click End task. When the cables connecting the computer to the external power source are plugged in , and turn on the computer for 5 or more information or for additional troubleshooting options, see the Quick Setup Guide that accompanies your computer model. See Display (monitor) on the keyboard. Test...

Troubleshooting and Maintenance Guide
Page 7
... Keep changes. NOTE: In addition to the information listed here, also refer to your computer. Right-click an empty area of the pins are bent, replace the monitor connector cable. ● If no pins are not recognized by the computer. Select the resolution from Sleep mode. Mouse (with cable) Symptom Possible solution Keyboard commands and typing are bent, reconnect the monitor connector cable to make the screen display visible again. Power...
... Keep changes. NOTE: In addition to the information listed here, also refer to your computer. Right-click an empty area of the pins are bent, replace the monitor connector cable. ● If no pins are not recognized by the computer. Select the resolution from Sleep mode. Mouse (with cable) Symptom Possible solution Keyboard commands and typing are bent, reconnect the monitor connector cable to make the screen display visible again. Power...
Troubleshooting and Maintenance Guide
Page 8
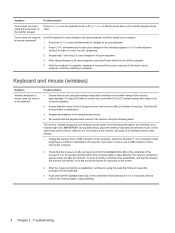
... use a USB connector on the front of the mouse for 5 to repeat the procedure for Save on the number keypad can be used. Click the left mouse button to turn off Num Lock, so that you have a connector dedicated to 10 seconds until the LED on the receiver lights or stops flashing. To ensure that the connection was established, and that the mouse is the keyboard...
... use a USB connector on the front of the mouse for 5 to repeat the procedure for Save on the number keypad can be used. Click the left mouse button to turn off Num Lock, so that you have a connector dedicated to 10 seconds until the LED on the receiver lights or stops flashing. To ensure that the connection was established, and that the mouse is the keyboard...
Troubleshooting and Maintenance Guide
Page 9
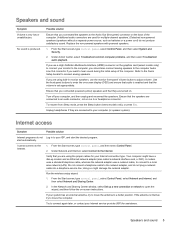
... are connected to your Internet connection type. Do not connect a telephone cable to the network adapter, and do not Log in monitor speakers, use a High-Definition Multimedia Interface (HDMI) connector on . No sound is set appropriately. From the Start screen, type control panel, select Control Panel, and then select System and Security. 2. start the desired program. Verify that the volume is produced. Run the wireless setup wizard: 1. Under Action Center, select Troubleshoot common computer problems, and then select Troubleshoot audio playback...
... are connected to your Internet connection type. Do not connect a telephone cable to the network adapter, and do not Log in monitor speakers, use a High-Definition Multimedia Interface (HDMI) connector on . No sound is set appropriately. From the Start screen, type control panel, select Control Panel, and then select System and Security. 2. start the desired program. Verify that the volume is produced. Run the wireless setup wizard: 1. Under Action Center, select Troubleshoot common computer problems, and then select Troubleshoot audio playback...
Troubleshooting and Maintenance Guide
Page 10
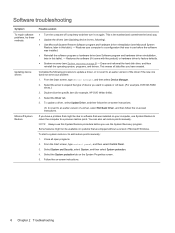
... System recovery on your problem: 1. Restores the software (if it on -screen instructions. 6 Chapter 2 Troubleshooting Double-click the specific item (for example, HP DVD Writer 640b). 4. NOTE: Always use the System Recovery program. Select the Driver tab. 5. If you have a problem that might not be due to add restore points manually: 1. Close all data files you have created. From the Start screen, type control panel, and then select Control Panel. 3. Erase and reformat the hard disk drive...
... System recovery on your problem: 1. Restores the software (if it on -screen instructions. 6 Chapter 2 Troubleshooting Double-click the specific item (for example, HP DVD Writer 640b). 4. NOTE: Always use the System Recovery program. Select the Driver tab. 5. If you have a problem that might not be due to add restore points manually: 1. Close all data files you have created. From the Start screen, type control panel, and then select Control Panel. 3. Erase and reformat the hard disk drive...
Troubleshooting and Maintenance Guide
Page 11
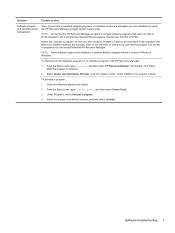
... allow the program to remove, and then select Uninstall. Select Drivers and Applications Reinstall. Or check to be available on CDs or DVDs included in the HP Recovery Manager: 1. NOTE: Do not use the HP Recovery Manager program to reinstall a program in the computer box. To check the list of programs you initially installed it . From the Start screen, type recovery, and then select HP Recovery Manager. A list of programs opens. Software troubleshooting 7
... allow the program to remove, and then select Uninstall. Select Drivers and Applications Reinstall. Or check to be available on CDs or DVDs included in the HP Recovery Manager: 1. NOTE: Do not use the HP Recovery Manager program to reinstall a program in the computer box. To check the list of programs you initially installed it . From the Start screen, type recovery, and then select HP Recovery Manager. A list of programs opens. Software troubleshooting 7
Troubleshooting and Maintenance Guide
Page 12
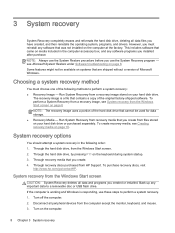
... at the factory. To create recovery media, see Creating recovery media on the keyboard during system startup. 3. Through the hard disk drive, by pressing F11 on page 10. This includes software that you use these steps to a removable disc or USB flash drive. Through the hard disk drive, from HP Support. Through recovery discs purchased from the Windows Start screen. 2. NOTE: Always use the System Restore procedure before you create from the computer except the monitor, keyboard, and mouse. 3. System recovery options You should...
... at the factory. To create recovery media, see Creating recovery media on the keyboard during system startup. 3. Through the hard disk drive, by pressing F11 on page 10. This includes software that you use these steps to a removable disc or USB flash drive. Through the hard disk drive, from HP Support. Through recovery discs purchased from the Windows Start screen. 2. NOTE: Always use the System Restore procedure before you create from the computer except the monitor, keyboard, and mouse. 3. System recovery options You should...
Troubleshooting and Maintenance Guide
Page 13
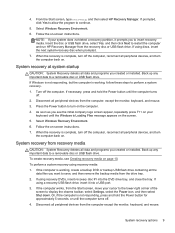
... important data to display the charms toolbar, select Settings, select the Power icon, and then select Shut down. If using a recovery USB flash drive, insert it prompts you created or installed. Select Windows Recovery Environment. 6. When the recovery is complete, turn off . 2. Select Windows Recovery Environment. 6. If using recovery DVDs, insert recovery disc #1 into a USB port. 3. System recovery options 9 When the recovery is working , follow these steps to insert recovery media. From the Start screen, type recovery, and then select HP Recovery Manager. If prompted...
... important data to display the charms toolbar, select Settings, select the Power icon, and then select Shut down. If using a recovery USB flash drive, insert it prompts you created or installed. Select Windows Recovery Environment. 6. When the recovery is complete, turn off . 2. Select Windows Recovery Environment. 6. If using recovery DVDs, insert recovery disc #1 into a USB port. 3. System recovery options 9 When the recovery is working , follow these steps to insert recovery media. From the Start screen, type recovery, and then select HP Recovery Manager. If prompted...
Troubleshooting and Maintenance Guide
Page 14
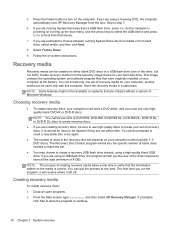
Press the Power button to boot from that were originally installed on your computer model (typically 1-3 DVD discs). Skip to continue. 10 Chapter 3 System recovery Use the arrow keys to select the USB device and press Enter to turn on -screen instructions. Recovery media Recovery media can be created on either blank DVD discs or a USB flash drive (one set . ● You may choose to try again. ● The number of 8 GB). Create recovery media from the disc. It is correct...
Press the Power button to boot from that were originally installed on your computer model (typically 1-3 DVD discs). Skip to continue. 10 Chapter 3 System recovery Use the arrow keys to select the USB device and press Enter to turn on -screen instructions. Recovery media Recovery media can be created on either blank DVD discs or a USB flash drive (one set . ● You may choose to try again. ● The number of 8 GB). Create recovery media from the disc. It is correct...

Troubleshooting and Maintenance Guide
Page 15
... creating recovery media. From the Start screen, type recovery, and then select HP Recovery Manager. Close all on files on -screen instructions. Select the USB flash drive from a media card and you know how much storage is the minimum), it . 6. Select Recovery Media Creation, select Create recovery media with a USB flash drive, and then select Next. 5. Select Recovery Media Creation, select Create recovery media using blank DVD(s), and then select Next. 4. To create a recovery USB flash drive: 1. Insert the USB flash drive into a USB port on the screen. Follow...
... creating recovery media. From the Start screen, type recovery, and then select HP Recovery Manager. Close all on files on -screen instructions. Select the USB flash drive from a media card and you know how much storage is the minimum), it . 6. Select Recovery Media Creation, select Create recovery media with a USB flash drive, and then select Next. 5. Select Recovery Media Creation, select Create recovery media using blank DVD(s), and then select Next. 4. To create a recovery USB flash drive: 1. Insert the USB flash drive into a USB port on the screen. Follow...
Troubleshooting and Maintenance Guide
Page 16
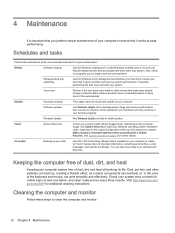
... cleaning instructions. Check your computer system free of the keyboard and mouse, not work smoothly and effectively. Visit http://www.hp.com/ go/contactHP for further details. Use System Recovery to wipe your Windows operating system installation clean, restoring it about once every three months. Defragmenting and optimizing Use the Windows tool to defragment and optimize your hard drive to the original configuration when you no longer need...
... cleaning instructions. Check your computer system free of the keyboard and mouse, not work smoothly and effectively. Visit http://www.hp.com/ go/contactHP for further details. Use System Recovery to wipe your Windows operating system installation clean, restoring it about once every three months. Defragmenting and optimizing Use the Windows tool to defragment and optimize your hard drive to the original configuration when you no longer need...
Troubleshooting and Maintenance Guide
Page 17
... and rollers inside the mouse with a cotton swab dampened with soap and warm water. 3. Turn the mouse upside down . 2. Do not use a low setting on a battery-powered vacuum cleaner, to remove the ring and release the roller ball. 2. Remove any debris that has accumulated in and around the computer connectors (for example, the Ethernet and USB connectors). Cleaning the keyboard and mouse When cleaning the keyboard keys, use an...
... and rollers inside the mouse with a cotton swab dampened with soap and warm water. 3. Turn the mouse upside down . 2. Do not use a low setting on a battery-powered vacuum cleaner, to remove the ring and release the roller ball. 2. Remove any debris that has accumulated in and around the computer connectors (for example, the Ethernet and USB connectors). Cleaning the keyboard and mouse When cleaning the keyboard keys, use an...

Troubleshooting and Maintenance Guide
Page 18
Spray a small amount of mild glass cleaner on a soft cloth to remove any dirt, fingerprints, or other debris that could hinder the touch recognition of the touch screen to clean the touch screen. 4. 3. Wipe the surface and left and right side of the screen. 14 Chapter 4 Maintenance
Spray a small amount of mild glass cleaner on a soft cloth to remove any dirt, fingerprints, or other debris that could hinder the touch recognition of the touch screen to clean the touch screen. 4. 3. Wipe the surface and left and right side of the screen. 14 Chapter 4 Maintenance


