Safety and Regulatory Information Desktops, Thin Clients, and Personal Workstations
Page 17
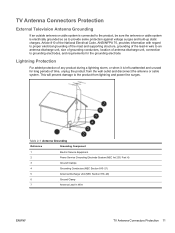
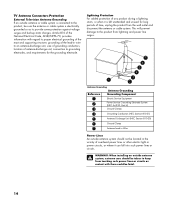
... Unit (NEC Section 810-20) 6 Ground Clamp 7 Antenna Lead-in wire to an antenna-discharge unit, size of grounding conductors, location of time, unplug the product from lightning and power line surges. TV Antenna Connectors Protection External Television Antenna Grounding If an outside antenna or cable system is connected to the product, be sure the antenna or...
... Unit (NEC Section 810-20) 6 Ground Clamp 7 Antenna Lead-in wire to an antenna-discharge unit, size of grounding conductors, location of time, unplug the product from lightning and power line surges. TV Antenna Connectors Protection External Television Antenna Grounding If an outside antenna or cable system is connected to the product, be sure the antenna or...

Getting Started Guide
Page 5
... updates 54 Guidelines for Installing Software and Hardware Devices 54 Transferring Files and Settings from an Old Computer to a New Computer 55 Using the Keyboard 57 Identifying Keyboard Features 57 Alphanumeric keys 57 Function keys 58 Edit keys...58 Arrow keys ...58 Numeric keys 59 Keyboard indicators 59 Special keyboard buttons 60 Identifying Special Keyboard Buttons 60 Customizing the keyboard buttons 62 Keyboard Shortcuts 63 Wireless Mouse and Keyboard Troubleshooting 64 Synchronizing a wireless mouse and keyboard 64 Using the Mouse 67 Using the Mouse Buttons...
... updates 54 Guidelines for Installing Software and Hardware Devices 54 Transferring Files and Settings from an Old Computer to a New Computer 55 Using the Keyboard 57 Identifying Keyboard Features 57 Alphanumeric keys 57 Function keys 58 Edit keys...58 Arrow keys ...58 Numeric keys 59 Keyboard indicators 59 Special keyboard buttons 60 Identifying Special Keyboard Buttons 60 Customizing the keyboard buttons 62 Keyboard Shortcuts 63 Wireless Mouse and Keyboard Troubleshooting 64 Synchronizing a wireless mouse and keyboard 64 Using the Mouse 67 Using the Mouse Buttons...
Getting Started Guide
Page 25
Checking the wireless LAN device installation To set up your wireless antenna may include the term wireless, wireless LAN, or 802.11. Your WLAN device should be listed here. Go to open the Device Manager window. 3 Click Network adapters. To connect the wireless LAN antenna: 1 Screw the wireless LAN antenna cable into the wireless LAN connector on the back of your wireless network, verify that the integrated WLAN device is installed on the computer correctly: 1 Click the Windows Start Button on the computer or...
Checking the wireless LAN device installation To set up your wireless antenna may include the term wireless, wireless LAN, or 802.11. Your WLAN device should be listed here. Go to open the Device Manager window. 3 Click Network adapters. To connect the wireless LAN antenna: 1 Screw the wireless LAN antenna cable into the wireless LAN connector on the back of your wireless network, verify that the integrated WLAN device is installed on the computer correctly: 1 Click the Windows Start Button on the computer or...
Getting Started Guide
Page 59
Setting Up User Accounts User accounts enable you can set the privileges for each user is allowed to access. Windows Vista provides three types of the computer. Guest: Is allowed to change account types for the First Time 49 Creating multiple user accounts on the computer, and install software and drivers that do not affect other users, change passwords, change system settings that are compatible with Windows Vista. Is not allowed to use most software and...
Setting Up User Accounts User accounts enable you can set the privileges for each user is allowed to access. Windows Vista provides three types of the computer. Guest: Is allowed to change account types for the First Time 49 Creating multiple user accounts on the computer, and install software and drivers that do not affect other users, change passwords, change system settings that are compatible with Windows Vista. Is not allowed to use most software and...
Getting Started Guide
Page 63
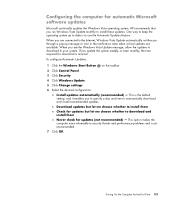
... updates the Windows Vista operating system. To configure Automatic Updates: 1 Click the Windows Start Button on the taskbar. 2 Click Control Panel. 3 Click Security. 4 Click Windows Update. 5 Click Change settings. 6 Select the desired configuration: Install updates automatically (recommended) - When you through a pop-up to date is the default setting, and it enables you see the Windows Vista Update message, allow the updates to download to automatically download and install recommended updates. This option makes the computer more vulnerable to the Internet, Windows Vista...
... updates the Windows Vista operating system. To configure Automatic Updates: 1 Click the Windows Start Button on the taskbar. 2 Click Control Panel. 3 Click Security. 4 Click Windows Update. 5 Click Change settings. 6 Select the desired configuration: Install updates automatically (recommended) - When you through a pop-up to date is the default setting, and it enables you see the Windows Vista Update message, allow the updates to download to automatically download and install recommended updates. This option makes the computer more vulnerable to the Internet, Windows Vista...
Getting Started Guide
Page 86
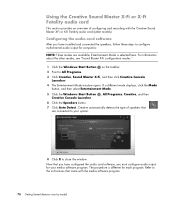
... Creative Console Launcher. 4 The Entertainment Mode window opens. Now that are available; Using the Creative Sound Blaster X-Fi or X-Fi Fatality audio card This section provides an overview of speakers that you have configured the audio card software, you have installed and connected the speakers, follow these steps to close the window. If a different mode displays, click the Mode button, and then select Entertainment Mode. 5 Click the Windows Start Button , All Programs, Creative, and...
... Creative Console Launcher. 4 The Entertainment Mode window opens. Now that are available; Using the Creative Sound Blaster X-Fi or X-Fi Fatality audio card This section provides an overview of speakers that you have configured the audio card software, you have installed and connected the speakers, follow these steps to close the window. If a different mode displays, click the Mode button, and then select Entertainment Mode. 5 Click the Windows Start Button , All Programs, Creative, and...

Getting Started Guide
Page 177
Then, use the arrow keys on the keyboard or the arrow buttons on a regularly scheduled basis. Program Library Options to allow programs in the Program Library to control the media experience and access media information in Windows Media Center. Windows Media Center Setup to get media information about CDs, DVDs, and movies from the Internet. Automatic Downloads Options to configure an Internet connection and speakers, run Windows Media Center setup again, and configure the TV display or monitor. Pictures to set slide show settings. Radio to...
Then, use the arrow keys on the keyboard or the arrow buttons on a regularly scheduled basis. Program Library Options to allow programs in the Program Library to control the media experience and access media information in Windows Media Center. Windows Media Center Setup to get media information about CDs, DVDs, and movies from the Internet. Automatic Downloads Options to configure an Internet connection and speakers, run Windows Media Center setup again, and configure the TV display or monitor. Pictures to set slide show settings. Radio to...

Getting Started Guide
Page 218
... panel 7 Composite Video In 6 computer 2 FM In 6 headphones 4 keyboard 4 Microphone In 4 modem 7 monitor 7 mouse 4 printer 5 S-video In 5 TV/Cable Ant 6 USB 4, 5 country/region codes 149 Creative Sound Blaster X-Fi Sound Card audio modes 77 configuring 76 cursor speed 70 customizing keyboard buttons 62 CyberLink LabelPrint creating a LightScribe label 176 features 104 CyberLink Power2Go copying a disc 174 erasing discs 170 features 104 CyberLink PowerDirector creating video disc 173 D desktop switching from Windows Media Center 164 devices connecting 10 digital camera connecting...
... panel 7 Composite Video In 6 computer 2 FM In 6 headphones 4 keyboard 4 Microphone In 4 modem 7 monitor 7 mouse 4 printer 5 S-video In 5 TV/Cable Ant 6 USB 4, 5 country/region codes 149 Creative Sound Blaster X-Fi Sound Card audio modes 77 configuring 76 cursor speed 70 customizing keyboard buttons 62 CyberLink LabelPrint creating a LightScribe label 176 features 104 CyberLink Power2Go copying a disc 174 erasing discs 170 features 104 CyberLink PowerDirector creating video disc 173 D desktop switching from Windows Media Center 164 devices connecting 10 digital camera connecting...
Getting Started Guide
Page 219
... HP Pocket Media Drive 125 HP Total Care Advisor 41 I IBM Microdrive 122 Internet security 52, 100 K keyboard connector 4 customizing buttons 62 shortcuts 63 types of buttons 57 using 57 L LAN (local area network) 12 antenna 15 checking wireless LAN device 15 connecting Ethernet LAN 5 connecting wireless LAN device 14 setting up 13 using Local Area Network 12 LightScribe, creating a LightScribe disc label 175 local area network (LAN) 12 M magicSpot 198 manuals storing 10 memory card reader 179 card types 119 in-use light 123 troubleshooting 124 using 119 memory card...
... HP Pocket Media Drive 125 HP Total Care Advisor 41 I IBM Microdrive 122 Internet security 52, 100 K keyboard connector 4 customizing buttons 62 shortcuts 63 types of buttons 57 using 57 L LAN (local area network) 12 antenna 15 checking wireless LAN device 15 connecting Ethernet LAN 5 connecting wireless LAN device 14 setting up 13 using Local Area Network 12 LightScribe, creating a LightScribe disc label 175 local area network (LAN) 12 M magicSpot 198 manuals storing 10 memory card reader 179 card types 119 in-use light 123 troubleshooting 124 using 119 memory card...
PC Troubleshooting
Page 3
... Problems 5 Audio ...5 CD and DVD Drives 7 Video...9 Display (Monitor 10 Hard Disk Drive...11 Hardware Installation 11 Internet Access ...13 Keyboard and Mouse 15 Power ...18 Performance ...19 Bluetooth Wireless Devices 20 Miscellaneous ...21 Repairing Software Problems 22 Software Repair Overview 22 Restarting Your Computer 22 Turning Off Your Computer 22 Updating Drivers 22 Microsoft System Restore 23 Software Program and Hardware Driver Reinstallation 23 System Recovery 24 Creating Recovery Discs 24 System Recovery Options 25 Starting system recovery from the hard disk drive...
... Problems 5 Audio ...5 CD and DVD Drives 7 Video...9 Display (Monitor 10 Hard Disk Drive...11 Hardware Installation 11 Internet Access ...13 Keyboard and Mouse 15 Power ...18 Performance ...19 Bluetooth Wireless Devices 20 Miscellaneous ...21 Repairing Software Problems 22 Software Repair Overview 22 Restarting Your Computer 22 Turning Off Your Computer 22 Updating Drivers 22 Microsoft System Restore 23 Software Program and Hardware Driver Reinstallation 23 System Recovery 24 Creating Recovery Discs 24 System Recovery Options 25 Starting system recovery from the hard disk drive...
PC Troubleshooting
Page 6
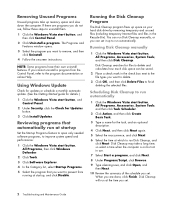
... system speed and performance: 1 Click the Windows Vista start button, and then click Control Panel. 2 Click Uninstall a program. Running the Disk Cleanup Program The Disk Cleanup program frees up memory space and slow down the computer. The Programs and Features window opens. 3 Select the program you can set . 2 Troubleshooting and Maintenance Guide Reviewing programs that you do not use . 7 Select Start a program, and click Next. 8 Under Program/Script, click Browse. 9 Type cleanmgr...
... system speed and performance: 1 Click the Windows Vista start button, and then click Control Panel. 2 Click Uninstall a program. Running the Disk Cleanup Program The Disk Cleanup program frees up memory space and slow down the computer. The Programs and Features window opens. 3 Select the program you can set . 2 Troubleshooting and Maintenance Guide Reviewing programs that you do not use . 7 Select Start a program, and click Next. 8 Under Program/Script, click Browse. 9 Type cleanmgr...
PC Troubleshooting
Page 9
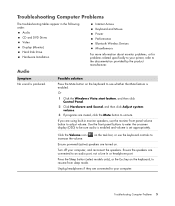
... DVD Drives Video Display (Monitor) Hard Disk Drive Hardware Installation Internet Access Keyboard and Mouse Power Performance Bluetooth Wireless Devices Miscellaneous For more information about monitor problems, or for problems related specifically to your computer. Use the front panel buttons to enter the onscreen display (OSD) to be sure audio is enabled and volume is produced. Troubleshooting Computer Problems 5 Ensure the speakers are muted, click the Mute button to unmute. Unplug headphones if they are turned on the task bar, or use the monitor front panel...
... DVD Drives Video Display (Monitor) Hard Disk Drive Hardware Installation Internet Access Keyboard and Mouse Power Performance Bluetooth Wireless Devices Miscellaneous For more information about monitor problems, or for problems related specifically to your computer. Use the front panel buttons to enter the onscreen display (OSD) to be sure audio is enabled and volume is produced. Troubleshooting Computer Problems 5 Ensure the speakers are muted, click the Mute button to unmute. Unplug headphones if they are turned on the task bar, or use the monitor front panel...
PC Troubleshooting
Page 11
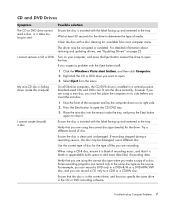
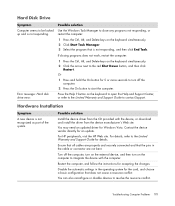
... fit into the recess inside the computer. Turn on page 22. however if you are using the correct disc type (media) for the drive. use a different disc. CD and DVD Drives Symptom Possible solution The CD or DVD drive cannot read a disc, or it takes too long to start button, and then click Computer. 2 Right-click the CD or DVD drive you want to open. 3 Select Eject from most...
... fit into the recess inside the computer. Turn on page 22. however if you are using the correct disc type (media) for the drive. use a different disc. CD and DVD Drives Symptom Possible solution The CD or DVD drive cannot read a disc, or it takes too long to start button, and then click Computer. 2 Right-click the CD or DVD drive you want to open. 3 Select Eject from most...
PC Troubleshooting
Page 14
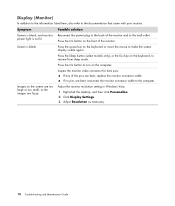
... the monitor. Press the Sleep button (select models only), or the Esc key on the computer. If no pins are fuzzy. Adjust the monitor resolution setting in Windows Vista: 1 Right-click the desktop, and then click Personalize. 2 Click Display Settings. 3 Adjust Resolution as necessary. 10 Troubleshooting and Maintenance Guide Press the On button on the screen are too large or too small, or the images are bent, reconnect the monitor connector cable...
... the monitor. Press the Sleep button (select models only), or the Esc key on the computer. If no pins are fuzzy. Adjust the monitor resolution setting in Windows Vista: 1 Right-click the desktop, and then click Personalize. 2 Click Display Settings. 3 Adjust Resolution as necessary. 10 Troubleshooting and Maintenance Guide Press the On button on the screen are too large or too small, or the images are bent, reconnect the monitor connector cable...
PC Troubleshooting
Page 15
... hold the On button for Windows Vista. A Hardware Installation Symptom A new device is not responding, and then click End Task. restart the computer: 1 Press the Ctrl, Alt, and Delete keys on the external device, and then turn off the computer, turn on the keyboard simultaneously. 2 Click Start Task Manager. 3 Select the program that the pins in the operating system for accepting the changes. You may need an updated driver for 5 or...
... hold the On button for Windows Vista. A Hardware Installation Symptom A new device is not responding, and then click End Task. restart the computer: 1 Press the Ctrl, Alt, and Delete keys on the external device, and then turn off the computer, turn on the keyboard simultaneously. 2 Click Start Task Manager. 3 Select the program that the pins in the operating system for accepting the changes. You may need an updated driver for 5 or...
PC Troubleshooting
Page 17
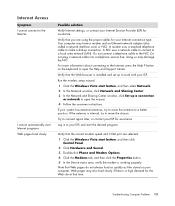
.... Troubleshooting Computer Problems 13 Possible solution Verify Internet settings, or contact your Internet connection type. Web pages may also load slowly if there is installed and set up to move the chassis. Verify that you are using the proper cables for the Web site at that the correct modem speed and COM port are selected: 1 Click the Windows Vista start button, and then click Control Panel. 2 Click Hardware and Sound. 3 Double...
.... Troubleshooting Computer Problems 13 Possible solution Verify Internet settings, or contact your Internet connection type. Web pages may also load slowly if there is installed and set up to move the chassis. Verify that you are using the proper cables for the Web site at that the correct modem speed and COM port are selected: 1 Click the Windows Vista start button, and then click Control Panel. 2 Click Hardware and Sound. 3 Double...
PC Troubleshooting
Page 25
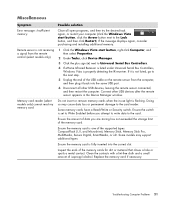
Close all other USB devices after the remote sensor appears in -use light is not listed, go to the Lock button, and then click Restart). Ensure the amount of the USB cable on the remote sensor from the remote control (select models only). 1 Click the Windows Vista start button, right-click Computer, and then select Properties. 2 Under Tasks, click Device Manager. 3 Click the plus sign (+) next to the card reader. Clean the...
Close all other USB devices after the remote sensor appears in -use light is not listed, go to the Lock button, and then click Restart). Ensure the amount of the USB cable on the remote sensor from the remote control (select models only). 1 Click the Windows Vista start button, right-click Computer, and then select Properties. 2 Under Tasks, click Device Manager. 3 Click the plus sign (+) next to the card reader. Clean the...
PC Troubleshooting
Page 26
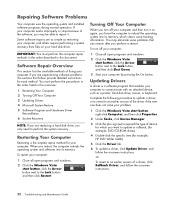
... open programs and windows. 2 Click the Windows Vista start button, right-click Computer, and then click Properties. 2 Under Tasks, click Device Manager. 3 Click the plus sign (+) to reload the operating system into its memory, which you perform a restart. To turn it . Repairing Software Problems Your computer uses the operating system and installed software programs during normal operation. Complete the following procedure to update a driver, or to revert to perform the system recovery...
... open programs and windows. 2 Click the Windows Vista start button, right-click Computer, and then click Properties. 2 Under Tasks, click Device Manager. 3 Click the plus sign (+) to reload the operating system into its memory, which you perform a restart. To turn it . Repairing Software Problems Your computer uses the operating system and installed software programs during normal operation. Complete the following procedure to update a driver, or to revert to perform the system recovery...
PC Troubleshooting
Page 31
... onscreen setup instructions, and then click Start in the last screen to turn the computer back on the computer. The system recovery software might have already installed some of the software that originally came in the box with your hard drive. 6 Choose to run from the computer, except the monitor, keyboard, and mouse. 5 Press the On button to display the Windows desktop. 2 Configure your Internet connection. 3 Turn off your files, and you installed updates to...
... onscreen setup instructions, and then click Start in the last screen to turn the computer back on the computer. The system recovery software might have already installed some of the software that originally came in the box with your hard drive. 6 Choose to run from the computer, except the monitor, keyboard, and mouse. 5 Press the On button to display the Windows desktop. 2 Configure your Internet connection. 3 Turn off your files, and you installed updates to...
Warranty
Page 14
.... 7 6 5 4 3 1 2 Antenna Grounding Antenna Grounding Reference Grounding Component 1 Electric Service Equipment 2 Power Service Grounding Electrode System (NEC Art 250, Part H) 3 Ground Clamps 4 Grounding Conductors (NEC Section 810-21) 5 Antenna Discharge Unit (NEC Section 810-20) 6 Ground Clamp 7 Antenna Lead in Wire Power Lines An outside antenna or cable system is connected to the product, be sure the antenna or...
.... 7 6 5 4 3 1 2 Antenna Grounding Antenna Grounding Reference Grounding Component 1 Electric Service Equipment 2 Power Service Grounding Electrode System (NEC Art 250, Part H) 3 Ground Clamps 4 Grounding Conductors (NEC Section 810-21) 5 Antenna Discharge Unit (NEC Section 810-20) 6 Ground Clamp 7 Antenna Lead in Wire Power Lines An outside antenna or cable system is connected to the product, be sure the antenna or...


