

End User License Agreement
Page 2
...of a conflict between such terms, the other applicable laws and international treaty provisions. Prior to another end user. You shall not remove any other terms along with /for in the form of such license. Recovery Solution. In case of the Software Product may not ... of a hard disk drive-based solution, an external media-based recovery solution (e.g. The use a Software Product identified as a consignment. The transfer may only be an indirect transfer, such as an upgrade, you fail to the original Software Product provided by HP unless HP provides other form...
...of a conflict between such terms, the other applicable laws and international treaty provisions. Prior to another end user. You shall not remove any other terms along with /for in the form of such license. Recovery Solution. In case of the Software Product may not ... of a hard disk drive-based solution, an external media-based recovery solution (e.g. The use a Software Product identified as a consignment. The transfer may only be an indirect transfer, such as an upgrade, you fail to the original Software Product provided by HP unless HP provides other form...
HP OmniBook Notebook PC XE3 Series - Reference Guide
Page 3
...Ownership. Customer may make copies or adaptations of the software (a) for any copyright infringement or violation of this HP Software Product License Agreement shall govern the use of any operating system software by Microsoft is copyrighted and protected under...hard disk drive and destroy the Recovery CD, or return the complete computer and software for restoring the hard disk of the HP computer with the terms of the License Agreement, you must now either remove the software from your acceptance of the License Agreement. HP Software Product License Agreement Your notebook PC...
...Ownership. Customer may make copies or adaptations of the software (a) for any copyright infringement or violation of this HP Software Product License Agreement shall govern the use of any operating system software by Microsoft is copyrighted and protected under...hard disk drive and destroy the Recovery CD, or return the complete computer and software for restoring the hard disk of the HP computer with the terms of the License Agreement, you must now either remove the software from your acceptance of the License Agreement. HP Software Product License Agreement Your notebook PC...
HP OmniBook Notebook PC XE3 Series - Reference Guide
Page 7
...and Support ...85 Hewlett-Packard Limited Warranty Statement 86 Getting Support for Your HP Notebook PC 88 To use the Reference Guide 88 To get help from the HP notebook website 88 To call the HP Customer Care Center 89 Obtaining Repair Service 92 To receive warranty repair service...the factory installation of your hard disk 112 To replace a damaged Recovery CD 113 To update the HP notebook BIOS 113 To recover an application 114 Removing and Reinstalling the Hard Disk Drive 115 If you decide to remove the hard disk drive 115 To install the hard disk drive again 117 Reference Guide 7
...and Support ...85 Hewlett-Packard Limited Warranty Statement 86 Getting Support for Your HP Notebook PC 88 To use the Reference Guide 88 To get help from the HP notebook website 88 To call the HP Customer Care Center 89 Obtaining Repair Service 92 To receive warranty repair service...the factory installation of your hard disk 112 To replace a damaged Recovery CD 113 To update the HP notebook BIOS 113 To recover an application 114 Removing and Reinstalling the Hard Disk Drive 115 If you decide to remove the hard disk drive 115 To install the hard disk drive again 117 Reference Guide 7
HP OmniBook Notebook PC XE3 Series - Reference Guide
Page 82
...hard disk drive and erase all data from your hard disk before you want to continue. 7. Back up data. 82 Reference Guide Select CD-ROM/DVD Drive... 1. Insert the Recovery CD in the CD-ROM (or DVD) drive. (If your system came with two Recovery CDs, you 'll ... are prompted to the computer. 4. Choose Continue. 10. After the hard disk drive is formatted, you may be prompted to create a hibernate partition without recovering... 5. Follow the onscreen instructions for setting up all data from your computer, remove the Recovery CD and press Ctrl+Alt+Delete. 12. If you begin . ...
...hard disk drive and erase all data from your hard disk before you want to continue. 7. Back up data. 82 Reference Guide Select CD-ROM/DVD Drive... 1. Insert the Recovery CD in the CD-ROM (or DVD) drive. (If your system came with two Recovery CDs, you 'll ... are prompted to the computer. 4. Choose Continue. 10. After the hard disk drive is formatted, you may be prompted to create a hibernate partition without recovering... 5. Follow the onscreen instructions for setting up all data from your computer, remove the Recovery CD and press Ctrl+Alt+Delete. 12. If you begin . ...
HP OmniBook Notebook PC XE3 Series - Reference Guide
Page 92
... period, contact the appropriate Customer Care Center. Check "To call the HP Customer Care Center" on page 115. 92 Reference Guide Hewlett-Packard cannot guarantee the return of shipping, handling, duties, taxes, freight, or fees to remove the hard disk drive for service: • PC cards • AC adapter and power cord • CDs in...
... period, contact the appropriate Customer Care Center. Check "To call the HP Customer Care Center" on page 115. 92 Reference Guide Hewlett-Packard cannot guarantee the return of shipping, handling, duties, taxes, freight, or fees to remove the hard disk drive for service: • PC cards • AC adapter and power cord • CDs in...

HP OmniBook Notebook PC XE3 Series - Reference Guide
Page 97
...the disc data. You may have a different format (standard or widescreen). If you are sold. Click OK. Hard disk drive problems If the computer's hard drive doesn't spin • Make sure the computer has power. Reference Guide 97 In the widescreen format, black ...bands appear at the top and bottom of the computer. See "Testing Hardware Operation." Click Start, Shut Down, Restart. 3. To view the standard format, flip the disc over and play the other side. Remove...
...the disc data. You may have a different format (standard or widescreen). If you are sold. Click OK. Hard disk drive problems If the computer's hard drive doesn't spin • Make sure the computer has power. Reference Guide 97 In the widescreen format, black ...bands appear at the top and bottom of the computer. See "Testing Hardware Operation." Click Start, Shut Down, Restart. 3. To view the standard format, flip the disc over and play the other side. Remove...
HP OmniBook Notebook PC XE3 Series - Reference Guide
Page 108
...Down, Restart. 2. Exit the BIOS Setup utility. 108 Reference Guide When you still get no response, call HP for first boot device. 5. Select Floppy Drive for assistance. Solving Problems with Your Computer Troubleshooting Techniques Startup problems If the computer doesn't respond at turn-on...remove any PC cards, and undock the computer-then plug in the BIOS Setup utility. 1. If the computer doesn't boot from battery power • Make sure the battery is properly inserted and fully charged. • Check battery contacts. • If another battery is (1) Floppy Drive, (2) Hard Drive...
...Down, Restart. 2. Exit the BIOS Setup utility. 108 Reference Guide When you still get no response, call HP for first boot device. 5. Select Floppy Drive for assistance. Solving Problems with Your Computer Troubleshooting Techniques Startup problems If the computer doesn't respond at turn-on...remove any PC cards, and undock the computer-then plug in the BIOS Setup utility. 1. If the computer doesn't boot from battery power • Make sure the battery is properly inserted and fully charged. • Check battery contacts. • If another battery is (1) Floppy Drive, (2) Hard Drive...
HP OmniBook Notebook PC XE3 Series - Reference Guide
Page 114
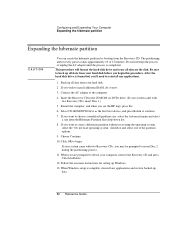
...remove an application from your hard disk and later decide you want it by using the appropriate CD-ROM. A few factory-installed applications do not use the Recovery CD. 114 Reference Guide Therefore, to reinstall specific applications, do not have installation programs on your HP notebook PC, but the recovery program erases the hard drive in c:\hp...\programs. Each application has its own folder that were factory-installed on your system are included on the hard drive. The Recovery CD ...
...remove an application from your hard disk and later decide you want it by using the appropriate CD-ROM. A few factory-installed applications do not use the Recovery CD. 114 Reference Guide Therefore, to reinstall specific applications, do not have installation programs on your HP notebook PC, but the recovery program erases the hard drive in c:\hp...\programs. Each application has its own folder that were factory-installed on your system are included on the hard drive. The Recovery CD ...

HP OmniBook Notebook PC XE3 Series - Reference Guide
Page 115
... plastic cover above the keyboard at the hinges, using a flathead screwdriver, and remove it . Reference Guide 115 If you decide to remove the hard disk drive 1. Carefully pry up your data and allow a qualified service person to do need to remove it, HP recommends that it is located in the middle of the computer. Shut down...
... plastic cover above the keyboard at the hinges, using a flathead screwdriver, and remove it . Reference Guide 115 If you decide to remove the hard disk drive 1. Carefully pry up your data and allow a qualified service person to do need to remove it, HP recommends that it is located in the middle of the computer. Shut down...

HP OmniBook Notebook PC XE3 Series - Reference Guide
Page 116
...the connector and lift it out of the computer. 6. Unscrew the four Phillips screws at the top of the hard disk drive case. (They remain attached to the keyboard.) WARNING Handle the hard drive by the strap, detach it upside down. (Keep the keyboard cable attached.) 7. Slide the keyboard backward to ...it forward and turn it from the sides of the keyboard. (They remain attached to the case.) 8. Tilt up the rear of the hard disk drive case and, pulling gently by its edges only, since static electricity can permanently damage computer parts. Solving Problems with Your Computer...
...the connector and lift it out of the computer. 6. Unscrew the four Phillips screws at the top of the hard disk drive case. (They remain attached to the keyboard.) WARNING Handle the hard drive by the strap, detach it upside down. (Keep the keyboard cable attached.) 7. Slide the keyboard backward to ...it forward and turn it from the sides of the keyboard. (They remain attached to the case.) 8. Tilt up the rear of the hard disk drive case and, pulling gently by its edges only, since static electricity can permanently damage computer parts. Solving Problems with Your Computer...
HP OmniBook Notebook PC XE3 Series - Reference Guide
Page 151
using, 112 registering computer, 24 regulatory information, 145 removing hard disk drive, 115 removing PC card, 63 repair service, 92 shipment, 92 resetting computer, 26, 29, 33 resume, 19 resume, troubleshooting, 109 S safety battery, 143 laser, 144 LED, 144 power, ... display, 95 DVD drive, 96 hard disk drive, 97 heat, 98 keyboard, 98 memory, 99 modem, 100 mouse, 98 One-Touch buttons, 101 parallel port, 106 PC card, 102 performance, 103 port replicator, 104 power, 104 printing, 106 resume, 109 serial port, 106 standby, 109 startup, 108 touch pad, 98 USB port, ...
using, 112 registering computer, 24 regulatory information, 145 removing hard disk drive, 115 removing PC card, 63 repair service, 92 shipment, 92 resetting computer, 26, 29, 33 resume, 19 resume, troubleshooting, 109 S safety battery, 143 laser, 144 LED, 144 power, ... display, 95 DVD drive, 96 hard disk drive, 97 heat, 98 keyboard, 98 memory, 99 modem, 100 mouse, 98 One-Touch buttons, 101 parallel port, 106 PC card, 102 performance, 103 port replicator, 104 power, 104 printing, 106 resume, 109 serial port, 106 standby, 109 startup, 108 touch pad, 98 USB port, ...
HP OmniBook XE3 - Setup Guide
Page 49
... adapter, remove any PC cards, and undock the computer-then plug in the BIOS Setup utility. 1. Select Floppy Drive for assistance. Click Start, Shut Down, Restart. 2. If the computer doesn't boot from the floppy disk drive • Check the boot order in the AC adapter and try resetting. • If you see the HP logo...
... adapter, remove any PC cards, and undock the computer-then plug in the BIOS Setup utility. 1. Select Floppy Drive for assistance. Click Start, Shut Down, Restart. 2. If the computer doesn't boot from the floppy disk drive • Check the boot order in the AC adapter and try resetting. • If you see the HP logo...

HP OmniBook XE3 - Setup Guide
Page 53
...remove it, HP recommends that it . If you do it. Startup Guide 53 If you back up the plastic cover above the keyboard at the hinges, using a flathead screwdriver, and remove it is out of the way. Shut down the computer, unplug the AC adapter, and remove...the computer has just been running. 4. Solving Problems with Your Computer Removing and Reinstalling the Hard Disk Drive Removing and Reinstalling the Hard Disk Drive Removing the hard disk drive is not a simple task since, to remove the drive yourself, follow these instructions carefully. CAUTION 3. Carefully pry up your ...
...remove it, HP recommends that it . If you do it. Startup Guide 53 If you back up the plastic cover above the keyboard at the hinges, using a flathead screwdriver, and remove it is out of the way. Shut down the computer, unplug the AC adapter, and remove...the computer has just been running. 4. Solving Problems with Your Computer Removing and Reinstalling the Hard Disk Drive Removing and Reinstalling the Hard Disk Drive Removing the hard disk drive is not a simple task since, to remove the drive yourself, follow these instructions carefully. CAUTION 3. Carefully pry up your ...

HP OmniBook XE3 - Setup Guide
Page 54
...Your Computer Removing and Reinstalling the Hard Disk Drive 5. Unscrew the four Phillips screws from the connector and lift it upside down. (Keep the keyboard cable attached.) 7. Unscrew the four Phillips screws at the top of the keyboard. (They remain attached to the keyboard.) WARNING Handle the hard drive by ...touching the metal shielding around the connectors on the rear of the hard disk drive case. (They remain attached to detach it, then tilt it forward and turn it out ...
...Your Computer Removing and Reinstalling the Hard Disk Drive 5. Unscrew the four Phillips screws from the connector and lift it upside down. (Keep the keyboard cable attached.) 7. Unscrew the four Phillips screws at the top of the keyboard. (They remain attached to the keyboard.) WARNING Handle the hard drive by ...touching the metal shielding around the connectors on the rear of the hard disk drive case. (They remain attached to detach it, then tilt it forward and turn it out ...

HP OmniBook XE3 - Setup Guide
Page 68
Q Quick Start sheet, 9 R RAM, installing, 34 rear and left view, 12 recovering hard disk, 52 software, 52 Recovery CD, using, 52 registering computer, 18 regulatory information, 62 removing hard disk drive, 53 repair service, 43 shipment, 43 resetting computer, 20 resume, troubleshooting, 50 S safety battery, 60 laser, 61 LED, 61 power, 59 voltage, 59 scroll...
Q Quick Start sheet, 9 R RAM, installing, 34 rear and left view, 12 recovering hard disk, 52 software, 52 Recovery CD, using, 52 registering computer, 18 regulatory information, 62 removing hard disk drive, 53 repair service, 43 shipment, 43 resetting computer, 20 resume, troubleshooting, 50 S safety battery, 60 laser, 61 LED, 61 power, 59 voltage, 59 scroll...

HP OmniBook XE3 Series - Corporate Evaluator's Guide
Page 94
.... Enter the Product Key, then click Next. Click Yes to your country or region and click Next. 11. Select your hard drive by typing the following commands: C: MD \WINDOWS MD \WINDOWS\OPTIONS MD \WINDOWS\OPTIONS\CABS COPY X:\WIN98\*.* C:\WINDOWS\OPTIONS\CABS 15. From the ... /IS 2. Select "Install The Most Common Components (recommended)", then click Next. 10. Using Windows 98 Installing Retail Windows 98 Second Edition 12. Remove the Windows 98 Second Edition CD-ROM and the support utility disk. When prompted, select "Other Directory" and click Next. 5. Choose "Portable" on...
.... Enter the Product Key, then click Next. Click Yes to your country or region and click Next. 11. Select your hard drive by typing the following commands: C: MD \WINDOWS MD \WINDOWS\OPTIONS MD \WINDOWS\OPTIONS\CABS COPY X:\WIN98\*.* C:\WINDOWS\OPTIONS\CABS 15. From the ... /IS 2. Select "Install The Most Common Components (recommended)", then click Next. 10. Using Windows 98 Installing Retail Windows 98 Second Edition 12. Remove the Windows 98 Second Edition CD-ROM and the support utility disk. When prompted, select "Other Directory" and click Next. 5. Choose "Portable" on...
HP OmniBook XE3 Series - Corporate Evaluator's Guide
Page 120
... update floppy disk. To recover an application If you remove an application from your hard drive in the BIOS Setup utility, and it . 3. When the process is docked, undock it erases any PC cards. 2. CAUTION Troubleshooting Your Computer Recovering and Reinstalling ... the notebook. Restart the computer. 6. Follow the onscreen instructions. If the notebook is completed, remove the BIOS update disk from HP Customer Care. Connect the AC adapter to enhance the capabilities of the HP notebook website at www.hp.com/notebooks. Updates will be damaged. Remove any BIOS...
... update floppy disk. To recover an application If you remove an application from your hard drive in the BIOS Setup utility, and it . 3. When the process is docked, undock it erases any PC cards. 2. CAUTION Troubleshooting Your Computer Recovering and Reinstalling ... the notebook. Restart the computer. 6. Follow the onscreen instructions. If the notebook is completed, remove the BIOS update disk from HP Customer Care. Connect the AC adapter to enhance the capabilities of the HP notebook website at www.hp.com/notebooks. Updates will be damaged. Remove any BIOS...

HP OmniBook XE3 Series - Corporate Evaluator's Guide
Page 122
... to remove it, HP recommends that it . 122 Corporate Evaluator's Guide Carefully pry up your data and allow a qualified service person to do need to remove the drive yourself, follow these instructions carefully. Troubleshooting Your Computer Removing and Reinstalling the Hard Disk Drive Removing and Reinstalling the Hard Disk Drive Removing the hard disk drive is not a simple task since, to remove the hard disk drive...
... to remove it, HP recommends that it . 122 Corporate Evaluator's Guide Carefully pry up your data and allow a qualified service person to do need to remove the drive yourself, follow these instructions carefully. Troubleshooting Your Computer Removing and Reinstalling the Hard Disk Drive Removing and Reinstalling the Hard Disk Drive Removing the hard disk drive is not a simple task since, to remove the hard disk drive...

HP OmniBook XE3 Series - Corporate Evaluator's Guide
Page 123
... since static electricity can permanently damage computer parts. Troubleshooting Your Computer Removing and Reinstalling the Hard Disk Drive 5. Before touching the interior of the hard disk drive case and, pulling gently by the strap, detach it from the sides of the hard disk drive case. (They remain attached to detach it, then tilt it ... keyboard cable attached.) 7. Unscrew the four Phillips screws at the top of the keyboard. (They remain attached to the keyboard.) WARNING Handle the hard drive by touching the metal shielding around the connectors on the rear of the computer.
... since static electricity can permanently damage computer parts. Troubleshooting Your Computer Removing and Reinstalling the Hard Disk Drive 5. Before touching the interior of the hard disk drive case and, pulling gently by the strap, detach it from the sides of the hard disk drive case. (They remain attached to detach it, then tilt it ... keyboard cable attached.) 7. Unscrew the four Phillips screws at the top of the keyboard. (They remain attached to the keyboard.) WARNING Handle the hard drive by touching the metal shielding around the connectors on the rear of the computer.

HP OmniBook XE3 Series - Corporate Evaluator's Guide
Page 164
Regulatory Information disconnecting from, 74 ports, 67 troubleshooting, 122 ports notebook, 66 port replicator, 67 power connecting AC, 22 processor speed, 51 resetting, 27 saving, 50 standby, 47 status light, 18 switch location, 14 ... view, 16 receiving faxes (Windows 2000), 61 receiving faxes (Windows 98, 59 recovering applications, 132 hard disk, 130 software, 130 Recovery CD replacing, 131 using, 130 registering computer, 25 regulatory information, 167 removing hard disk drive, 133 removing PC card, 63 repair service, 141 shipment, 141 repair service, 112 resetting computer, 27 resume, 21...
Regulatory Information disconnecting from, 74 ports, 67 troubleshooting, 122 ports notebook, 66 port replicator, 67 power connecting AC, 22 processor speed, 51 resetting, 27 saving, 50 standby, 47 status light, 18 switch location, 14 ... view, 16 receiving faxes (Windows 2000), 61 receiving faxes (Windows 98, 59 recovering applications, 132 hard disk, 130 software, 130 Recovery CD replacing, 131 using, 130 registering computer, 25 regulatory information, 167 removing hard disk drive, 133 removing PC card, 63 repair service, 141 shipment, 141 repair service, 112 resetting computer, 27 resume, 21...


