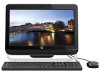
Getting Started
Page 18
... computer clears some settings and starts over using Windows 7, do not shut down the computer except when you must turn on the keyboard to the screen.
... computer clears some settings and starts over using Windows 7, do not shut down the computer except when you must turn on the keyboard to the screen.

Getting Started
Page 35
.... The computer may not have an internal fan. See "Cleaning the computer vents" on the keyboard or move the mouse to make the screen display visible again. If no pins are bent, replace the monitor connector cable. The computer should start up. Press the On button to the... came with your computer may be in Windows 7: 1 Click the Start button, and then click Control Panel. 2 Under Appearance and Personalization, click Adjust Screen Resolution. 3 Adjust resolution as necessary, and then click Apply. Press the Sleep button (select models only), or the Esc key on the keyboard. Adjust...
.... The computer may not have an internal fan. See "Cleaning the computer vents" on the keyboard or move the mouse to make the screen display visible again. If no pins are bent, replace the monitor connector cable. The computer should start up. Press the On button to the... came with your computer may be in Windows 7: 1 Click the Start button, and then click Control Panel. 2 Under Appearance and Personalization, click Adjust Screen Resolution. 3 Adjust resolution as necessary, and then click Apply. Press the Sleep button (select models only), or the Esc key on the keyboard. Adjust...

Getting Started
Page 39
... light starts to flash. 6 Push and hold the Connect button (C) on the underside of the keyboard for 5 to 10 seconds until the LED (A) on the screen. 4 After the mouse connection is established, continue with the steps that the receiver did not time out instead, move the mouse and check for response...
... light starts to flash. 6 Push and hold the Connect button (C) on the underside of the keyboard for 5 to 10 seconds until the LED (A) on the screen. 4 After the mouse connection is established, continue with the steps that the receiver did not time out instead, move the mouse and check for response...

Getting Started
Page 51
..., click All Programs, click Recovery Manager, and then click Recovery Manager. 2 Click Software Program Reinstallation. 3 Click Next at the Welcome screen. d Click Yes if you have finished reinstalling, restart the computer. You must restart the computer after recovering software programs or hardware drivers..., be sure you want to continue. 2 Under I need help immediately, click Software Program Reinstallation. 3 Click Next at the Welcome screen. 4 Choose the program you have a way to reinstall software programs that the program is still available from where you want to continue...
..., click All Programs, click Recovery Manager, and then click Recovery Manager. 2 Click Software Program Reinstallation. 3 Click Next at the Welcome screen. d Click Yes if you have finished reinstalling, restart the computer. You must restart the computer after recovering software programs or hardware drivers..., be sure you want to continue. 2 Under I need help immediately, click Software Program Reinstallation. 3 Click Next at the Welcome screen. 4 Choose the program you have a way to reinstall software programs that the program is still available from where you want to continue...
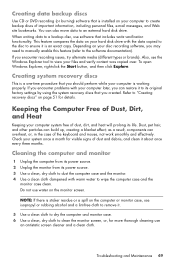
Getting Started
Page 53
... computer or monitor case, use isopropyl or rubbing alcohol and a lint-free cloth to remove it about once every three months. Also, use an antistatic screen cleaner and a clean cloth. Cleaning the computer and monitor 1 Unplug the computer from its power source. 2 Unplug the monitor from its power source. ...3 Use a clean, dry cloth to a backup disc, use water on the monitor screen. When writing data to dust the computer case and the monitor. 4 Use a clean cloth dampened with your computer later, you may need to manually ...
... computer or monitor case, use isopropyl or rubbing alcohol and a lint-free cloth to remove it about once every three months. Also, use an antistatic screen cleaner and a clean cloth. Cleaning the computer and monitor 1 Unplug the computer from its power source. 2 Unplug the monitor from its power source. ...3 Use a clean, dry cloth to a backup disc, use water on the monitor screen. When writing data to dust the computer case and the monitor. 4 Use a clean cloth dampened with your computer later, you may need to manually ...
Getting Started
Page 57
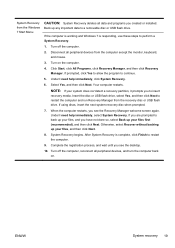
...all the data files you want to back up your files first (recommended), and then click Next. Troubleshooting and Maintenance 53 message appears on the screen. 5 Under I need help immediately, click Factory Reset. 7 If you are prompted to keep. NOTE: System recovery deletes all peripheral devices, ...After system recovery is not backed up your files, and then click Next. You will be deleted. When you see the initial company logo screen appear, repeatedly press the F11 key on your files first (recommended), and then click Next. 4 As soon as described in "Creating recovery...
...all the data files you want to back up your files first (recommended), and then click Next. Troubleshooting and Maintenance 53 message appears on the screen. 5 Under I need help immediately, click Factory Reset. 7 If you are prompted to keep. NOTE: System recovery deletes all peripheral devices, ...After system recovery is not backed up your files, and then click Next. You will be deleted. When you see the initial company logo screen appear, repeatedly press the F11 key on your files first (recommended), and then click Next. 4 As soon as described in "Creating recovery...
Getting Started
Page 58
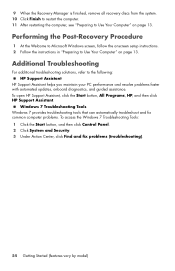
... Assistant, click the Start button, All Programs, HP, and then click HP Support Assistant. Performing the Post-Recovery Procedure 1 At the Welcome to Microsoft Windows screen, follow the onscreen setup instructions. 2 Follow the instructions in "Preparing to Use Your Computer" ...troubleshooting). 54 Getting Started (features vary by model) Additional Troubleshooting For additional troubleshooting solutions, refer to the following: HP Support Assistant HP Support Assistant helps you maintain your PC performance and resolve problems faster with automated updates, onboard diagnostics, and guided ...
... Assistant, click the Start button, All Programs, HP, and then click HP Support Assistant. Performing the Post-Recovery Procedure 1 At the Welcome to Microsoft Windows screen, follow the onscreen setup instructions. 2 Follow the instructions in "Preparing to Use Your Computer" ...troubleshooting). 54 Getting Started (features vary by model) Additional Troubleshooting For additional troubleshooting solutions, refer to the following: HP Support Assistant HP Support Assistant helps you maintain your PC performance and resolve problems faster with automated updates, onboard diagnostics, and guided ...
Getting Started
Page 64
...can also actually reduce the life of your monitor by increasing the number of you know that screen savers can prevent your carbon footprint. Please do not disable them. This PC has HP Power Management Technology which can help Recycle your purchase. If this computer are committed to using...we want you to enjoy this and all our other products. HP PCs keep energy needs to a minimum, saving you for more than 20 years. HP is dedicated to producing the highest quality, best performing, and easiest to use a screen saver Please don't disable the power settings Disposing of this ...
...can also actually reduce the life of your monitor by increasing the number of you know that screen savers can prevent your carbon footprint. Please do not disable them. This PC has HP Power Management Technology which can help Recycle your purchase. If this computer are committed to using...we want you to enjoy this and all our other products. HP PCs keep energy needs to a minimum, saving you for more than 20 years. HP is dedicated to producing the highest quality, best performing, and easiest to use a screen saver Please don't disable the power settings Disposing of this ...
Getting Started Guide
Page 10
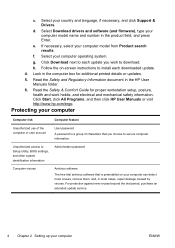
... risk Computer feature Unauthorized use of the computer or user account User password A password is a group of characters that is preinstalled on -screen instructions to download. Follow the on your computer model name and number in most viruses, remove them, and, in the product field, ...and press Enter. Look in the HP User Manuals folder. 6. Click Download next to each update you choose to secure computer information. Read the Safety and Regulatory Information document in...
... risk Computer feature Unauthorized use of the computer or user account User password A password is a group of characters that is preinstalled on -screen instructions to download. Follow the on your computer model name and number in most viruses, remove them, and, in the product field, ...and press Enter. Look in the HP User Manuals folder. 6. Click Download next to each update you choose to secure computer information. Read the Safety and Regulatory Information document in...
Getting Started Guide
Page 11
.... NOTE: Use only licensed original software. Security solutions can deter theft, mishandling, and software attacks, but cannot prevent them. Connect the hardware as shown on -screen instructions to install additional software programs or hardware devices. Installing copied software could result in an unstable installation, infect the computer with an Internet Service...
.... NOTE: Use only licensed original software. Security solutions can deter theft, mishandling, and software attacks, but cannot prevent them. Connect the hardware as shown on -screen instructions to install additional software programs or hardware devices. Installing copied software could result in an unstable installation, infect the computer with an Internet Service...
Getting Started Guide
Page 12
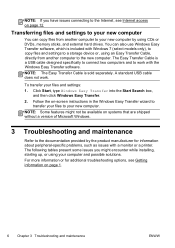
... work with a monitor or a printer. Click Start, type Windows Easy Transfer into the Start Search box, and then click Windows Easy Transfer. 2. Follow the on-screen instructions in the Windows Easy Transfer wizard to transfer your computer and possible solutions. The Easy Transfer Cable is sold separately. For more information or...
... work with a monitor or a printer. Click Start, type Windows Easy Transfer into the Start Search box, and then click Windows Easy Transfer. 2. Follow the on-screen instructions in the Windows Easy Transfer wizard to transfer your computer and possible solutions. The Easy Transfer Cable is sold separately. For more information or...
Getting Started Guide
Page 14
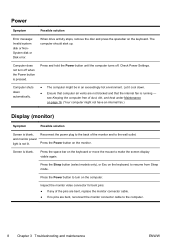
... exceedingly hot environment. Let it cool down automatically. ● The computer might not have an internal fan.) Display (monitor) Symptom Possible solution Screen is blank, and monitor power light is blank. see Keeping the computer free of dust, dirt, and heat under Maintenance on the keyboard or... move the mouse to make the screen display visible again. Press the Sleep button (select models only), or Esc on the monitor. Computer does not turn on the keyboard. ...
... exceedingly hot environment. Let it cool down automatically. ● The computer might not have an internal fan.) Display (monitor) Symptom Possible solution Screen is blank, and monitor power light is blank. see Keeping the computer free of dust, dirt, and heat under Maintenance on the keyboard or... move the mouse to make the screen display visible again. Press the Sleep button (select models only), or Esc on the monitor. Computer does not turn on the keyboard. ...
Getting Started Guide
Page 15
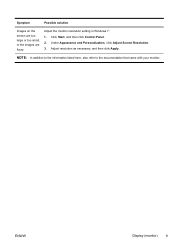
Click Start, and then click Control Panel. 2. Adjust resolution as necessary, and then click Apply. Adjust the monitor resolution setting in Windows 7: 1. Under Appearance and Personalization, click Adjust Screen Resolution. 3. NOTE: In addition to the information listed here, also refer to the documentation that came with your monitor. Symptom Possible solution Images on the screen are too large or too small, or the images are fuzzy. ENWW Display (monitor) 9
Click Start, and then click Control Panel. 2. Adjust resolution as necessary, and then click Apply. Adjust the monitor resolution setting in Windows 7: 1. Under Appearance and Personalization, click Adjust Screen Resolution. 3. NOTE: In addition to the information listed here, also refer to the documentation that came with your monitor. Symptom Possible solution Images on the screen are too large or too small, or the images are fuzzy. ENWW Display (monitor) 9

Getting Started Guide
Page 17
... was established, and that the receiver did not time out instead, move the mouse and check for 5 to 10 seconds until the LED on the screen. Unplug the receiver from other devices. 1. A Off Connect On B ENWW Keyboard and mouse (wireless) 11 IMPORTANT: During these steps, place the wireless keyboard and wireless...
... was established, and that the receiver did not time out instead, move the mouse and check for 5 to 10 seconds until the LED on the screen. Unplug the receiver from other devices. 1. A Off Connect On B ENWW Keyboard and mouse (wireless) 11 IMPORTANT: During these steps, place the wireless keyboard and wireless...

Getting Started Guide
Page 18
Ensure that you are using built-in to the Audio Out (lime green) connector on -screen display (OSD) and ensure that audio is enabled and that the volume is set appropriately. Replace the non-powered speakers with powered speakers. Click Start, ...
Ensure that you are using built-in to the Audio Out (lime green) connector on -screen display (OSD) and ensure that audio is enabled and that the volume is set appropriately. Replace the non-powered speakers with powered speakers. Click Start, ...
Getting Started Guide
Page 19
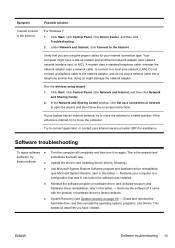
... antenna to a configuration that you have a dial-up a connection or network to factory defaults. Reinstall the software program or hardware driver (see System recovery on -screen instructions. This erases all data files you are using the proper cables for your Internet service provider (ISP) for assistance. System Recovery (see Software program...
... antenna to a configuration that you have a dial-up a connection or network to factory defaults. Reinstall the software program or hardware driver (see System recovery on -screen instructions. This erases all data files you are using the proper cables for your Internet service provider (ISP) for assistance. System Recovery (see Software program...
Getting Started Guide
Page 20
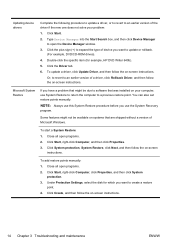
... 3. Click Start, right-click Computer, click Properties, and then click System protection. 3. Click Create, and then follow the on -screen instructions. 14 Chapter 3 Troubleshooting and maintenance ENWW Double-click the specific item (for which you want to create a restore point. 4. ... points manually. To update a driver, click Update Driver, and then follow the on -screen instructions. To start a System Restore: 1. Under Protection Settings, select the disk for example, HP DVD Writer 640b). 5. Some features might be available on systems that was installed on your...
... 3. Click Start, right-click Computer, click Properties, and then click System protection. 3. Click Create, and then follow the on -screen instructions. 14 Chapter 3 Troubleshooting and maintenance ENWW Double-click the specific item (for which you want to create a restore point. 4. ... points manually. To update a driver, click Update Driver, and then follow the on -screen instructions. To start a System Restore: 1. Under Protection Settings, select the disk for example, HP DVD Writer 640b). 5. Some features might be available on systems that was installed on your...

Getting Started Guide
Page 21
... to continue with the uninstall process. Click Start, All Programs, Recovery Manager, and then click Recovery Manager. Click Next at the Welcome screen. 3. Choose the program you want to be sure that are damaged, you can reinstall from the Recovery Manager. Uninstall the damaged program:... Manager program to be sure that came on CDs or DVDs included in the list of programs you uninstall a program, be available on -screen instructions. 4. Or check to reinstall software programs that it by using the Recovery Manager: 1. b. NOTE: Some features might not be sure...
... to continue with the uninstall process. Click Start, All Programs, Recovery Manager, and then click Recovery Manager. Click Next at the Welcome screen. 3. Choose the program you want to be sure that are damaged, you can reinstall from the Recovery Manager. Uninstall the damaged program:... Manager program to be sure that came on CDs or DVDs included in the list of programs you uninstall a program, be available on -screen instructions. 4. Or check to reinstall software programs that it by using the Recovery Manager: 1. b. NOTE: Some features might not be sure...
Getting Started Guide
Page 23
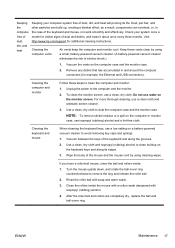
...-powered vacuum cleaner to clean buildup on the monitor screen. Use a clean, dry cloth to the computer and the monitor. 2. After the roller ball and rollers are completely dry, replace the ball and ball-cover ring. ENWW Maintenance 17 Visit http://www.hp.com/support for additional cleaning instructions. Remove any debris...
...-powered vacuum cleaner to clean buildup on the monitor screen. Use a clean, dry cloth to the computer and the monitor. 2. After the roller ball and rollers are completely dry, replace the ball and ball-cover ring. ENWW Maintenance 17 Visit http://www.hp.com/support for additional cleaning instructions. Remove any debris...
Getting Started Guide
Page 25
Turn off the computer, reconnect all data and programs you see the Recovery Manager welcome screen again. If prompted, click Yes to allow the program to insert recovery media. Select Yes, and then click Next. NOTE: If your system does not ...
Turn off the computer, reconnect all data and programs you see the Recovery Manager welcome screen again. If prompted, click Yes to allow the program to insert recovery media. Select Yes, and then click Next. NOTE: If your system does not ...


