

User Guide
Page 7
... started ...1 Best practices ...1 More HP resources ...2 2 Getting to know your computer ...3 Locating hardware ...3 Locating software ...3 Right side ...4 Left side ...5 Rear ...6 Display ...8 Keyboard area ...9 TouchPad ...9 Lights ...10 Button ...11 Special keys ...12 Action keys ...13 Bottom ...14 Labels ...14 3 Connecting to a network ...16 Connecting to a wireless network ...16 Using the wireless controls ...16 Airplane mode key ...16 Operating system controls 16 Connecting to a WLAN ...17 Using HP Mobile Broadband (select products only 18 Using GPS (select products only) ...18 Using...
... started ...1 Best practices ...1 More HP resources ...2 2 Getting to know your computer ...3 Locating hardware ...3 Locating software ...3 Right side ...4 Left side ...5 Rear ...6 Display ...8 Keyboard area ...9 TouchPad ...9 Lights ...10 Button ...11 Special keys ...12 Action keys ...13 Bottom ...14 Labels ...14 3 Connecting to a network ...16 Connecting to a wireless network ...16 Using the wireless controls ...16 Airplane mode key ...16 Operating system controls 16 Connecting to a WLAN ...17 Using HP Mobile Broadband (select products only 18 Using GPS (select products only) ...18 Using...
User Guide
Page 9
...40 Setting Setup Utility (BIOS) passwords 41 Using Windows Hello (select products only) ...42 Using Internet security software ...42 Using antivirus software ...42 Using firewall software ...42 Installing software updates ...43 Using HP Device as a Service (select products only 43 Securing your wireless network ...43 Backing up your software applications and information 43 Using an optional security cable (select products only 43 9 Using Setup Utility (BIOS) ...44 Starting Setup Utility (BIOS) ...44 Updating Setup Utility (BIOS) ...44 Determining the BIOS version ...44 Downloading a BIOS...
...40 Setting Setup Utility (BIOS) passwords 41 Using Windows Hello (select products only) ...42 Using Internet security software ...42 Using antivirus software ...42 Using firewall software ...42 Installing software updates ...43 Using HP Device as a Service (select products only 43 Securing your wireless network ...43 Backing up your software applications and information 43 Using an optional security cable (select products only 43 9 Using Setup Utility (BIOS) ...44 Starting Setup Utility (BIOS) ...44 Updating Setup Utility (BIOS) ...44 Determining the BIOS version ...44 Downloading a BIOS...

User Guide
Page 10
... 49 Downloading Remote HP PC Hardware Diagnostics UEFI by product name or number ...49 Customizing Remote HP PC Hardware Diagnostics UEFI settings 49 11 Backing up, restoring, and recovering ...51 Backing up information and creating recovery media 51 Using Windows tools ...51 Using the HP Cloud Recovery Download Tool to create recovery media (select products only) ..... 51 Restoring and recovery ...52 Restoring, resetting, and refreshing using Windows tools 52 Recovering using HP Recovery media 52 Changing the computer boot order 52 12 Specifications ...53 Input power ...53 Operating...
... 49 Downloading Remote HP PC Hardware Diagnostics UEFI by product name or number ...49 Customizing Remote HP PC Hardware Diagnostics UEFI settings 49 11 Backing up, restoring, and recovering ...51 Backing up information and creating recovery media 51 Using Windows tools ...51 Using the HP Cloud Recovery Download Tool to create recovery media (select products only) ..... 51 Restoring and recovery ...52 Restoring, resetting, and refreshing using Windows tools 52 Recovering using HP Recovery media 52 Changing the computer boot order 52 12 Specifications ...53 Input power ...53 Operating...
User Guide
Page 28
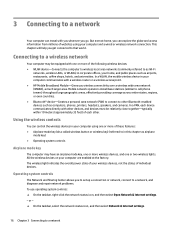
... even countries. ● Bluetooth® device-Creates a personal area network (PAN) to connect to a network The wireless light indicates the overall power state of your computer are enabled at home, you can travel with you wherever you to set up a connection or network, connect to a network, and diagnose and repair network problems. To use operating system controls: ▲ On the taskbar, right-click the network status icon, and then select Open Network & Internet settings. ‒ or - ▲...
... even countries. ● Bluetooth® device-Creates a personal area network (PAN) to connect to a network The wireless light indicates the overall power state of your computer are enabled at home, you can travel with you wherever you to set up a connection or network, connect to a network, and diagnose and repair network problems. To use operating system controls: ▲ On the taskbar, right-click the network status icon, and then select Open Network & Internet settings. ‒ or - ▲...

User Guide
Page 33
... a microphone are not connected to a network. You can be controlled through an audio control panel specific to your computer, you are called headsets. To view or change system sounds, or manage audio devices. Connecting a Thunderbolt device using your computer when you need a USB Type-C cable, purchased separately. To reduce the risk of personal injury, lower the volume setting before putting on the computer. IMPORTANT: Be sure that the external device is a powerful video device that can connect wired...
... a microphone are not connected to a network. You can be controlled through an audio control panel specific to your computer, you are called headsets. To view or change system sounds, or manage audio devices. Connecting a Thunderbolt device using your computer when you need a USB Type-C cable, purchased separately. To reduce the risk of personal injury, lower the volume setting before putting on the computer. IMPORTANT: Be sure that the external device is a powerful video device that can connect wired...

User Guide
Page 46
... optional docking device or expansion product. Do not charge the computer battery while you are aboard aircraft. Type support in the Diagnostics section, select HP Battery Check. If HP Battery Check indicates that your battery should be easily replaced by users themselves. The battery[ies] in the computer box. If a battery is no power source is connected to a disc (select products only) 34 Chapter 6 Managing power To reduce potential safety issues, use battery power...
... optional docking device or expansion product. Do not charge the computer battery while you are aboard aircraft. Type support in the Diagnostics section, select HP Battery Check. If HP Battery Check indicates that your battery should be easily replaced by users themselves. The battery[ies] in the computer box. If a battery is no power source is connected to a disc (select products only) 34 Chapter 6 Managing power To reduce potential safety issues, use battery power...
User Guide
Page 48
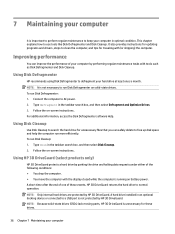
... then select Disk Cleanup. 2. It also provides instructions for updating programs and drivers, steps to clean the computer, and tips for these events, HP 3D DriveGuard returns the hard drive to a USB port is unnecessary for traveling with tools such as Disk Defragmenter and Disk Cleanup. To run Disk Cleanup: 1. For additional information, access the Disk Defragmenter software Help. Follow the on -screen instructions. A hard drive installed in optimal condition...
... then select Disk Cleanup. 2. It also provides instructions for updating programs and drivers, steps to clean the computer, and tips for these events, HP 3D DriveGuard returns the hard drive to a USB port is unnecessary for traveling with tools such as Disk Defragmenter and Disk Cleanup. To run Disk Cleanup: 1. For additional information, access the Disk Defragmenter software Help. Follow the on -screen instructions. A hard drive installed in optimal condition...
User Guide
Page 53
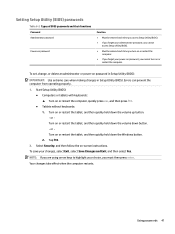
... set, change, or delete an administrator or power-on -screen instructions. or Turn on or restart the tablet, and then quickly hold down the volume up button. - NOTE: If you are using arrow keys to highlight your choice, you cannot turn on or restart the computer. ● If you forget your power-on password, you must then press enter. Setting Setup Utility (BIOS) passwords Table 8-2 Types of BIOS passwords and their functions Password Administrator password Power-on password Function...
... set, change, or delete an administrator or power-on -screen instructions. or Turn on or restart the tablet, and then quickly hold down the volume up button. - NOTE: If you are using arrow keys to highlight your choice, you cannot turn on or restart the computer. ● If you forget your power-on password, you must then press enter. Setting Setup Utility (BIOS) passwords Table 8-2 Types of BIOS passwords and their functions Password Administrator password Power-on password Function...

User Guide
Page 55
... a virus attack or a software or hardware failure. You can quickly download and install the software, which may not provide any security. Installing software updates HP, Windows, and third-party software installed on your computer, follow the device manufacturer's instructions. Using HP Device as you set up your software applications and information to correct security problems and improve software performance. Securing your network from Microsoft as soon as a Service (select products only) HP DaaS is highly...
... a virus attack or a software or hardware failure. You can quickly download and install the software, which may not provide any security. Installing software updates HP, Windows, and third-party software installed on your computer, follow the device manufacturer's instructions. Using HP Device as you set up your software applications and information to correct security problems and improve software performance. Securing your network from Microsoft as soon as a Service (select products only) HP DaaS is highly...
User Guide
Page 57
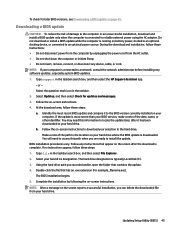
... a network, consult the network administrator before installing any software updates, especially system BIOS updates. 1. Using the hard drive path you can delete the downloaded file from the AC outlet. ● Do not shut down the computer or initiate Sleep. ● Do not insert, remove, connect, or disconnect any instructions that appear on -screen instructions. 4. The BIOS installation begins. 5. Updating Setup Utility (BIOS) 45 Do not download or install a BIOS update while the computer is connected to the hard drive. or...
... a network, consult the network administrator before installing any software updates, especially system BIOS updates. 1. Using the hard drive path you can delete the downloaded file from the AC outlet. ● Do not shut down the computer or initiate Sleep. ● Do not insert, remove, connect, or disconnect any instructions that appear on -screen instructions. 4. The BIOS installation begins. 5. Updating Setup Utility (BIOS) 45 Do not download or install a BIOS update while the computer is connected to the hard drive. or...
User Guide
Page 59
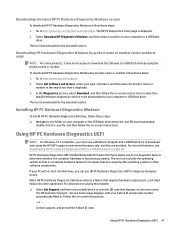
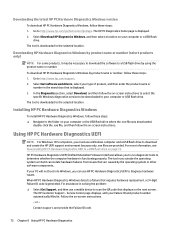
... -screen instructions. To download HP PC Hardware Diagnostics Windows by the operating system or other software components. Installing HP PC Hardware Diagnostics Windows To install HP PC Hardware Diagnostics Windows, follow these steps: 1. If your PC will not boot into Windows, you to run diagnostic tests to the folder on your computer or USB flash drive. Using HP PC Hardware Diagnostics UEFI 47 Service Center page displays, with your computer or a USB flash drive. Downloading the latest HP PC Hardware Diagnostics Windows version...
... -screen instructions. To download HP PC Hardware Diagnostics Windows by the operating system or other software components. Installing HP PC Hardware Diagnostics Windows To install HP PC Hardware Diagnostics Windows, follow these steps: 1. If your PC will not boot into Windows, you to run diagnostic tests to the folder on your computer or USB flash drive. Using HP PC Hardware Diagnostics UEFI 47 Service Center page displays, with your computer or a USB flash drive. Downloading the latest HP PC Hardware Diagnostics Windows version...
User Guide
Page 75
... 33 battery power 32 best practices 1 BIOS determining version 44 downloading an update 45 starting the Setup Utility 44 updating 44 Bluetooth device 16, 18 Bluetooth label 15 boot order, changing 52 bottom components 14 buttons left TouchPad 9 power 11 right TouchPad 9 C camera identifying 8 using 20 camera light, identifying 8 caps lock light, identifying 10 caring for your computer 37 cleaning your computer 37 components bottom 14 display 8 keyboard area 9 left side 5 right side 4 connecting to a network 16 connecting to a wireless network 16 connecting to...
... 33 battery power 32 best practices 1 BIOS determining version 44 downloading an update 45 starting the Setup Utility 44 updating 44 Bluetooth device 16, 18 Bluetooth label 15 boot order, changing 52 bottom components 14 buttons left TouchPad 9 power 11 right TouchPad 9 C camera identifying 8 using 20 camera light, identifying 8 caps lock light, identifying 10 caring for your computer 37 cleaning your computer 37 components bottom 14 display 8 keyboard area 9 left side 5 right side 4 connecting to a network 16 connecting to a wireless network 16 connecting to...
User Guide
Page 76
... drivers 37 managing power 30 MEID number 18 microphone, connecting 21 MicroSD memory card reader, identifying 5 Miracast 24 mobile broadband activating 18 IMEI number 18 MEID number 18 mute volume action key 14 N network jack, identifying 6 next track action key 13 O OMEN key 12 one-finger slide touch screen gesture 29 operating environment 54 operating system controls 16 P passwords Setup Utility (BIOS) 41 Windows 40 pause action key 13 play action key 13 ports Dual-Mode DisplayPort 6 HDMI 6, 22, 24 USB SuperSpeed 4, 5 USB SuperSpeed port with HP Sleep and Charge 6 USB Type...
... drivers 37 managing power 30 MEID number 18 microphone, connecting 21 MicroSD memory card reader, identifying 5 Miracast 24 mobile broadband activating 18 IMEI number 18 MEID number 18 mute volume action key 14 N network jack, identifying 6 next track action key 13 O OMEN key 12 one-finger slide touch screen gesture 29 operating environment 54 operating system controls 16 P passwords Setup Utility (BIOS) 41 Windows 40 pause action key 13 play action key 13 ports Dual-Mode DisplayPort 6 HDMI 6, 22, 24 USB SuperSpeed 4, 5 USB SuperSpeed port with HP Sleep and Charge 6 USB Type...
User Guide
Page 77
... Type-C port, connecting 21, 25 USB Type-C power connector and Thunderbolt port with HP Sleep and Charge, identifying USB Type-C 6 Thunderbolt, connecting USB Type- media 52 USB flash drive 52 recovery media creating using HP Cloud Recovery Download Tool 51 creating using Windows tools 51 regulatory information regulatory label 15 wireless certification labels 15 Remote HP PC Hardware Diagnostics UEFI settings customizing 49 using 51 wired network (LAN) 19 wireless button 16 wireless certification label 15 wireless controls button 16 operating system 16 wireless light 16 wireless network...
... Type-C port, connecting 21, 25 USB Type-C power connector and Thunderbolt port with HP Sleep and Charge, identifying USB Type-C 6 Thunderbolt, connecting USB Type- media 52 USB flash drive 52 recovery media creating using HP Cloud Recovery Download Tool 51 creating using Windows tools 51 regulatory information regulatory label 15 wireless certification labels 15 Remote HP PC Hardware Diagnostics UEFI settings customizing 49 using 51 wired network (LAN) 19 wireless button 16 wireless certification label 15 wireless controls button 16 operating system 16 wireless light 16 wireless network...

Maintenance and Service Guide
Page 8
...for disassembly ...34 Base enclosure ...34 Hard drive (HDD) ...37 Solid-state drive (SSD) ...39 Memory modules ...40 WLAN module ...42 6 Removal and replacement procedures for authorized service provider parts 44 Component replacement procedures ...44 Battery ...45 Speakers ...46 Smart card board ...47 Fans ...48 Power connector cable ...50 Audio board ...51 USB board ...52 System board ...53 Heat sink ...56 Touchpad board ...59 Power button board ...61 Display assembly ...62 Keyboard/top cover ...68 7 Using Setup Utility (BIOS) ...69 Starting Setup Utility (BIOS) ...69 Updating Setup Utility...
...for disassembly ...34 Base enclosure ...34 Hard drive (HDD) ...37 Solid-state drive (SSD) ...39 Memory modules ...40 WLAN module ...42 6 Removal and replacement procedures for authorized service provider parts 44 Component replacement procedures ...44 Battery ...45 Speakers ...46 Smart card board ...47 Fans ...48 Power connector cable ...50 Audio board ...51 USB board ...52 System board ...53 Heat sink ...56 Touchpad board ...59 Power button board ...61 Display assembly ...62 Keyboard/top cover ...68 7 Using Setup Utility (BIOS) ...69 Starting Setup Utility (BIOS) ...69 Updating Setup Utility...
Maintenance and Service Guide
Page 80
... may need to access this information to locate the update later, after the download is downloaded. Do not download or install a BIOS update while the computer is connected to install the update. Select your hard drive. 70 Chapter 7 Using Setup Utility (BIOS) NOTE: After a message on -screen instructions. 4. Follow any device, cable, or cord. Follow the on the screen reports a successful installation, you recorded earlier, open the folder that appear on battery power, docked in the taskbar. 2. Type file...
... may need to access this information to locate the update later, after the download is downloaded. Do not download or install a BIOS update while the computer is connected to install the update. Select your hard drive. 70 Chapter 7 Using Setup Utility (BIOS) NOTE: After a message on -screen instructions. 4. Follow any device, cable, or cord. Follow the on the screen reports a successful installation, you recorded earlier, open the folder that appear on battery power, docked in the taskbar. 2. Type file...
Maintenance and Service Guide
Page 82
... a USB flash drive to download and create the HP UEFI support environment because only .exe files are provided. Installing HP PC Hardware Diagnostics Windows To install HP PC Hardware Diagnostics Windows, follow these steps: 1. Service Center page displays, with your Failure ID and product number automatically filled in solving the problem: ▲ Select Get Support, and then use a mobile device to scan the QR code that requires hardware replacement, a 24-digit Failure ID code is displayed. 3. or - Downloading...
... a USB flash drive to download and create the HP UEFI support environment because only .exe files are provided. Installing HP PC Hardware Diagnostics Windows To install HP PC Hardware Diagnostics Windows, follow these steps: 1. Service Center page displays, with your Failure ID and product number automatically filled in solving the problem: ▲ Select Get Support, and then use a mobile device to scan the QR code that requires hardware replacement, a 24-digit Failure ID code is displayed. 3. or - Downloading...
Maintenance and Service Guide
Page 93
... part numbers 27 audio board removal 51 spare part number 24, 51 audio cable spare part number 24 audio, product description 2, 8 audio-in (microphone) jack, identifying 14 audio-out (headphone)/audio-in (microphone) combo jack, identifying 14 B backup, creating 76 backups 76 base enclosure removing 34 spare part number 34 base enclosure, spare part numbers 25 battery removal 45 spare part number 25, 45 BIOS determining version 69 downloading an update 70 starting the Setup Utility 69 updating 69 Bluetooth label 22 boot order, changing 77 bottom components 21 buttons left touchpad 17 power...
... part numbers 27 audio board removal 51 spare part number 24, 51 audio cable spare part number 24 audio, product description 2, 8 audio-in (microphone) jack, identifying 14 audio-out (headphone)/audio-in (microphone) combo jack, identifying 14 B backup, creating 76 backups 76 base enclosure removing 34 spare part number 34 base enclosure, spare part numbers 25 battery removal 45 spare part number 25, 45 BIOS determining version 69 downloading an update 70 starting the Setup Utility 69 updating 69 Bluetooth label 22 boot order, changing 77 bottom components 21 buttons left touchpad 17 power...

Maintenance and Service Guide
Page 94
...M memory module removal 40 spare part numbers 40 memory, product description 2, 7 microphone product description 2, 8 MicroSD memory card reader, identifying 14 model name 1, 5 N network jack, identifying 15 O OMEN key 20 operating system, product description 4, 10, 11 optical drive, spare part number 28 P packaging guidelines 33 ports Dual-Mode DisplayPort 15 HDMI 15 product description 3, 9 USB SuperSpeed 13, 14 USB SuperSpeed port with HP Sleep and Charge 15 USB Type-C power connector and Thunderbolt port with HP Sleep and Charge 15 USB Type-C with HP Sleep and Charge 15 power button board...
...M memory module removal 40 spare part numbers 40 memory, product description 2, 7 microphone product description 2, 8 MicroSD memory card reader, identifying 14 model name 1, 5 N network jack, identifying 15 O OMEN key 20 operating system, product description 4, 10, 11 optical drive, spare part number 28 P packaging guidelines 33 ports Dual-Mode DisplayPort 15 HDMI 15 product description 3, 9 USB SuperSpeed 13, 14 USB SuperSpeed port with HP Sleep and Charge 15 USB Type-C power connector and Thunderbolt port with HP Sleep and Charge 15 USB Type-C with HP Sleep and Charge 15 power button board...

Maintenance and Service Guide
Page 95
... creating using Windows tools 76 regulatory information regulatory label 22 wireless certification labels 22 Remote HP PC Hardware Diagnostics UEFI settings customizing 74 using 74 removal/replacement procedures 34, 44 restoring 76 right side components 13 RJ-45 (network) jack, identifying 15 RJ-45 (network) status lights, identifying 15 static electricity 31 storage, product description 2 system board removal 53 spare part numbers 24, 53 system restore point, creating 76 T Thunderbolt port with HP Sleep and Charge, identifying USB Type-C 15 touchpad removing...
... creating using Windows tools 76 regulatory information regulatory label 22 wireless certification labels 22 Remote HP PC Hardware Diagnostics UEFI settings customizing 74 using 74 removal/replacement procedures 34, 44 restoring 76 right side components 13 RJ-45 (network) jack, identifying 15 RJ-45 (network) status lights, identifying 15 static electricity 31 storage, product description 2 system board removal 53 spare part numbers 24, 53 system restore point, creating 76 T Thunderbolt port with HP Sleep and Charge, identifying USB Type-C 15 touchpad removing...


