Maintenance and Service Guide
Page 8
... parts 35 Component replacement procedures ...35 Battery ...36 WLAN module ...38 Speakers ...40 Memory card reader board ...42 TouchPad ...43 Hinge covers ...45 System support brackets ...46 Power connector cable ...48 Fans ...49 USB board ...51 Heat sink ...53 Power button board ...56 System board ...58 Display assembly ...61 Keyboard/top cover ...63 Display bezel ...66 Display hinges ...68 Webcam ...70 Display panel ...72 Display cable and webcam cable ...75 WLAN antennas ...77 Back cover ...79 7 Using Setup Utility (BIOS) ...80 Starting Setup Utility (BIOS) ...80 Updating Setup Utility...
... parts 35 Component replacement procedures ...35 Battery ...36 WLAN module ...38 Speakers ...40 Memory card reader board ...42 TouchPad ...43 Hinge covers ...45 System support brackets ...46 Power connector cable ...48 Fans ...49 USB board ...51 Heat sink ...53 Power button board ...56 System board ...58 Display assembly ...61 Keyboard/top cover ...63 Display bezel ...66 Display hinges ...68 Webcam ...70 Display panel ...72 Display cable and webcam cable ...75 WLAN antennas ...77 Back cover ...79 7 Using Setup Utility (BIOS) ...80 Starting Setup Utility (BIOS) ...80 Updating Setup Utility...
Maintenance and Service Guide
Page 36
... plastic parts. Plastic parts CAUTION: Using excessive force during disassembly and assembly procedures. Use care when handling the plastic 26 Chapter 4 Removal and replacement procedures preliminary requirements 4 Removal and replacement procedures preliminary requirements Tools required You will need the following tools to complete the removal and replacement procedures: ● Flat-bladed screwdriver ● Magnetic screwdriver ● Phillips P0 and P1 screwdrivers Service considerations...
... plastic parts. Plastic parts CAUTION: Using excessive force during disassembly and assembly procedures. Use care when handling the plastic 26 Chapter 4 Removal and replacement procedures preliminary requirements 4 Removal and replacement procedures preliminary requirements Tools required You will need the following tools to complete the removal and replacement procedures: ● Flat-bladed screwdriver ● Magnetic screwdriver ● Phillips P0 and P1 screwdrivers Service considerations...
Maintenance and Service Guide
Page 41
... hard drive, follow the on page 36). Remove the hard drive: Component replacement procedures 31 Component replacement procedures NOTE: Details about your computer, including model, serial number, product key, and length of your computer. There are on page 15 for details. Shut down the computer. 2. For complete and current information on supported parts for Customer Self-Repair parts. NOTE: The Customer Self-Repair program is supported in all external devices connected...
... hard drive, follow the on page 36). Remove the hard drive: Component replacement procedures 31 Component replacement procedures NOTE: Details about your computer, including model, serial number, product key, and length of your computer. There are on page 15 for details. Shut down the computer. 2. For complete and current information on supported parts for Customer Self-Repair parts. NOTE: The Customer Self-Repair program is supported in all external devices connected...
Maintenance and Service Guide
Page 91
... (for updates and messages. 3. Updating Setup Utility (BIOS) 81 Downloading a BIOS update CAUTION: To reduce the risk of damage to the computer or an unsuccessful installation, download and install a BIOS update only when the computer is connected to an optional power source. Do not download or install a BIOS update while the computer is running on your hard drive designation. Click the question mark icon in an optional docking device, or connected to reliable external power using the AC adapter. Make...
... (for updates and messages. 3. Updating Setup Utility (BIOS) 81 Downloading a BIOS update CAUTION: To reduce the risk of damage to the computer or an unsuccessful installation, download and install a BIOS update only when the computer is connected to an optional power source. Do not download or install a BIOS update while the computer is running on your hard drive designation. Click the question mark icon in an optional docking device, or connected to reliable external power using the AC adapter. Make...
Maintenance and Service Guide
Page 92
.... 82 Chapter 8 Using HP PC Hardware Diagnostics Select the Start button, and then select HP Help and Support. Select Troubleshooting and fixes. The tool runs within the Windows operating system in the taskbar. If HP PC Hardware Diagnostics Windows is installed, follow the on-screen instructions. After HP PC Hardware Diagnostics Windows is not installed on page 82. Select Diagnostics, and then select HP PC Hardware Diagnostics Windows. 2. b. When HP PC Hardware Diagnostics Windows detects a failure that...
.... 82 Chapter 8 Using HP PC Hardware Diagnostics Select the Start button, and then select HP Help and Support. Select Troubleshooting and fixes. The tool runs within the Windows operating system in the taskbar. If HP PC Hardware Diagnostics Windows is installed, follow the on-screen instructions. After HP PC Hardware Diagnostics Windows is not installed on page 82. Select Diagnostics, and then select HP PC Hardware Diagnostics Windows. 2. b. When HP PC Hardware Diagnostics Windows detects a failure that...

Maintenance and Service Guide
Page 106
... (headphone)/audio-in (microphone) jack, identifying 5, 7 B Back cover removal 79 spare part numbers 79 backup, creating 87 backups 87 Battery spare part number 23 battery removal 36 spare part number 36 Bezel spare part number 24 BIOS determining version 80 downloading an update 81 starting the Setup Utility 80 updating 80 Bluetooth label 16 boot order, changing 88 Bottom cover spare part number 23 buttons left TouchPad 9 power 11 right TouchPad 9 caps lock light, identifying 10 components bottom 14 display 8 left side 5 right side 4 computer major components 18 computer specifications 89...
... (headphone)/audio-in (microphone) jack, identifying 5, 7 B Back cover removal 79 spare part numbers 79 backup, creating 87 backups 87 Battery spare part number 23 battery removal 36 spare part number 36 Bezel spare part number 24 BIOS determining version 80 downloading an update 81 starting the Setup Utility 80 updating 80 Bluetooth label 16 boot order, changing 88 Bottom cover spare part number 23 buttons left TouchPad 9 power 11 right TouchPad 9 caps lock light, identifying 10 components bottom 14 display 8 left side 5 right side 4 computer major components 18 computer specifications 89...
Maintenance and Service Guide
Page 107
... 93 set requirements 92 power lights, identifying 10 power requirements, product description 2 processor product description 1 product description audio 1 display panel 1 Ethernet 2 external media cards 2 graphics 1 hard drive 1 keyboard 2 memory module 1 microphone 1 operating system 2 optical drive 1 pointing device 2 ports 2 power requirements 2 processors 1 product name 1 security 2 serviceability 3 video 1 wireless 2 product name 1 product name and number, computer 15 PRT SC key 12 R recovery 87 discs 88 HP Recovery partition 88 media 88 USB flash drive 88 recovery media creating using HP...
... 93 set requirements 92 power lights, identifying 10 power requirements, product description 2 processor product description 1 product description audio 1 display panel 1 Ethernet 2 external media cards 2 graphics 1 hard drive 1 keyboard 2 memory module 1 microphone 1 operating system 2 optical drive 1 pointing device 2 ports 2 power requirements 2 processors 1 product name 1 security 2 serviceability 3 video 1 wireless 2 product name 1 product name and number, computer 15 PRT SC key 12 R recovery 87 discs 88 HP Recovery partition 88 media 88 USB flash drive 88 recovery media creating using HP...
User Guide
Page 7
Table of contents 1 Starting right ...1 Best practices ...1 More HP resources ...2 2 Getting to know your computer ...4 Locating hardware ...4 Locating software ...4 Right side ...5 Left side ...6 Display ...9 Keyboard area ...10 TouchPad ...10 Lights ...11 Button ...12 Special keys ...13 Action keys ...14 Bottom ...15 Labels ...16 HP OMEN Command Center ...18 3 Connecting to a network ...19 Connecting to a wireless network ...19 Using the wireless controls ...19 Airplane mode key ...19 Operating system controls 19 Connecting to a WLAN ...20 Using HP Mobile Broadband (select products only 21...
Table of contents 1 Starting right ...1 Best practices ...1 More HP resources ...2 2 Getting to know your computer ...4 Locating hardware ...4 Locating software ...4 Right side ...5 Left side ...6 Display ...9 Keyboard area ...10 TouchPad ...10 Lights ...11 Button ...12 Special keys ...13 Action keys ...14 Bottom ...15 Labels ...16 HP OMEN Command Center ...18 3 Connecting to a network ...19 Connecting to a wireless network ...19 Using the wireless controls ...19 Airplane mode key ...19 Operating system controls 19 Connecting to a WLAN ...20 Using HP Mobile Broadband (select products only 21...
User Guide
Page 9
... Setting Setup Utility (BIOS) passwords 44 Using Windows Hello (select products only) ...44 Using Internet security software ...45 Using antivirus software ...45 Using firewall software ...45 Installing software updates ...45 Using HP Managed Services (select products only 46 Securing your wireless network ...46 Backing up your software applications and information 46 Using an optional security cable (select products only 46 9 Using Setup Utility (BIOS) ...47 Starting Setup Utility (BIOS) ...47 Updating Setup Utility (BIOS) ...47 Determining the BIOS version ...47 Downloading a BIOS update...
... Setting Setup Utility (BIOS) passwords 44 Using Windows Hello (select products only) ...44 Using Internet security software ...45 Using antivirus software ...45 Using firewall software ...45 Installing software updates ...45 Using HP Managed Services (select products only 46 Securing your wireless network ...46 Backing up your software applications and information 46 Using an optional security cable (select products only 46 9 Using Setup Utility (BIOS) ...47 Starting Setup Utility (BIOS) ...47 Updating Setup Utility (BIOS) ...47 Determining the BIOS version ...47 Downloading a BIOS update...
User Guide
Page 10
... you begin ...55 Creating the recovery media 55 Using the HP Cloud Recovery Download Tool to create recovery media 56 Restoring and recovery ...56 Restoring, resetting, and refreshing using Windows tools 56 Restoring using HP Recovery Manager and the HP Recovery partition 56 Recovering using HP Recovery Manager 56 Recovering using the HP Recovery partition (select products only 57 Recovering using HP Recovery media 57 Changing the computer boot order 58 Removing the HP Recovery partition (select products only 58 12 Specifications ...59 Input power ...59 Operating environment ...60 13...
... you begin ...55 Creating the recovery media 55 Using the HP Cloud Recovery Download Tool to create recovery media 56 Restoring and recovery ...56 Restoring, resetting, and refreshing using Windows tools 56 Restoring using HP Recovery Manager and the HP Recovery partition 56 Recovering using HP Recovery Manager 56 Recovering using the HP Recovery partition (select products only 57 Recovering using HP Recovery media 57 Changing the computer boot order 58 Removing the HP Recovery partition (select products only 58 12 Specifications ...59 Input power ...59 Operating environment ...60 13...
User Guide
Page 31
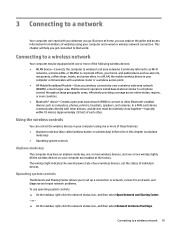
... more wireless devices, and one or more of each other Bluetooth-enabled devices such as airports, restaurants, coffee shops, hotels, and universities. The wireless light indicates the overall power state of your wireless devices, not the status of websites using one or more of these features: ● Airplane mode key (also called wireless button or wireless key) (referred to in this chapter as airplane mode key) ● Operating system controls Airplane mode key The...
... more wireless devices, and one or more of each other Bluetooth-enabled devices such as airports, restaurants, coffee shops, hotels, and universities. The wireless light indicates the overall power state of your wireless devices, not the status of websites using one or more of these features: ● Airplane mode key (also called wireless button or wireless key) (referred to in this chapter as airplane mode key) ● Operating system controls Airplane mode key The...
User Guide
Page 36
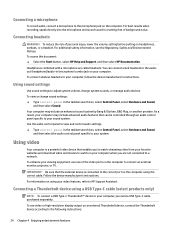
... port on the computer to connect an external monitor, projector, or TV. Headphones combined with a microphone are not connected to a network. To view or change system sounds, or manage audio devices. Follow the device manufacturer's instructions. To reduce the risk of personal injury, lower the volume setting before putting on the computer. Connecting a microphone To record audio, connect a microphone to the microphone jack on headphones, earbuds, or a headset. Using sound settings Use sound settings to adjust system volume, change sound settings: ▲ Type control panel...
... port on the computer to connect an external monitor, projector, or TV. Headphones combined with a microphone are not connected to a network. To view or change system sounds, or manage audio devices. Follow the device manufacturer's instructions. To reduce the risk of personal injury, lower the volume setting before putting on the computer. Connecting a microphone To record audio, connect a microphone to the microphone jack on headphones, earbuds, or a headset. Using sound settings Use sound settings to adjust system volume, change sound settings: ▲ Type control panel...
User Guide
Page 51
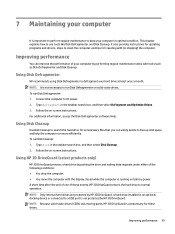
... device or connected to a USB port is not protected by HP 3D DriveGuard. Improving performance You can safely delete to free up disk space and help the computer run Disk Defragmenter: 1. NOTE: It is not necessary to run Disk Cleanup: 1. A hard drive installed in optimal condition. Type defragment in the taskbar search box, and then select Disk Cleanup. 2. To run Disk Defragmenter on battery power. Follow the on -screen instructions...
... device or connected to a USB port is not protected by HP 3D DriveGuard. Improving performance You can safely delete to free up disk space and help the computer run Disk Defragmenter: 1. NOTE: It is not necessary to run Disk Cleanup: 1. A hard drive installed in optimal condition. Type defragment in the taskbar search box, and then select Disk Cleanup. 2. To run Disk Defragmenter on battery power. Follow the on -screen instructions...
User Guide
Page 56
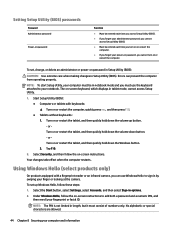
The on-screen keyboard, which displays in options. 2. or Turn on or restart the tablet, and then quickly hold down the volume down button. - To set , change, or delete an administrator or power-on password in Setup Utility (BIOS): CAUTION: Use extreme care when making changes in length, but it must use the keyboard attached to sign in notebook mode and you must consist of numbers only. Select the Start button, select Settings, select Accounts, and then...
The on-screen keyboard, which displays in options. 2. or Turn on or restart the tablet, and then quickly hold down the volume down button. - To set , change, or delete an administrator or power-on password in Setup Utility (BIOS): CAUTION: Use extreme care when making changes in length, but it must use the keyboard attached to sign in notebook mode and you must consist of numbers only. Select the Start button, select Settings, select Accounts, and then...
User Guide
Page 57
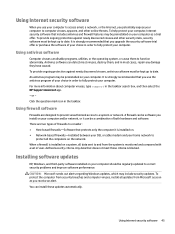
... viruses, type support in order to fully protect your computer. Using firewall software Firewalls are two types of firewalls to consider: ● Host-based firewalls-Software that protects only the computer it can disable programs, utilities, or the operating system, or cause them , and in the taskbar. When a firewall is installed on your computer should be kept up to date. Installing software updates HP, Windows, and...
... viruses, type support in order to fully protect your computer. Using firewall software Firewalls are two types of firewalls to consider: ● Host-based firewalls-Software that protects only the computer it can disable programs, utilities, or the operating system, or cause them , and in the taskbar. When a firewall is installed on your computer should be kept up to date. Installing software updates HP, Windows, and...
User Guide
Page 60
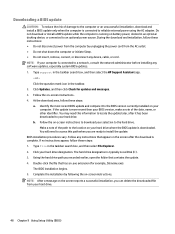
... external power using the AC adapter. NOTE: If your hard drive. 48 Chapter 9 Using Setup Utility (BIOS) Identify the most recent BIOS update and compare it has been downloaded to a network, consult the network administrator before installing any instructions that has an .exe extension (for updates and messages. 3. The hard drive designation is running on -screen instructions. During the download and installation, follow these steps: 1. Click your selection to download your hard drive designation. Follow the on -screen instructions. 4. BIOS installation...
... external power using the AC adapter. NOTE: If your hard drive. 48 Chapter 9 Using Setup Utility (BIOS) Identify the most recent BIOS update and compare it has been downloaded to a network, consult the network administrator before installing any instructions that has an .exe extension (for updates and messages. 3. The hard drive designation is running on -screen instructions. During the download and installation, follow these steps: 1. Click your selection to download your hard drive designation. Follow the on -screen instructions. 4. BIOS installation...
User Guide
Page 61
...c. 10 Using HP PC Hardware Diagnostics Using HP PC Hardware Diagnostics Windows HP PC Hardware Diagnostics Windows is a Windows-based utility that requires hardware replacement, a 24digit Failure ID code is generated. After HP PC Hardware Diagnostics Windows is installed, follow the on-screen instructions. or - Select Diagnostics, and then select HP PC Hardware Diagnostics Windows. 2. Using HP PC Hardware Diagnostics Windows 49 Type support in correcting the problem, contact support, and then provide the Failure ID code. Select Troubleshooting and fixes. Select the Start button...
...c. 10 Using HP PC Hardware Diagnostics Using HP PC Hardware Diagnostics Windows HP PC Hardware Diagnostics Windows is a Windows-based utility that requires hardware replacement, a 24digit Failure ID code is generated. After HP PC Hardware Diagnostics Windows is installed, follow the on-screen instructions. or - Select Diagnostics, and then select HP PC Hardware Diagnostics Windows. 2. Using HP PC Hardware Diagnostics Windows 49 Type support in correcting the problem, contact support, and then provide the Failure ID code. Select Troubleshooting and fixes. Select the Start button...
User Guide
Page 75
... 36 battery power 35 best practices 1 BIOS determining version 47 downloading an update 48 starting the Setup Utility 47 updating 47 Bluetooth device 19, 21 Bluetooth label 17 boot order, changing 58 buttons left TouchPad 10 optical drive eject 5 power 12 right TouchPad 10 C camera identifying 9 using 23 camera light, identifying 9 caps lock light, identifying 11 caring for your computer 40 cleaning your computer 40 components bottom 15 display 9 left side 6 right side 5 connecting to a network 19 connecting to a wireless network 19 connecting to...
... 36 battery power 35 best practices 1 BIOS determining version 47 downloading an update 48 starting the Setup Utility 47 updating 47 Bluetooth device 19, 21 Bluetooth label 17 boot order, changing 58 buttons left TouchPad 10 optical drive eject 5 power 12 right TouchPad 10 C camera identifying 9 using 23 camera light, identifying 9 caps lock light, identifying 11 caring for your computer 40 cleaning your computer 40 components bottom 15 display 9 left side 6 right side 5 connecting to a network 19 connecting to a wireless network 19 connecting to...
User Guide
Page 76
... port with HP Sleep and Charge 8 USB Type-C Thunderbolt 24 USB Type-C with HP Sleep and Charge 6 power battery 35 external 37 power button, identifying 12 power connector, identifying 5, 8 Power icon, using 35 power lights, identifying 11 power settings, using 35 product name and number, computer 16 PRT SC key 13 public WLAN connection 20 R recovery 54 discs 55, 57 HP Recovery Manager 56 HP Recovery partition 56 media 57 starting 57 supported discs 55 system 56 USB flash drive 57 using HP Recovery media 55 recovery media creating using HP Cloud Recovery Download Tool 56 creating using HP...
... port with HP Sleep and Charge 8 USB Type-C Thunderbolt 24 USB Type-C with HP Sleep and Charge 6 power battery 35 external 37 power button, identifying 12 power connector, identifying 5, 8 Power icon, using 35 power lights, identifying 11 power settings, using 35 product name and number, computer 16 PRT SC key 13 public WLAN connection 20 R recovery 54 discs 55, 57 HP Recovery Manager 56 HP Recovery partition 56 media 57 starting 57 supported discs 55 system 56 USB flash drive 57 using HP Recovery media 55 recovery media creating using HP Cloud Recovery Download Tool 56 creating using HP...
User Guide
Page 77
... port device 24 USB Type-C 28 wireless displays 28 video, using 24 Index 65 RJ-45 (network) jack, identifying 6, 7 RJ-45 (network) status lights, identifying 6, 7 S security cable slot, identifying 6, 7 security cable, installing 46 serial number, computer 16 service labels, locating 16 Setup Utility (BIOS) passwords 44 shipping the computer 41 shutdown 34 Sleep exiting 33 initiating 33 Sleep and Hibernation, initiating 33 slots memory card reader 5, 7, 8 security cable 6, 7 software Disk Cleanup 39 Disk Defragmenter 39 locating 4 software installed locating 4 software updates, installing...
... port device 24 USB Type-C 28 wireless displays 28 video, using 24 Index 65 RJ-45 (network) jack, identifying 6, 7 RJ-45 (network) status lights, identifying 6, 7 S security cable slot, identifying 6, 7 security cable, installing 46 serial number, computer 16 service labels, locating 16 Setup Utility (BIOS) passwords 44 shipping the computer 41 shutdown 34 Sleep exiting 33 initiating 33 Sleep and Hibernation, initiating 33 slots memory card reader 5, 7, 8 security cable 6, 7 software Disk Cleanup 39 Disk Defragmenter 39 locating 4 software installed locating 4 software updates, installing...


