Resolving Start Up and No Boot Problems Checklist
Page 1
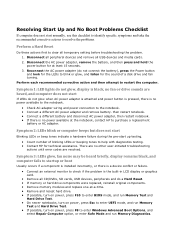
... to startup or boot Usually occurs if a component is installed incorrectly, or there is a device conflict or failure. Connect an external monitor to check if the problem is no fan or drive sounds are resolved. Symptom 1: LED lights do not glow, display is no power available at least 15 seconds. 3. Reconnect the AC power adapter (do a Hard Reset. If memory or hard drive components were replaced, reinstall original components. Remove memory modules and replace...
... to startup or boot Usually occurs if a component is installed incorrectly, or there is a device conflict or failure. Connect an external monitor to check if the problem is no fan or drive sounds are resolved. Symptom 1: LED lights do not glow, display is no power available at least 15 seconds. 3. Reconnect the AC power adapter (do a Hard Reset. If memory or hard drive components were replaced, reinstall original components. Remove memory modules and replace...
Resolving Start Up and No Boot Problems Checklist
Page 2
... run memory and hard drive tests. Symptom 4: Computer may display an error message on power, press F8 to enter Windows Advanced Boot Options, and select Boot into Safe Mode and then Uninstall recently installed programs. Update Computer after resolving a problem When the computer starts into Windows normally, you can boot to BIOS, use recovery disk to recover the computer to view error message. Run Repair Your Computer. Run Last Known Good Configuration. Select Boot into Safe Mode...
... run memory and hard drive tests. Symptom 4: Computer may display an error message on power, press F8 to enter Windows Advanced Boot Options, and select Boot into Safe Mode and then Uninstall recently installed programs. Update Computer after resolving a problem When the computer starts into Windows normally, you can boot to BIOS, use recovery disk to recover the computer to view error message. Run Repair Your Computer. Run Last Known Good Configuration. Select Boot into Safe Mode...
HP Notebook Reference Guide - Windows 7
Page 7
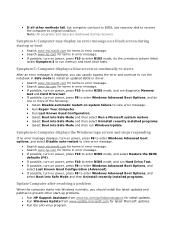
...card ...31 Using a USB device ...31 Connecting a USB device 31 Removing a USB device ...32 Using 1394 devices (select models only 32 Connecting a 1394 device 32 Removing a 1394 device 33 Using an eSATA device (select models only 33 Connecting an eSATA device 33 Removing an eSATA device 34 Using optional external devices ...34 Using optional external drives 34 Using the expansion port (select models only 34 6 Drives ...36 Handling drives ...36 Using hard drives ...37 Improving hard drive performance 37 Using Disk Defragmenter 37 Using Disk Cleanup 37 Using HP ProtectSmart Hard Drive...
...card ...31 Using a USB device ...31 Connecting a USB device 31 Removing a USB device ...32 Using 1394 devices (select models only 32 Connecting a 1394 device 32 Removing a 1394 device 33 Using an eSATA device (select models only 33 Connecting an eSATA device 33 Removing an eSATA device 34 Using optional external devices ...34 Using optional external drives 34 Using the expansion port (select models only 34 6 Drives ...36 Handling drives ...36 Using hard drives ...37 Improving hard drive performance 37 Using Disk Defragmenter 37 Using Disk Cleanup 37 Using HP ProtectSmart Hard Drive...
HP Notebook Reference Guide - Windows 7
Page 28
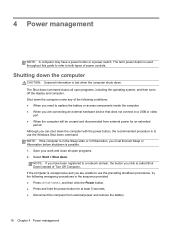
... used throughout this guide to refer to both types of the following emergency procedures in the sequence provided: ● Press ctrl+alt+delete, and then click the Power button. ● Press and hold the power button for an extended period Although you are connecting an external hardware device that does not connect to use the Windows Shut down command closes all open programs, including the operating...
... used throughout this guide to refer to both types of the following emergency procedures in the sequence provided: ● Press ctrl+alt+delete, and then click the Power button. ● Press and hold the power button for an extended period Although you are connecting an external hardware device that does not connect to use the Windows Shut down command closes all open programs, including the operating...
HP Notebook Reference Guide - Windows 7
Page 29
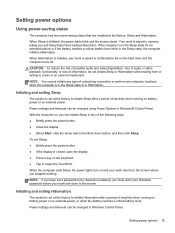
... to be changed using Power Options in Windows Control Panel. Initiating and exiting Sleep The system is initiated, your work returns to the screen where you have set at the factory to initiate Sleep after a period of networking connection or perform any type of inactivity when running on battery power or on external power. When Sleep is closed, open the display. ● Press a key on the keyboard. ● Tap or swipe the TouchPad. Your work is saved...
... to be changed using Power Options in Windows Control Panel. Initiating and exiting Sleep The system is initiated, your work returns to the screen where you have set at the factory to initiate Sleep after a period of networking connection or perform any type of inactivity when running on battery power or on external power. When Sleep is closed, open the display. ● Press a key on the keyboard. ● Tap or swipe the TouchPad. Your work is saved...
HP Notebook Reference Guide - Windows 7
Page 44
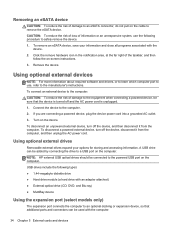
... remove hardware icon in the notification area, at the far right of damage to an eSATA connector, do not pull on the cable to the powered USB port on the computer. Using optional external devices NOTE: For more information about required software and drivers, or to learn which computer port to use the following types: ● 1.44-megabyte diskette drive ● Hard drive module (a hard drive with an adapter attached) ● External optical drive...
... remove hardware icon in the notification area, at the far right of damage to an eSATA connector, do not pull on the cable to the powered USB port on the computer. Using optional external devices NOTE: For more information about required software and drivers, or to learn which computer port to use the following types: ● 1.44-megabyte diskette drive ● Hard drive module (a hard drive with an adapter attached) ● External optical drive...
HP Notebook Reference Guide - Windows 7
Page 47
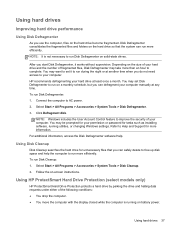
...Disk Cleanup. 2. Using hard drives Improving hard drive performance Using Disk Defragmenter As you start Disk Defragmenter, it to run more efficiently. You may set it works without supervision. Follow the on battery power. Depending on solid-state drives. Connect the computer to run on the hard drive become fragmented. Using Disk Cleanup Disk Cleanup searches the hard drive for tasks such as installing software, running on -screen instructions. Using HP ProtectSmart Hard Drive Protection (select models only) HP ProtectSmart Hard Drive Protection protects a hard...
...Disk Cleanup. 2. Using hard drives Improving hard drive performance Using Disk Defragmenter As you start Disk Defragmenter, it to run more efficiently. You may set it works without supervision. Follow the on battery power. Depending on solid-state drives. Connect the computer to run on the hard drive become fragmented. Using Disk Cleanup Disk Cleanup searches the hard drive for tasks such as installing software, running on -screen instructions. Using HP ProtectSmart Hard Drive Protection (select models only) HP ProtectSmart Hard Drive Protection protects a hard...
HP Notebook Reference Guide - Windows 7
Page 55
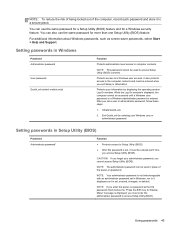
... information about Windows passwords, such as it in Windows Password Administrator password User password QuickLock (select models only) Function Protects administrator-level access to a Windows user account. Using passwords 45 CAUTION: If you forget your administrator password, you set , entered, changed, or deleted. NOTE: To reduce the risk of being locked out of the power-on password at the first password check before the "Press the ESC key for Startup Menu" message is displayed, you access Setup Utility (BIOS). Initiate...
... information about Windows passwords, such as it in Windows Password Administrator password User password QuickLock (select models only) Function Protects administrator-level access to a Windows user account. Using passwords 45 CAUTION: If you forget your administrator password, you set , entered, changed, or deleted. NOTE: To reduce the risk of being locked out of the power-on password at the first password check before the "Press the ESC key for Startup Menu" message is displayed, you access Setup Utility (BIOS). Initiate...
HP Notebook Reference Guide - Windows 7
Page 61
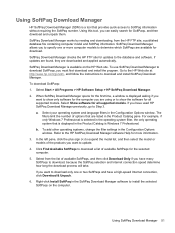
... SoftPaq Download Manager opens for the first time, a window is displayed asking if you want to download and install SoftPaq Download Manager. If you have a high-speed Internet connection, click Download & Unpack. 6. To add other operating systems, change the filter settings in the Configuration Options window. SoftPaq Download Manager checks the HP FTP site for all supported models. To use SoftPaq Download Manager to the database and software. Select Start > All Programs > HP Software Setup > HP SoftPaq Download Manager. 2. The filters limit the number of...
... SoftPaq Download Manager opens for the first time, a window is displayed asking if you want to download and install SoftPaq Download Manager. If you have a high-speed Internet connection, click Download & Unpack. 6. To add other operating systems, change the filter settings in the Configuration Options window. SoftPaq Download Manager checks the HP FTP site for all supported models. To use SoftPaq Download Manager to the database and software. Select Start > All Programs > HP Software Setup > HP SoftPaq Download Manager. 2. The filters limit the number of...
HP Notebook Reference Guide - Windows 7
Page 63
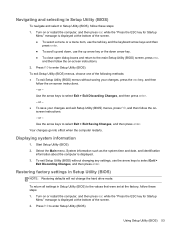
... Saving Changes, and then press enter. Select the Main menu. System information such as the system time and date, and identification information about the computer is displayed at the factory, follow these steps: 1. To return all settings in Setup Utility (BIOS) NOTE: Restoring defaults will not change the hard drive mode. or - Use the arrow keys to enter Setup Utility (BIOS). Your changes go into effect when the computer restarts. Restoring factory settings in Setup Utility (BIOS) to...
... Saving Changes, and then press enter. Select the Main menu. System information such as the system time and date, and identification information about the computer is displayed at the factory, follow these steps: 1. To return all settings in Setup Utility (BIOS) NOTE: Restoring defaults will not change the hard drive mode. or - Use the arrow keys to enter Setup Utility (BIOS). Your changes go into effect when the computer restarts. Restoring factory settings in Setup Utility (BIOS) to...
HP Notebook Reference Guide - Windows 7
Page 65
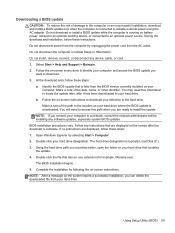
... -screen instructions to identify your hard drive designation. Using Setup Utility (BIOS) 55 At the download area, follow these steps: 1. If no instructions are displayed, follow these instructions: Do not disconnect power from the computer by unplugging the power cord from your computer to a network, consult the network administrator before installing any device, cable, or cord. 1. Using the hard drive path you connect your hard drive. Open Windows Explorer by following the on your selection to the hard drive. Downloading a BIOS update...
... -screen instructions to identify your hard drive designation. Using Setup Utility (BIOS) 55 At the download area, follow these steps: 1. If no instructions are displayed, follow these instructions: Do not disconnect power from the computer by unplugging the power cord from your computer to a network, consult the network administrator before installing any device, cable, or cord. 1. Using the hard drive path you connect your hard drive. Open Windows Explorer by following the on your selection to the hard drive. Downloading a BIOS update...
HP Notebook Reference Guide - Windows 7
Page 71
...displaying remaining charge 23 disposing 25 low battery levels 23 replacing 25 storing 24 Battery Check 22 battery information, finding 22 battery power 22 battery temperature 24 BIOS determining version 54 downloading an update 55 updating 54 Bluetooth device 2, 8 buttons media 13 power 18 volume 14 C cables 1394 32 eSATA 33 USB 31 checking audio functions 14 computer, traveling 24, 57 configuring audio for HDMI 17 configuring ExpressCards 28 connecting to a wired network 8 connecting to an existing wireless network 4 Connection Manager 3 conservation, power 24 creating a wireless connection...
...displaying remaining charge 23 disposing 25 low battery levels 23 replacing 25 storing 24 Battery Check 22 battery information, finding 22 battery power 22 battery temperature 24 BIOS determining version 54 downloading an update 55 updating 54 Bluetooth device 2, 8 buttons media 13 power 18 volume 14 C cables 1394 32 eSATA 33 USB 31 checking audio functions 14 computer, traveling 24, 57 configuring audio for HDMI 17 configuring ExpressCards 28 connecting to a wired network 8 connecting to an existing wireless network 4 Connection Manager 3 conservation, power 24 creating a wireless connection...
HP Notebook Reference Guide - Windows 7
Page 72
...9 connecting a modem cable adapter 9 selecting a location setting 10 N network cable, connecting 11 network icon 2 O operating system controls 4 optical disc inserting 39 removing 40 optical drive 34 optional external devices, using 34 P passwords set in Setup Utility (BIOS) 45 set in Windows 45 ports DisplayPort 15 expansion 34 external monitor 15 HDMI 16 Intel Wireless Display 17 VGA 15 power battery 22 conserving 24 options 19 power button 18 power meter 20 power plans customizing 21 selecting 20 viewing current 20 power switch 18 power-on password creating 47 entering 47 managing 47 power...
...9 connecting a modem cable adapter 9 selecting a location setting 10 N network cable, connecting 11 network icon 2 O operating system controls 4 optical disc inserting 39 removing 40 optical drive 34 optional external devices, using 34 P passwords set in Setup Utility (BIOS) 45 set in Windows 45 ports DisplayPort 15 expansion 34 external monitor 15 HDMI 16 Intel Wireless Display 17 VGA 15 power battery 22 conserving 24 options 19 power button 18 power meter 20 power plans customizing 21 selecting 20 viewing current 20 power switch 18 power-on password creating 47 entering 47 managing 47 power...
HP Mini and Compaq Mini Getting Started - Windows 7
Page 23
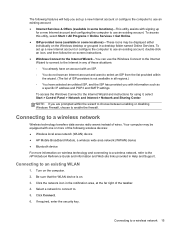
.... (The list of ISP providers is on the computer. 2. Be sure that the WLAN device is not available in Help and Support. Click Connect. 6. If required, enter the security key. To set up a new Internet account or configure the computer to use an existing account: ● Internet Services & Offers (available in some locations)-These icons may be displayed either individually on -screen instructions. ● Windows Connect to the Internet Wizard...
.... (The list of ISP providers is on the computer. 2. Be sure that the WLAN device is not available in Help and Support. Click Connect. 6. If required, enter the security key. To set up a new Internet account or configure the computer to use an existing account: ● Internet Services & Offers (available in some locations)-These icons may be displayed either individually on -screen instructions. ● Windows Connect to the Internet Wizard...
HP Mini and Compaq Mini Getting Started - Windows 7
Page 50
... 11 battery, replacing 24 Bluetooth label 39 C caps lock light, identifying 5 Certificate of Authenticity label 39 components bottom 11 display 10 front 6 left side 9 right side 7 top 4 connector, power 9 D Digital Media Slot, identifying 7 E esc key, identifying 6 external monitor, identifying 9 F f11 34 fn key, identifying 6, 17 H hard drive installing 28 removing 28 replacing 28 hard drive light 9 headphone (audio-out) jack 9 hotkeys, description 17 HP Recovery Manager 33 I input power 40 integrated webcam light, identifying 10 internal microphone, identifying 10 Internet connection setup...
... 11 battery, replacing 24 Bluetooth label 39 C caps lock light, identifying 5 Certificate of Authenticity label 39 components bottom 11 display 10 front 6 left side 9 right side 7 top 4 connector, power 9 D Digital Media Slot, identifying 7 E esc key, identifying 6 external monitor, identifying 9 F f11 34 fn key, identifying 6, 17 H hard drive installing 28 removing 28 replacing 28 hard drive light 9 headphone (audio-out) jack 9 hotkeys, description 17 HP Recovery Manager 33 I input power 40 integrated webcam light, identifying 10 internal microphone, identifying 10 Internet connection setup...

HP Mini 110 and Compaq Mini CQ10 - Maintenance and Service Guide
Page 106
... boot order 80 caps lock light, identifying 7 changing Setup Utility language 77 chipset, product description 1 components additional hardware 15 bottom 13 computer, major 17 display 12 front 8 left-side 10 right-side 9 TouchPad 6 computer feet locations 39 spare part number 39 connector, power 10 connectors, service considerations 35 cord, power 15 D device specifications 81 devices, mass storage 25 Diagnostics menu 80 Digital Media Slot, identifying 9 diskette drive, precautions 35 display product description 1 removal 61 spare part numbers...
... boot order 80 caps lock light, identifying 7 changing Setup Utility language 77 chipset, product description 1 components additional hardware 15 bottom 13 computer, major 17 display 12 front 8 left-side 10 right-side 9 TouchPad 6 computer feet locations 39 spare part number 39 connector, power 10 connectors, service considerations 35 cord, power 15 D device specifications 81 devices, mass storage 25 Diagnostics menu 80 Digital Media Slot, identifying 9 diskette drive, precautions 35 display product description 1 removal 61 spare part numbers...
HP Mini 110 and Compaq Mini CQ10 - Maintenance and Service Guide
Page 107
... webcam light, identifying 12 internal display switch, identifying 12 internal media cards, product description 3 internal microphone, identifying 12 J jacks audio-in (microphone) 11 audio-out (headphone) 11 RJ-45 (network) 10 K keyboard product description 4 removal 55 spare part numbers 18, 28, 29, 31, 32, 33, 55 keys action 8 esc 8 fn 8 Windows applications 8 Windows logo 8 L language support 79 latch, battery release 13 lights battery 10 caps lock 7 power 9 webcam 12 M Main menu 79 mass storage devices, hard drive 25 memory module product description 2 removal 52 spare part numbers...
... webcam light, identifying 12 internal display switch, identifying 12 internal media cards, product description 3 internal microphone, identifying 12 J jacks audio-in (microphone) 11 audio-out (headphone) 11 RJ-45 (network) 10 K keyboard product description 4 removal 55 spare part numbers 18, 28, 29, 31, 32, 33, 55 keys action 8 esc 8 fn 8 Windows applications 8 Windows logo 8 L language support 79 latch, battery release 13 lights battery 10 caps lock 7 power 9 webcam 12 M Main menu 79 mass storage devices, hard drive 25 memory module product description 2 removal 52 spare part numbers...

HP Mini 110 and Compaq Mini CQ10 - Maintenance and Service Guide
Page 108
... drive 2 internal media cards 3 keyboard 4 memory module 2 modem 2 operating system 4 optical drive 2 pointing device 4 ports 4 power requirements 4 processors 1 product name 1 security 4 serviceability 4 video 2 wireless 3 product name 1 R recovering a program or driver 84 recovering from the dedicated recovery partition 85 recovering from the recovery discs 87 recovery discs 84 Recovery Manager 84, 85 recovery partition 84 recovery, system 85 recycling battery 92 display 92 removal/replacement preliminaries 34 procedures 39 restore points 89 restoring default settings 78 RJ-45 (network) jack...
... drive 2 internal media cards 3 keyboard 4 memory module 2 modem 2 operating system 4 optical drive 2 pointing device 4 ports 4 power requirements 4 processors 1 product name 1 security 4 serviceability 4 video 2 wireless 3 product name 1 R recovering a program or driver 84 recovering from the dedicated recovery partition 85 recovering from the recovery discs 87 recovery discs 84 Recovery Manager 84, 85 recovery partition 84 recovery, system 85 recycling battery 92 display 92 removal/replacement preliminaries 34 procedures 39 restore points 89 restoring default settings 78 RJ-45 (network) jack...
HP Limited Warranty and Techincal Support - 3-year - North America
Page 10
... the use of a CSR part, HP will ship that HP replace these parts, you , this service.* 2) Parts for which customer self-repair is covered under warranty, HP will help sources to meet your needs: „ Access to drivers and product documentation: Find original product drivers, latest updates and software fixes, Limited Warranty information, and product documentation. „ Open an online service event with an HP Support Specialist: If you diagnose the problem. A technical support...
... the use of a CSR part, HP will ship that HP replace these parts, you , this service.* 2) Parts for which customer self-repair is covered under warranty, HP will help sources to meet your needs: „ Access to drivers and product documentation: Find original product drivers, latest updates and software fixes, Limited Warranty information, and product documentation. „ Open an online service event with an HP Support Specialist: If you diagnose the problem. A technical support...
Worldwide Waranty and Technical Support - HP - 90day - North America
Page 14
... support offering, please go /lookuptool/. Initial Setup and Technical Support for Included Software Technical Support for your installation questions (how to, first steps, and prerequisites). „ Setting up and configuring the software and options supplied or purchased with HP Hardware Products (how-to software usage problems. „ Obtaining HP Care Pack information or updates for your product that can be available in your country and type "Packaged Services...
... support offering, please go /lookuptool/. Initial Setup and Technical Support for Included Software Technical Support for your installation questions (how to, first steps, and prerequisites). „ Setting up and configuring the software and options supplied or purchased with HP Hardware Products (how-to software usage problems. „ Obtaining HP Care Pack information or updates for your product that can be available in your country and type "Packaged Services...


