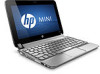
Getting Started - Windows 7
Page 6
... devices ...28 Using the keyboard ...29 Identifying the hotkey ...29 Identifying the action keys 30 Using keypads ...31 Using pointing devices ...32 Setting pointing device preferences 32 Using the TouchPad ...... Installing a hard drive ...42 Replacing the memory module ...44 Updating programs and drivers ...46 Routine care ...46 Cleaning the display ...46 Cleaning the TouchPad and keyboard 46 7 Backup and recovery ...47 Recovery discs ...48 Performing a system recovery ...48 Recovery using the dedicated recovery partition 49 Recovery using the recovery discs 49...
Getting Started - Windows 7
Page 9
...to Backup and recovery on page 47. ● Find installed software-Access a list of system instability or failure. For more information, refer to HP QuickWeb on page 14. ● Connect to Networking on page 2. ● Get to know your computer features. 1 Welcome ● Finding ... antivirus software-Protect your computer from damage caused by viruses. Select Start > All Programs. For details about your computer on page 4 and Keyboard and pointing devices on the manufacturer's Web site. 1 Refer to Getting to know your main operating system. For more information, refer to ...
Getting Started - Windows 7
Page 36
5 Keyboard and pointing devices ● Using the keyboard ● Using pointing devices 28 Chapter 5 Keyboard and pointing devices
Getting Started - Windows 7
Page 37
Hotkey fn+esc Description Displays information about system hardware components and the system BIOS version number. Using the keyboard Identifying the hotkey A hotkey is a combination of the fn key (1) and the esc key (2). Using the keyboard 29
Getting Started - Windows 7
Page 38
... display devices connected to simultaneous display on or off. Plays the next track of an audio CD or the next section of the keyboard, execute specifically assigned functions. Stops audio or video playback of a DVD. To establish a wireless connection, a wireless network must be set up.... 30 Chapter 5 Keyboard and pointing devices Most external monitors receive video information from computer display to monitor display to the system. Plays, pauses, or resumes an audio...
Getting Started - Windows 7
Page 39
Using keypads The computer supports an optional external numeric keypad or an optional external keyboard that includes a numeric keypad. Using the keyboard 31
Getting Started - Windows 7
Page 40
... the TouchPad off when the TouchPad is off and on the computer. Use the left and right TouchPad buttons like the buttons on . 32 Chapter 5 Keyboard and pointing devices
Getting Started - Windows 7
Page 42
NOTE: The computer also supports additional TouchPad features. To view and turn on these features, click the Synaptics icon in the notification area, at the far right of the taskbar. Select the device, and then click Settings. 34 Chapter 5 Keyboard and pointing devices Click Pointer Device Properties, and then click the Device Settings tab. Select the gesture that you want to turn on or off. 4. 3. Click Apply, and then click OK.
Getting Started - Windows 7
Page 44
To rotate, anchor your right forefinger from 12 o'clock to rotate items such as photos. Move the right forefinger around the anchored finger in the TouchPad zone. NOTE: Rotating must be done within the TouchPad zone. NOTE: The factory setting for gesture rotation is Off. 36 Chapter 5 Keyboard and pointing devices To reverse the rotation, move your left forefinger in a sweeping motion, moving from 3 o'clock to 12 o'clock. Rotating Rotating allows you to 3 o'clock.
Getting Started - Windows 7
Page 54
...cleaner attachment to the computer, never spray water, cleaning fluids, or chemicals on the keyboard surface. Updating programs and drivers HP recommends that can become available. Go to http://www.hp.com/support to receive automatic update notifications when they become trapped beneath the keys. Routine... care Cleaning the display CAUTION: To prevent permanent damage to clean the keyboard. A vacuum cleaner can deposit household debris on...
Getting Started - Windows 7
Page 66
..., using 24 J jacks audio-in (microphone) 11 audio-out (headphone) 11 network 10 RJ-45 (network) 10 K keyboard hotkey, identifying 29 keyboard, using 29 keys action 7 esc 7 fn 7 Windows applications 7 Windows logo 7 L labels Bluetooth 54 HP Mobile Broadband Module 54 Microsoft Certificate of Authenticity 54 regulatory 54 serial number 54 SIM 54 wireless...
HP Mini 210 - Maintenance and Service Guide
Page 6
... ...33 Service access cover ...34 Hard drive ...37 WWAN and GPS modules (select models only 40 WLAN module ...42 Memory module ...44 RTC battery ...45 Keyboard ...46 Top cover ...49 Speakers ...53 Display assembly ...55 Fan/heat sink assembly ...59 System board ...61 Power connector cable ...64 RJ-45 cover ...65...
HP Mini 210 - Maintenance and Service Guide
Page 11
... power External monitor 93% island-style keyboard HP TouchPad with multi-touch/gesture and left and right buttons support Supports external numeric keypad only TouchPad on/off button with LED indicator 40-W UMA AC adapter (non-Smart) with support for WWAN, GPS ● Half-size Mini Card slot with localized cable plug support...
HP Mini 210 - Maintenance and Service Guide
Page 24
... 622342-001 ● HD, flush glass display assembly in lavender frost 622343-001 Display hinges 626591-001 Display hinge covers (internal and external) 626590-001 Keyboard (includes cable) ● For use in Belgium ● For use in Brazil ● For use in the Czech Republic ● For use in Denmark, Finland...
HP Mini 210 - Maintenance and Service Guide
Page 30
... the United Kingdom and Singapore (includes cable) Keyboard for use in Germany (includes cable) Keyboard for use in France (includes cable) Keyboard for use in Italy (includes cable) Keyboard for use in Spain (includes cable) Keyboard for use in French Canada (includes cable) Keyboard for use in Portugal (includes cable) Keyboard for use in Turkey (includes cable...
HP Mini 210 - Maintenance and Service Guide
Page 31
... in the Czech Republic (includes cable) Keyboard for use in Russia (includes cable) Keyboard for use in Thailand (includes cable) Keyboard for use in Japan (includes cable) Keyboard for use in Belgium (includes cable) Keyboard for use in Taiwan (includes cable) Keyboard for use in South Korea (includes cable) Keyboard for use in the Netherlands (includes cable...
HP Mini 210 - Maintenance and Service Guide
Page 54
... 2. Remove the RTC battery (2) from the computer. NOTE: The RTC battery is attached with double-sided tape. Reverse this procedure to install the RTC battery. Keyboard NOTE: The keyboard spare part kit includes...
HP Mini 210 - Maintenance and Service Guide
Page 55
Disconnect all external devices connected to the computer. 2. Battery (see Service access cover on page 31). Remove the keyboard: 1. Remove the 3 Phillips 2.0×5.0 screws that secure the keyboard to the computer. 3. Turn the computer right-side up, with the front toward you are unsure whether the computer ...is off or in the United Kingdom and 622344-031 Singapore The United States 622344-001 Before removing the keyboard, follow these steps: 1. For use in: Italy Japan Latin America Spare part number 622344-061 622344-291 622344-161 For use in...
HP Mini 210 - Maintenance and Service Guide
Page 56
Release the zero insertion force (ZIF) connector (1) to install the keyboard. 48 Chapter 4 Removal and replacement procedures Lift the rear edge of the keyboard until it rests at an angle. 5. Reverse this procedure to which the keyboard cable is attached, and then disconnect the keyboard cable (2) 6. 3. Open the computer as far as possible. 4. Remove the keyboard.
HP Mini 210 - Maintenance and Service Guide
Page 57
...display hinges. Remove the following components: a. Service access cover (see Service access cover on page 46). Remove the top cover. 1. Keyboard (see Battery on , and then shut it down the computer. Disconnect the power from the computer by first unplugging the power cord... the AC adapter from the computer. 4. c. Remove the interior hinge covers (2). Shut down through the operating system. 2. Battery (see Keyboard on page 34). b. Component replacement procedures 49 Top cover NOTE: The top cover includes the TouchPad and TouchPad cable. Description Top cover ...