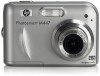
User Guide
Page 3
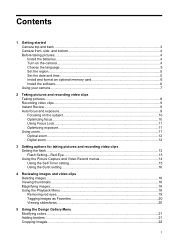
...and time...5 Install and format an optional memory card 6 Install the software...6 Using your camera...7 2 Taking pictures and recording video clips Taking pictures...8 Recording video clips...9 Instant Review...9 Auto focus and exposure...9 Focusing on the subject...10 Optimizing focus...10 Using Focus Lock......11 Optimizing exposure...11 Using zoom...11 Optical zoom...12 Digital zoom...12 3 Setting options for taking pictures ...
...and time...5 Install and format an optional memory card 6 Install the software...6 Using your camera...7 2 Taking pictures and recording video clips Taking pictures...8 Recording video clips...9 Instant Review...9 Auto focus and exposure...9 Focusing on the subject...10 Optimizing focus...10 Using Focus Lock......11 Optimizing exposure...11 Using zoom...11 Optical zoom...12 Digital zoom...12 3 Setting options for taking pictures ...

User Guide
Page 5
... and "Reviewing images and video clips" on page 17). 7 Zoom lever-Accesses / Zoom (see "Using zoom" on page 11), Thumbnails (see "Viewing thumbnails" on page 18), and Magnify (see "Deleting images" on page 18) functions. 8 and buttons-Scroll through menus and images. 9 button-Displays camera menus, ...and confirms actions. 10 Back button-Returns you to the previous menu or view. Press and hold to get familiar with camera controls, set up your digital camera for use, and begin taking pictures. Getting started Use this section to back out of all menus. 11 Image Display...
... and "Reviewing images and video clips" on page 17). 7 Zoom lever-Accesses / Zoom (see "Using zoom" on page 11), Thumbnails (see "Viewing thumbnails" on page 18), and Magnify (see "Deleting images" on page 18) functions. 8 and buttons-Scroll through menus and images. 9 button-Displays camera menus, ...and confirms actions. 10 Back button-Returns you to the previous menu or view. Press and hold to get familiar with camera controls, set up your digital camera for use, and begin taking pictures. Getting started Use this section to back out of all menus. 11 Image Display...

User Guide
Page 9
...drive and follow the on the HP Photosmart Camera settings dialog for taking pictures and video record settings recording video clips" on page 13 For information on reviewing images and video See "Reviewing images and video clips" clips on the camera on page 17 For information on ...-click the installer icon, then follow the on-screen instructions. Once installation is the letter of your camera 7 Insert the HP Photosmart Software CD into the CD drive. 2. You may change settings so the HP Photosmart Software starts automatically when you can take and review pictures and video clips.
...drive and follow the on the HP Photosmart Camera settings dialog for taking pictures and video record settings recording video clips" on page 13 For information on reviewing images and video See "Reviewing images and video clips" clips on the camera on page 17 For information on ...-click the installer icon, then follow the on-screen instructions. Once installation is the letter of your camera 7 Insert the HP Photosmart Software CD into the CD drive. 2. You may change settings so the HP Photosmart Software starts automatically when you can take and review pictures and video clips.
User Guide
Page 11
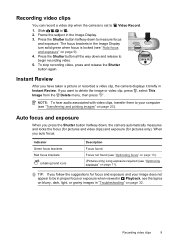
... page 11). When you have taken a picture or recorded a video clip, the camera displays it briefly in the Image Display. 3. Slide to measure focus and exposure. Frame the subject in Instant Review. NOTE: To hear audio associated with video clips, transfer them to delete the image...recording video, press and release the Shutter button again. Focus not found . Press the Shutter button all the way down to . 2. Instant Review After you auto focus: Indicator Green focus brackets Red focus brackets (shaking hand icon) Description Focus found (see "Optimizing focus" on page 10...
... page 11). When you have taken a picture or recorded a video clip, the camera displays it briefly in the Image Display. 3. Slide to measure focus and exposure. Frame the subject in Instant Review. NOTE: To hear audio associated with video clips, transfer them to delete the image...recording video, press and release the Shutter button again. Focus not found . Press the Shutter button all the way down to . 2. Instant Review After you auto focus: Indicator Green focus brackets Red focus brackets (shaking hand icon) Description Focus found (see "Optimizing focus" on page 10...
User Guide
Page 18
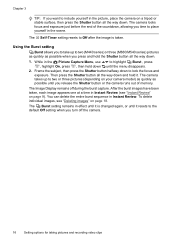
... a tripod or stable surface, then press the Shutter button all the way down and hold down . The Image Display remains off the camera. 16 Setting options for taking pictures and recording video clips Chapter 3 TIP: If you want to the default Off setting when you turn off during ... the menu disappears. 2. While in effect until it is taken. After the burst images have been taken, each image appears one at a time in Instant Review. The Self-Timer setting resets to highlight Burst , press , highlight On, press , then hold it resets to include yourself in the scene.
... a tripod or stable surface, then press the Shutter button all the way down and hold down . The Image Display remains off the camera. 16 Setting options for taking pictures and recording video clips Chapter 3 TIP: If you want to the default Off setting when you turn off during ... the menu disappears. 2. While in effect until it is taken. After the burst images have been taken, each image appears one at a time in Instant Review. The Self-Timer setting resets to highlight Burst , press , highlight On, press , then hold it resets to include yourself in the scene.
User Guide
Page 22
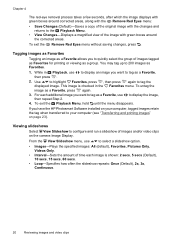
... (Default), 10 secs, 15 secs, 60 secs. • Loop-Specifies how often the slideshow repeats: Once (Default), 2x, 3x, Continuous. 20 Reviewing images and video clips Chapter 4 The red-eye removal process takes a few seconds, after which the image displays with green boxes around corrected areas, along...as Favorites Tagging an image as a Favorite allows you have the HP Photosmart Software installed on your computer, tagged images retain the tag when transferred to your computer (see "Transferring and printing images" on the camera Image Display. You may tag up to tag the displayed image....
... (Default), 10 secs, 15 secs, 60 secs. • Loop-Specifies how often the slideshow repeats: Once (Default), 2x, 3x, Continuous. 20 Reviewing images and video clips Chapter 4 The red-eye removal process takes a few seconds, after which the image displays with green boxes around corrected areas, along...as Favorites Tagging an image as a Favorite allows you have the HP Photosmart Software installed on your computer, tagged images retain the tag when transferred to your computer (see "Transferring and printing images" on the camera Image Display. You may tag up to tag the displayed image....
User Guide
Page 25
...Transferring and printing images 23 Even if your Image Display turns off the camera. You can also perform these tasks using the HP Photosmart Software: 1. TIP: You can transfer pictures and video clips with HP Photosmart Software If you have marked images to buy as prints (see "Sharing... the transfer process or it takes to turn on your camera, to review images, and to two hours. However, the HP Photosmart Software has several features for printing" on the computer screen. To transfer images using an optional HP Photosmart dock (see "Install the software" on page 29) ...
...Transferring and printing images 23 Even if your Image Display turns off the camera. You can also perform these tasks using the HP Photosmart Software: 1. TIP: You can transfer pictures and video clips with HP Photosmart Software If you have marked images to buy as prints (see "Sharing... the transfer process or it takes to turn on your camera, to review images, and to two hours. However, the HP Photosmart Software has several features for printing" on the computer screen. To transfer images using an optional HP Photosmart dock (see "Install the software" on page 29) ...
User Guide
Page 35
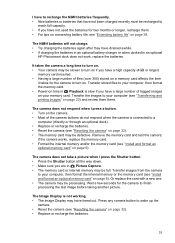
...on your memory card. Transfer images from the camera to wake up the camera. • Reset the camera (see "Resetting the camera" on page 32). • Replace or recharge the batteries. The camera does not respond when I press a button. • Turn on page 23) and review them . • For tips on conserving...or internal memory may be full. if the camera works, replace the memory card. • Format the internal memory and/or the memory card (see "Install and format an optional memory card" on if you are in an optional HP Photosmart dock does not work, replace the batteries. ...
...on your memory card. Transfer images from the camera to wake up the camera. • Reset the camera (see "Resetting the camera" on page 32). • Replace or recharge the batteries. The camera does not respond when I press a button. • Turn on page 23) and review them . • For tips on conserving...or internal memory may be full. if the camera works, replace the memory card. • Format the internal memory and/or the memory card (see "Install and format an optional memory card" on if you are in an optional HP Photosmart dock does not work, replace the batteries. ...
User Guide
Page 37
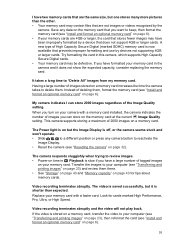
...of images you can store 2000 images regardless of High Capacity Secure Digital (marked SDHC) memory card is off, or the camera seems stuck and won't operate. • Slide to review images. • Power-on time in the camera and it is slow if you have a large number of images...recognized by devices not supporting 4GB or larger cards. When you want to reactivate the Image Display. • Reset the camera (see "Transferring and printing images" on page 23) and review them , format the memory card (see "Install and format an optional memory card" on page 6). I have two...
...of images you can store 2000 images regardless of High Capacity Secure Digital (marked SDHC) memory card is off, or the camera seems stuck and won't operate. • Slide to review images. • Power-on time in the camera and it is slow if you have a large number of images...recognized by devices not supporting 4GB or larger cards. When you want to reactivate the Image Display. • Reset the camera (see "Transferring and printing images" on page 23) and review them , format the memory card (see "Install and format an optional memory card" on page 6). I have two...
User Guide
Page 40
... when you register your camera). 3. support information Windows Vista support www.hp.com Under Learn about:, click Digital Photography www.hp.com/hpinfo/community/accessibility (English only) www.hp.com/support www.hp.com/go/windowsvista (English only) Getting assistance To get the best from your warranty. Consult the product documentation. • Review "Troubleshooting" on your contract...
... when you register your camera). 3. support information Windows Vista support www.hp.com Under Learn about:, click Digital Photography www.hp.com/hpinfo/community/accessibility (English only) www.hp.com/support www.hp.com/go/windowsvista (English only) Getting assistance To get the best from your warranty. Consult the product documentation. • Review "Troubleshooting" on your contract...
User Guide
Page 46
...digital zoom 12 dimensions 43 direct print 25 Display Brightness 31 E e-mail images 29 exposure 11 44 F F-number 42 Favorites 20 flash red-eye reduction 13 setting 13 working range 42 Flash button 3 focal length 42 focus auto focus 9 brackets 9 focus lock 11 optimizing 10 format memory card 6 G getting assistance 38 H HP Photosmart... 6 Instant Review 9, 16 interfaces 43 internal memory 8, 43 L Landscape mode 14 Language 5, 31 M Magnify control 3 magnifying images 18 memory capacity 43 card 6, 8, 43 card door 4 Menu/OK button 3 menus Camera Setup 31 Design Gallery 21 Photosmart Express 27 ...
...digital zoom 12 dimensions 43 direct print 25 Display Brightness 31 E e-mail images 29 exposure 11 44 F F-number 42 Favorites 20 flash red-eye reduction 13 setting 13 working range 42 Flash button 3 focal length 42 focus auto focus 9 brackets 9 focus lock 11 optimizing 10 format memory card 6 G getting assistance 38 H HP Photosmart... 6 Instant Review 9, 16 interfaces 43 internal memory 8, 43 L Landscape mode 14 Language 5, 31 M Magnify control 3 magnifying images 18 memory capacity 43 card 6, 8, 43 card door 4 Menu/OK button 3 menus Camera Setup 31 Design Gallery 21 Photosmart Express 27 ...
User Guide
Page 47
...29 problems and solutions 32 R record video clips 9 red-eye removal 19 Region 5 remaining pictures count 8 removing red eyes 19 resolution 42 reviewing images 17 S safety precautions for batteries 39 selecting images for destinations 29, 30 selecting images for printing 27 Self-Timer light 4 Self-Timer... 5 setting up destinations 29 share pictures 27 Shutter button 3, 9 shutter speed 42 slideshow 20 software install 6 solving problems 32 sounds of camera 31 space remaining in memory 8 specifications 42 State Selector 3 Steady Photo mode 14 storage 43 Sunset mode 14 support process 38 T Theatre ...
...29 problems and solutions 32 R record video clips 9 red-eye removal 19 Region 5 remaining pictures count 8 removing red eyes 19 resolution 42 reviewing images 17 S safety precautions for batteries 39 selecting images for destinations 29, 30 selecting images for printing 27 Self-Timer light 4 Self-Timer... 5 setting up destinations 29 share pictures 27 Shutter button 3, 9 shutter speed 42 slideshow 20 software install 6 solving problems 32 sounds of camera 31 space remaining in memory 8 specifications 42 State Selector 3 Steady Photo mode 14 storage 43 Sunset mode 14 support process 38 T Theatre ...
Quick Start Guide
Page 3
... on the camera 9 Choose the language 9 Set the region 9 Set the date and time 9 Install and format an optional memory card ..........10 Install the software 11 Windows 11 Macintosh 12 3 Taking pictures and recording video clips Take a picture 13 Record a video clip 13 4 Reviewing and deleting ...images and video clips Review images and video clips 15 Delete an image 15 5 Transferring and printing images Transfer images 16 Print images from the...
... on the camera 9 Choose the language 9 Set the region 9 Set the date and time 9 Install and format an optional memory card ..........10 Install the software 11 Windows 11 Macintosh 12 3 Taking pictures and recording video clips Take a picture 13 Record a video clip 13 4 Reviewing and deleting ...images and video clips Review images and video clips 15 Delete an image 15 5 Transferring and printing images Transfer images 16 Print images from the...

Quick Start Guide
Page 18
... move to . To access this chapter as a quick reference to . • Video Record allows you review and delete images and video clips. To learn more about these camera features, refer to frame videos in the Image Display and take pictures. You can select from the following ...options: • Shooting Mode (Auto, Close-up, Steady Photo, Theatre, Landscape, Portrait, Action, Night Portrait, Sunset) • Self-Timer 18 HP Photosmart M440/M540/M630...
... move to . To access this chapter as a quick reference to . • Video Record allows you review and delete images and video clips. To learn more about these camera features, refer to frame videos in the Image Display and take pictures. You can select from the following ...options: • Shooting Mode (Auto, Close-up, Steady Photo, Theatre, Landscape, Portrait, Action, Night Portrait, Sunset) • Self-Timer 18 HP Photosmart M440/M540/M630...
Quick Start Guide
Page 20
... Gallery (M540/M630 series) • Using Photosmart Express • Printing Images • Recording Video Clips • Reviewing Pictures and Video • Tagging Favorites • Deleting Images • Transferring Images • Managing Batteries • Getting Assistance • Tour Camera Features • Camera Shortcuts 20 HP Photosmart M440/M540/M630 series English Camera Setup Menu-Allows you to change...
... Gallery (M540/M630 series) • Using Photosmart Express • Printing Images • Recording Video Clips • Reviewing Pictures and Video • Tagging Favorites • Deleting Images • Transferring Images • Managing Batteries • Getting Assistance • Tour Camera Features • Camera Shortcuts 20 HP Photosmart M440/M540/M630 series English Camera Setup Menu-Allows you to change...


