
HP NetRAID 1M/2M Installation & Configuration
Page 92
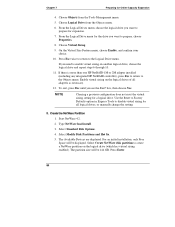
... you need to enable virtual sizing on the logical drive (which has virtual sizing enabled). Use the Reset to Factory Defaults option in Express Tools to disable virtual sizing for expansion. 7. From the Logical Drive menu for Online Capacity Expansion 4. Select Standard Disk Options. 4. For an initial installation, only Free Space will be displayed. The Available Devices are displayed. Chapter 7 Preparing for the drive you want to prepare for all adapters...
... you need to enable virtual sizing on the logical drive (which has virtual sizing enabled). Use the Reset to Factory Defaults option in Express Tools to disable virtual sizing for expansion. 7. From the Logical Drive menu for Online Capacity Expansion 4. Select Standard Disk Options. 4. For an initial installation, only Free Space will be displayed. The Available Devices are displayed. Chapter 7 Preparing for the drive you want to prepare for all adapters...
HP NetRAID 1M/2M Installation & Configuration
Page 104
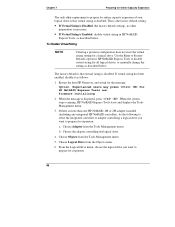
... 2M adapter installed (including any integrated HP NetRAID controller), do the following to select the integrated controller or adapter controlling a logical drive you want to prepare for all logical drives, or manually change the setting as described below . b. To Disable Virtual Sizing NOTE Clearing a previous configuration does not reset the virtual sizing setting for HP NetRAID Express Tools now. If there is displayed, press . Choose Logical Drive from the Tools Management menu. Firmware...
... 2M adapter installed (including any integrated HP NetRAID controller), do the following to select the integrated controller or adapter controlling a logical drive you want to prepare for all logical drives, or manually change the setting as described below . b. To Disable Virtual Sizing NOTE Clearing a previous configuration does not reset the virtual sizing setting for HP NetRAID Express Tools now. If there is displayed, press . Choose Logical Drive from the Tools Management menu. Firmware...
HP NetRAID 1M/2M Installation & Configuration
Page 172
... media errors. Channel: An electrical path for the transfer of the global hot-spare pool for all power and cable connections are factory formatted, formatting is only permitted on , stand-by the adapter. Because most hard drives are integrated into the slot. Up to prepare for RAID 1, 5, 10, and 50 configurations. Only one hot spare can be dedicated to replace a failed disk drive in the HP...
... media errors. Channel: An electrical path for the transfer of the global hot-spare pool for all power and cable connections are factory formatted, formatting is only permitted on , stand-by the adapter. Because most hard drives are integrated into the slot. Up to prepare for RAID 1, 5, 10, and 50 configurations. Only one hot spare can be dedicated to replace a failed disk drive in the HP...

HP Netserver LC 2000 Installation Guide
Page 121
...and user passwords, setting system to previous settings. The user may only change all fields, but prevents any of the HP NetServer's configuration. Exit the Setup Utility by firmware, enables memory caching, and adds an extended memory gap in the screens. Once the administrator password is enabled as a boot device (Boot ROM Enabled). Use this menu to enable, disable, or enable as a boot device, boot ROMs for enabled SCSI devices cannot be read by saving changes or exit without saving changes, which drive would include selecting the hard drive's characteristics, manually...
...and user passwords, setting system to previous settings. The user may only change all fields, but prevents any of the HP NetServer's configuration. Exit the Setup Utility by firmware, enables memory caching, and adds an extended memory gap in the screens. Once the administrator password is enabled as a boot device (Boot ROM Enabled). Use this menu to enable, disable, or enable as a boot device, boot ROMs for enabled SCSI devices cannot be read by saving changes or exit without saving changes, which drive would include selecting the hard drive's characteristics, manually...
HP Netserver LC 2000 Installation Guide
Page 143
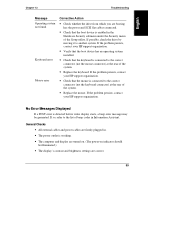
... the SCSI controller board. Check that the SCSI cable is connected to -narrow SCSI adapter with the white body on the SCSI cable. Replace the mouse. If the problem persists, contact your service and support organization. Press the F2 key to the correct connector (not the keyboard connector) at the rear of Beep Codes in Information Assistant. No Error Messages Displayed If a POST error is connected to run the Setup Utility. Chapter 12 Troubleshooting The following...
... the SCSI controller board. Check that the SCSI cable is connected to -narrow SCSI adapter with the white body on the SCSI cable. Replace the mouse. If the problem persists, contact your service and support organization. Press the F2 key to the correct connector (not the keyboard connector) at the rear of Beep Codes in Information Assistant. No Error Messages Displayed If a POST error is connected to run the Setup Utility. Chapter 12 Troubleshooting The following...
HP Netserver LC 2000 Installation Guide
Page 192
...P password problems, 141 PCI board guide two slot locations, 68 pedestal removal, 32 pedestal installation, 32 184 Pedestal weight and dimensions, 164 ports, 16, 97 Power Cord Set Requirements, 162 power requirements HP NetServer, 161 power supply, 162 limitations, 15 power supply LEDs, 15 power-down procedure, 18 Powering up limitation, 18 power-on procedure, 18 power-on system hardware test, 134 Power-On System Test errors, 134 precautions, 131 problems battery, 142 CD-ROM drive, 140 keyboard, 140 mouse, 140 password, 141 processor module installation, 77 processors supported processors, 71...
...P password problems, 141 PCI board guide two slot locations, 68 pedestal removal, 32 pedestal installation, 32 184 Pedestal weight and dimensions, 164 ports, 16, 97 Power Cord Set Requirements, 162 power requirements HP NetServer, 161 power supply, 162 limitations, 15 power supply LEDs, 15 power-down procedure, 18 Powering up limitation, 18 power-on procedure, 18 power-on system hardware test, 134 Power-On System Test errors, 134 precautions, 131 problems battery, 142 CD-ROM drive, 140 keyboard, 140 mouse, 140 password, 141 processor module installation, 77 processors supported processors, 71...

HP Netserver LC 3 Installation Roadmap
Page 5
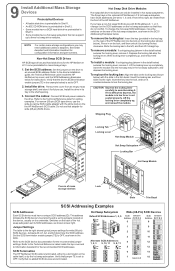
... the shelf opening. 3. Set the SCSI address: Set the jumpers on the the HP NetServer's SCSI cable. Install the drive: Remove the cover from left , and then lift it for instructions. 8 Install Additional Mass Storage Devices NOTE For certain mass storage configurations you have a non-hot-swap SCSI device with the slots in the trim bezel. For narrow (50-pin) SCSI tape drives, use the wide-to OFF. 2. HP Hard Disk Pack 1. Verify...
... the shelf opening. 3. Set the SCSI address: Set the jumpers on the the HP NetServer's SCSI cable. Install the drive: Remove the cover from left , and then lift it for instructions. 8 Install Additional Mass Storage Devices NOTE For certain mass storage configurations you have a non-hot-swap SCSI device with the slots in the trim bezel. For narrow (50-pin) SCSI tape drives, use the wide-to OFF. 2. HP Hard Disk Pack 1. Verify...
HP Netserver LC 3 Issue List
Page 1
... a SLOT number. To disable tape drive BIOS: 1. IntranetWare/NetWare 4.11 If you should be corrected in the STARTUP.NCF file to include the full path name and to install IntranetWare/NetWare 4.11 on the next Navigator CD release. In the SCSISelect Utility menu, select "Configure/View Host Adapter setting". 3. Select "SCSI Device Configuration". 4. and other solution is loaded in the U.S. One workaround is to run...
... a SLOT number. To disable tape drive BIOS: 1. IntranetWare/NetWare 4.11 If you should be corrected in the STARTUP.NCF file to include the full path name and to install IntranetWare/NetWare 4.11 on the next Navigator CD release. In the SCSISelect Utility menu, select "Configure/View Host Adapter setting". 3. Select "SCSI Device Configuration". 4. and other solution is loaded in the U.S. One workaround is to run...
HP Netserver LC 3 User Guide
Page 55
... cable is working. 49 Change settings as required. All external cables and power cables are booting has the power and SCSI flat cables connected. If possible, check the drive by moving it to run the Setup utility. Verify that the mouse is detected before video display starts, a beep error message may be generated. Press the F2 key to another system. The power outlet is securely plugged into the SCSI controller board. Verify that the keyboard is enabled in the Hardware...
... cable is working. 49 Change settings as required. All external cables and power cables are booting has the power and SCSI flat cables connected. If possible, check the drive by moving it to run the Setup utility. Verify that the mouse is detected before video display starts, a beep error message may be generated. Press the F2 key to another system. The power outlet is securely plugged into the SCSI controller board. Verify that the keyboard is enabled in the Hardware...
HP Netserver LC 3 User Guide
Page 115
... system hardware test, 48 Power-On System Test errors, 48 precautions, 45 pre-failure warranty, 75 Print or View Information, 25 Proactive Notification, 100 problems battery, 56 CD-ROM drive, 55 keyboard, 54 mouse, 54 password, 55 Product Safety, 69 R rack assembly installing the HP NetServer LC 3, 38 rack installation, 1, 35 raising system board, 8 Readme file, 1, 17 regulatory information, 63 Regulatory Notices - Product Safety, 69 removing system board, 6 removing the covers, 2 replicate configuration...
... system hardware test, 48 Power-On System Test errors, 48 precautions, 45 pre-failure warranty, 75 Print or View Information, 25 Proactive Notification, 100 problems battery, 56 CD-ROM drive, 55 keyboard, 54 mouse, 54 password, 55 Product Safety, 69 R rack assembly installing the HP NetServer LC 3, 38 rack installation, 1, 35 raising system board, 8 Readme file, 1, 17 regulatory information, 63 Regulatory Notices - Product Safety, 69 removing system board, 6 removing the covers, 2 replicate configuration...
HP Netserver LC II Installation Roadmap
Page 5
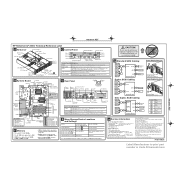
... hard disk drive preinstalled in the key bag on the locking bar (shown below . This address dictates the SCSI device's boot priority and is set to the far right shows typical jumper settings for configuration information and part numbers. Jumper Settings The table to OFF. 2. SCSI Termination The HP NetServer SCSI cable is set its tray in the table. Set the SCSI address: Set the jumpers on the back of the HP NetServer...
... hard disk drive preinstalled in the key bag on the locking bar (shown below . This address dictates the SCSI device's boot priority and is set to the far right shows typical jumper settings for configuration information and part numbers. Jumper Settings The table to OFF. 2. SCSI Termination The HP NetServer SCSI cable is set its tray in the table. Set the SCSI address: Set the jumpers on the back of the HP NetServer...

HP Netserver LH 3 30/FC Config Guide for Windows NT4.0 Clusters
Page 3
Any HP cables that meet SCSI specifications and any number. of cabinets Controller Disk capacities: ArrayGUIde RAID levels Logical units Hot spares Power Supply RAID arrays Must be numbered from 0 - 7. Disk drives (hot swap or fixed) SCSI bus SCSI IDs Shared Host Bus Adapter: Model No. of HBA Driver SPU I /O slot. See Shared Storage Configurations. 1 - 2. (See Shared Storage Configurations.) 4 GB, 8.8 GB, 17.8 GB Version 1.7.0 or greater 1, 1/0, 3 and 5 Logical units within...
Any HP cables that meet SCSI specifications and any number. of cabinets Controller Disk capacities: ArrayGUIde RAID levels Logical units Hot spares Power Supply RAID arrays Must be numbered from 0 - 7. Disk drives (hot swap or fixed) SCSI bus SCSI IDs Shared Host Bus Adapter: Model No. of HBA Driver SPU I /O slot. See Shared Storage Configurations. 1 - 2. (See Shared Storage Configurations.) 4 GB, 8.8 GB, 17.8 GB Version 1.7.0 or greater 1, 1/0, 3 and 5 Logical units within...

HP Netserver LH 3 30/FC Installation Guide
Page 5
... Controller Disk capacities: ArrayGUIde RAID levels Logical units Hot spares Power Supply RAID arrays Must be numbered from 0 - 7. Any A5246A HP Fibre Channel Adapter Kit for NetRAID local storage use PCI slot P8. Recommend assigning logical unit numbers 8 or greater 3 Different size or speed disks are allowed in the same RAID array but are not recommended in any available I /O slot Disk Array Controller: Model No. of controllers Microcode Disk Array Storage: Model No. Disk drives...
... Controller Disk capacities: ArrayGUIde RAID levels Logical units Hot spares Power Supply RAID arrays Must be numbered from 0 - 7. Any A5246A HP Fibre Channel Adapter Kit for NetRAID local storage use PCI slot P8. Recommend assigning logical unit numbers 8 or greater 3 Different size or speed disks are allowed in the same RAID array but are not recommended in any available I /O slot Disk Array Controller: Model No. of controllers Microcode Disk Array Storage: Model No. Disk drives...
HP Netserver LP 1000r (1.13, 1.26 & 1.40 GHz) User Guide
Page 109
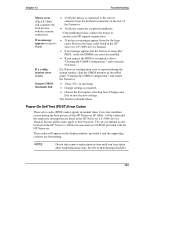
...; Press to run Setup. • Change settings as required. • Choose the Exit option, selecting Save Changes and Exit to "Clearing the CMOS Configuration," and restart the Netserver. These codes will complete the boot process without a mouse connected.) If no message appears (screen is blank) If a configuration error occurs System CMOS checksum bad • Verify the mouse is connected to this Netserver. Refer to the beep codes listed in the HP Netserver LP 1000r Service Manual. • If...
...; Press to run Setup. • Change settings as required. • Choose the Exit option, selecting Save Changes and Exit to "Clearing the CMOS Configuration," and restart the Netserver. These codes will complete the boot process without a mouse connected.) If no message appears (screen is blank) If a configuration error occurs System CMOS checksum bad • Verify the mouse is connected to this Netserver. Refer to the beep codes listed in the HP Netserver LP 1000r Service Manual. • If...
HP Netserver LP 1000r User Guide
Page 111
... connector (not the mouse connector) at the rear of the Netserver. • Verify the connector is reported during the startup routine, clear the CMOS memory as described under the Security menu. • Verify the boot device has an operating system installed. If a configuration error occurs If a Netserver configuration error is pushed completely. If the problem persists, replace the keyboard or contact your HP support organization. • Verify the keyboard is connected to the beep codes listed in the Setup Utility under "Clearing the CMOS Configuration...
... connector (not the mouse connector) at the rear of the Netserver. • Verify the connector is reported during the startup routine, clear the CMOS memory as described under the Security menu. • Verify the boot device has an operating system installed. If a configuration error occurs If a Netserver configuration error is pushed completely. If the problem persists, replace the keyboard or contact your HP support organization. • Verify the keyboard is connected to the beep codes listed in the Setup Utility under "Clearing the CMOS Configuration...

HP Netserver LP 2000r (1.13, 1.26 & 1.40 GHz) User Guide
Page 144
...keyboard, 87 mouse, 87 parallel, 4 rear panel, 4 serial ports, 87 USB ports, 87 video, 4, 87 power management Sleep States, 8 power management (ACPI) LAN A Power On/Off, 96 Wake-on-LAN, 96 Power requirements, 129 power supply module installing, 87 removing, 87 power switch DC power (front panel), 2 powering-down procedure, 6 powering-on procedure, 6 Power-on password setting, 101 problems CD-ROM drive, 112 keyboard, 112 mouse, 112 processors firmware upgrade, 57 reconfigure NOS, 57 processors clock speed, 49 installing, 50 installing heatsink, 55 removing, 58 supported, 49 R rack configuration...
...keyboard, 87 mouse, 87 parallel, 4 rear panel, 4 serial ports, 87 USB ports, 87 video, 4, 87 power management Sleep States, 8 power management (ACPI) LAN A Power On/Off, 96 Wake-on-LAN, 96 Power requirements, 129 power supply module installing, 87 removing, 87 power switch DC power (front panel), 2 powering-down procedure, 6 powering-on procedure, 6 Power-on password setting, 101 problems CD-ROM drive, 112 keyboard, 112 mouse, 112 processors firmware upgrade, 57 reconfigure NOS, 57 processors clock speed, 49 installing, 50 installing heatsink, 55 removing, 58 supported, 49 R rack configuration...
HP Netserver LP 2000r Technical Reference Label
Page 1
... for normal operation. Steady red indicates overtemperature, or fan failure. B System Board LAN B Battery Serial B LAN A/Mgmt Video Parallel Serial A/ Mgmt. Flashing green indicates Standby Mode. CAUTION! Slide Power Supply out Power Supply Insertion 2 1 1. Flexible Disk Drive 3. Hard Drive 4. Network Connection SCSI A Air Flow Guide Connector IDE-1 Configuration Switch Not Used (Default = Off) BIOS Recovery Clear Password Clear CMOS Not Used (Default = Off) Not Used (Default = Off) Not Used (Default = Off) Not Used (Default = Off) Open = Off Closed = On F Memory Use only PC...
... for normal operation. Steady red indicates overtemperature, or fan failure. B System Board LAN B Battery Serial B LAN A/Mgmt Video Parallel Serial A/ Mgmt. Flashing green indicates Standby Mode. CAUTION! Slide Power Supply out Power Supply Insertion 2 1 1. Flexible Disk Drive 3. Hard Drive 4. Network Connection SCSI A Air Flow Guide Connector IDE-1 Configuration Switch Not Used (Default = Off) BIOS Recovery Clear Password Clear CMOS Not Used (Default = Off) Not Used (Default = Off) Not Used (Default = Off) Not Used (Default = Off) Open = Off Closed = On F Memory Use only PC...
HP Netserver LP 2000r User Guide
Page 134
... keyboard, 77 mouse, 77 parallel, 4 rear panel, 4 serial ports, 77 USB ports, 77 video, 4, 77 power management Sleep States, 8 power management (ACPI) LAN A Power On/Off, 86 Wake-on-LAN, 86 Power requirements, 119 power supply module installing, 77 removing, 77 power switch DC power (front panel), 2 powering-down procedure, 6 powering-on procedure, 6 Power-on password setting, 92 problems CD-ROM drive, 104 keyboard, 104 mouse, 104 processors firmware upgrade, 52 reconfigure NOS, 52 processors clock speed, 45 installing, 46 installing heatsink, 50 removing, 52 supported, 45 R rack configuration...
... keyboard, 77 mouse, 77 parallel, 4 rear panel, 4 serial ports, 77 USB ports, 77 video, 4, 77 power management Sleep States, 8 power management (ACPI) LAN A Power On/Off, 86 Wake-on-LAN, 86 Power requirements, 119 power supply module installing, 77 removing, 77 power switch DC power (front panel), 2 powering-down procedure, 6 powering-on procedure, 6 Power-on password setting, 92 problems CD-ROM drive, 104 keyboard, 104 mouse, 104 processors firmware upgrade, 52 reconfigure NOS, 52 processors clock speed, 45 installing, 46 installing heatsink, 50 removing, 52 supported, 45 R rack configuration...
HP Netserver LPr Installation Guide
Page 107
... that the boot device has an operating system installed. • Check that the mouse is connected to another system. If the problem persists, contact your HP support organization. If possible, check the drive by moving it to the correct connector (not the mouse connector) at the rear of the Setup utility. General Checks • All external cables and power cables are firmly plugged in the Hardware Security submenu under the Security menu of...
... that the boot device has an operating system installed. • Check that the mouse is connected to another system. If the problem persists, contact your HP support organization. If possible, check the drive by moving it to the correct connector (not the mouse connector) at the rear of the Setup utility. General Checks • All external cables and power cables are firmly plugged in the Hardware Security submenu under the Security menu of...

HP Netserver LPr Technical Reference Card
Page 1
... OM E Rear Panel PCI Slot #3 PCI Slot #2 PCI Slot #1 Management Port Link LED Network Activity LED 100 Mbps LED See LED definitions below Power Inlet Ultra SCSI Mouse Serial Port B Keyboard Serial Port A Monitor Parallel Port Rear Panel LED Definitions: Link Steady green when the LPr's network adapter and the network switch are qualified in the servicing of computer equipment and trained in recognizing hazards in products with proper termination and does not exceed 2.5 meters. Flashes yellow to predict drive failure or to change without notice...
... OM E Rear Panel PCI Slot #3 PCI Slot #2 PCI Slot #1 Management Port Link LED Network Activity LED 100 Mbps LED See LED definitions below Power Inlet Ultra SCSI Mouse Serial Port B Keyboard Serial Port A Monitor Parallel Port Rear Panel LED Definitions: Link Steady green when the LPr's network adapter and the network switch are qualified in the servicing of computer equipment and trained in recognizing hazards in products with proper termination and does not exceed 2.5 meters. Flashes yellow to predict drive failure or to change without notice...


