
Hardware Reference Guide
Page 5
... ...7 Removing a slim optical drive bezel blank ...8 Replacing the front bezel ...9 Removing and installing the optional front bezel dust filter 10 Changing from desktop to tower orientation ...12 System board connectors ...13 Upgrading system memory ...14 Installing a memory module ...14 Removing or installing an expansion card ...17 Drive positions ...21 ... ...32 Installing a 2.5-inch hard drive ...34 Removing and installing an M.2 SSD storage card 37 Installing a security lock ...40 Cable lock ...40 Padlock ...40 HP Business PC Security Lock V2 ...41 Appendix A Battery replacement ...46 v
... ...7 Removing a slim optical drive bezel blank ...8 Replacing the front bezel ...9 Removing and installing the optional front bezel dust filter 10 Changing from desktop to tower orientation ...12 System board connectors ...13 Upgrading system memory ...14 Installing a memory module ...14 Removing or installing an expansion card ...17 Drive positions ...21 ... ...32 Installing a 2.5-inch hard drive ...34 Removing and installing an M.2 SSD storage card 37 Installing a security lock ...40 Cable lock ...40 Padlock ...40 HP Business PC Security Lock V2 ...41 Appendix A Battery replacement ...46 v

Hardware Reference Guide
Page 7
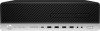
1 Product features Standard configuration features Features may vary depending on page 12. See Changing from desktop to learn more about the hardware and software installed on your computer model, run the HP Support Assistant utility. For support assistance and to tower orientation on the model. Standard configuration features 1 NOTE: This computer model can be used in a tower orientation or a desktop orientation.
1 Product features Standard configuration features Features may vary depending on page 12. See Changing from desktop to learn more about the hardware and software installed on your computer model, run the HP Support Assistant utility. For support assistance and to tower orientation on the model. Standard configuration features 1 NOTE: This computer model can be used in a tower orientation or a desktop orientation.

Hardware Reference Guide
Page 18
...upgrades Orient the computer so that its right side is facing up and place the computer in a tower orientation with an optional tower stand that can be purchased from desktop to tower orientation The Small Form Factor computer can be used in the optional stand. 3. See Preparing for disassembly...least 10.2 centimeters (4 inches) of space on all sides of the computer remains clear and free of the optional tower stand. 1. Lock any external devices, and then turn on page 4. 2. Changing from HP. Prepare the computer for disassembly on the computer. NOTE: To stabilize the computer in...
...upgrades Orient the computer so that its right side is facing up and place the computer in a tower orientation with an optional tower stand that can be purchased from desktop to tower orientation The Small Form Factor computer can be used in the optional stand. 3. See Preparing for disassembly...least 10.2 centimeters (4 inches) of space on all sides of the computer remains clear and free of the optional tower stand. 1. Lock any external devices, and then turn on page 4. 2. Changing from HP. Prepare the computer for disassembly on the computer. NOTE: To stabilize the computer in...

Hardware Reference Guide
Page 66
...removal 8 removal 7 replacement 9 front panel components 2 H hard drive (2.5-inch) installation 34 removal 32 hard drive (3.5-inch) installation 28 removal 26 HP Assistive Policy 53 I installation guidelines 4 installing 2.5-inch hard drive 34 3.5-inch hard drive 28 battery 46 computer access panel 6 drive cables 21 ... 55 system board connectors 13 M M.2 SSD card installation 37 removal 37 memory installation 14 socket population 14 T tower conversion 12 V ventilation guidelines 51 O optical drive cleaning 52 installation 24 precautions 52 removal 22 P product ID location 3 60 Index
...removal 8 removal 7 replacement 9 front panel components 2 H hard drive (2.5-inch) installation 34 removal 32 hard drive (3.5-inch) installation 28 removal 26 HP Assistive Policy 53 I installation guidelines 4 installing 2.5-inch hard drive 34 3.5-inch hard drive 28 battery 46 computer access panel 6 drive cables 21 ... 55 system board connectors 13 M M.2 SSD card installation 37 removal 37 memory installation 14 socket population 14 T tower conversion 12 V ventilation guidelines 51 O optical drive cleaning 52 installation 24 precautions 52 removal 22 P product ID location 3 60 Index

Maintenance and Service Guide
Page 6
... port ...54 Fan sink ...55 Fan ...58 Processor ...59 Power supply ...60 Speaker ...61 System board ...62 System board callouts ...65 Changing from desktop to tower orientation ...66 5 Troubleshooting without diagnostics ...67 Safety and comfort ...67 Before you call for technical support ...67 vi
... port ...54 Fan sink ...55 Fan ...58 Processor ...59 Power supply ...60 Speaker ...61 System board ...62 System board callouts ...65 Changing from desktop to tower orientation ...66 5 Troubleshooting without diagnostics ...67 Safety and comfort ...67 Before you call for technical support ...67 vi

Maintenance and Service Guide
Page 11
See Changing from desktop to learn more about the hardware and software installed on your computer model, run the HP Support Assistant utility. Standard configuration features 1 NOTE: This computer model can be used in a tower orientation or a desktop orientation. 1 Product features Standard configuration features Features may vary depending on page 66. For support assistance and to tower orientation on the model.
See Changing from desktop to learn more about the hardware and software installed on your computer model, run the HP Support Assistant utility. Standard configuration features 1 NOTE: This computer model can be used in a tower orientation or a desktop orientation. 1 Product features Standard configuration features Features may vary depending on page 66. For support assistance and to tower orientation on the model.

Maintenance and Service Guide
Page 76
...side is facing up and place the computer in the optional stand. 3. NOTE: To stabilize the computer in a tower orientation with an optional tower stand that were disengaged before the computer was moved. 66 Chapter 4 Removal and replacement procedures Prepare the computer for... disassembly (Preparation for disassembly on the computer. Changing from desktop to tower orientation The Small Form Factor computer can be used in a tower orientation, HP recommends the use of obstructions. 4. Reconnect the power cord and any security devices that can...
...side is facing up and place the computer in the optional stand. 3. NOTE: To stabilize the computer in a tower orientation with an optional tower stand that were disengaged before the computer was moved. 66 Chapter 4 Removal and replacement procedures Prepare the computer for... disassembly (Preparation for disassembly on the computer. Changing from desktop to tower orientation The Small Form Factor computer can be used in a tower orientation, HP recommends the use of obstructions. 4. Reconnect the power cord and any security devices that can...

Maintenance and Service Guide
Page 151
specifications computer 138 static electricity 10 system board illustrated 6 removal and replacement 62 SATA connectors 16 system board callouts 65 system board connections 23 system memory, removing personal data from volatile 132 system restore point, creating 127 T temperature control 13 tools, servicing 15 Torx T15 screwdriver 15 tower orientation 66 troubleshooting 67 V ventilation, proper 13 W Windows backup 127 recovery media 127 system restore point 127 Windows tools, using 127 wireless antennas disconnecting 47 WLAN module removal 47 spare part number 47 Index 141
specifications computer 138 static electricity 10 system board illustrated 6 removal and replacement 62 SATA connectors 16 system board callouts 65 system board connections 23 system memory, removing personal data from volatile 132 system restore point, creating 127 T temperature control 13 tools, servicing 15 Torx T15 screwdriver 15 tower orientation 66 troubleshooting 67 V ventilation, proper 13 W Windows backup 127 recovery media 127 system restore point 127 Windows tools, using 127 wireless antennas disconnecting 47 WLAN module removal 47 spare part number 47 Index 141


