

Maintenance and Service Guide
Page 6
..., restoring, and recovering in Windows 8.1 74 Creating recovery media and backups ...74 Creating HP Recovery media (select models only 74 Using Windows tools ...75 Restore and recovery ...75 Recovering using HP Recovery Manager 76 What you need to know before you get started 76 vi touch screen ...57 Display assembly - WLAN module ...30 Memory module ...32 RJ-45 door ...34 Fan ...36 USB board ...38 Subwoofer ...40 Heat sink ...42 Battery ...44 RTC battery ...45 Hard drive ...46 Speakers (front) ...48 Cable routing ...50 LED board ...51 Card reader board ...52 TouchPad assembly...
..., restoring, and recovering in Windows 8.1 74 Creating recovery media and backups ...74 Creating HP Recovery media (select models only 74 Using Windows tools ...75 Restore and recovery ...75 Recovering using HP Recovery Manager 76 What you need to know before you get started 76 vi touch screen ...57 Display assembly - WLAN module ...30 Memory module ...32 RJ-45 door ...34 Fan ...36 USB board ...38 Subwoofer ...40 Heat sink ...42 Battery ...44 RTC battery ...45 Hard drive ...46 Speakers (front) ...48 Cable routing ...50 LED board ...51 Card reader board ...52 TouchPad assembly...

Maintenance and Service Guide
Page 7
... Windows tools ...80 Restore and recovery ...81 Recovering using HP Recovery Manager 81 What you need to know before you get started 81 Using the HP Recovery partition (select products only 82 Using HP Recovery media to recover 82 Changing the computer boot order 83 Removing the HP Recovery partition (select products only 83 10 Using HP PC Hardware Diagnostics (UEFI) ...84 Downloading HP PC Hardware Diagnostics (UEFI) to a USB device 85 11 Specifications ...86 Computer specifications ...86 39.6-cm (15.6-in) display specifications ...87 Hard drive specifications ...88 12 Power cord set...
... Windows tools ...80 Restore and recovery ...81 Recovering using HP Recovery Manager 81 What you need to know before you get started 81 Using the HP Recovery partition (select products only 82 Using HP Recovery media to recover 82 Changing the computer boot order 83 Removing the HP Recovery partition (select products only 83 10 Using HP PC Hardware Diagnostics (UEFI) ...84 Downloading HP PC Hardware Diagnostics (UEFI) to a USB device 85 11 Specifications ...86 Computer specifications ...86 39.6-cm (15.6-in) display specifications ...87 Hard drive specifications ...88 12 Power cord set...

Maintenance and Service Guide
Page 9
... glass panel cover support - antiglare panel Touch solution with flush glass, multitouch enabled Support LVDS (co-layout with A10 processors, 8GB memory, WLAN, HD panel) ● 1.0-TB, 5400-rpm, 9.5-mm ● 750-GB, 5400-rpm, 9.5-mm HP TrueVision HD: HD camera - fixed (no tilt) + activity LED, USB 2.0, M-JPEG (1280x720 by 30 frames per second) Dual array digital microphones with appropriate software - typical brightness 220 nits, 16:9 aspect ratio (touch display...
... glass panel cover support - antiglare panel Touch solution with flush glass, multitouch enabled Support LVDS (co-layout with A10 processors, 8GB memory, WLAN, HD panel) ● 1.0-TB, 5400-rpm, 9.5-mm ● 750-GB, 5400-rpm, 9.5-mm HP TrueVision HD: HD camera - fixed (no tilt) + activity LED, USB 2.0, M-JPEG (1280x720 by 30 frames per second) Dual array digital microphones with appropriate software - typical brightness 220 nits, 16:9 aspect ratio (touch display...

Maintenance and Service Guide
Page 18
... a network cable. ● White: The network is connected. ● Amber: Activity is off. (7) Audio-out (headphone)/Audio-in (microphone) Connects optional powered stereo speakers, headphones, jack earbuds, a headset, or a television audio cable. Standard USB ports will not charge all USB devices or will charge using a low current. Also connects an optional headset microphone. NOTE: USB charging ports can also charge select models of cell phones and MP3 players, even when the computer is occurring on the network. (4) HDMI port Connects an optional video or audio device, such...
... a network cable. ● White: The network is connected. ● Amber: Activity is off. (7) Audio-out (headphone)/Audio-in (microphone) Connects optional powered stereo speakers, headphones, jack earbuds, a headset, or a television audio cable. Standard USB ports will not charge all USB devices or will charge using a low current. Also connects an optional headset microphone. NOTE: USB charging ports can also charge select models of cell phones and MP3 players, even when the computer is occurring on the network. (4) HDMI port Connects an optional video or audio device, such...
Maintenance and Service Guide
Page 22
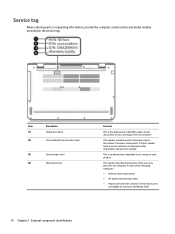
... alphanumeric identifier used to locate documents, drivers, and support for the computer. Item (1) (2) (3) (4) Description Model description Part number/Product number (p/n) Serial number (s/n) Warranty period Function This is unique to determine what components and parts are needed. This number provides specific information about the product's hardware components. The part number helps a service technician to each of the warranty period for the computer for Customer Self Repair (CSR) 14 Chapter 2 External component identification...
... alphanumeric identifier used to locate documents, drivers, and support for the computer. Item (1) (2) (3) (4) Description Model description Part number/Product number (p/n) Serial number (s/n) Warranty period Function This is unique to determine what components and parts are needed. This number provides specific information about the product's hardware components. The part number helps a service technician to each of the warranty period for the computer for Customer Self Repair (CSR) 14 Chapter 2 External component identification...

Maintenance and Service Guide
Page 35
... or region, and then follow the on-screen instructions. Make special note of each screw size and location during removal and replacement. For complete and current information on supported parts for Authorized Service Provider only parts. Component replacement procedures 27 Accessing these parts can damage the computer or void the warranty. NOTE: HP continually improves and changes product parts. There are as many as 75 screws...
... or region, and then follow the on-screen instructions. Make special note of each screw size and location during removal and replacement. For complete and current information on supported parts for Authorized Service Provider only parts. Component replacement procedures 27 Accessing these parts can damage the computer or void the warranty. NOTE: HP continually improves and changes product parts. There are as many as 75 screws...

Maintenance and Service Guide
Page 40
... the Enter a product name/number box, type the computer model information, and then click Search. 4. Select the operating system, and then click Next. 6. Under Step 2: Select a Download, click the BIOS link. 7. Turn off or in various system problems. To update BIOS: 1. Remove the bottom cover (see Bottom cover on -screen instructions. Click Support & Drivers > click Drivers & Software. 3. Click the Download button, and then follow these steps: 1. Disconnect all external devices from the computer. 3. Before removing a memory module...
... the Enter a product name/number box, type the computer model information, and then click Search. 4. Select the operating system, and then click Next. 6. Under Step 2: Select a Download, click the BIOS link. 7. Turn off or in various system problems. To update BIOS: 1. Remove the bottom cover (see Bottom cover on -screen instructions. Click Support & Drivers > click Drivers & Software. 3. Click the Download button, and then follow these steps: 1. Disconnect all external devices from the computer. 3. Before removing a memory module...
Maintenance and Service Guide
Page 77
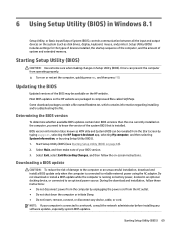
... connected to an optional power source. BIOS version information (also known as disk drives, display, keyboard, mouse, and printer). Select Exit, select Exit Discarding Changes, and then follow these instructions: ● Do not disconnect power from the computer by using the AC adapter. Do not download or install a BIOS update while the computer is running on battery power, docked in an optional docking device, or connected to reliable external power using Setup Utility (BIOS). 1. Setup Utility (BIOS) includes settings for the types of devices installed, the startup...
... connected to an optional power source. BIOS version information (also known as disk drives, display, keyboard, mouse, and printer). Select Exit, select Exit Discarding Changes, and then follow these instructions: ● Do not disconnect power from the computer by using the AC adapter. Do not download or install a BIOS update while the computer is running on battery power, docked in an optional docking device, or connected to reliable external power using Setup Utility (BIOS). 1. Setup Utility (BIOS) includes settings for the types of devices installed, the startup...
Maintenance and Service Guide
Page 78
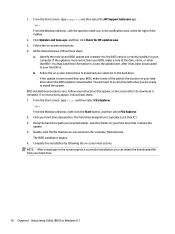
... ready to the BIOS version currently installed on -screen instructions to download your selection to your computer. Follow any instructions that has an .exe extension (for HP updates now. 3. From the Start screen, type support, and then select the HP Support Assistant app. ‒ or - Click your hard drive. 70 Chapter 6 Using Setup Utility (BIOS) in the notification area, at the far right of the taskbar. 2. From the Windows desktop, click...
... ready to the BIOS version currently installed on -screen instructions to download your selection to your computer. Follow any instructions that has an .exe extension (for HP updates now. 3. From the Start screen, type support, and then select the HP Support Assistant app. ‒ or - Click your hard drive. 70 Chapter 6 Using Setup Utility (BIOS) in the notification area, at the far right of the taskbar. 2. From the Windows desktop, click...
Maintenance and Service Guide
Page 79
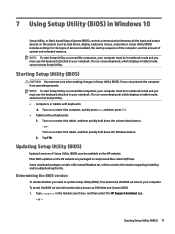
... operating properly. NOTE: To start Setup Utility on or restart the tablet, and then quickly hold down the volume down the Windows button. 2. or Turn on convertible computers, your computer must be in notebook mode and you must use the keyboard attached to your computer. Starting Setup Utility (BIOS) 71 Starting Setup Utility (BIOS) CAUTION: Use extreme care when making changes in the taskbar search box, and then select the HP Support Assistant app. - NOTE: To start Setup Utility...
... operating properly. NOTE: To start Setup Utility on or restart the tablet, and then quickly hold down the volume down the Windows button. 2. or Turn on convertible computers, your computer must be in notebook mode and you must use the keyboard attached to your computer. Starting Setup Utility (BIOS) 71 Starting Setup Utility (BIOS) CAUTION: Use extreme care when making changes in the taskbar search box, and then select the HP Support Assistant app. - NOTE: To start Setup Utility...

Maintenance and Service Guide
Page 80
... or initiate Sleep. ● Do not insert, remove, connect, or disconnect any device, cable, or cord. NOTE: If your BIOS version, make note of damage to reliable external power using the AC adapter. Click the question mark icon in Windows 10 If the update is more recent than your computer is downloaded. b. If no instructions appear, follow these steps: 1. The hard drive designation is complete. Make a note of...
... or initiate Sleep. ● Do not insert, remove, connect, or disconnect any device, cable, or cord. NOTE: If your BIOS version, make note of damage to reliable external power using the AC adapter. Click the question mark icon in Windows 10 If the update is more recent than your computer is downloaded. b. If no instructions appear, follow these steps: 1. The hard drive designation is complete. Make a note of...
Maintenance and Service Guide
Page 84
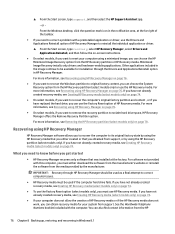
... created recovery media, see Creating HP Recovery media (select models only) on page 74. For more information, see Recovering using the HP Recovery partition (select models only). For more information, see Creating HP Recovery media (select models only) on page 76. ▲ From the Start screen, type support, and then select the HP Support Assistant app. - Recovering using HP Recovery Manager on page 74. ● To use the Factory Reset option of the taskbar. ● If you need to know before you get started ● HP Recovery Manager recovers only software...
... created recovery media, see Creating HP Recovery media (select models only) on page 74. For more information, see Recovering using the HP Recovery partition (select models only). For more information, see Creating HP Recovery media (select models only) on page 76. ▲ From the Start screen, type support, and then select the HP Support Assistant app. - Recovering using HP Recovery Manager on page 74. ● To use the Factory Reset option of the taskbar. ● If you need to know before you get started ● HP Recovery Manager recovers only software...

Maintenance and Service Guide
Page 85
... hard drive and re-creating the partitions. Using HP Recovery media, you can change the computer boot order. Select Troubleshoot from the HP Recovery partition: 1. If possible, back up any personal data you to http://www.hp.com/support, select your computer display when you press the power button. 2. Follow the on -screen instructions. website. Go to perform a system recovery or minimized image recovery (select models only) without the need for recovery discs or a recovery USB flash drive. Using the HP Recovery partition (select models only) The HP Recovery partition...
... hard drive and re-creating the partitions. Using HP Recovery media, you can change the computer boot order. Select Troubleshoot from the HP Recovery partition: 1. If possible, back up any personal data you to http://www.hp.com/support, select your computer display when you press the power button. 2. Follow the on -screen instructions. website. Go to perform a system recovery or minimized image recovery (select models only) without the need for recovery discs or a recovery USB flash drive. Using the HP Recovery partition (select models only) The HP Recovery partition...
Maintenance and Service Guide
Page 88
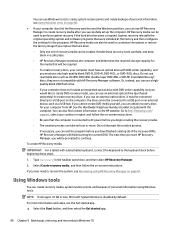
... blank USB flash drive. ◦ If your computer does not include an integrated optical drive with DVD writer capability, and you replace the hard drive. ◦ Only one set up , restoring, and recovering in Windows 10 the drive cannot be created. Type recovery in a safe place. ◦ HP Recovery Manager examines the computer and determines the required storage capacity for the media that will be used to customize the system or restore the factory...
... blank USB flash drive. ◦ If your computer does not include an integrated optical drive with DVD writer capability, and you replace the hard drive. ◦ Only one set up , restoring, and recovering in Windows 10 the drive cannot be created. Type recovery in a safe place. ◦ HP Recovery Manager examines the computer and determines the required storage capacity for the media that will be used to customize the system or restore the factory...
Maintenance and Service Guide
Page 89
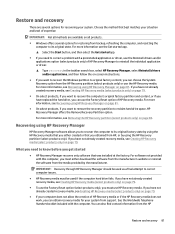
... the HP Restore and recovery 81 For more information, see the Get started app. ▲ Select the Start button, and then select the Get started ● HP Recovery Manager recovers only software that was installed at the factory. If you have not already created recovery media, see Creating HP Recovery media (select products only) on page 79. ● On select products, if you want to recover the Windows partition to reclaim hard drive space, HP Recovery Manager offers the Remove Recovery Partition option...
... the HP Restore and recovery 81 For more information, see the Get started app. ▲ Select the Start button, and then select the Get started ● HP Recovery Manager recovers only software that was installed at the factory. If you have not already created recovery media, see Creating HP Recovery media (select products only) on page 79. ● On select products, if you want to recover the Windows partition to reclaim hard drive space, HP Recovery Manager offers the Remove Recovery Partition option...
Maintenance and Service Guide
Page 91
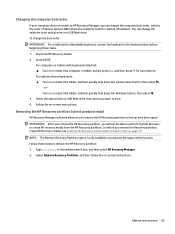
... instructions. Select Remove Recovery Partition, and then follow the on -screen instructions. Restore and recovery 83 You can change the selection to an optical drive or a USB flash drive. or Turn on or restart the tablet, and then quickly hold down button; see Creating HP Recovery media (select products only) on products that support this function. NOTE: The Remove Recovery Partition option is the order of devices listed in BIOS where the computer looks for boot options. Removing the HP Recovery partition (select products only) HP Recovery Manager software...
... instructions. Select Remove Recovery Partition, and then follow the on -screen instructions. Restore and recovery 83 You can change the selection to an optical drive or a USB flash drive. or Turn on or restart the tablet, and then quickly hold down button; see Creating HP Recovery media (select products only) on products that support this function. NOTE: The Remove Recovery Partition option is the order of devices listed in BIOS where the computer looks for boot options. Removing the HP Recovery partition (select products only) HP Recovery Manager software...
Maintenance and Service Guide
Page 96
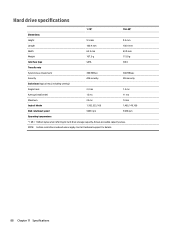
... setting) Single track 2.0 ms 1.5 ms Average (read/write) 12 ms 11 ms Maximum 22 ms 14 ms Logical blocks 1,953,525,168 1,465,149,168 Disk rotational speed 5400 rpm 5400 rpm Operating temperature *1 GB = 1 billion bytes when referring to hard drive storage capacity. Actual accessible capacity is less. Contact technical support for details. 88 Chapter 11 Specifications...
... setting) Single track 2.0 ms 1.5 ms Average (read/write) 12 ms 11 ms Maximum 22 ms 14 ms Logical blocks 1,953,525,168 1,465,149,168 Disk rotational speed 5400 rpm 5400 rpm Operating temperature *1 GB = 1 billion bytes when referring to hard drive storage capacity. Actual accessible capacity is less. Contact technical support for details. 88 Chapter 11 Specifications...
Maintenance and Service Guide
Page 100
... (microphone) jack, identifying 10 B backups 74, 79 base enclosure spare part numbers 17 battery removal 44 spare part numbers 17, 44 bezel illustrated 19 bezel trim illustrated 20 BIOS determining version 69, 71 downloading an update 69, 72 starting the Setup Utility 69, 71 updating 69, 71 boot order changing 77, 83 bottom cover removal 28 spare part numbers 28 buttons left TouchPad 6 optical drive eject 12 power 8 right TouchPad 6 C cable routing removal 50 cables illustrated 20 cables, service considerations 23 caps lock light, identifying 7 card reader board removal...
... (microphone) jack, identifying 10 B backups 74, 79 base enclosure spare part numbers 17 battery removal 44 spare part numbers 17, 44 bezel illustrated 19 bezel trim illustrated 20 BIOS determining version 69, 71 downloading an update 69, 72 starting the Setup Utility 69, 71 updating 69, 71 boot order changing 77, 83 bottom cover removal 28 spare part numbers 28 buttons left TouchPad 6 optical drive eject 12 power 8 right TouchPad 6 C cable routing removal 50 cables illustrated 20 cables, service considerations 23 caps lock light, identifying 7 card reader board removal...
Maintenance and Service Guide
Page 101
...(UEFI) using 84 HP Recovery Manager correcting boot problems 77, 83 starting 77, 82 HP Recovery media creating 74, 79 recovery 77, 82 HP Recovery partition recovery 77, 82 removing 78, 83 I integrated numeric keypad, identifying 9 internal display switch, identifying 4 internal microphones, identifying 4 J jacks audio-out (headphone)/audio-in (microphone) 10 network 10 RJ-45 (network) 10 K keyboard product description spare part numbers keys action 9 esc 9 fn 9 Windows 9 2 16, 28 L LED board removal 51 spare part numbers 17, 51 lights AC adapter/battery 10 caps lock 7 hard drive 12 mute...
...(UEFI) using 84 HP Recovery Manager correcting boot problems 77, 83 starting 77, 82 HP Recovery media creating 74, 79 recovery 77, 82 HP Recovery partition recovery 77, 82 removing 78, 83 I integrated numeric keypad, identifying 9 internal display switch, identifying 4 internal microphones, identifying 4 J jacks audio-out (headphone)/audio-in (microphone) 10 network 10 RJ-45 (network) 10 K keyboard product description spare part numbers keys action 9 esc 9 fn 9 Windows 9 2 16, 28 L LED board removal 51 spare part numbers 17, 51 lights AC adapter/battery 10 caps lock 7 hard drive 12 mute...
Maintenance and Service Guide
Page 102
... spare part number 16 TouchPad zone, identifying 6 transporting guidelines 25 U USB 2.0 port, identifying 12 USB 3.0 charging (powered) port, identifying 10 USB 3.0 port, identifying 10 USB board removal 38 spare part number 16, 38 USB board cable illustrated 20 V vents, identifying 13 video, product description 1 W webcam identifying 4 illustrated 18, 19 webcam cable removing 60 webcam light, identifying 4 webcam/microphone cable removing 60, 65 webcam/microphone module removing 59, 64 Windows system restore point 74, 75, 79, 80 Windows key, identifying 9 Windows tools using 75, 80 wireless...
... spare part number 16 TouchPad zone, identifying 6 transporting guidelines 25 U USB 2.0 port, identifying 12 USB 3.0 charging (powered) port, identifying 10 USB 3.0 port, identifying 10 USB board removal 38 spare part number 16, 38 USB board cable illustrated 20 V vents, identifying 13 video, product description 1 W webcam identifying 4 illustrated 18, 19 webcam cable removing 60 webcam light, identifying 4 webcam/microphone cable removing 60, 65 webcam/microphone module removing 59, 64 Windows system restore point 74, 75, 79, 80 Windows key, identifying 9 Windows tools using 75, 80 wireless...


