User Guide
Page 5
... HP Quick Start (select models only) ...1 Best practices ...1 Fun things to do ...2 More HP resources ...3 2 Getting to know your computer ...4 Finding your hardware and software information 4 Locating hardware ...4 Locating software ...4 Right side ...5 Left side ...6 Display ...8 Top ...9 TouchPad ...9 Lights ...10 Buttons and speakers ...11 Keys ...12 Bottom ...13 Labels ...14 3 Connecting to a network ...15 Connecting to a wireless network ...15 Using the wireless controls 15 Using the wireless button 15 Using operating system controls 16 Using a WLAN ...16 Using an Internet service...
... HP Quick Start (select models only) ...1 Best practices ...1 Fun things to do ...2 More HP resources ...3 2 Getting to know your computer ...4 Finding your hardware and software information 4 Locating hardware ...4 Locating software ...4 Right side ...5 Left side ...6 Display ...8 Top ...9 TouchPad ...9 Lights ...10 Buttons and speakers ...11 Keys ...12 Bottom ...13 Labels ...14 3 Connecting to a network ...15 Connecting to a wireless network ...15 Using the wireless controls 15 Using the wireless button 15 Using operating system controls 16 Using a WLAN ...16 Using an Internet service...
User Guide
Page 7
... 43 Resolving a low battery level when the computer cannot exit Hibernation ....... 44 Running on external AC power ...44 Troubleshooting power problems 44 HP CoolSense (select models only 45 Refreshing your software content with Intel Smart Connect Technology (select models only 45 Shutting down (turning off) the computer 46 7 Managing and sharing information ...47 Using a USB device ...47 Connecting a USB device 48 Removing a USB device ...48 Connecting a powered USB device 48 Inserting and removing a digital storage card 49 8 Maintaining...
... 43 Resolving a low battery level when the computer cannot exit Hibernation ....... 44 Running on external AC power ...44 Troubleshooting power problems 44 HP CoolSense (select models only 45 Refreshing your software content with Intel Smart Connect Technology (select models only 45 Shutting down (turning off) the computer 46 7 Managing and sharing information ...47 Using a USB device ...47 Connecting a USB device 48 Removing a USB device ...48 Connecting a powered USB device 48 Inserting and removing a digital storage card 49 8 Maintaining...
User Guide
Page 8
... up your software applications and information 57 Using an optional security cable lock 57 10 Using Setup Utility (BIOS) and System Diagnostics 58 Starting Setup Utility (BIOS) ...58 Updating the BIOS ...58 Determining the BIOS version 58 Downloading a BIOS update 59 Using HP PC Hardware Diagnostics (UEFI 60 Downloading HP PC Hardware Diagnostics (UEFI) to a USB device 60 11 Backing up, restoring, and recovering ...61 Creating recovery media and backups 61 Creating HP Recovery media 62 Restore and recovery ...63 Using Windows Refresh for quick and easy recovery 64 Remove everything...
... up your software applications and information 57 Using an optional security cable lock 57 10 Using Setup Utility (BIOS) and System Diagnostics 58 Starting Setup Utility (BIOS) ...58 Updating the BIOS ...58 Determining the BIOS version 58 Downloading a BIOS update 59 Using HP PC Hardware Diagnostics (UEFI 60 Downloading HP PC Hardware Diagnostics (UEFI) to a USB device 60 11 Backing up, restoring, and recovering ...61 Creating recovery media and backups 61 Creating HP Recovery media 62 Restore and recovery ...63 Using Windows Refresh for quick and easy recovery 64 Remove everything...

User Guide
Page 25
..., headsets, speakers, and cameras. If the wireless light is on the model. In a PAN, each other Bluetoothenabled devices such as Wi-Fi networks, wireless LANs, or WLANs) in Help and Support. From the Start screen, type h, and then select Help and Support. All of wires. Because the wireless devices are enabled at home, you can use the wireless button to turn on or turn on your computer are enabled at least one...
..., headsets, speakers, and cameras. If the wireless light is on the model. In a PAN, each other Bluetoothenabled devices such as Wi-Fi networks, wireless LANs, or WLANs) in Help and Support. From the Start screen, type h, and then select Help and Support. All of wires. Because the wireless devices are enabled at home, you can use the wireless button to turn on or turn on your computer are enabled at least one...
User Guide
Page 26
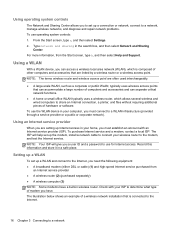
... set up Internet access in your wireless router to a network, manage wireless networks, and diagnose and repair network problems. To use operating system controls: 1. From the Start screen, type n, and then select Settings. 2. For more information, from an Internet service provider ● A wireless router (2) (purchased separately) ● A wireless computer (3) NOTE: Some modems have . Using operating system controls The Network and Sharing Center allows you need the following equipment: ● A broadband modem (either DSL or cable) (1) and high-speed Internet service...
... set up Internet access in your wireless router to a network, manage wireless networks, and diagnose and repair network problems. To use operating system controls: 1. From the Start screen, type n, and then select Settings. 2. For more information, from an Internet service provider ● A wireless router (2) (purchased separately) ● A wireless computer (3) NOTE: Some modems have . Using operating system controls The Network and Sharing Center allows you need the following equipment: ● A broadband modem (either DSL or cable) (1) and high-speed Internet service...

User Guide
Page 28
... select Open Network and Sharing Center. Follow the on the computer. 18 Chapter 3 Connecting to set up a new connection or network. If the WLAN is made, place the mouse pointer over the network status icon in your office. Both cables are listed, you want to connect to enter a security code. Connecting to a local area network (LAN) Use a LAN connection if you to a network Plug the network cable into an RJ-45 (network) jack. Using Bluetooth wireless devices (select models only) A Bluetooth device...
... select Open Network and Sharing Center. Follow the on the computer. 18 Chapter 3 Connecting to set up a new connection or network. If the WLAN is made, place the mouse pointer over the network status icon in your office. Both cables are listed, you want to connect to enter a security code. Connecting to a local area network (LAN) Use a LAN connection if you to a network Plug the network cable into an RJ-45 (network) jack. Using Bluetooth wireless devices (select models only) A Bluetooth device...

User Guide
Page 36
... the USB ports on a touch screen (select models only). From the Start screen, type c to reveal the Apps list. From the Synaptics ClickPad screen, select or clear the check box next to the gesture that you to activate the demonstration. Review the Windows 8 Basics guide included with simple finger movements. Using the TouchPad The TouchPad allows you want to perform routine tasks. Select Control Panel, and then select Hardware and Sound. 2. Select Control Panel...
... the USB ports on a touch screen (select models only). From the Start screen, type c to reveal the Apps list. From the Synaptics ClickPad screen, select or clear the check box next to the gesture that you to activate the demonstration. Review the Windows 8 Basics guide included with simple finger movements. Using the TouchPad The TouchPad allows you want to perform routine tasks. Select Control Panel, and then select Hardware and Sound. 2. Select Control Panel...
User Guide
Page 47
... display on opening Setup Utility (BIOS), and then follow the instructions at the factory. See Using Setup Utility (BIOS) and System Diagnostics on page 58 for instructions on both the computer and the monitor. Errors can disable this feature. f4 Switches the screen image between display devices connected to your computer. To activate the assigned function after you have disabled the action key feature, you hold down the key. Help and Support also provides automated troubleshooting tools...
... display on opening Setup Utility (BIOS), and then follow the instructions at the factory. See Using Setup Utility (BIOS) and System Diagnostics on page 58 for instructions on both the computer and the monitor. Errors can disable this feature. f4 Switches the screen image between display devices connected to your computer. To activate the assigned function after you have disabled the action key feature, you hold down the key. Help and Support also provides automated troubleshooting tools...
User Guide
Page 57
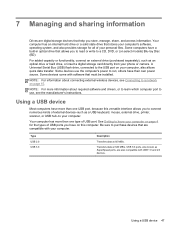
... of USB port. NOTE: For more information about connecting external wireless devices, see the manufacturer's instructions. Using a USB device Most computers have more than one type of your computer, also allows quick data transfer. See Getting to a CD, DVD, or (on select models) Blu-ray Disc (BD). Be sure to run; For added capacity or functionality, connect an external drive (purchased separately), such as a USB keyboard, mouse, external drive, printer, scanner, or USB hub-to a network...
... of USB port. NOTE: For more information about connecting external wireless devices, see the manufacturer's instructions. Using a USB device Most computers have more than one type of your computer, also allows quick data transfer. See Getting to a CD, DVD, or (on select models) Blu-ray Disc (BD). Be sure to run; For added capacity or functionality, connect an external drive (purchased separately), such as a USB keyboard, mouse, external drive, printer, scanner, or USB hub-to a network...
User Guide
Page 61
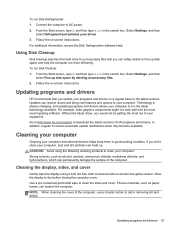
... type disk in the search box. Select Settings, and then select Free up . Allow the display to the latest versions. To run Disk Defragmenter: 1. Updating programs and drivers HP recommends that you update your computer, dust and dirt particles can resolve issues and bring new features and options to aid in good working condition. For additional information, access the Disk Defragmenter software Help. Connect the computer to download...
... type disk in the search box. Select Settings, and then select Free up . Allow the display to the latest versions. To run Disk Defragmenter: 1. Updating programs and drivers HP recommends that you update your computer, dust and dirt particles can resolve issues and bring new features and options to aid in good working condition. For additional information, access the Disk Defragmenter software Help. Connect the computer to download...
User Guide
Page 69
... computer to reliable external power using the AC adapter. From the Start screen, type support, select the HP Support Assistant app. 2. Follow the on your hard drive that contains the update. 4. BIOS installation procedures vary. The BIOS installation begins. 5. Updating the BIOS 59 You may need to access this information to locate the update later, after the download is complete. You will need this path when you connect your hard drive where the BIOS update is downloaded. If no instructions are revealed...
... computer to reliable external power using the AC adapter. From the Start screen, type support, select the HP Support Assistant app. 2. Follow the on your hard drive that contains the update. 4. BIOS installation procedures vary. The BIOS installation begins. 5. Updating the BIOS 59 You may need to access this information to locate the update later, after the download is complete. You will need this path when you connect your hard drive where the BIOS update is downloaded. If no instructions are revealed...

User Guide
Page 73
... History, see Remove everything and reinstall Windows on page 65. ● If you have replaced the hard drive, you can use the Factory Reset option of HP Recovery media to restore the factory image to reinstall the individual application or driver. Other applications included in HP Recovery Manager. Minimized Image Recovery installs only drivers and hardware-enabling applications. For more information, see Help and Support. Windows creates system restore points automatically during a Windows update and other system maintenance events. For...
... History, see Remove everything and reinstall Windows on page 65. ● If you have replaced the hard drive, you can use the Factory Reset option of HP Recovery media to restore the factory image to reinstall the individual application or driver. Other applications included in HP Recovery Manager. Minimized Image Recovery installs only drivers and hardware-enabling applications. For more information, see Help and Support. Windows creates system restore points automatically during a Windows update and other system maintenance events. For...
User Guide
Page 75
... HP Recovery Manager should be used if the computer hard drive fails. ● To use HP Recovery media. ● If the HP Recovery media do not work, you can only be used as you need for recovery discs or a recovery USB flash drive. This type of the following recovery options: ● System Recovery-Reinstalls the original operating system, and then configures the settings for your personal data. or - Under Remove everything and reinstall Windows, select Get started, and follow the on-screen instructions. Recovering using HP Recovery Manager HP Recovery Manager software...
... HP Recovery Manager should be used if the computer hard drive fails. ● To use HP Recovery media. ● If the HP Recovery media do not work, you can only be used as you need for recovery discs or a recovery USB flash drive. This type of the following recovery options: ● System Recovery-Reinstalls the original operating system, and then configures the settings for your personal data. or - Under Remove everything and reinstall Windows, select Get started, and follow the on-screen instructions. Recovering using HP Recovery Manager HP Recovery Manager software...
User Guide
Page 79
... H hard drive light 7 hard drive, HP 3D DriveGuard 50 HDMI port connecting 24 identifying 6, 21 HDMI, configuring audio 24 headphone jack, identifying 5, 21 headphones, connecting 22 Hibernation exiting 41 initiated during critical battery level 43 initiating 41 high-definition devices, connecting 24, 25 hot keys bass settings 39 description 39 reveal system information 39 using 39 HP 3D DriveGuard 50 HP and third-party software updates, installing 57 HP Quick Start 1 HP Recovery Manager 65 correcting boot problems 66 starting 65 HP Recovery media creating 62 recovery 66 HP Recovery partition...
... H hard drive light 7 hard drive, HP 3D DriveGuard 50 HDMI port connecting 24 identifying 6, 21 HDMI, configuring audio 24 headphone jack, identifying 5, 21 headphones, connecting 22 Hibernation exiting 41 initiated during critical battery level 43 initiating 41 high-definition devices, connecting 24, 25 hot keys bass settings 39 description 39 reveal system information 39 using 39 HP 3D DriveGuard 50 HP and third-party software updates, installing 57 HP Quick Start 1 HP Recovery Manager 65 correcting boot problems 66 starting 65 HP Recovery media creating 62 recovery 66 HP Recovery partition...
User Guide
Page 80
... 10 hard drive 7 mute 10 power 7, 10 webcam 20 wireless 10 low battery level 43 M maintenance Disk Cleanup 51 Disk Defragmenter 50 Media Card Reader, identifying 6 microphone jack, identifying 5, 21 microphone, connecting 22 minimized image creating 65 recovery 65 mouse, external setting preferences 26 mute light, identifying 10 N network jack, identifying 5 num lock key, identifying 12, 39 O operating environment 67 optional external devices, using 48 original system recovery 65 P passwords Setup Utility (BIOS) 55 Windows 55 PC Hardware Diagnostics downloading 60 starting 60 pinching touch...
... 10 hard drive 7 mute 10 power 7, 10 webcam 20 wireless 10 low battery level 43 M maintenance Disk Cleanup 51 Disk Defragmenter 50 Media Card Reader, identifying 6 microphone jack, identifying 5, 21 microphone, connecting 22 minimized image creating 65 recovery 65 mouse, external setting preferences 26 mute light, identifying 10 N network jack, identifying 5 num lock key, identifying 12, 39 O operating environment 67 optional external devices, using 48 original system recovery 65 P passwords Setup Utility (BIOS) 55 Windows 55 PC Hardware Diagnostics downloading 60 starting 60 pinching touch...
HP ENVY m6 Sleekbook HP ENVY Touchsmart m6 SleekBook HP ENVY TouchSmart m6 Ultrabook - Maintenance and Service Guide
Page 77
... steps: 1. Errors can be used with your change takes effect immediately. Turn on the system (such as disk drives, display, keyboard, mouse, and printer). Your change and exit Setup Utility, use the arrow keys to select Exit > Exit Saving Changes, and then press enter. Changing the language of Setup Utility 1. When a confirmation prompt with Setup Utility only if USB legacy support is displayed, press enter. 5. Start Setup Utility. 2. 5 Setup Utility (BIOS) and System Diagnostics Using Setup Utility Setup Utility, or Basic Input/Output System (BIOS), controls communication...
... steps: 1. Errors can be used with your change takes effect immediately. Turn on the system (such as disk drives, display, keyboard, mouse, and printer). Your change and exit Setup Utility, use the arrow keys to select Exit > Exit Saving Changes, and then press enter. Changing the language of Setup Utility 1. When a confirmation prompt with Setup Utility only if USB legacy support is displayed, press enter. 5. Start Setup Utility. 2. 5 Setup Utility (BIOS) and System Diagnostics Using Setup Utility Setup Utility, or Basic Input/Output System (BIOS), controls communication...
HP ENVY m6 Sleekbook HP ENVY Touchsmart m6 SleekBook HP ENVY TouchSmart m6 Ultrabook - Maintenance and Service Guide
Page 80
... Exit Discarding Changes, and then press enter. Do not insert, remove, connect, or disconnect any software updates, especially system BIOS updates. At the download area, follow these steps: 1. Start Setup Utility (BIOS). 2. To exit Setup Utility (BIOS) without saving your hard drive designation. Click Updates and tune-ups, and then click Check for HP updates now. 3. If no instructions are displayed on the screen after it to the BIOS version currently installed on your hard drive. BIOS version information...
... Exit Discarding Changes, and then press enter. Do not insert, remove, connect, or disconnect any software updates, especially system BIOS updates. At the download area, follow these steps: 1. Start Setup Utility (BIOS). 2. To exit Setup Utility (BIOS) without saving your hard drive designation. Click Updates and tune-ups, and then click Check for HP updates now. 3. If no instructions are displayed on the screen after it to the BIOS version currently installed on your hard drive. BIOS version information...
HP ENVY m6 Sleekbook HP ENVY Touchsmart m6 SleekBook HP ENVY TouchSmart m6 Ultrabook - Maintenance and Service Guide
Page 88
..., a list of the screen to remove personal information before you wish to start Refresh: 1. To use the f11 key: 1. Select Reset your computer, or you press the power button. 2. IMPORTANT: This option does not provide backups of your PC, and follow the on -screen instructions. 80 Chapter 7 Backup and recovery On the Start screen, point to its original state. To access HP Support Assistant on the system at the factory. Press...
..., a list of the screen to remove personal information before you wish to start Refresh: 1. To use the f11 key: 1. Select Reset your computer, or you press the power button. 2. IMPORTANT: This option does not provide backups of your PC, and follow the on -screen instructions. 80 Chapter 7 Backup and recovery On the Start screen, point to its original state. To access HP Support Assistant on the system at the factory. Press...
HP ENVY m6 Sleekbook HP ENVY Touchsmart m6 SleekBook HP ENVY TouchSmart m6 Ultrabook - Maintenance and Service Guide
Page 94
...) jack 14 right side 14 top 8 computer major components 17 computer part number 16 computer reset 80 computer specifications 74 connector, power 14 connectors, service considerations 25 B backup and restore 77 battery removal 32 spare part numbers 20, 23, 32 BIOS determining version 71 downloading an update 72 Blu-ray ROM DVD±R/RW Super Multi Double-Layer Drive precautions 26 buttons left TouchPad 8 power 10 right TouchPad 8 C cables, service considerations 25 caps lock light, identifying 9 card reader board removal 44...
...) jack 14 right side 14 top 8 computer major components 17 computer part number 16 computer reset 80 computer specifications 74 connector, power 14 connectors, service considerations 25 B backup and restore 77 battery removal 32 spare part numbers 20, 23, 32 BIOS determining version 71 downloading an update 72 Blu-ray ROM DVD±R/RW Super Multi Double-Layer Drive precautions 26 buttons left TouchPad 8 power 10 right TouchPad 8 C cables, service considerations 25 caps lock light, identifying 9 card reader board removal 44...
HP ENVY m6 Sleekbook HP ENVY Touchsmart m6 SleekBook HP ENVY TouchSmart m6 Ultrabook - Maintenance and Service Guide
Page 95
... chipset 1 display panel 1 Ethernet 2 external media cards 3 graphics 1 hard drives 2 internal card expansion 3 keyboard 4 memory module 2 microphone 2 operating system 5 pointing device 4 ports 4 power requirements 4 processors 1 product name 1 security 4 serviceability 5 video 2 wireless 2 product name 1 product number 16 R recovery 80 recovery partition 78 recycle computer 80 refresh 80 removal/replacement preliminaries 25 procedures 30 remove everything and reinstall Windows 80 reset computer 80 steps 80 restoring the hard drive 78 right TouchPad button, identifying 8 RJ-45 (network) jack...
... chipset 1 display panel 1 Ethernet 2 external media cards 3 graphics 1 hard drives 2 internal card expansion 3 keyboard 4 memory module 2 microphone 2 operating system 5 pointing device 4 ports 4 power requirements 4 processors 1 product name 1 security 4 serviceability 5 video 2 wireless 2 product name 1 product number 16 R recovery 80 recovery partition 78 recycle computer 80 refresh 80 removal/replacement preliminaries 25 procedures 30 remove everything and reinstall Windows 80 reset computer 80 steps 80 restoring the hard drive 78 right TouchPad button, identifying 8 RJ-45 (network) jack...


