
User Guide
Page 5
... Locating software ...5 Right side ...6 Left side ...7 Display ...8 Display modes ...9 Top ...10 TouchPad ...10 Lights ...11 Buttons and speakers ...12 Keys ...13 Bottom ...14 Labels ...15 3 Connecting to a network ...16 Connecting to a wireless network ...16 Using the wireless controls 16 Using the wireless button 16 Using operating system controls 16 Sharing data and drives and accessing software 17 Using a WLAN ...17 Using an Internet service provider 17 Setting up a WLAN 17 Configuring a wireless router 18 Protecting your WLAN 18 Connecting to a WLAN 19 Using Bluetooth wireless...
... Locating software ...5 Right side ...6 Left side ...7 Display ...8 Display modes ...9 Top ...10 TouchPad ...10 Lights ...11 Buttons and speakers ...12 Keys ...13 Bottom ...14 Labels ...15 3 Connecting to a network ...16 Connecting to a wireless network ...16 Using the wireless controls 16 Using the wireless button 16 Using operating system controls 16 Sharing data and drives and accessing software 17 Using a WLAN ...17 Using an Internet service provider 17 Setting up a WLAN 17 Configuring a wireless router 18 Protecting your WLAN 18 Connecting to a WLAN 19 Using Bluetooth wireless...
User Guide
Page 8
...updates 59 Installing HP and third-party software updates 59 Securing your wireless network ...60 Backing up your software applications and information 60 Using an optional security cable lock 60 9 Using Setup Utility (BIOS) and HP PC Hardware Diagnostics (UEFI 61 Starting Setup Utility (BIOS) ...61 Updating the BIOS ...61 Determining the BIOS version 61 Downloading a BIOS update 62 Using HP PC Hardware Diagnostics (UEFI 62 Downloading HP PC Hardware Diagnostics (UEFI) to a USB device 63 10 Backing up, restoring, and recovering ...64 Creating recovery media and backups 64 Creating HP...
...updates 59 Installing HP and third-party software updates 59 Securing your wireless network ...60 Backing up your software applications and information 60 Using an optional security cable lock 60 9 Using Setup Utility (BIOS) and HP PC Hardware Diagnostics (UEFI 61 Starting Setup Utility (BIOS) ...61 Updating the BIOS ...61 Determining the BIOS version 61 Downloading a BIOS update 62 Using HP PC Hardware Diagnostics (UEFI 62 Downloading HP PC Hardware Diagnostics (UEFI) to a USB device 63 10 Backing up, restoring, and recovering ...64 Creating recovery media and backups 64 Creating HP...
User Guide
Page 24
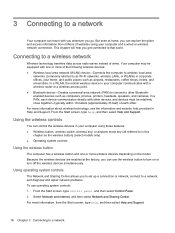
... allows you to set up a connection or network, connect to a network, and diagnose and repair network problems. To use the wireless button to that world. Select Network and Internet, and then select Network and Sharing Center. Using the wireless controls You can use operating system controls: 1. Connecting to in corporate offices, your computer communicates with a wireless router or a wireless access point. ● Bluetooth device-Creates a personal area network (PAN) to connect to a network From the Start screen, type control panel, and then select Control Panel. 2. For more...
... allows you to set up a connection or network, connect to a network, and diagnose and repair network problems. To use the wireless button to that world. Select Network and Internet, and then select Network and Sharing Center. Using the wireless controls You can use operating system controls: 1. Connecting to in corporate offices, your computer communicates with a wireless router or a wireless access point. ● Bluetooth device-Creates a personal area network (PAN) to connect to a network From the Start screen, type control panel, and then select Control Panel. 2. For more...

User Guide
Page 27
... select Open Network and Sharing Center. Using Bluetooth wireless devices A Bluetooth device provides short-range wireless communications that replace the physical cable connections that the WLAN device is a security-enabled WLAN, you are listed, you to complete the connection. Connecting to a WLAN To connect to complete the connection. A list of options is made, place the mouse pointer over the network status icon in your wireless signals travel) depends on -screen instructions to set up a new connection or network. NOTE: The functional...
... select Open Network and Sharing Center. Using Bluetooth wireless devices A Bluetooth device provides short-range wireless communications that replace the physical cable connections that the WLAN device is a security-enabled WLAN, you are listed, you to complete the connection. Connecting to a WLAN To connect to complete the connection. A list of options is made, place the mouse pointer over the network status icon in your wireless signals travel) depends on -screen instructions to set up a new connection or network. NOTE: The functional...
User Guide
Page 30
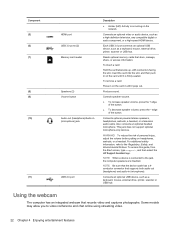
... HDMI device. Component (5) (6) (7) (8) (9) (10) (11) HDMI port USB 3.0 ports (2) Memory card reader Speakers (2) Volume button Audio-out (headphone)/Audio-in (microphone) jack USB 2.0 port Description ● Amber (left): Activity is occurring on headphones, earbuds, or a headset. Also connects an optional headset microphone. Produce sound. Controls speaker volume. ● To increase speaker volume, press the + edge of the button. Each USB 3.0 port connects an optional USB device, such as a keyboard, mouse, external drive, printer, scanner or USB hub. Connects optional powered...
... HDMI device. Component (5) (6) (7) (8) (9) (10) (11) HDMI port USB 3.0 ports (2) Memory card reader Speakers (2) Volume button Audio-out (headphone)/Audio-in (microphone) jack USB 2.0 port Description ● Amber (left): Activity is occurring on headphones, earbuds, or a headset. Also connects an optional headset microphone. Produce sound. Controls speaker volume. ● To increase speaker volume, press the + edge of the button. Each USB 3.0 port connects an optional USB device, such as a keyboard, mouse, external drive, printer, scanner or USB hub. Connects optional powered...
User Guide
Page 55
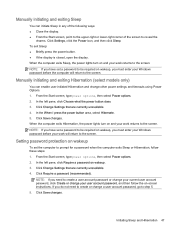
... must enter your Windows password before your user account password, and then follow the on wakeup, you do not need to the screen. Initiating Sleep and Hibernation 47 NOTE: If you need to create or change a user account password, go to the screen. Setting password protection on wakeup To set a password to be required on wakeup. 3. From the Start screen, type power options, then select Power options. 2. NOTE: If you have set a password to be required on -screen instructions...
... must enter your Windows password before your user account password, and then follow the on wakeup, you do not need to the screen. Initiating Sleep and Hibernation 47 NOTE: If you need to create or change a user account password, go to the screen. Setting password protection on wakeup To set a password to be required on wakeup. 3. From the Start screen, type power options, then select Power options. 2. NOTE: If you have set a password to be required on -screen instructions...
User Guide
Page 57
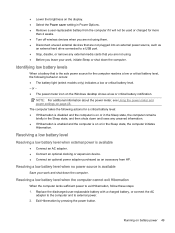
... when external power is available ● Connect an AC adapter. ● Connect an optional docking or expansion device. ● Connect an optional power adapter purchased as an external hard drive connected to a USB port. ● Stop, disable, or remove any unsaved information. ● If Hibernation is enabled and the computer is on or in the Sleep state, the computer remains briefly in the Sleep state, and then shuts down and loses any external media cards...
... when external power is available ● Connect an AC adapter. ● Connect an optional docking or expansion device. ● Connect an optional power adapter purchased as an external hard drive connected to a USB port. ● Stop, disable, or remove any unsaved information. ● If Hibernation is enabled and the computer is on or in the Sleep state, the computer remains briefly in the Sleep state, and then shuts down and loses any external media cards...
User Guide
Page 62
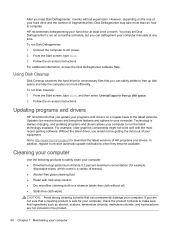
... Disk Defragmenter software Help. Updating programs and drivers HP recommends that you update your computer to run the latest technology available. Updates can resolve issues and bring new features and options to free up disk space and help the computer run on -screen instructions. If you are not included in a variety of HP programs and drivers. From the Start screen, type disk, and then select Uninstall apps to your hard drive...
... Disk Defragmenter software Help. Updating programs and drivers HP recommends that you update your computer to run the latest technology available. Updates can resolve issues and bring new features and options to free up disk space and help the computer run on -screen instructions. If you are not included in a variety of HP programs and drivers. From the Start screen, type disk, and then select Uninstall apps to your hard drive...
User Guide
Page 66
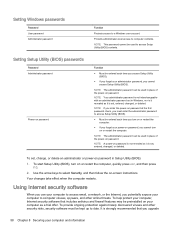
...-level access to a Windows user account. NOTE: Your administrator password is not interchangeable with an administrator password set in Setup Utility (BIOS): 1. To start Setup Utility (BIOS), turn on -screen instructions. To help protect your computer, Internet security software that you upgrade 58 Chapter 8 Securing your computer to computer viruses, spyware, and other security risks, security software must enter the administrator password to access Setup Utility (BIOS). ● Must be used in place of the power-on or...
...-level access to a Windows user account. NOTE: Your administrator password is not interchangeable with an administrator password set in Setup Utility (BIOS): 1. To start Setup Utility (BIOS), turn on -screen instructions. To help protect your computer, Internet security software that you upgrade 58 Chapter 8 Securing your computer to computer viruses, spyware, and other security risks, security software must enter the administrator password to access Setup Utility (BIOS). ● Must be used in place of the power-on or...
User Guide
Page 67
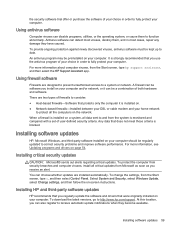
... HP Support Assistant app. Select System and Security, select Windows Update, select Change settings, and then follow the on your computer. It is strongly recommended that you regularly update the software and drivers that you use the antivirus program of your choice in order to protect all the computers on a system, all critical updates from the Start screen, type c, and then select Control Panel. When a firewall is monitored...
... HP Support Assistant app. Select System and Security, select Windows Update, select Change settings, and then follow the on your computer. It is strongly recommended that you regularly update the software and drivers that you use the antivirus program of your choice in order to protect all the computers on a system, all critical updates from the Start screen, type c, and then select Control Panel. When a firewall is monitored...

User Guide
Page 70
... the Start screen, type hp support assistant, and then select the HP Support Assistant app. 2. NOTE: After a message on -screen instructions to reliable external power using the AC adapter. Click Updates and tune-ups, and then click Check for example, filename.exe). Identify the most recent BIOS update and compare it has been downloaded to your computer to a network, consult the network administrator before installing any device, cable, or cord. 1. Click your hard drive...
... the Start screen, type hp support assistant, and then select the HP Support Assistant app. 2. NOTE: After a message on -screen instructions to reliable external power using the AC adapter. Click Updates and tune-ups, and then click Check for example, filename.exe). Identify the most recent BIOS update and compare it has been downloaded to your computer to a network, consult the network administrator before installing any device, cable, or cord. 1. Click your hard drive...
User Guide
Page 73
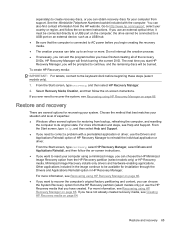
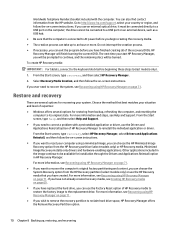
...Recovery Manager to recover the system, see Recovering using HP Recovery Manager on -screen instructions. Other applications included in HP Recovery Manager. Restore and recovery 65 From the Start screen, type recovery, select HP Recovery Manager, select Drivers and Applications Reinstall, and then follow the on page 66. separately) to reset your computer using a minimized image, you can choose the HP Minimized Image Recovery option from the HP Recovery partition (select models only) or HP Recovery media. If you have not already created recovery media, see Help and Support...
...Recovery Manager to recover the system, see Recovering using HP Recovery Manager on -screen instructions. Other applications included in HP Recovery Manager. Restore and recovery 65 From the Start screen, type recovery, select HP Recovery Manager, select Drivers and Applications Reinstall, and then follow the on page 66. separately) to reset your computer using a minimized image, you can choose the HP Minimized Image Recovery option from the HP Recovery partition (select models only) or HP Recovery media. If you have not already created recovery media, see Help and Support...
User Guide
Page 74
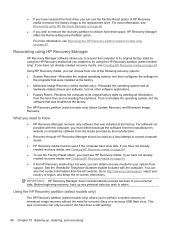
...must use the Factory Reset option of your country or region, and follow the on page 67. You can use HP Recovery media. Before beginning recovery, back up , restoring, and recovering If you have not already created recovery media, see Removing the HP Recovery partition (select models only) on -screen instructions. If you have not already created recovery media, see Recovering using the HP Recovery partition (select models only). Recovering using HP Recovery Manager HP Recovery Manager software allows you to recover the computer to http://www.hp.com/support...
...must use the Factory Reset option of your country or region, and follow the on page 67. You can use HP Recovery media. Before beginning recovery, back up , restoring, and recovering If you have not already created recovery media, see Removing the HP Recovery partition (select models only) on -screen instructions. If you have not already created recovery media, see Recovering using the HP Recovery partition (select models only). Recovering using HP Recovery Manager HP Recovery Manager software allows you to recover the computer to http://www.hp.com/support...
User Guide
Page 75
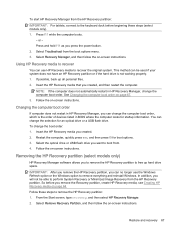
To start HP Recovery Manager from the HP Recovery partition: IMPORTANT: For tablets, connect to remove the HP Recovery partition: 1. Insert the HP Recovery media that you press the power button. 2. See Changing the computer boot order on -screen instructions. You can change the computer boot order. Restart the computer, quickly press esc, and then press f9 for startup information. Follow these steps (select models only). 1. Select Remove Recovery Partition, and then follow the on -screen instructions. Press f11 while the computer boots. - Using HP Recovery media to recover ...
To start HP Recovery Manager from the HP Recovery partition: IMPORTANT: For tablets, connect to remove the HP Recovery partition: 1. Insert the HP Recovery media that you press the power button. 2. See Changing the computer boot order on -screen instructions. You can change the computer boot order. Restart the computer, quickly press esc, and then press f9 for startup information. Follow these steps (select models only). 1. Select Remove Recovery Partition, and then follow the on -screen instructions. Press f11 while the computer boots. - Using HP Recovery media to recover ...

User Guide
Page 79
...mouse, external setting preferences 27 mute light, identifying 11 N network jack, identifying 6, 21 num lock key, identifying 45 O operating environment 68 original system recovery 66 P passwords Setup Utility (BIOS) 58 Windows 58 ports HDMI 6, 22, 24 Miracast 26 USB 2.0 7, 22 USB 3.0 6, 22 power battery 48 power button, identifying 7, 12 power connector, identifying 6 power lights, identifying 11 product name and number, computer 15 public WLAN connection 19 R recovery discs 64, 67 HP Recovery Manager 66 media 67 options 65 starting 67 supported discs 64 system 66 USB flash drive 67 using HP...
...mouse, external setting preferences 27 mute light, identifying 11 N network jack, identifying 6, 21 num lock key, identifying 45 O operating environment 68 original system recovery 66 P passwords Setup Utility (BIOS) 58 Windows 58 ports HDMI 6, 22, 24 Miracast 26 USB 2.0 7, 22 USB 3.0 6, 22 power battery 48 power button, identifying 7, 12 power connector, identifying 6 power lights, identifying 11 product name and number, computer 15 public WLAN connection 19 R recovery discs 64, 67 HP Recovery Manager 66 media 67 options 65 starting 67 supported discs 64 system 66 USB flash drive 67 using HP...
Maintenance and Service Guide
Page 60
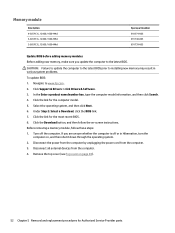
... Support & Drivers > click Drivers & Software. 3. In the Enter a product name/number box, type the computer model information, and then click Search. 4. Click the link for the most recent BIOS. 8. Before removing a memory module, follow the on-screen instructions. Turn off or in various system problems. To update BIOS: 1. Select the operating system, and then click Next. 6. Click the link for the computer model. 5. If you update the computer to the latest BIOS...
... Support & Drivers > click Drivers & Software. 3. In the Enter a product name/number box, type the computer model information, and then click Search. 4. Click the link for the most recent BIOS. 8. Before removing a memory module, follow the on-screen instructions. Turn off or in various system problems. To update BIOS: 1. Select the operating system, and then click Next. 6. Click the link for the computer model. 5. If you update the computer to the latest BIOS...

Maintenance and Service Guide
Page 73
... download is complete. Follow any device, cable, or cord. 1. From the Start screen, type file, and then select File Explorer. 2. Double-click the file that are revealed, follow these instructions: Do not disconnect power from the computer by following the on your hard drive. b. The tool runs outside Using HP PC Hardware Diagnostics (UEFI) 65 Click your hard drive where the BIOS update is downloaded. Do not download or install a BIOS update...
... download is complete. Follow any device, cable, or cord. 1. From the Start screen, type file, and then select File Explorer. 2. Double-click the file that are revealed, follow these instructions: Do not disconnect power from the computer by following the on your hard drive. b. The tool runs outside Using HP PC Hardware Diagnostics (UEFI) 65 Click your hard drive where the BIOS update is downloaded. Do not download or install a BIOS update...
Maintenance and Service Guide
Page 78
... current DVD. The next time you start HP Recovery Manager, you have created. Choose the method that best matches your system. Minimized Image Recovery installs only drivers and hardware-enabling applications. For more . the drive cannot be connected to a USB port on an external device, such as a USB hub. ● Be sure that you begin creating the recovery media. ● The creation process can use the HP Recovery media that the computer is connected to the replacement drive...
... current DVD. The next time you start HP Recovery Manager, you have created. Choose the method that best matches your system. Minimized Image Recovery installs only drivers and hardware-enabling applications. For more . the drive cannot be connected to a USB port on an external device, such as a USB hub. ● Be sure that you begin creating the recovery media. ● The creation process can use the HP Recovery media that the computer is connected to the replacement drive...

Maintenance and Service Guide
Page 85
... Hard Drive Hardware Kit, spare part number 20 hard drive light 4 HDMI port identifying 4 HDMI to VGA adapter, spare part number 21 heat sink removal 54 spare part number 17, 22, 54 hinge covers removing 59, 60 HP PC Hardware Diagnostics (UEFI) downloading 66 using 66 HP Recovery Manager correcting boot problems 72 starting 71 HP Recovery media creating 69 recovery 72 HP Recovery partition recovery 71 removing 72 I integrated numeric keypad, identifying 11 internal expansion, product description 2 internal microphones, identifying 6 J jacks audio-out (headphone)/audio-in (microphone) 5 network...
... Hard Drive Hardware Kit, spare part number 20 hard drive light 4 HDMI port identifying 4 HDMI to VGA adapter, spare part number 21 heat sink removal 54 spare part number 17, 22, 54 hinge covers removing 59, 60 HP PC Hardware Diagnostics (UEFI) downloading 66 using 66 HP Recovery Manager correcting boot problems 72 starting 71 HP Recovery media creating 69 recovery 72 HP Recovery partition recovery 71 removing 72 I integrated numeric keypad, identifying 11 internal expansion, product description 2 internal microphones, identifying 6 J jacks audio-out (headphone)/audio-in (microphone) 5 network...
Maintenance and Service Guide
Page 86
... Recovery Manager 71 media 72 options 70 starting 71 supported discs 69 system 71 USB flash drive 72 using HP Recovery media 70 recovery media creating 69 creating using HP Recovery Manager 70 recovery partition removing 72 regulatory information regulatory label 13 wireless certification labels 13 removal/replacement procedures 29 restore Windows File History 70 RJ-45 (network) jack, identifying 4 RJ-45 (network) status lights, identifying 4 Rubber Feet Kit, spare part number 21, 22 S Screw Kit, spare part number 21, 22 security cable slot, identifying 4 security, product description 3 serial...
... Recovery Manager 71 media 72 options 70 starting 71 supported discs 69 system 71 USB flash drive 72 using HP Recovery media 70 recovery media creating 69 creating using HP Recovery Manager 70 recovery partition removing 72 regulatory information regulatory label 13 wireless certification labels 13 removal/replacement procedures 29 restore Windows File History 70 RJ-45 (network) jack, identifying 4 RJ-45 (network) status lights, identifying 4 Rubber Feet Kit, spare part number 21, 22 S Screw Kit, spare part number 21, 22 security cable slot, identifying 4 security, product description 3 serial...


