Start Here
Page 3
... new ...1 2 Navigating the Start screen ...2 Locating the Start button and the Start menu 3 Shutting down the computer ...3 Displaying all apps ...3 Closing apps ...4 Enhanced search feature ...4 Enhanced snap feature ...4 Discovering and connecting to a Miracast-certified wireless display (select models only 4 Opening to the Windows desktop instead of the Start screen 5 This PC ...5 3 Backup, restore, and recovery updates ...6 Using Windows backup and restore ...6 Checking for recovery partitions ...6 Using HP Software Setup (select models only 6 Using other backup, restore, and recovery...
... new ...1 2 Navigating the Start screen ...2 Locating the Start button and the Start menu 3 Shutting down the computer ...3 Displaying all apps ...3 Closing apps ...4 Enhanced search feature ...4 Enhanced snap feature ...4 Discovering and connecting to a Miracast-certified wireless display (select models only 4 Opening to the Windows desktop instead of the Start screen 5 This PC ...5 3 Backup, restore, and recovery updates ...6 Using Windows backup and restore ...6 Checking for recovery partitions ...6 Using HP Software Setup (select models only 6 Using other backup, restore, and recovery...

Start Here
Page 7
... computer Using a keyboard and mouse Point to display the Start button and the Start menu. Locating the Start button and the Start menu 3 The Start menu offers quick access to frequently used options, including File Explorer, Control Panel, Desktop, Power Options, and Shut down . 2. Follow the instructions below . Swipe from the Start menu, follow the instructions below to the lower-left area of the Start screen. Click the Power icon, and then click Settings. Shut down . Using touch gestures Swipe to the Start screen, click...
... computer Using a keyboard and mouse Point to display the Start button and the Start menu. Locating the Start button and the Start menu 3 The Start menu offers quick access to frequently used options, including File Explorer, Control Panel, Desktop, Power Options, and Shut down . 2. Follow the instructions below . Swipe from the Start menu, follow the instructions below to the lower-left area of the Start screen. Click the Power icon, and then click Settings. Shut down . Using touch gestures Swipe to the Start screen, click...
Start Here
Page 10
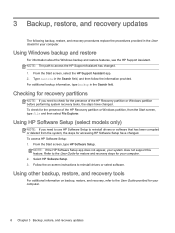
Type restore in the User Guide for accessing HP Software Setup have changed . 1. From the Start screen, type HP Software Setup. Using HP Software Setup (select models only) NOTE: If you need to use HP Software Setup to check for the presence of the HP Recovery partition or Windows partition, from the system, the steps for your computer. 6 Chapter 3 Backup, restore, and recovery updates Refer to the User Guide provided for recovery partitions NOTE: If you need to reinstall drivers or software that has been corrupted or deleted from the Start screen, type file and...
Type restore in the User Guide for accessing HP Software Setup have changed . 1. From the Start screen, type HP Software Setup. Using HP Software Setup (select models only) NOTE: If you need to use HP Software Setup to check for the presence of the HP Recovery partition or Windows partition, from the system, the steps for your computer. 6 Chapter 3 Backup, restore, and recovery updates Refer to the User Guide provided for recovery partitions NOTE: If you need to reinstall drivers or software that has been corrupted or deleted from the Start screen, type file and...

ENVY Notebook Maintenance and Service Guide
Page 6
Hard drive ...29 Memory module ...31 6 Removal and replacement procedures for Authorized Service Provider parts 33 Component replacement procedures ...33 RTC battery ...33 Base enclosure ...35 Display assembly ...37 Fan ...45 System board ...46 Heat sink ...49 Connector board ...52 Power connector cable ...54 Subwoofer ...55 Speakers ...57 TouchPad assembly ...59 Power button board ...61 Keyboard ...62 7 Using Setup Utility (BIOS) in Windows 8 ...65 Starting Setup Utility (BIOS) ...65 Updating Setup Utility (BIOS) ...65 Determining the BIOS version ...65 Downloading a BIOS update ...66 8 ...
Hard drive ...29 Memory module ...31 6 Removal and replacement procedures for Authorized Service Provider parts 33 Component replacement procedures ...33 RTC battery ...33 Base enclosure ...35 Display assembly ...37 Fan ...45 System board ...46 Heat sink ...49 Connector board ...52 Power connector cable ...54 Subwoofer ...55 Speakers ...57 TouchPad assembly ...59 Power button board ...61 Keyboard ...62 7 Using Setup Utility (BIOS) in Windows 8 ...65 Starting Setup Utility (BIOS) ...65 Updating Setup Utility (BIOS) ...65 Determining the BIOS version ...65 Downloading a BIOS update ...66 8 ...

ENVY Notebook Maintenance and Service Guide
Page 7
...Tips for a successful backup 78 What you need to know 78 Creating a backup using Windows Backup and Restore 78 Restore and recovery ...79 Restoring to a previous system restore point 79 Restoring specific files ...79 Restoring specific files using Windows Backup and Restore 79 Recovering the original system using HP Recovery Manager 79 What you need to know 79 Recovering using HP Recovery partition (select models only 80 Recovering using the recovery media 80 Changing the computer boot order 80 12 Specifications ...82 Computer specifications ...82 13 Power cord set requirements ...83...
...Tips for a successful backup 78 What you need to know 78 Creating a backup using Windows Backup and Restore 78 Restore and recovery ...79 Restoring to a previous system restore point 79 Restoring specific files ...79 Restoring specific files using Windows Backup and Restore 79 Recovering the original system using HP Recovery Manager 79 What you need to know 79 Recovering using HP Recovery partition (select models only 80 Recovering using the recovery media 80 Changing the computer boot order 80 12 Specifications ...82 Computer specifications ...82 13 Power cord set requirements ...83...

ENVY Notebook Maintenance and Service Guide
Page 17
... operation. To remove a card: ▲ Press in on the card it until it is normal for the internal fan to the display and other components. Left side Component (1) Security cable slot (2) Vents (2) (3) HDMI port (4) USB 3.0 charging (powered) port (5) USB 3.0 port (6) Memory card reader (7) Hard drive light (8) Power light Description Attaches an optional security cable to cool internal components. NOTE: The computer fan starts up , with connectors facing the slot, insert the card into the slot, and then push in the Sleep state, a powersaving state. Connects...
... operation. To remove a card: ▲ Press in on the card it until it is normal for the internal fan to the display and other components. Left side Component (1) Security cable slot (2) Vents (2) (3) HDMI port (4) USB 3.0 charging (powered) port (5) USB 3.0 port (6) Memory card reader (7) Hard drive light (8) Power light Description Attaches an optional security cable to cool internal components. NOTE: The computer fan starts up , with connectors facing the slot, insert the card into the slot, and then push in the Sleep state, a powersaving state. Connects...

ENVY Notebook Maintenance and Service Guide
Page 18
... the Windows desktop, click the question mark icon in (microphone) Connects optional powered stereo speakers, headphones, jack earbuds, a headset, or a television audio cable. This jack does not support optional microphone-only devices. NOTE: Be sure that the device cable has a 4-conductor connector that uses the least amount of personal injury, adjust the volume before putting on the network. (4) AC adapter light ● White: The computer is connected to external power and the battery is charged from...
... the Windows desktop, click the question mark icon in (microphone) Connects optional powered stereo speakers, headphones, jack earbuds, a headset, or a television audio cable. This jack does not support optional microphone-only devices. NOTE: Be sure that the device cable has a 4-conductor connector that uses the least amount of personal injury, adjust the volume before putting on the network. (4) AC adapter light ● White: The computer is connected to external power and the battery is charged from...
ENVY Notebook Maintenance and Service Guide
Page 33
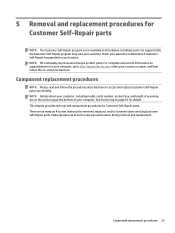
... Service tag on -screen instructions. This chapter provides removal and replacement procedures for Customer Self-Repair parts NOTE: The Customer Self-Repair program is supported in all locations. Component replacement procedures 25 NOTE: HP continually improves and changes product parts. Make special note of your country or region, and then follow the procedures described here to access and replace Customer Self-Repair parts successfully. 5 Removal and replacement procedures for Customer Self-Repair parts...
... Service tag on -screen instructions. This chapter provides removal and replacement procedures for Customer Self-Repair parts NOTE: The Customer Self-Repair program is supported in all locations. Component replacement procedures 25 NOTE: HP continually improves and changes product parts. Make special note of your country or region, and then follow the procedures described here to access and replace Customer Self-Repair parts successfully. 5 Removal and replacement procedures for Customer Self-Repair parts...

ENVY Notebook Maintenance and Service Guide
Page 39
... it down through the operating system. 2. Under Step 2: Select a Download, click the BIOS link. 7. Remove the service cover (see Battery on page 27). Component replacement procedures 31 Click Support & Drivers > click Drivers & Software. 3. Before removing a memory module, follow the on , and then shut it up and to installing new memory may result in Hibernation, turn the computer on -screen instructions. In the Enter a product name/number box, type the computer model information, and then click...
... it down through the operating system. 2. Under Step 2: Select a Download, click the BIOS link. 7. Remove the service cover (see Battery on page 27). Component replacement procedures 31 Click Support & Drivers > click Drivers & Software. 3. Before removing a memory module, follow the on , and then shut it up and to installing new memory may result in Hibernation, turn the computer on -screen instructions. In the Enter a product name/number box, type the computer model information, and then click...
ENVY Notebook Maintenance and Service Guide
Page 41
... Service Provider only parts. RTC battery Description RTC battery Spare part number 718440-001 Before removing the RTC battery, follow the on-screen instructions. Remove the battery (see WLAN module on page 27). Disconnect all external devices from the computer. 4. Component replacement procedures 33 If you are as many as 94 screws that must be accessed by unplugging the power cord from the socket on the system board. 6 Removal and replacement...
... Service Provider only parts. RTC battery Description RTC battery Spare part number 718440-001 Before removing the RTC battery, follow the on-screen instructions. Remove the battery (see WLAN module on page 27). Disconnect all external devices from the computer. 4. Component replacement procedures 33 If you are as many as 94 screws that must be accessed by unplugging the power cord from the socket on the system board. 6 Removal and replacement...

ENVY Notebook Maintenance and Service Guide
Page 74
... any device, cable, or cord. From the Start screen, type file, and then select File Explorer. ‒ or - The BIOS installation begins. 5. NOTE: After a message on your hard drive. 66 Chapter 7 Using Setup Utility (BIOS) in Windows 8 Do not download or install a BIOS update while the computer is running on your selection to the computer or an unsuccessful installation, download and install a BIOS update only when the computer is complete. If no instructions appear...
... any device, cable, or cord. From the Start screen, type file, and then select File Explorer. ‒ or - The BIOS installation begins. 5. NOTE: After a message on your hard drive. 66 Chapter 7 Using Setup Utility (BIOS) in Windows 8 Do not download or install a BIOS update while the computer is running on your selection to the computer or an unsuccessful installation, download and install a BIOS update only when the computer is complete. If no instructions appear...

ENVY Notebook Maintenance and Service Guide
Page 75
... HP website. BIOS version information (also known as disk drives, display, keyboard, mouse, and printer). NOTE: Use extreme care when making changes in Windows) or by unplugging the power cord from operating properly. Use the arrow keys to select Main, and then make note of the BIOS may be displayed by pressing fn+esc (if you need to reliable external power using Setup Utility (BIOS). 1. Do not insert, remove, connect, or disconnect any device, cable, or cord. Starting Setup Utility (BIOS) 67 8 Using Setup Utility (BIOS) in Windows 7 Setup Utility...
... HP website. BIOS version information (also known as disk drives, display, keyboard, mouse, and printer). NOTE: Use extreme care when making changes in Windows) or by unplugging the power cord from operating properly. Use the arrow keys to select Main, and then make note of the BIOS may be displayed by pressing fn+esc (if you need to reliable external power using Setup Utility (BIOS). 1. Do not insert, remove, connect, or disconnect any device, cable, or cord. Starting Setup Utility (BIOS) 67 8 Using Setup Utility (BIOS) in Windows 7 Setup Utility...
ENVY Notebook Maintenance and Service Guide
Page 76
... the BIOS update that contains the update. 4. If no instructions are displayed, follow these steps: 1. Using the hard drive path you recorded earlier, open the folder on your hard drive that is complete. The BIOS installation begins. 5. Follow the on -screen instructions. Select Start, type hp support assistant, and then select the HP Support Assistant program. 2. b. Open Windows Explorer by following the on -screen instructions to download your computer to a network, consult the network administrator before installing any instructions that...
... the BIOS update that contains the update. 4. If no instructions are displayed, follow these steps: 1. Using the hard drive path you recorded earlier, open the folder on your hard drive that is complete. The BIOS installation begins. 5. Follow the on -screen instructions. Select Start, type hp support assistant, and then select the HP Support Assistant program. 2. b. Open Windows Explorer by following the on -screen instructions to download your computer to a network, consult the network administrator before installing any instructions that...

ENVY Notebook Maintenance and Service Guide
Page 81
.... Restore and recovery 73 For software not provided with the computer. What you need to http://www.hp.com/support, select your personal data. If you can choose the System Recovery option from the HP website. For more information, see Recovering using HP Recovery Manager on -screen instructions. For more information, see Recovering using the HP Recovery partition (select models only). You can obtain recovery media for your computer using a minimized image, you start the recovery process...
.... Restore and recovery 73 For software not provided with the computer. What you need to http://www.hp.com/support, select your personal data. If you can choose the System Recovery option from the HP website. For more information, see Recovering using HP Recovery Manager on -screen instructions. For more information, see Recovering using the HP Recovery partition (select models only). You can obtain recovery media for your computer using a minimized image, you start the recovery process...
ENVY Notebook Maintenance and Service Guide
Page 82
... hard drive is the order of recovery can be used if your computer does not restart in HP Recovery Manager, change the computer boot order, which you press the power button. 2. Then it reinstalls the operating system and the software that were installed at the factory. Select Troubleshoot from the HP Recovery partition: 1. You can use HP Recovery media to recover the original system. Select the optical drive or USB flash drive from the hard drive and re-creating the partitions. To start HP Recovery Manager from the boot options menu...
... hard drive is the order of recovery can be used if your computer does not restart in HP Recovery Manager, change the computer boot order, which you press the power button. 2. Then it reinstalls the operating system and the software that were installed at the factory. Select Troubleshoot from the HP Recovery partition: 1. You can use HP Recovery media to recover the original system. Select the optical drive or USB flash drive from the hard drive and re-creating the partitions. To start HP Recovery Manager from the boot options menu...

ENVY Notebook Maintenance and Service Guide
Page 86
... videos from individual folders to replace, such as installing software, running utilities, or changing Windows settings. To restore, see Restoring specific files using Windows Backup and Restore on files sizes, it may be a time-saver if you have recent copies of free space on -screen instructions to AC power during backups. ● Allow enough time for the backup. Open a word-processing document or graphics editing program, and then select Edit > Paste. Creating a backup using Windows Backup and Restore Windows...
... videos from individual folders to replace, such as installing software, running utilities, or changing Windows settings. To restore, see Restoring specific files using Windows Backup and Restore on files sizes, it may be a time-saver if you have recent copies of free space on -screen instructions to AC power during backups. ● Allow enough time for the backup. Open a word-processing document or graphics editing program, and then select Edit > Paste. Creating a backup using Windows Backup and Restore Windows...

ENVY Notebook Maintenance and Service Guide
Page 88
... computer or an optional external optical drive, and then restart the computer. - Recovering using HP Recovery partition (select models only) The HP Recovery partition (select models only), allows you can only be used if the hard drive is displayed on -screen instructions. See Changing the computer boot order on or restart the computer, and then press esc while the "Press the ESC key for recovery discs or a recovery flash drive. To change the boot order for boot options. 3. Access HP Recovery Manager in Windows 7 or - ● Turn on page...
... computer or an optional external optical drive, and then restart the computer. - Recovering using HP Recovery partition (select models only) The HP Recovery partition (select models only), allows you can only be used if the hard drive is displayed on -screen instructions. See Changing the computer boot order on or restart the computer, and then press esc while the "Press the ESC key for recovery discs or a recovery flash drive. To change the boot order for boot options. 3. Access HP Recovery Manager in Windows 7 or - ● Turn on page...

ENVY Notebook Maintenance and Service Guide
Page 94
... specifications 82 connector board removal 52 spare part numbers 14, 18, 52 connector, power 10 connectors, service considerations 21 counterbalance weight, spare part number 18 B backups 71, 76 base enclosure removal 35 spare part numbers 14, 18, 35 battery removal 26 spare part numbers 15, 17, 26 battery cover, identifying 11 battery release latch 11 BIOS determining version 65, 67 downloading an update 66, 67 starting the Setup Utility 65 updating 67 boot order changing 74, 80 bottom 12 buttons left TouchPad 5 power 7 right TouchPad 5 C cables, service...
... specifications 82 connector board removal 52 spare part numbers 14, 18, 52 connector, power 10 connectors, service considerations 21 counterbalance weight, spare part number 18 B backups 71, 76 base enclosure removal 35 spare part numbers 14, 18, 35 battery removal 26 spare part numbers 15, 17, 26 battery cover, identifying 11 battery release latch 11 BIOS determining version 65, 67 downloading an update 66, 67 starting the Setup Utility 65 updating 67 boot order changing 74, 80 bottom 12 buttons left TouchPad 5 power 7 right TouchPad 5 C cables, service...
ENVY Notebook Maintenance and Service Guide
Page 95
... USB 3.0 9 USB 3.0 (powered) charging 9 power button board removal 61 spare part number 14, 18, 61 power button, identifying 7 power connector cable removal 54 spare part number 14, 54 power connector, identifying 10 power cord set requirements 83 spare part number 15, 18 power lights, identifying 6, 9 power requirements, product description 2 processor, product description 1 product description audio 1 chipset 1 display panel 1 Ethernet 2 external media cards 2 graphics 1 hard drive 1 internal card expansion 2 keyboard 2 memory module 1 microphone 1 operating system 3 pointing device 2 ports...
... USB 3.0 9 USB 3.0 (powered) charging 9 power button board removal 61 spare part number 14, 18, 61 power button, identifying 7 power connector cable removal 54 spare part number 14, 54 power connector, identifying 10 power cord set requirements 83 spare part number 15, 18 power lights, identifying 6, 9 power requirements, product description 2 processor, product description 1 product description audio 1 chipset 1 display panel 1 Ethernet 2 external media cards 2 graphics 1 hard drive 1 internal card expansion 2 keyboard 2 memory module 1 microphone 1 operating system 3 pointing device 2 ports...

ENVY Notebook Maintenance and Service Guide
Page 96
... recovery 79 discs 72, 74 HP Recovery Manager 73, 79 media 74 starting 74 supported discs 72 system 73 USB flash drive 74 using HP Recovery media 72 recovery discs 76 recovery media 76 creating 71 creating using HP Recovery Manager 72 recovery partition removing 75 recovery, system 79 regulatory information regulatory label 12 wireless certification labels 12 removal/replacement procedures 25, 33 restore points 77 restoring the original system creating recovery media 76 RJ-45 (network) jack, identifying 10 RJ-45 (network) status lights, identifying 10 RTC battery removal 33 spare part numbers...
... recovery 79 discs 72, 74 HP Recovery Manager 73, 79 media 74 starting 74 supported discs 72 system 73 USB flash drive 74 using HP Recovery media 72 recovery discs 76 recovery media 76 creating 71 creating using HP Recovery Manager 72 recovery partition removing 75 recovery, system 79 regulatory information regulatory label 12 wireless certification labels 12 removal/replacement procedures 25, 33 restore points 77 restoring the original system creating recovery media 76 RJ-45 (network) jack, identifying 10 RJ-45 (network) status lights, identifying 10 RTC battery removal 33 spare part numbers...


