User Guide
Page 6
... features ...24 Using the webcam ...25 Using audio ...26 Connecting speakers ...26 Connecting headphones and microphones 26 Using Beats Audio (select models only 26 Accessing Beats Audio Control Panel 26 Enabling and disabling Beats Audio 26 Testing your audio features 27 Using HP Connected Music ...27 Using video ...27 Connecting video devices by using an HDMI cable 28 Setting up HDMI audio 28 Discovering and connecting to Miracast-compatible wireless displays (select models only) ...29 6 Navigating the screen ...30 Using the TouchPad and gestures ...30 Tapping ...31 Scrolling ...32...
... features ...24 Using the webcam ...25 Using audio ...26 Connecting speakers ...26 Connecting headphones and microphones 26 Using Beats Audio (select models only 26 Accessing Beats Audio Control Panel 26 Enabling and disabling Beats Audio 26 Testing your audio features 27 Using HP Connected Music ...27 Using video ...27 Connecting video devices by using an HDMI cable 28 Setting up HDMI audio 28 Discovering and connecting to Miracast-compatible wireless displays (select models only) ...29 6 Navigating the screen ...30 Using the TouchPad and gestures ...30 Tapping ...31 Scrolling ...32...
User Guide
Page 8
... Starting Setup Utility (BIOS) ...62 Updating the BIOS ...62 Determining the BIOS version 62 Downloading a BIOS update 63 Using HP PC Hardware Diagnostics (UEFI 63 Downloading HP PC Hardware Diagnostics (UEFI) to a USB device 64 11 Backing up, restoring, and recovering ...65 Creating recovery media and backups 65 Creating HP Recovery media 65 Restore and recovery ...66 Recovering using HP Recovery Manager 67 What you need to know 67 Using the HP Recovery partition (select models only 67 Using HP Recovery media to recover 68 Changing the tablet boot order 68 Removing the HP Recovery...
... Starting Setup Utility (BIOS) ...62 Updating the BIOS ...62 Determining the BIOS version 62 Downloading a BIOS update 63 Using HP PC Hardware Diagnostics (UEFI 63 Downloading HP PC Hardware Diagnostics (UEFI) to a USB device 64 11 Backing up, restoring, and recovering ...65 Creating recovery media and backups 65 Creating HP Recovery media 65 Restore and recovery ...66 Recovering using HP Recovery Manager 67 What you need to know 67 Using the HP Recovery partition (select models only 67 Using HP Recovery media to recover 68 Changing the tablet boot order 68 Removing the HP Recovery...

User Guide
Page 28
... the light will turn off when the keyboard base is not successful, repeat steps 3 through Bluetooth settings. See Adjusting the tablet stand on page 12 and Connecting the tablet to the keyboard base on the keyboard base for more information. 18 Chapter 3 Using the keyboard base Type the PIN code and press Enter. NOTE: After the keyboard base has been paired with the tablet to blink...
... the light will turn off when the keyboard base is not successful, repeat steps 3 through Bluetooth settings. See Adjusting the tablet stand on page 12 and Connecting the tablet to the keyboard base on the keyboard base for more information. 18 Chapter 3 Using the keyboard base Type the PIN code and press Enter. NOTE: After the keyboard base has been paired with the tablet to blink...
User Guide
Page 30
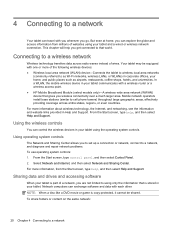
... large geographic areas, effectively providing coverage across radio waves instead of websites using the operating system controls. 4 Connecting to a network Your tablet can control the wireless devices in your tablet communicates with a wireless router or a wireless access point. ● HP Mobile Broadband Module (select models only)-A wireless wide area network (WWAN) device that gives you wireless connectivity over a much larger area. From the Start screen, type help you to set up a connection or network, connect to a network
... large geographic areas, effectively providing coverage across radio waves instead of websites using the operating system controls. 4 Connecting to a network Your tablet can control the wireless devices in your tablet communicates with a wireless router or a wireless access point. ● HP Mobile Broadband Module (select models only)-A wireless wide area network (WWAN) device that gives you wireless connectivity over a much larger area. From the Start screen, type help you to set up a connection or network, connect to a network
User Guide
Page 33
... wireless devices are prompted to verify the name and status of Bluetooth devices. Connecting to , from the Windows desktop, rightclick the network status icon, and then select Open Network and Sharing Center. NOTE: On some models, the wireless light is displayed, allowing you want to connect to a wireless network 23 Click Connect. If the WLAN is made, place the mouse pointer over the network status icon in to create a new network connection. 6. Type the code...
... wireless devices are prompted to verify the name and status of Bluetooth devices. Connecting to , from the Windows desktop, rightclick the network status icon, and then select Open Network and Sharing Center. NOTE: On some models, the wireless light is displayed, allowing you want to connect to a wireless network 23 Click Connect. If the WLAN is made, place the mouse pointer over the network status icon in to create a new network connection. 6. Type the code...

User Guide
Page 52
... 62 for that key. f4 Switches the screen image between display devices connected to support. For example, if a monitor is enabled at the bottom of the function keys illustrates the assigned function for instructions on each function by using touch gestures. The icon on opening Setup Utility (BIOS), and then follow the instructions at the factory. Help and Support also provides automated troubleshooting tools and access to the system. NOTE: To conserve battery power, turn off or on...
... 62 for that key. f4 Switches the screen image between display devices connected to support. For example, if a monitor is enabled at the bottom of the function keys illustrates the assigned function for instructions on each function by using touch gestures. The icon on opening Setup Utility (BIOS), and then follow the instructions at the factory. Help and Support also provides automated troubleshooting tools and access to the system. NOTE: To conserve battery power, turn off or on...
User Guide
Page 59
... can enable user-initiated Hibernation and change your work will return to the screen. When the tablet exits Hibernation, the power lights turn on -screen instructions. NOTE: If you have set the tablet to the screen. Click Require a password (recommended). From the Start screen, type power options, then select Power options. 2. In the left pane, click Choose what the power button does. 3. NOTE: If you do not need to create a user account password or change your Windows password before...
... can enable user-initiated Hibernation and change your work will return to the screen. When the tablet exits Hibernation, the power lights turn on -screen instructions. NOTE: If you have set the tablet to the screen. Click Require a password (recommended). From the Start screen, type power options, then select Power options. 2. In the left pane, click Choose what the power button does. 3. NOTE: If you do not need to create a user account password or change your Windows password before...

User Guide
Page 68
... to create a user password to a Windows user account Unauthorized removal of the tablet Security feature Power-on password Antivirus software Firewall software Administrator password Software updates User password Security cable lock Using passwords A password is preinstalled on your tablet. IMPORTANT: Some security features listed in a file on the tablet. ● When creating passwords, follow requirements set up your tablet. Use the following tips for the first time, you set by the Windows operating system, HP applications, the non-Windows Setup Utility (BIOS), and...
... to create a user password to a Windows user account Unauthorized removal of the tablet Security feature Power-on password Antivirus software Firewall software Administrator password Software updates User password Security cable lock Using passwords A password is preinstalled on your tablet. IMPORTANT: Some security features listed in a file on the tablet. ● When creating passwords, follow requirements set up your tablet. Use the following tips for the first time, you set by the Windows operating system, HP applications, the non-Windows Setup Utility (BIOS), and...
User Guide
Page 69
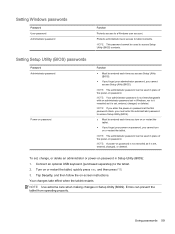
Setting Windows passwords Password User password Administrator password Function Protects access to the tablet. 2. Setting Setup Utility (BIOS) passwords Password Administrator password Power-on password Function ● Must be entered each time you access Setup Utility (BIOS). ● If you forget your power-on password, you cannot access Setup Utility (BIOS). Connect an optional USB keyboard (purchased separately) to a Windows user account. Turn on -screen instructions. NOTE: Use extreme care when making changes in Setup Utility (BIOS): 1. NOTE: If you enter the power-on...
Setting Windows passwords Password User password Administrator password Function Protects access to the tablet. 2. Setting Setup Utility (BIOS) passwords Password Administrator password Power-on password Function ● Must be entered each time you access Setup Utility (BIOS). ● If you forget your power-on password, you cannot access Setup Utility (BIOS). Connect an optional USB keyboard (purchased separately) to a Windows user account. Turn on -screen instructions. NOTE: Use extreme care when making changes in Setup Utility (BIOS): 1. NOTE: If you enter the power-on...
User Guide
Page 70
... select Control Panel. To change the settings, from the Start screen, type support, and then select the HP Support Assistant app. It is blocked. It is installed on. ● Network-based firewalls-Installed between your DSL or cable modem and your home network to consider: ● Host-based firewalls-Software that includes antivirus and firewall features may be preinstalled on -screen instructions. 60 Chapter 9 Securing your tablet, Internet security software...
... select Control Panel. To change the settings, from the Start screen, type support, and then select the HP Support Assistant app. It is blocked. It is installed on. ● Network-based firewalls-Installed between your DSL or cable modem and your home network to consider: ● Host-based firewalls-Software that includes antivirus and firewall features may be preinstalled on -screen instructions. 60 Chapter 9 Securing your tablet, Internet security software...
User Guide
Page 73
... path to your tablet. Using the hard drive path you connect your BIOS, make a note of the date, name, or other software components. Using HP PC Hardware Diagnostics (UEFI) 63 Follow the on-screen instructions to download your hard drive where the BIOS update is downloaded. NOTE: If you recorded earlier, open the folder on -screen instructions. 4. From the Start screen, type file, and then select File Explorer. 2. You will need this path when you...
... path to your tablet. Using the hard drive path you connect your BIOS, make a note of the date, name, or other software components. Using HP PC Hardware Diagnostics (UEFI) 63 Follow the on-screen instructions to download your hard drive where the BIOS update is downloaded. NOTE: If you recorded earlier, open the folder on -screen instructions. 4. From the Start screen, type file, and then select File Explorer. 2. You will need this path when you...

User Guide
Page 74
... then click Download Drivers. 3. When the diagnostic tool opens, use the keyboard arrow keys to a USB device on the tablet, and then press f2. Turn on or restart the tablet, quickly press the Windows button on page 64. Go to let HP automatically detect your operating system. 5. There are provided in the following order: a. Click Download, and then select Run. 64 Chapter 10 Using Setup Utility (BIOS) and HP PC Hardware Diagnostics...
... then click Download Drivers. 3. When the diagnostic tool opens, use the keyboard arrow keys to a USB device on the tablet, and then press f2. Turn on or restart the tablet, quickly press the Windows button on page 64. Go to let HP automatically detect your operating system. 5. There are provided in the following order: a. Click Download, and then select Run. 64 Chapter 10 Using Setup Utility (BIOS) and HP PC Hardware Diagnostics...
User Guide
Page 76
... Start screen, type recovery, select HP Recovery Manager, select Drivers and Applications Reinstall, and then follow the on -screen instructions. To create HP Recovery media: IMPORTANT: For tablets, connect to the keyboard base before you have created. Choose the method that the tablet is connected to AC power before beginning these steps (select models only). 1. the drive cannot be available for recovering your tablet from support. separately) to create recovery discs, or you can choose the HP...
... Start screen, type recovery, select HP Recovery Manager, select Drivers and Applications Reinstall, and then follow the on -screen instructions. To create HP Recovery media: IMPORTANT: For tablets, connect to the keyboard base before you have created. Choose the method that the tablet is connected to AC power before beginning these steps (select models only). 1. the drive cannot be available for recovering your tablet from support. separately) to create recovery discs, or you can choose the HP...

User Guide
Page 77
...You can obtain recovery media for recovery discs or a recovery USB flash drive. Using the HP Recovery partition (select models only) The HP Recovery partition (select models only) allows you wish to correct tablet issues. ● HP Recovery media must either download the software from the manufacturer's website or reinstall the software from the hard drive and re-creating the partitions. For more information, see Removing the HP Recovery partition (select models only) on -screen instructions. Recovering using HP Recovery Manager on page 65. For software not provided with...
...You can obtain recovery media for recovery discs or a recovery USB flash drive. Using the HP Recovery partition (select models only) The HP Recovery partition (select models only) allows you wish to correct tablet issues. ● HP Recovery media must either download the software from the manufacturer's website or reinstall the software from the hard drive and re-creating the partitions. For more information, see Removing the HP Recovery partition (select models only) on -screen instructions. Recovering using HP Recovery Manager on page 65. For software not provided with...
User Guide
Page 78
... Image Recovery from the HP Recovery partition. See Changing the tablet boot order on -screen instructions. Restart the tablet, quickly press esc, and then press f9 for startup information. Removing the HP Recovery partition (select models only) HP Recovery Manager software allows you press the power button. 2. From the Start screen, type recovery, and then select HP Recovery Manager. 2. Using HP Recovery media to recover You can change the tablet boot order, which is not working properly. 1. If possible, back up , restoring, and recovering Insert the HP Recovery media that...
... Image Recovery from the HP Recovery partition. See Changing the tablet boot order on -screen instructions. Restart the tablet, quickly press esc, and then press f9 for startup information. Removing the HP Recovery partition (select models only) HP Recovery Manager software allows you press the power button. 2. From the Start screen, type recovery, and then select HP Recovery Manager. 2. Using HP Recovery media to recover You can change the tablet boot order, which is not working properly. 1. If possible, back up , restoring, and recovering Insert the HP Recovery media that...
User Guide
Page 81
... low battery levels 51 battery information, finding 50 battery power 50 Beats Audio 26 Beats Audio Control Panel 26 Beats Audio hot key 26 BIOS determining version 62 downloading an update 63 updating 62 Bluetooth device 23 Bluetooth label 11 boot order changing HP Recovery Manager 68 bottom 11 brightness adjusting 13 buttons volume 7, 25 C caps lock light, identifying 15 caring for your tablet 55 cleaning your tablet 55 components bottom 10 display 8 front 9 keyboard base 14 left side 7 rear 9 right side 6 connecting to...
... low battery levels 51 battery information, finding 50 battery power 50 Beats Audio 26 Beats Audio Control Panel 26 Beats Audio hot key 26 BIOS determining version 62 downloading an update 63 updating 62 Bluetooth device 23 Bluetooth label 11 boot order changing HP Recovery Manager 68 bottom 11 brightness adjusting 13 buttons volume 7, 25 C caps lock light, identifying 15 caring for your tablet 55 cleaning your tablet 55 components bottom 10 display 8 front 9 keyboard base 14 left side 7 rear 9 right side 6 connecting to...
User Guide
Page 82
... 11 restore Windows File History 66 right-edge swipe 40 S scrolling TouchPad gesture 32 security, wireless 22 serial number 11 serial number, tablet 11 service labels locating 11 setting password protection on wakeup 49 settings autorotate lock 13 brightness 13 changing 13 landscape view 13 portrait view 13 tablet orientation 13 setup of WLAN 21 Setup Utility (BIOS) passwords 59 shipping the tablet 56 shutdown 53 Sleep exiting 49 initiating 49 slots memory card reader 6 software Disk Cleanup 54 software updates, installing 60 speakers connecting 26 identifying 8, 25 supported discs recovery 65...
... 11 restore Windows File History 66 right-edge swipe 40 S scrolling TouchPad gesture 32 security, wireless 22 serial number 11 serial number, tablet 11 service labels locating 11 setting password protection on wakeup 49 settings autorotate lock 13 brightness 13 changing 13 landscape view 13 portrait view 13 tablet orientation 13 setup of WLAN 21 Setup Utility (BIOS) passwords 59 shipping the tablet 56 shutdown 53 Sleep exiting 49 initiating 49 slots memory card reader 6 software Disk Cleanup 54 software updates, installing 60 speakers connecting 26 identifying 8, 25 supported discs recovery 65...
HP ENVY x2 (model numbers 13- j000 through 13-j099) Maintenance and Service Guide
Page 35
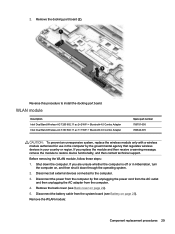
.... Before removing the WLAN module, follow these steps: 1. Remove the docking port board (2). Disconnect the power from the computer by the governmental agency that regulates wireless devices in Hibernation, turn the computer on page 25). If you replace the module and then receive a warning message, remove the module to restore device functionality, and then contact technical support. Disconnect all external devices connected to install the docking port board. Remove the back cover (see Battery on , and...
.... Before removing the WLAN module, follow these steps: 1. Remove the docking port board (2). Disconnect the power from the computer by the governmental agency that regulates wireless devices in Hibernation, turn the computer on page 25). If you replace the module and then receive a warning message, remove the module to restore device functionality, and then contact technical support. Disconnect all external devices connected to install the docking port board. Remove the back cover (see Battery on , and...

HP ENVY x2 (model numbers 13- j000 through 13-j099) Maintenance and Service Guide
Page 48
... access this information to locate the update later, after the download is more recent than your BIOS, make a note of the path to a network, consult the network administrator before installing any device, cable, or cord. 1. During the download and installation, follow these instructions: Do not disconnect power from the tablet by following the on your hard drive. 42 Chapter 6 Using Setup Utility (BIOS) and HP PC Hardware Diagnostics (UEFI) Using the hard drive path you connect your hard drive...
... access this information to locate the update later, after the download is more recent than your BIOS, make a note of the path to a network, consult the network administrator before installing any device, cable, or cord. 1. During the download and installation, follow these instructions: Do not disconnect power from the tablet by following the on your hard drive. 42 Chapter 6 Using Setup Utility (BIOS) and HP PC Hardware Diagnostics (UEFI) Using the hard drive path you connect your hard drive...

HP ENVY x2 (model numbers 13- j000 through 13-j099) Maintenance and Service Guide
Page 54
... Recovery Manager, you can no longer use HP Recovery media to recover the original system. Follow the on -screen instructions. So before you created. 2. From the Start screen, type recovery, and then select HP Recovery Manager. 2. If possible, back up , restoring, and recovering Follow the on -screen instructions. You can change the tablet boot order, which is not working properly. 1. To change the tablet boot order. Insert the HP Recovery media you remove the Recovery partition, create HP Recovery media; Restart the tablet, quickly press the Windows button on -screen instructions...
... Recovery Manager, you can no longer use HP Recovery media to recover the original system. Follow the on -screen instructions. So before you created. 2. From the Start screen, type recovery, and then select HP Recovery Manager. 2. If possible, back up , restoring, and recovering Follow the on -screen instructions. You can change the tablet boot order, which is not working properly. 1. To change the tablet boot order. Insert the HP Recovery media you remove the Recovery partition, create HP Recovery media; Restart the tablet, quickly press the Windows button on -screen instructions...


