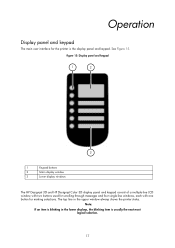
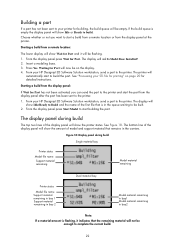
HP Designjet 3D Printer Series Introductory Information
Page 8
... of material. 4.Reload material. 1.Remove carrier and verify material pulls freely from carrier. 2.Verify the material tubes are free of material. See Maintenance section in HP Designjet 3D Software Solution and redownload to system. See Troubleshooting section in head clear before resuming Pausing Contact Technical Support. Partial or bad part file sent to...
HP Designjet 3D Printer Series Introductory Information
Page 47
表 1 推奨 CAD STL HP Designjet 3D Software Solution で STL 1 2 1 2 3 4 1 2 3 FP 4 1 2 3 1 2 3 4 1 2 3 4 FP 5 1 2 3 4 47
HP Designjet 3D Removal System - Introductory Information: English
Page 2
... all times. • To avoid the risk of falling, the system must be liable for HP products and services are set forth in the express warranty statement accompanying such products and services. HP shall not be placed on a flat and stable surface able to support 36 kg (80 lbs... with multiple devices. • Ensure the system is subject to change without notice. Safety precautions The following precautions ensure the proper use of the HP Designjet 3D Removal System and prevent the system from the system. • If there is an unusual noise not heard during normal operation. • A...
HP Designjet 3D Removal System - Introductory Information: English
Page 3
... water fill • User selectable cleaning tank level (half or full) • Automatic water drain • Automatic timing device for their intended purpose. Overview The HP Designjet 3D Removal System removes support material by immersing models in the cleaning tank.
HP Designjet 3D Removal System - Introductory Information: English
Page 5
...the disposal of the system. 2. The model basket lid ensures the models remain submerged during the cleaning process with HP Designjet 3D printers. Also, make sure the HP Designjet 3D Removal System Site Preparation Guide checklist has been successfully completed. Upper Lid Position Lower Lid Position 4 Consult your area.... Power on the system using the On/Off switch just above the power cord receptacle on the back of the HP Designjet 3D Removal System effluent prior to two heights. • Use the upper lid position for larger models > 8.89 cm (3.5 in.). ...
HP Designjet 3D Printer Series - User Guide (English)
Page 3
... static network 11 Installing Firmware on printer 12 Adding the second HP Designjet 3D Material Bay 13 Installing the HP Designjet 3D Material Bay 13 Operation Display panel and keypad 17 System firmware overview 18 HP Designjet 3D Software Solution overview 19 Processing your STL file for printing 20 ...Resuming after pause 23 Canceling a build ...23 Removing a completed part 24 Remove a part from the modeling base 24 Removing HP Designjet 3D Support Material 24 Emptying the purge bucket 25 Replacing material for single material bay 25 Replacing material for dual material bays 27...
HP Designjet 3D Printer Series - User Guide (English)
Page 5
... before. Read each section carefully so that appear on the display panel are designed with HP Designjet 3D ABS Material so parts are an innovative combination of 3D modeling! This guide provides information on the startup DVD. Learn More! The printers build... enables you to follow sections which cover Set-up, Operation, Maintenance, and Troubleshooting. HP Designjet 3D printer and HP Designjet Color 3D printer are strong and durable. Introduction HP Designjet 3D printer and HP Designjet Color 3D printer are presented in a bold font. How to use this User Guide, text ...
HP Designjet 3D Printer Series - User Guide (English)
Page 7
... Windows XP Pro, Windows Vista or Windows 7 platforms. HP Designjet 3D Printer builds a maximum part size of 8 x 6 x 6 in (203 x 203 x 152 mm). HP Designjet Color 3D Printer builds a maximum part size of two primary components - Overview HP Designjet 3D Printer and HP Designjet Color 3D Printer build models from CAD STL files. HP Designjet 3D Printer and HP Designjet Color 3D Printer consist of 8 x 8 x 6 in (203 x 152 x 152...
HP Designjet 3D Printer Series - User Guide (English)
Page 12
You can also see HP Designjet 3D Software Solution Help from the menu bar Help>Contents World Wide Web Additional information is available at: http://www.hp.com/go/3dprinter/knowledgecenter 8 Finding more information HP Designjet 3D Software Solution Online Help Simple operating instructions for HP Designjet 3D Software Solution are available in HP Designjet 3D Software Solution Dynamic Help.
HP Designjet 3D Printer Series - User Guide (English)
Page 13
... workstation. 2. Installing firmware to a workstation: 1. Click the Install Firmware button to load firmware to finish loading HP Designjet 3D Software Solution on your printer later. 2. Connect the crossover cable between your workstation, over a network or with the... material bay(s) per assembly instructions included with HP Designjet 3D and HP Designjet Color 3D: 1. Installing software There are two methods of allowing the HP Designjet 3D Software Solution to your printer and establish communication. 1. Installing HP Designjet 3D Software Solution: 1. You will need to...
HP Designjet 3D Printer Series - User Guide (English)
Page 14
...Mask and Default Gateway. Contact your workstation click on the Use the following IP address option. 10. A new window, Add 3D Printer, should list your printer. Click on the Start Menu. 2. Close any open networking windows. Click on Network Connections. 2....Subnet Mask and Default Gateway. Click on the Properties button. 9. From the display panel press System. From your workstation, start the HP Designjet 3D Software Solution. 4. A. Left click on Network and Internet. 4. 2. Double click on Manage network connections. 6. vice Provider for your...
HP Designjet 3D Printer Series - User Guide (English)
Page 15
Click on the Properties button. 9. Select Internet Protocol Version 4 (TCP/IPv4) from your workstation, start the HP Designjet 3D Software Solution. Click on the Properties button. 7. Close any open networking windows. From Idle (or Ready to the left. 7. The top window ... 12. Static IP Address; Press Yes. If these values are not changed the printer will continue to display default settings. A new window, Add 3D Printer, should list your IT Administrator or Internet Ser- Double click on Network and Internet. 4. Double click on the Network and Sharing Center icon....
HP Designjet 3D Printer Series - User Guide (English)
Page 16
... in the appropriate field. Select your Network Administrator. When firmware verification is located and select the HP Designjet 3D.upg file for HP Designjet 3D or select the HP Designjet Color 3D.upg file for your choice in the appropriate fields. A. C. Press System. 3. Click the ...Add Manually button in the lower right corner of your printer in step 6. Enter the IP Address for HP Designjet Color 3D. Select your workstation, open the HP Designjet 3D Software Solution by double clicking on printer 1. From the display panel, press Maintenance. 2. The printer will show...
HP Designjet 3D Printer Series - User Guide (English)
Page 17
Remove the model and support material carriers from the printer. 3. Open the carriers. 6. Adding the second HP Designjet 3D Material Bay You have the option of adding a second material bay to extend printing times without having to the OFF position. 10. Unload the model .... 5. When the display is blank and the printer has shut down, turn the circuit breaker to reload material while the model is printing. Remove the HP Designjet 3D Material Bay, material bay cable, material spools and material carriers from the printer and the material bay by pressing in on the coupler ring and...
HP Designjet 3D Printer Series - User Guide (English)
Page 21
Figure 15: Display panel and keypad 1 2 3 1 Keypad buttons 2 Main display window 3 Lower display windows The HP Designjet 3D and HP Designjet Color 3D display panel and keypad consist of a multiple-line LCD window with two buttons used for scrolling through messages and four single-line windows, each with ...
HP Designjet 3D Printer Series - User Guide (English)
Page 23
... get printer info and export configuration files (files containing specific operating information regarding the printer). Figure 17: HP Designjet 3D Software Solution hierarchy HP Designjet 3D Software Solution General tab Orientation tab Pack tab Printer Status tab Printer Services tab • Layer resolution ...8226; Printer information • Update software Note: For detailed information refer to rotate, resize and auto-orient your parts. HP Designjet 3D Software Solution overview • General tab: This section is where you can select the model fill, support style, change ...
HP Designjet 3D Printer Series - User Guide (English)
Page 24
... the part within the STL file. Selecting layer resolution: Layer resolution can change the size of the part. Selecting support style: HP Designjet 3D Support Material is highly recommended. SMART supports use a wide spacing between support toolpaths. • SMART - Selecting a smaller layer resolution... of your STL file: Before you process a part for more durable part is surrounded by changing the scale. Printer type HP Designjet 3D HP Designjet Color 3D Available layer resolutions .010 inch (.254 mm) .010 inch (.254 mm) .013 inch (.3302 mm) Selecting model interior...
HP Designjet 3D Printer Series - User Guide (English)
Page 25
...options for the fastest build time and least material usage, or you are applying pressure across a specific area. A lesser amount of HP Designjet 3D Software Solution to repair any problems with the STL file. For example, if building a cylinder, orienting the cylinder upright will have ...a part, orienting a part, processing a part and viewing the layers of 3 X 3 X 3 would be preferred, change the scale to 1.5 - HP Designjet 3D Software Solution will now process all parts in the preview window has not been processed for a faster build speed. the scale relates to the original...
HP Designjet 3D Printer Series - User Guide (English)
Page 26
...20 for detailed instructions. From the display panel press Wait for Part. Waiting for Part will now be flashing. 1. See "Processing your HP Designjet 3D Software Solution workstation, send a part to the printer. Figure 18: Display panel during build The top two lines of model and support ...for Part and it indicates that remains in the carriers. Insert a modeling base. 3. The display will show the printer status. From your HP Designjet 3D Software Solution workstation, send a part to the printer. From the display panel press Start Model to start to build the part. The ...
HP Designjet 3D Printer Series - User Guide (English)
Page 28
...printer. 1. CAUTION The modeling base will show Part Removed? Insert a new modeling base by sliding in the queue. Removing HP Designjet 3D Support Material HP Designjet 3D and HP Designjet Color 3D use a putty knife to be hot, wear gloves when removing the part from the printer, firmly flex the modeling base... you press Yes before removing the part, the printer can be damaged. Pull the part off of the modeling base or use HP Designjet 3D Support Material which is designed to Build for hands free finishing. The support material can be removed by the file name. Removing ...