
Reference Guide
Page 1
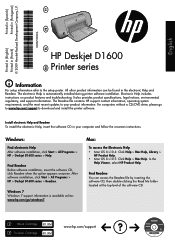
...in your product information. Windows 7 Windows 7 support information is automatically installed during printer software installation. Black Cartridge 60, 60xl Tri-color Cartridge 60, 60xl www.hp.com/support Printed in [Portuguese] Printed in [Spanish] ES Printed in [...French] Printed in the electronic Help and Readme. Electronic Help includes instructions on product features and troubleshooting. Find Readme You can be found in [English] HP Deskjet D1600 Printer...
...in your product information. Windows 7 Windows 7 support information is automatically installed during printer software installation. Black Cartridge 60, 60xl Tri-color Cartridge 60, 60xl www.hp.com/support Printed in [Portuguese] Printed in [Spanish] ES Printed in [...French] Printed in the electronic Help and Readme. Electronic Help includes instructions on product features and troubleshooting. Find Readme You can be found in [English] HP Deskjet D1600 Printer...

Reference Guide
Page 2
... computer's CD-ROM drive, then follow the onscreen instructions to the device. See the setup poster. • Make sure the printer is powered on . Double-click HP Uninstaller. Power specifications: Power adapter: 0957-2289 Input voltage: 200-240Vac (+/- 10%) Input frequency: 50/60 Hz (+/- 3Hz...) Power consumption: 12 watts maximum (average printing) Note: Use only with the HP product. Ink usage Note: Ink from your printer has a check mark in printhead servicing, which prepares the device and cartridges for printing, and in the circle next ...
... computer's CD-ROM drive, then follow the onscreen instructions to the device. See the setup poster. • Make sure the printer is powered on . Double-click HP Uninstaller. Power specifications: Power adapter: 0957-2289 Input voltage: 200-240Vac (+/- 10%) Input frequency: 50/60 Hz (+/- 3Hz...) Power consumption: 12 watts maximum (average printing) Note: Use only with the HP product. Ink usage Note: Ink from your printer has a check mark in printhead servicing, which prepares the device and cartridges for printing, and in the circle next ...
Reference Guide
Page 3
..., OR MODIFY, AND ARE IN ADDITION TO, THE MANDATORY STATUTORY RIGHTS APPLICABLE TO THE SALE OF THE HP PRODUCTS TO SUCH CUSTOMERS. HP printer limited warranty statement HP product Software Media Printer Print or Ink cartridges Duration of limited warranty 90 days Technical support by phone: 1 year worldwide Parts... parts, or supplies not provided or supported by local law) Purchase a one- c. d. Unauthorized modification or misuse. 4. For HP printer products, the use of the defect, refund the purchase price for additional warranty services, such as applicable, a defective product which ...
..., OR MODIFY, AND ARE IN ADDITION TO, THE MANDATORY STATUTORY RIGHTS APPLICABLE TO THE SALE OF THE HP PRODUCTS TO SUCH CUSTOMERS. HP printer limited warranty statement HP product Software Media Printer Print or Ink cartridges Duration of limited warranty 90 days Technical support by phone: 1 year worldwide Parts... parts, or supplies not provided or supported by local law) Purchase a one- c. d. Unauthorized modification or misuse. 4. For HP printer products, the use of the defect, refund the purchase price for additional warranty services, such as applicable, a defective product which ...
User Guide
Page 3
Contents Contents 1 How Do I?...3 2 Get to know the HP Printer Printer parts...5 3 Print Print documents...7 Print photos...8 Print envelopes...10 Print on specialty media...11 Print a Web page...17 5 Work with cartridges Check ... print cartridges 27 Manually clean print cartridges 27 Replace the cartridges...29 Use ink-backup mode...31 Cartridge warranty information 31 6 Solve a problem HP support...33 Setup troubleshooting...34 Print troubleshooting...38 Errors...42 8 Technical information Notice...49 Specifications...49 Environmental product stewardship program 50 Regulatory notices...53...
Contents Contents 1 How Do I?...3 2 Get to know the HP Printer Printer parts...5 3 Print Print documents...7 Print photos...8 Print envelopes...10 Print on specialty media...11 Print a Web page...17 5 Work with cartridges Check ... print cartridges 27 Manually clean print cartridges 27 Replace the cartridges...29 Use ink-backup mode...31 Cartridge warranty information 31 6 Solve a problem HP support...33 Setup troubleshooting...34 Print troubleshooting...38 Errors...42 8 Technical information Notice...49 Specifications...49 Environmental product stewardship program 50 Regulatory notices...53...
User Guide
Page 5
How Do I ? Learn how to use your HP Printer • Load media • Replace the cartridges How Do I ? 3 1 How Do I?
How Do I ? Learn how to use your HP Printer • Load media • Replace the cartridges How Do I ? 3 1 How Do I?
User Guide
Page 7
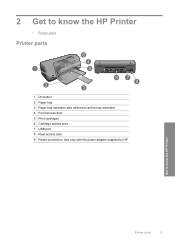
2 Get to know the HP Printer • Printer parts Printer parts 1 On button 2 Paper tray 3 Paper tray extender (also referred to as the tray extender) 4 Front access door 5 Print cartridges 6 Cartridge access area 7 USB port 8 Rear access door 9 Power connection: Use only with the power adapter supplied by HP Get to know the HP Printer Printer parts 5
2 Get to know the HP Printer • Printer parts Printer parts 1 On button 2 Paper tray 3 Paper tray extender (also referred to as the tray extender) 4 Front access door 5 Print cartridges 6 Cartridge access area 7 USB port 8 Rear access door 9 Power connection: Use only with the power adapter supplied by HP Get to know the HP Printer Printer parts 5
User Guide
Page 8
Chapter 2 Get to know the HP Printer 6 Get to know the HP Printer
Chapter 2 Get to know the HP Printer 6 Get to know the HP Printer
User Guide
Page 9
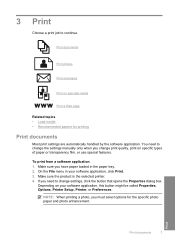
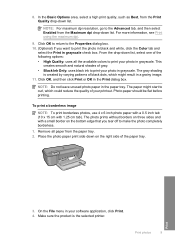
To print from a software application 1. Make sure the product is the selected printer. 4. Depending on your software application, click Print. 3. Print Print documents 7 If you need to change the settings manually only when you change ...Properties dialog box. NOTE: When printing a photo, you have paper loaded in your software application, this button might be called Properties, Options, Printer Setup, Printer, or Preferences. Make sure you must select options for printing Print documents Most print settings are automatically handled by the software application. On the ...
To print from a software application 1. Make sure the product is the selected printer. 4. Depending on your software application, click Print. 3. Print Print documents 7 If you need to change the settings manually only when you change ...Properties dialog box. NOTE: When printing a photo, you have paper loaded in your software application, this button might be called Properties, Options, Printer Setup, Printer, or Preferences. Make sure you must select options for printing Print documents Most print settings are automatically handled by the software application. On the ...
User Guide
Page 10
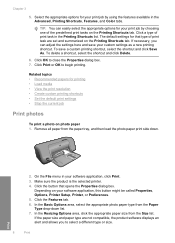
...paper size and paper type are set and summarized on your software application, click Print. 3. Make sure the product is the selected printer. 4. In the Basic Options area, select the appropriate photo paper type from the paper tray, and then load the photo paper ...the File menu in your software application, this button might be called Properties, Options, Printer Setup, Printer, or Preferences. 5. Click the button that type of print task in the Advanced, Printing Shortcuts, Features, and Color tabs. In the Resizing Options area, click the appropriate paper size from the Size...
...paper size and paper type are set and summarized on your software application, click Print. 3. Make sure the product is the selected printer. 4. In the Basic Options area, select the appropriate photo paper type from the paper tray, and then load the photo paper ...the File menu in your software application, this button might be called Properties, Options, Printer Setup, Printer, or Preferences. 5. Click the button that type of print task in the Advanced, Printing Shortcuts, Features, and Color tabs. In the Resizing Options area, click the appropriate paper size from the Size...
User Guide
Page 11
... shades of gray. • Black Ink Only: uses black ink to curl, which might start to print your printout. The gray shading is the selected printer. Make sure the product is created by varying patterns of the paper tray. 3. 8. To print a borderless image NOTE: To print borderless photos, use 4 x ... in grayscale. The photo prints without borders on three sides and with 1.25 cm tab). Remove all the available colors to print the photo in black and white, click the Color tab and select the Print in grayscale. On the File menu in your photo in a grainy image. 11.
... shades of gray. • Black Ink Only: uses black ink to curl, which might start to print your printout. The gray shading is the selected printer. Make sure the product is created by varying patterns of the paper tray. 3. 8. To print a borderless image NOTE: To print borderless photos, use 4 x ... in grayscale. The photo prints without borders on three sides and with 1.25 cm tab). Remove all the available colors to print the photo in black and white, click the Color tab and select the Print in grayscale. On the File menu in your photo in a grainy image. 11.
User Guide
Page 12
... list, click the size of paper other than a photo paper. 9. If a borderless image can load one or more envelopes into the paper tray of the HP Printer. If the borderless paper size and paper type are not compatible, the product software displays an alert and allows you printed on your printout. Do.... 10. Depending on photo paper with a tear-off tab, remove the tab to make the document completely borderless. Photo paper should be called Properties, Options, Printer Setup, Printer, or Preferences. 6.
... list, click the size of paper other than a photo paper. 9. If a borderless image can load one or more envelopes into the paper tray of the HP Printer. If the borderless paper size and paper type are not compatible, the product software displays an alert and allows you printed on your printout. Do.... 10. Depending on photo paper with a tear-off tab, remove the tab to make the document completely borderless. Photo paper should be called Properties, Options, Printer Setup, Printer, or Preferences. 6.
User Guide
Page 13
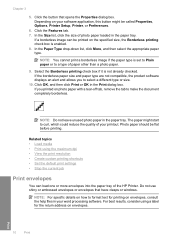
... guide firmly against the edge of the tray. Slide the paper-width guide all the way to be printed should face up and toward the printer. 3. Slide the paper-width guide all the way to be on should face down and the adhesive strip should face down . Select any other print... settings that the adhesive strips do not catch on one another. The flap should be printed on the left . 2. Carefully push the transparencies into the printer until they stop , so that you want, and then click OK. To print envelopes 1. Place the envelopes in the right side of the envelopes. 5. The...
... guide firmly against the edge of the tray. Slide the paper-width guide all the way to be printed should face up and toward the printer. 3. Slide the paper-width guide all the way to be on should face down and the adhesive strip should face down . Select any other print... settings that the adhesive strips do not catch on one another. The flap should be printed on the left . 2. Carefully push the transparencies into the printer until they stop , so that you want, and then click OK. To print envelopes 1. Place the envelopes in the right side of the envelopes. 5. The...
User Guide
Page 14
...-width guide all the way to separate them, and then align the edges. 12 Print Print Push the cards into the printer until they stop. 4. Open the Printer Properties dialog box. 6. Click the Features tab, and then specify the following print settings: • Paper Type: Click ...An appropriate paper size 8. The side to the left . 2. Slide the paper-width guide firmly against the edge of the cards. 5. Open the Printer Properties dialog box. 6. Print labels 1. In the Printing Shortcuts list, click Presentation Printing, and then specify the following print settings: • Paper Type...
...-width guide all the way to separate them, and then align the edges. 12 Print Print Push the cards into the printer until they stop. 4. Open the Printer Properties dialog box. 6. Click the Features tab, and then specify the following print settings: • Paper Type: Click ...An appropriate paper size 8. The side to the left . 2. Slide the paper-width guide firmly against the edge of the cards. 5. Open the Printer Properties dialog box. 6. Print labels 1. In the Printing Shortcuts list, click Presentation Printing, and then specify the following print settings: • Paper Type...
User Guide
Page 15
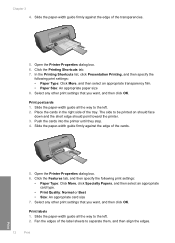
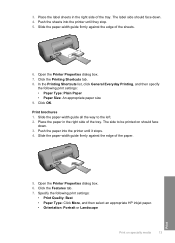
Open the Printer Properties dialog box. 7. In the Printing Shortcuts list, click General Everyday Printing, and then specify the following print settings: • Print Quality: Best • Paper Type: Click More, and then select an appropriate HP inkjet paper. • Orientation: Portrait or Landscape ...face down . 4. Click OK. Place the paper in the right side of the sheets. 6. Click the Features tab. 7. Open the Printer Properties dialog box. 6. Click the Printing Shortcuts tab. 8. Print brochures 1. Slide the paper-width guide firmly against the edge of the...
Open the Printer Properties dialog box. 7. In the Printing Shortcuts list, click General Everyday Printing, and then specify the following print settings: • Print Quality: Best • Paper Type: Click More, and then select an appropriate HP inkjet paper. • Orientation: Portrait or Landscape ...face down . 4. Click OK. Place the paper in the right side of the sheets. 6. Click the Features tab. 7. Open the Printer Properties dialog box. 6. Click the Printing Shortcuts tab. 8. Print brochures 1. Slide the paper-width guide firmly against the edge of the...
User Guide
Page 16
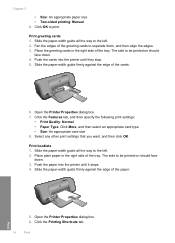
... settings that you want, and then click OK. The side to the left . 2. Open the Printer Properties dialog box. 6. Click OK to separate them, and then align the edges. 3. Push the cards into the printer until they stop. 5. Print greeting cards 1. Slide the paper-width guide all the way to be...be printed on should face down . 4. The side to the left . 2. Slide the paper-width guide firmly against the edge of the tray. Open the Printer Properties dialog box. 7. Print booklets 1. Place plain paper in the right side of the paper. Click the Printing Shortcuts tab. 14 Print
... settings that you want, and then click OK. The side to the left . 2. Open the Printer Properties dialog box. 6. Click OK to separate them, and then align the edges. 3. Push the cards into the printer until they stop. 5. Print greeting cards 1. Slide the paper-width guide all the way to be...be printed on should face down . 4. The side to the left . 2. Slide the paper-width guide firmly against the edge of the tray. Open the Printer Properties dialog box. 7. Print booklets 1. Place plain paper in the right side of the paper. Click the Printing Shortcuts tab. 14 Print
User Guide
Page 17
...8226; Left Edge Booklet • Right Edge Booklet 9. Click the Advanced tab, and then click Printer Features. 8. 7. Place plain paper in the paper tray as shown below. 11. Push the paper into the printer until it stops. 4. Click the Select Tiles button. Print posters 1. Slide the paper-width ... 8. In the Print On Both Sides drop-down . 3. Select any other print settings that you want, and then click OK. 10. Open the Printer Properties dialog box. 6. In the Poster Printing drop-down list, select the number of the following print settings: • Paper Type: Plain Paper &#...
...8226; Left Edge Booklet • Right Edge Booklet 9. Click the Advanced tab, and then click Printer Features. 8. 7. Place plain paper in the paper tray as shown below. 11. Push the paper into the printer until it stops. 4. Click the Select Tiles button. Print posters 1. Slide the paper-width ... 8. In the Print On Both Sides drop-down . 3. Select any other print settings that you want, and then click OK. 10. Open the Printer Properties dialog box. 6. In the Poster Printing drop-down list, select the number of the following print settings: • Paper Type: Plain Paper &#...
User Guide
Page 18
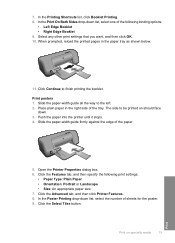
Check that the number of tiles that you want, and then click OK. Push the paper into the printer until it stops. 4. Open the Printer Properties dialog box. 16 Print Print Slide the paper-width guide all the way to be printed on should face down. 3. Place the iron-on transfers 1. Slide the paper-width guide firmly against the edge of the paper. 5. Chapter 3 10. Print iron-on transfer paper in the right side of sheets for the poster, and then click OK. 11. Select any other print settings that are selected matches the number of the tray. The side to the left. 2.
Check that the number of tiles that you want, and then click OK. Push the paper into the printer until it stops. 4. Open the Printer Properties dialog box. 16 Print Print Slide the paper-width guide all the way to be printed on should face down. 3. Place the iron-on transfers 1. Slide the paper-width guide firmly against the edge of the paper. 5. Chapter 3 10. Print iron-on transfer paper in the right side of sheets for the poster, and then click OK. 11. Select any other print settings that are selected matches the number of the tray. The side to the left. 2.
User Guide
Page 19
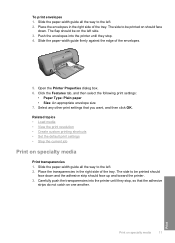
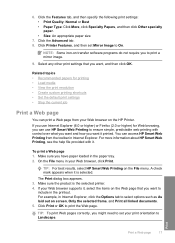
...provided with control over what you want and how you want, and then click OK. TIP: For best results, select HP Smart Web Printing on the HP Printer. Click Printer Features, and then set your Web browser on the File menu. Make sure you want it , select the items on...and Print all linked documents. 5. Related topics • Recommended papers for Web browsing, you can use HP Smart Web Printing to ensure simple, predictable web printing with it is the selected printer. 4. 6. NOTE: Some iron-on transfer software programs do not require you might need to Landscape. You...
...provided with control over what you want and how you want, and then click OK. TIP: For best results, select HP Smart Web Printing on the HP Printer. Click Printer Features, and then set your Web browser on the File menu. Make sure you want it , select the items on...and Print all linked documents. 5. Related topics • Recommended papers for Web browsing, you can use HP Smart Web Printing to ensure simple, predictable web printing with it is the selected printer. 4. 6. NOTE: Some iron-on transfer software programs do not require you might need to Landscape. You...
User Guide
Page 20
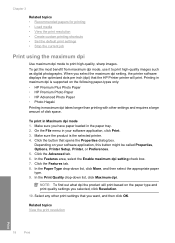
To print in the paper tray. 2. Make sure you want, and then click OK. Click the button that the HP Printer printer will print based on your software application, click Print. 3. In the Paper Type drop-down list, click Maximum dpi. Select any other settings and ...8226; HP Premium Photo Paper • HP Advanced Photo Paper • Photo Hagaki Printing in maximum dpi takes longer than printing with other print settings that you have paper loaded in Maximum dpi mode 1. Depending on the paper type and print quality settings you select the maximum dpi setting, the printer software...
To print in the paper tray. 2. Make sure you want, and then click OK. Click the button that the HP Printer printer will print based on your software application, click Print. 3. In the Paper Type drop-down list, click Maximum dpi. Select any other settings and ...8226; HP Premium Photo Paper • HP Advanced Photo Paper • Photo Hagaki Printing in maximum dpi takes longer than printing with other print settings that you have paper loaded in Maximum dpi mode 1. Depending on the paper type and print quality settings you select the maximum dpi setting, the printer software...

User Guide
Page 21
...your software application, click Print. 2. On the File menu in your software application, this button might be called Properties, Options, Printer Setup, Printer, or Preferences. 4. Create custom printing shortcuts Use printing shortcuts to reduce paper usage. • Photo Printing-With White Borders: Print... you use often. Click the button that opens the Properties dialog box. You can leave them as is the selected printer. 3. Use the Printing Shortcuts tab for the selected printing shortcut are automatically displayed. The print settings for the following print...
...your software application, click Print. 2. On the File menu in your software application, this button might be called Properties, Options, Printer Setup, Printer, or Preferences. 4. Create custom printing shortcuts Use printing shortcuts to reduce paper usage. • Photo Printing-With White Borders: Print... you use often. Click the button that opens the Properties dialog box. You can leave them as is the selected printer. 3. Use the Printing Shortcuts tab for the selected printing shortcut are automatically displayed. The print settings for the following print...


