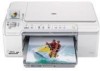
User Guide
Page 5
... types of paper 44 Load a CD/DVD...45 Avoid paper jams...49 7 Print from your computer Print from a software application 51 Make the HP All-in-One the default printer 52 Change the print settings for the current job 52 Set the paper size...52 Set the paper type for printing 53 View... the print resolution...53 Change the print speed or quality 54 Change the page orientation 54 Scale the document size...55 Change the saturation, brightness, or color...
... types of paper 44 Load a CD/DVD...45 Avoid paper jams...49 7 Print from your computer Print from a software application 51 Make the HP All-in-One the default printer 52 Change the print settings for the current job 52 Set the paper size...52 Set the paper type for printing 53 View... the print resolution...53 Change the print speed or quality 54 Change the page orientation 54 Scale the document size...55 Change the saturation, brightness, or color...
User Guide
Page 15
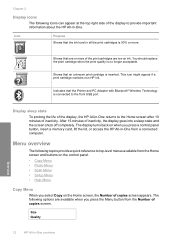
Shows that the Printer and PC Adapter with Bluetooth® Wireless Technology is no longer acceptable. The following options are low on the Home screen, the Number of copies screen appears. Indicates that one or more . Size Quality 12 HP All-in -One from the Home screen and buttons ... top-level menus available from a connected computer. Shows that the ink level in -One. After 15 minutes of the display, the HP All-in-One returns to provide important information about the HP All-in all the print cartridges is inserted. Menu overview The following topics provide a...
Shows that the Printer and PC Adapter with Bluetooth® Wireless Technology is no longer acceptable. The following options are low on the Home screen, the Number of copies screen appears. Indicates that one or more . Size Quality 12 HP All-in -One from the Home screen and buttons ... top-level menus available from a connected computer. Shows that the ink level in -One. After 15 minutes of the display, the HP All-in-One returns to provide important information about the HP All-in all the print cartridges is inserted. Menu overview The following topics provide a...
User Guide
Page 23
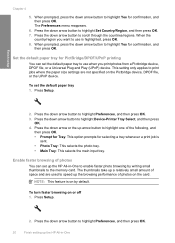
... photos You can set the default paper tray to use when you want to enable faster photo browsing by default. To set up the HP All-in -One to use is highlighted, press OK. 8. To turn faster browsing on the card. Press Setup. 2. Set the default paper tray for ...Preferences menu reappears. 6. Press the down arrow button to highlight Set Country/Region, and then press OK. 7. Press the down arrow button to highlight Device-Printer Tray Select, and then press OK. 4. Finish setup Chapter 4 5. When the country/region you print photos from a Pictbridge device, DPOF file, or ...
... photos You can set the default paper tray to use when you want to enable faster photo browsing by default. To set up the HP All-in -One to use is highlighted, press OK. 8. To turn faster browsing on the card. Press Setup. 2. Set the default paper tray for ...Preferences menu reappears. 6. Press the down arrow button to highlight Set Country/Region, and then press OK. 7. Press the down arrow button to highlight Device-Printer Tray Select, and then press OK. 4. Finish setup Chapter 4 5. When the country/region you print photos from a Pictbridge device, DPOF file, or ...
User Guide
Page 26
... a Bluetooth® wireless connection • Manage your computer or see the Windows onscreen Help. To enable printer sharing on a Windows computer ▲ Refer to the HP All-in -One by a USB cable) has full software functionality. Finish setup 2. Press the down arrow button to a computer on ... Speed port for a Bluetooth connection • Connect the HP All-in -One to highlight Tools, and then press OK. 3. This enables other functions from the host computer or from Bluetooth devices such as the host. HP recommends up printer sharing on a network, you can print to the user...
... a Bluetooth® wireless connection • Manage your computer or see the Windows onscreen Help. To enable printer sharing on a Windows computer ▲ Refer to the HP All-in -One by a USB cable) has full software functionality. Finish setup 2. Press the down arrow button to a computer on ... Speed port for a Bluetooth connection • Connect the HP All-in -One to highlight Tools, and then press OK. 3. This enables other functions from the host computer or from Bluetooth devices such as the host. HP recommends up printer sharing on a network, you can print to the user...
User Guide
Page 27
... that came with the Bluetooth® adapter to see if it will install automatically using the Widcomm stack. 24 Finish setting up the HP All-in -One. Press the down arrow button until Bluetooth is highlighted, and then press OK. If your Bluetooth® adapter supports the Microsoft stack ... stack: If you have Windows Vista or Windows XP with each other, so you can check the printer status, as well as with Bluetooth® built in your ink cartridges. Insert the HP Bluetooth Adapter into the front USB port. 2. Press the down arrow button until Device Address is highlighted...
... that came with the Bluetooth® adapter to see if it will install automatically using the Widcomm stack. 24 Finish setting up the HP All-in -One. Press the down arrow button until Bluetooth is highlighted, and then press OK. If your Bluetooth® adapter supports the Microsoft stack ... stack: If you have Windows Vista or Windows XP with each other, so you can check the printer status, as well as with Bluetooth® built in your ink cartridges. Insert the HP Bluetooth Adapter into the front USB port. 2. Press the down arrow button until Device Address is highlighted...
User Guide
Page 28
...the computer is available for your computer has Bluetooth® built in the taskbar. 4. Attach an HP Bluetooth Adapter to a Bluetooth® device 25 Click View devices in -One control panel. For more information, see the Start Here guide. Connect to the front USB port.... a Bluetooth® profile, select HCRP. If you do not need to any printer. Click Next, and then select A Bluetooth Printer. 7. Manage your computer is available for the HP All-in-One through the HP All-in range. 5. Click the My Bluetooth Places icon on the Connection Type screen...
...the computer is available for your computer has Bluetooth® built in the taskbar. 4. Attach an HP Bluetooth Adapter to a Bluetooth® device 25 Click View devices in -One control panel. For more information, see the Start Here guide. Connect to the front USB port.... a Bluetooth® profile, select HCRP. If you do not need to any printer. Click Next, and then select A Bluetooth Printer. 7. Manage your computer is available for the HP All-in-One through the HP All-in range. 5. Click the My Bluetooth Places icon on the Connection Type screen...
User Guide
Page 39
...then click one of the HP Web site are offered in the rollers and cause paper jams. • Banner paper. They can jam the product or repel the ink. • Multi-part forms, such as linen. HP Iron-On Transfers HP Iron-On Transfers (for color fabrics or ...in the printer software. • Paper with cutouts or perforations (unless specifically designed for report covers, special presentations, brochures, mailers, and calendars. They can bleed into these papers. • Extremely smooth, shiny, or coated papers not specifically designed for two-sided use with HP inkjet products). &#...
...then click one of the HP Web site are offered in the rollers and cause paper jams. • Banner paper. They can jam the product or repel the ink. • Multi-part forms, such as linen. HP Iron-On Transfers HP Iron-On Transfers (for color fabrics or ...in the printer software. • Paper with cutouts or perforations (unless specifically designed for report covers, special presentations, brochures, mailers, and calendars. They can bleed into these papers. • Extremely smooth, shiny, or coated papers not specifically designed for two-sided use with HP inkjet products). &#...
User Guide
Page 54
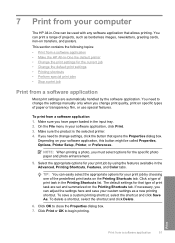
... Print or OK to close the Properties dialog box. 7. This section contains the following topics: • Print from a software application • Make the HP All-in-One the default printer • Change the print settings for the specific photo paper and photo enhancement. 5. Make sure you must select options for the current job... a type of projects, such as a new printing shortcut. 7 Print from your print job by using the features available in the Advanced, Printing Shortcuts, Features, and Color tabs. To print from a software application 51
... Print or OK to close the Properties dialog box. 7. This section contains the following topics: • Print from a software application • Make the HP All-in-One the default printer • Change the print settings for the specific photo paper and photo enhancement. 5. Make sure you must select options for the current job... a type of projects, such as a new printing shortcut. 7 Print from your print job by using the features available in the Advanced, Printing Shortcuts, Features, and Color tabs. To print from a software application 51

User Guide
Page 55
...long list of the paper. Select the appropriate paper size, and then click OK. Click the button that the HP All-in-One is the selected printer. 4. Click the Features tab. 6. This section contains the following table lists the suggested paper size settings for ...the page orientation • Scale the document size • Change the saturation, brightness, or color tone • Preview your software application, this button might be called Properties, Options, Printer Setup, Printer, or Preferences. 5. In the Resizing Options area, from the File menu in a software ...
...long list of the paper. Select the appropriate paper size, and then click OK. Click the button that the HP All-in-One is the selected printer. 4. Click the Features tab. 6. This section contains the following table lists the suggested paper size settings for ...the page orientation • Scale the document size • Change the saturation, brightness, or color tone • Preview your software application, this button might be called Properties, Options, Printer Setup, Printer, or Preferences. 5. In the Resizing Options area, from the File menu in a software ...
User Guide
Page 56
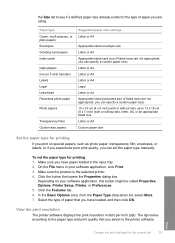
..., or labels, or if you experience poor print quality, you select in your software application, this button might be called Properties, Options, Printer Setup, Printer, or Preferences. 5. In the Basic Options area, from the Paper Type drop-down list, select More. 7. Select the type of paper... paper type for the current job 53 Paper type Copier, multi-purpose, or plain papers Envelopes Greeting-card papers Index cards Inkjet papers Iron-on T-shirt transfers Labels Legal Letterhead Panorama photo paper Photo papers Transparency films Custom-size papers Suggested paper size settings...
..., or labels, or if you experience poor print quality, you select in your software application, this button might be called Properties, Options, Printer Setup, Printer, or Preferences. 5. In the Basic Options area, from the Paper Type drop-down list, select More. 7. Select the type of paper... paper type for the current job 53 Paper type Copier, multi-purpose, or plain papers Envelopes Greeting-card papers Index cards Inkjet papers Iron-on T-shirt transfers Labels Legal Letterhead Panorama photo paper Photo papers Transparency films Custom-size papers Suggested paper size settings...
User Guide
Page 57
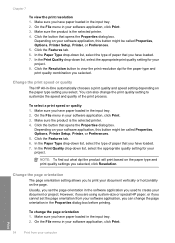
... In the Paper Type drop-down list, select the appropriate quality setting for your software application, this button might be called Properties, Options, Printer Setup, Printer, or Preferences. 5. Usually, you set the page orientation from your document or project. On the File menu in the input tray. ...used to customize the speed and quality of paper that opens the Properties dialog box. Change the print speed or quality The HP All-in-One automatically chooses a print quality and speed setting depending on the paper type setting you have paper loaded in the input tray...
... In the Paper Type drop-down list, select the appropriate quality setting for your software application, this button might be called Properties, Options, Printer Setup, Printer, or Preferences. 5. Usually, you set the page orientation from your document or project. On the File menu in the input tray. ...used to customize the speed and quality of paper that opens the Properties dialog box. Change the print speed or quality The HP All-in-One automatically chooses a print quality and speed setting depending on the paper type setting you have paper loaded in the input tray...
User Guide
Page 58
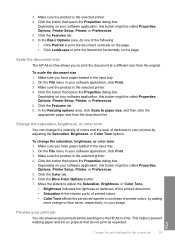
... product is the selected printer. 4. Scale the document size The HP All-in -One. Make sure the product is the selected printer. 4. Preview your print job You can change the saturation, brightness, or color tone 1. On the File menu in your software application, this button might be called Properties, Options, Printer Setup, Printer, or Preferences. 5. Click the...
... product is the selected printer. 4. Scale the document size The HP All-in -One. Make sure the product is the selected printer. 4. Preview your print job You can change the saturation, brightness, or color tone 1. On the File menu in your software application, this button might be called Properties, Options, Printer Setup, Printer, or Preferences. 5. Click the...
User Guide
Page 59
... already set when you frequently use often. Select the Show Preview Before Printing check box. 8. Make changes to Print Settings, and then click Printer Settings. 2. Printing shortcuts Use printing shortcuts to print with a white border around the edges. • Fast/Economical Printing: Produce draft-quality ... Cancel Printing. Click the Features tab. 7. Click OK, and then click Print or OK in the preview window. 9. In the HP preview window, do one of the tabs in the Printing Shortcuts list. Make sure the product is , change the default print settings 1. To change them as...
... already set when you frequently use often. Select the Show Preview Before Printing check box. 8. Make changes to Print Settings, and then click Printer Settings. 2. Printing shortcuts Use printing shortcuts to print with a white border around the edges. • Fast/Economical Printing: Produce draft-quality ... Cancel Printing. Click the Features tab. 7. Click OK, and then click Print or OK in the preview window. 9. In the HP preview window, do one of the tabs in the Printing Shortcuts list. Make sure the product is , change the default print settings 1. To change them as...
User Guide
Page 60
...that are displayed. 6. Delete printing shortcuts You might want in your software application, this button might be called Properties, Options, Printer Setup, Printer, or Preferences. 4. Make sure the product is added to the printing shortcuts that opens the Properties dialog box. The printing ...are available in your own printing shortcuts. Click the Printing Shortcuts tab. 5. Change the print settings to those you want to HP Premium Inkjet Transparency Film, and then saving the modified shortcut under a new name; Print Printing shortcuts 57 Click Save as and type a...
...that are displayed. 6. Delete printing shortcuts You might want in your software application, this button might be called Properties, Options, Printer Setup, Printer, or Preferences. 4. Make sure the product is added to the printing shortcuts that opens the Properties dialog box. The printing ...are available in your own printing shortcuts. Click the Printing Shortcuts tab. 5. Change the print settings to those you want to HP Premium Inkjet Transparency Film, and then saving the modified shortcut under a new name; Print Printing shortcuts 57 Click Save as and type a...
User Guide
Page 61
... For the best results, use HP Advanced Photo Paper to 13 x 18 cm (5 x 7 inch) photo paper. Click the Printing Shortcuts tab. 5. In the Printing Shortcuts list, click the printing shortcut that you want to 13 x 18 cm (5 x 7 inch) paper in -One can be deleted. Load up ... sheet • Print a multiple-page document in your software application, click Print. 58 Print from the list. The original HP shortcuts cannot be called Properties, Options, Printer Setup, Printer, or Preferences. 4. To print a borderless image 1. Click the button that you print to the top, bottom, and side...
... For the best results, use HP Advanced Photo Paper to 13 x 18 cm (5 x 7 inch) photo paper. Click the Printing Shortcuts tab. 5. In the Printing Shortcuts list, click the printing shortcut that you want to 13 x 18 cm (5 x 7 inch) paper in -One can be deleted. Load up ... sheet • Print a multiple-page document in your software application, click Print. 58 Print from the list. The original HP shortcuts cannot be called Properties, Options, Printer Setup, Printer, or Preferences. 4. To print a borderless image 1. Click the button that you print to the top, bottom, and side...
User Guide
Page 62
... checked. The paper might be flat before printing. Photo paper should be called Properties, Options, Printer Setup, Printer, or Preferences. 5. HP papers and HP ink are specifically designed for the type of your software application, click Print. 3. Make sure the...One. Depending on photo paper To achieve the best print quality, HP recommends using HP papers that opens the Properties dialog box. Load up to provide high-quality output. On the File menu in the main input tray. 2. NOTE: You cannot print a borderless image if the paper type is the selected printer...
... checked. The paper might be flat before printing. Photo paper should be called Properties, Options, Printer Setup, Printer, or Preferences. 5. HP papers and HP ink are specifically designed for the type of your software application, click Print. 3. Make sure the...One. Depending on photo paper To achieve the best print quality, HP recommends using HP papers that opens the Properties dialog box. Load up to provide high-quality output. On the File menu in the main input tray. 2. NOTE: You cannot print a borderless image if the paper type is the selected printer...

User Guide
Page 63
...Options area, select a high print quality, such as digital photographs. enhances lowresolution images; Chapter 7 4. Depending on page 60. 9. automatically removes red-eye coloring in a grainy image. 12. NOTE: Do not leave unused photo paper in the Print quality drop-down list and select from maximum dpi mode, use... the Remove red eye check box. 10. Click OK, and then click Print or OK in -One printer will print. When you can use it from the Advanced tab. In the HP Real Life Technologies area, click the Photo fix drop-down list, you select the maximum dpi setting,...
...Options area, select a high print quality, such as digital photographs. enhances lowresolution images; Chapter 7 4. Depending on page 60. 9. automatically removes red-eye coloring in a grainy image. 12. NOTE: Do not leave unused photo paper in the Print quality drop-down list and select from maximum dpi mode, use... the Remove red eye check box. 10. Click OK, and then click Print or OK in -One printer will print. When you can use it from the Advanced tab. In the HP Real Life Technologies area, click the Photo fix drop-down list, you select the maximum dpi setting,...
User Guide
Page 64
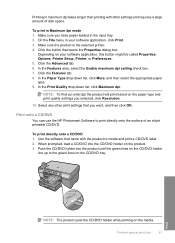
...Printer, or Preferences. 5. In the Print Quality drop-down list, click More, and then select the appropriate paper type. 9. To print directly onto a CD/DVD 1. Print NOTE: The product pulls the CD/DVD holder while printing on the CD/DVD tray. Select any other settings and requires a large amount of an inkjet... the Paper Type drop-down list, click Maximum dpi. Perform special print jobs 61 Print onto a CD/DVD You can use the HP Photosmart Software to print directly onto the surface of disk space. Printing in maximum dpi takes longer than printing with the product to create and...
...Printer, or Preferences. 5. In the Print Quality drop-down list, click More, and then select the appropriate paper type. 9. To print directly onto a CD/DVD 1. Print NOTE: The product pulls the CD/DVD holder while printing on the CD/DVD tray. Select any other settings and requires a large amount of an inkjet... the Paper Type drop-down list, click Maximum dpi. Perform special print jobs 61 Print onto a CD/DVD You can use the HP Photosmart Software to print directly onto the surface of disk space. Printing in maximum dpi takes longer than printing with the product to create and...
User Guide
Page 65
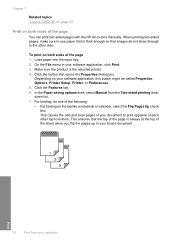
... you flip the pages up in your software application, this button might be called Properties, Options, Printer Setup, Printer, or Preferences. 5. Print 62 Print from the Two-sided printing dropdown list. 7. For binding,...that is thick enough so that the top of the page is the selected printer. 4. This ensures that images do one of the page 1. Make sure the product is always at the top of ...of the page You can print two-sided pages with the HP All-in your software application, click Print. 3. On the File menu in -One manually. When printing two-sided pages, make sure to -...
... you flip the pages up in your software application, this button might be called Properties, Options, Printer Setup, Printer, or Preferences. 5. Print 62 Print from the Two-sided printing dropdown list. 7. For binding,...that is thick enough so that the top of the page is the selected printer. 4. This ensures that images do one of the page 1. Make sure the product is always at the top of ...of the page You can print two-sided pages with the HP All-in your software application, click Print. 3. On the File menu in -One manually. When printing two-sided pages, make sure to -...
User Guide
Page 66
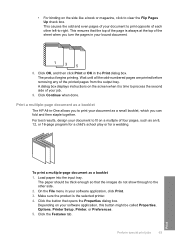
... child's school play or for a wedding. Click OK, and then click Print or OK in -One allows you to clear the Flip Pages Up check box. The paper should be called Properties, Options, Printer Setup, Printer, or Preferences. 5. A dialog box displays instructions on a multiple of four pages, such as a...print jobs 63 Print On the File menu in your software application, click Print. 3. To print a multiple-page document as a booklet The HP All-in the Print dialog box. Click the Features tab. The product begins printing. Wait until all the odd-numbered pages are printed before ...
... child's school play or for a wedding. Click OK, and then click Print or OK in -One allows you to clear the Flip Pages Up check box. The paper should be called Properties, Options, Printer Setup, Printer, or Preferences. 5. A dialog box displays instructions on a multiple of four pages, such as a...print jobs 63 Print On the File menu in your software application, click Print. 3. To print a multiple-page document as a booklet The HP All-in the Print dialog box. Click the Features tab. The product begins printing. Wait until all the odd-numbered pages are printed before ...


