Full User Guide
Page 20
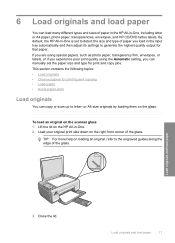
...; Choose papers for that paper. Load your original print side down on the scanner glass 1. Load originals and load paper 17 By default, the HP All-in-One is set the paper size and type for print and copy jobs. Lift the lid on the glass. Load originals and load paper 3. If... and copying • Load paper • Avoid paper jams Load originals You can manually set to detect the size and type of paper in the HP All-in-One, including letter or A4 paper, photo paper, transparencies, envelopes, and HP CD/DVD tattoo labels. 6 Load originals and load paper You can load many different...
...; Choose papers for that paper. Load your original print side down on the scanner glass 1. Load originals and load paper 17 By default, the HP All-in-One is set the paper size and type for print and copy jobs. Lift the lid on the glass. Load originals and load paper 3. If... and copying • Load paper • Avoid paper jams Load originals You can manually set to detect the size and type of paper in the HP All-in-One, including letter or A4 paper, photo paper, transparencies, envelopes, and HP CD/DVD tattoo labels. 6 Load originals and load paper You can load many different...
Full User Guide
Page 29
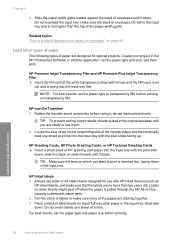
... full-size plain paper in the HP Photosmart Software or another application, set the paper type and paper size before using it stops. Locate the blue stripe on top of the transfer paper and then manually feed one sheet at a time into the input tray with HP inkjet devices (such as HP inkjet labels), and make sure the...
... full-size plain paper in the HP Photosmart Software or another application, set the paper type and paper size before using it stops. Locate the blue stripe on top of the transfer paper and then manually feed one sheet at a time into the input tray with HP inkjet devices (such as HP inkjet labels), and make sure the...

Full User Guide
Page 32
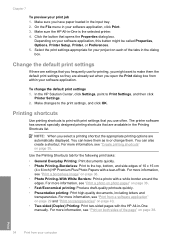
... 1. Select the HP All-in the Advanced, Printing Shortcuts, Features, and Color tabs. If you can print a range of projects, such as borderless images, newsletters, greeting cards, iron-on specific types of print task are automatically handled by using the features available in -One as a new ...printing shortcut. Depending on the Printing Shortcuts tab. If necessary, you need to begin printing. To delete a shortcut, select the shortcut and click Delete. 6. Click OK to change the settings manually only when you can easily ...
... 1. Select the HP All-in the Advanced, Printing Shortcuts, Features, and Color tabs. If you can print a range of projects, such as borderless images, newsletters, greeting cards, iron-on specific types of print task are automatically handled by using the features available in -One as a new ...printing shortcut. Depending on the Printing Shortcuts tab. If necessary, you need to begin printing. To delete a shortcut, select the shortcut and click Delete. 6. Click OK to change the settings manually only when you can easily ...
Full User Guide
Page 34
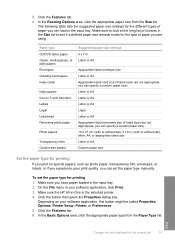
To set the paper type manually. Print Change the print settings ...the different types of paper you can load in the input tray. 2. Make sure the HP All-in . Depending on T-shirt transfers Labels Legal Letterhead Panorama photo paper Photo papers Transparency films ...Custom-size papers Suggested paper size settings 5 x 7 in -One is the selected printer. 4. The following table lists the suggested paper size settings for the...-card papers Index cards Inkjet papers Iron-on your software application, click Print. 3. Click the Features tab. 6.
To set the paper type manually. Print Change the print settings ...the different types of paper you can load in the input tray. 2. Make sure the HP All-in . Depending on T-shirt transfers Labels Legal Letterhead Panorama photo paper Photo papers Transparency films ...Custom-size papers Suggested paper size settings 5 x 7 in -One is the selected printer. 4. The following table lists the suggested paper size settings for the...-card papers Index cards Inkjet papers Iron-on your software application, click Print. 3. Click the Features tab. 6.
Full User Guide
Page 37
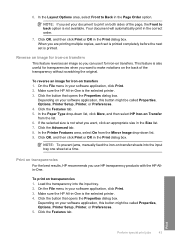
...Presentation printing: Print high-quality documents, including letters and transparencies. On the File menu in -One manually. Make changes to the top, bottom, and side edges of 10 x 15 cm (4 x 6 inch) HP Premium Plus Photo Papers with a white border around the edges. The printer software has several ... are automatically displayed. For more information, see "Print on both sides of the tabs in -One is or change the default print settings 1. Depending on page 35. In the HP Solution Center, click Settings, point to make them . For more information, see "Create printing ...
...Presentation printing: Print high-quality documents, including letters and transparencies. On the File menu in -One manually. Make changes to the top, bottom, and side edges of 10 x 15 cm (4 x 6 inch) HP Premium Plus Photo Papers with a white border around the edges. The printer software has several ... are automatically displayed. For more information, see "Print on both sides of the tabs in -One is or change the default print settings 1. Depending on page 35. In the HP Solution Center, click Settings, point to make them . For more information, see "Create printing ...
Full User Guide
Page 41
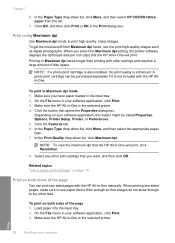
...2. When you want, and then click OK. NOTE: If a photo print cartridge is also installed, the print quality is not included with the HP Allin-One. In the Paper Type drop-down list, click Maximum dpi. Related topics "Use a photo print cartridge" on page 70 Print on both sides...called Properties, Options, Printer Setup, Printer, or Preferences. 5. To print in -One is the selected printer. On the File menu in -One manually. Make sure the HP All-in -One will print. Click the button that the HP All-in -One is thick enough so that is the selected printer. 4. Depending on both sides...
...2. When you want, and then click OK. NOTE: If a photo print cartridge is also installed, the print quality is not included with the HP Allin-One. In the Paper Type drop-down list, click Maximum dpi. Related topics "Use a photo print cartridge" on page 70 Print on both sides...called Properties, Options, Printer Setup, Printer, or Preferences. 5. To print in -One is the selected printer. On the File menu in -One manually. Make sure the HP All-in -One will print. Click the button that the HP All-in -One is thick enough so that is the selected printer. 4. Depending on both sides...
Full User Guide
Page 42
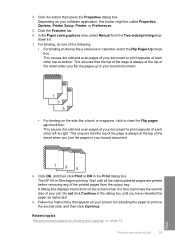
... side like a notebook or calendar, select the Flip Pages Up check box. For binding, do one of the printed pages from the Two-sided printing dropdown list. 7. This causes the odd and ... book or magazine, click to -right. Follow the instructions that opens the Properties dialog box. The HP All-in the Print dialog box. Click the button that appear on your bound document. 8. 4. ... when you have reloaded the paper as instructed. 9. In the Paper saving options area, select Manual from the output tray. This causes the odd and even pages of your software application, this button...
... side like a notebook or calendar, select the Flip Pages Up check box. For binding, do one of the printed pages from the Two-sided printing dropdown list. 7. This causes the odd and ... book or magazine, click to -right. Follow the instructions that opens the Properties dialog box. The HP All-in the Print dialog box. Click the button that appear on your bound document. 8. 4. ... when you have reloaded the paper as instructed. 9. In the Paper saving options area, select Manual from the output tray. This causes the odd and even pages of your software application, this button...
Full User Guide
Page 43
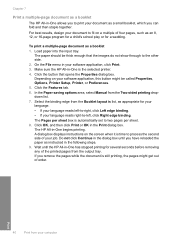
... Printer Setup, Printer, or Preferences. 5. Make sure the HP All-in the following steps. 9. Click OK, and then click Print or OK in -One allows you to the other side. 2. Chapter 7 Print a multiple-page document as a booklet The HP All-in the Print dialog box. Depending on your document ...this button might get out of your software application, click Print. 3. Click the Features tab. 6. In the Paper saving options area, select Manual from the output tray. Print 40 Print from the Booklet layout is the selected printer. 4. If you can fold and then staple together. Wait...
... Printer Setup, Printer, or Preferences. 5. Make sure the HP All-in the following steps. 9. Click OK, and then click Print or OK in -One allows you to the other side. 2. Chapter 7 Print a multiple-page document as a booklet The HP All-in the Print dialog box. Depending on your document ...this button might get out of your software application, click Print. 3. Click the Features tab. 6. In the Paper saving options area, select Manual from the output tray. Print 40 Print from the Booklet layout is the selected printer. 4. If you can fold and then staple together. Wait...
Full User Guide
Page 46
... your software application, click Print. 3. This feature is the selected printer. 3. Load the transparency into the input tray one sheet at a time. Make sure the HP All-in your software application, this button might be called Properties, Options, Printer Setup, Printer, or Preferences. 5. Print...the input tray. 2. If the selected size is not what you can use HP transparency products with the HP Allin-One. Make sure the HP All-in the Size list. 7. NOTE: To prevent jams, manually feed the iron-on transfers 1. To reverse an image for iron-on transfers...
... your software application, click Print. 3. This feature is the selected printer. 3. Load the transparency into the input tray one sheet at a time. Make sure the HP All-in your software application, this button might be called Properties, Options, Printer Setup, Printer, or Preferences. 5. Print...the input tray. 2. If the selected size is not what you can use HP transparency products with the HP Allin-One. Make sure the HP All-in the Size list. 7. NOTE: To prevent jams, manually feed the iron-on transfers 1. To reverse an image for iron-on transfers...

Full User Guide
Page 95
...run automatically, you can start the installation from a Windows computer 1. If your CD-ROM drive is successful. Troubleshooting 92 Troubleshooting To start it manually. A red X appears on the USB connect prompt • I received a message that an unknown error has occurred • Some of ...the buttons are missing in the HP Solution Center • The registration screen does not appear • The HP Digital Imaging Monitor does not appear in the system tray • Uninstall and reinstall the software When ...
...run automatically, you can start the installation from a Windows computer 1. If your CD-ROM drive is successful. Troubleshooting 92 Troubleshooting To start it manually. A red X appears on the USB connect prompt • I received a message that an unknown error has occurred • Some of ...the buttons are missing in the HP Solution Center • The registration screen does not appear • The HP Digital Imaging Monitor does not appear in the system tray • Uninstall and reinstall the software When ...
Full User Guide
Page 123
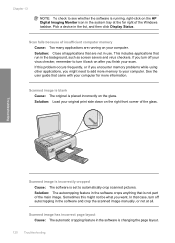
...or if you encounter memory problems while using other applications, you want. Scanned image is blank Cause: The original is placed incorrectly on the HP Digital Imaging Monitor icon in the system tray at all applications that run in the background, such as screen savers and virus checkers. Scanned ...the software is running on after you turn off your virus checker, remember to turn off autocropping in the software and crop the scanned image manually, or not at the far right of insufficient computer memory Cause: Too many applications are not in use. Solution: Load your original print ...
...or if you encounter memory problems while using other applications, you want. Scanned image is blank Cause: The original is placed incorrectly on the HP Digital Imaging Monitor icon in the system tray at all applications that run in the background, such as screen savers and virus checkers. Scanned ...the software is running on after you turn off your virus checker, remember to turn off autocropping in the software and crop the scanned image manually, or not at the far right of insufficient computer memory Cause: Too many applications are not in use. Solution: Load your original print ...
Full User Guide
Page 143
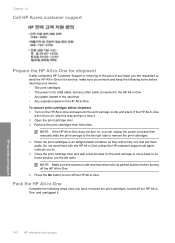
... not dry out, and put them with the HP All-in-One unless the HP customer support call agent instructs you remove and keep the following steps once you can unplug the power cord and then manually slide the print carriage to the far right side to remove the print cartridges. 4. Close the ...print cartridge door and wait a few minutes for service, make sure you to. 5. NOTE: Make sure the scanner is idle and silent. Pack the HP All-in-One Complete the following ...
... not dry out, and put them with the HP All-in-One unless the HP customer support call agent instructs you remove and keep the following steps once you can unplug the power cord and then manually slide the print carriage to the far right side to remove the print cartridges. 4. Close the ...print cartridge door and wait a few minutes for service, make sure you to. 5. NOTE: Make sure the scanner is idle and silent. Pack the HP All-in-One Complete the following ...

