
HP DesignJet 3000/3500 CP Printer User’s Guide - C4724-90051
Page 2
... liable for incidental or consequential damages in connection with this product when driven by the HP DesignJet 3000CP/3500CP printers are four-color process simulations and may not match PANTONEidentified solid color standards. Inc. "WingDingsTM in TrueType® format is a registered trademark of Apple ... trademark for a current list of qualified licensees. Macintosh is a registered trademark of Adobe Systems Incorporated. Use current PANTONE Color Reference Manuals for any kind with regard to this document and the program material which , if not correctly performed or adhered to,...
... liable for incidental or consequential damages in connection with this product when driven by the HP DesignJet 3000CP/3500CP printers are four-color process simulations and may not match PANTONEidentified solid color standards. Inc. "WingDingsTM in TrueType® format is a registered trademark of Apple ... trademark for a current list of qualified licensees. Macintosh is a registered trademark of Adobe Systems Incorporated. Use current PANTONE Color Reference Manuals for any kind with regard to this document and the program material which , if not correctly performed or adhered to,...

HP DesignJet 3000/3500 CP Printer User’s Guide - C4724-90051
Page 20
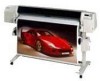
... you press the Standby button on the printer or there is high image quality for the HP DesignJet CP Printers provided with a two-line display, giving you access to a comprehensive set of printer functions and to a number of useful internal prints. The printer "wakes up to 54 inches wide (1370mm...The following media types are supported for HP DesignJet CP Ink (imaging ink) which is any I/O activity such as receipt of a file. See page1-9, Front View of Printer, for the switch location and page 2-6, Standby Mode, for more information about this manual and the Media Guide for indoor use...
... you press the Standby button on the printer or there is high image quality for the HP DesignJet CP Printers provided with a two-line display, giving you access to a comprehensive set of printer functions and to a number of useful internal prints. The printer "wakes up to 54 inches wide (1370mm...The following media types are supported for HP DesignJet CP Ink (imaging ink) which is any I/O activity such as receipt of a file. See page1-9, Front View of Printer, for the switch location and page 2-6, Standby Mode, for more information about this manual and the Media Guide for indoor use...
HP DesignJet 3000/3500 CP Printer User’s Guide - C4724-90051
Page 22
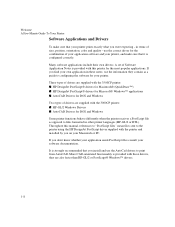
...combination of size, position, orientation, color and quality - A set of Software Application Notes is provided with these drivers, they contain as opposed to the printer using the HP DesignJet PostScript driver supplied with the printer and installed by you find your ... Three types of drivers are also faster than HP-GL/2 or PostScript® Windows™ drivers. 1-8 More CAD-orientated functionality is provided with the 3500CP printer: s HP DesignJet PostScript® drivers for Macintosh® (QuickDraw™) s HP DesignJet PostScript® drivers for Microsoft® Windows...
...combination of size, position, orientation, color and quality - A set of Software Application Notes is provided with these drivers, they contain as opposed to the printer using the HP DesignJet PostScript driver supplied with the printer and installed by you find your ... Three types of drivers are also faster than HP-GL/2 or PostScript® Windows™ drivers. 1-8 More CAD-orientated functionality is provided with the 3500CP printer: s HP DesignJet PostScript® drivers for Macintosh® (QuickDraw™) s HP DesignJet PostScript® drivers for Microsoft® Windows...
HP DesignJet 3000/3500 CP Printer User’s Guide - C4724-90051
Page 306
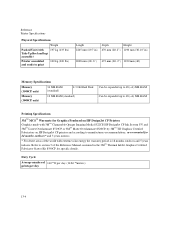
Refer to section 5 of the Reference Manual contained in ) 2008 mm (6ft. 6") 672 mm (2ft. 2") 1220 mm (4ft) Memory Specifications Memory (3500CP only) Memory (3000CP only) 36 MB RAM (standard) 4.3 Gb Hard Disk 12 MB RAM (standard) Can be expanded up to 68 (+4) MB RAM ...Specifications 3M™ MCS™ Warranty for Graphics Produced on HP DesignJet CP printers and according to print 100 kg (220 lbs) Length Depth Height 2265 mm (69.7 in) 670 mm (2ft.2") 1190 mm (3ft.10"in the 3M™ Thermal InkJet Graphics Certified Fabricator Starter Kit 8590CP for 24 months outdoors* and...
Refer to section 5 of the Reference Manual contained in ) 2008 mm (6ft. 6") 672 mm (2ft. 2") 1220 mm (4ft) Memory Specifications Memory (3500CP only) Memory (3000CP only) 36 MB RAM (standard) 4.3 Gb Hard Disk 12 MB RAM (standard) Can be expanded up to 68 (+4) MB RAM ...Specifications 3M™ MCS™ Warranty for Graphics Produced on HP DesignJet CP printers and according to print 100 kg (220 lbs) Length Depth Height 2265 mm (69.7 in) 670 mm (2ft.2") 1190 mm (3ft.10"in the 3M™ Thermal InkJet Graphics Certified Fabricator Starter Kit 8590CP for 24 months outdoors* and...

Service Manual
Page 4
... information for plotter options, accessories and service parts are located in this manual are consulting. ii Using this Manual HP DesignJet CP Series Printers Part Numbers Part numbers for the color HP DesignJet 2500CP, 2000CP, 3500CP and 3000CP printers. Throughout this Manual, these printers, refer to the topic you can find information related to the corresponding user and quickĆreference guides...
... information for plotter options, accessories and service parts are located in this manual are consulting. ii Using this Manual HP DesignJet CP Series Printers Part Numbers Part numbers for the color HP DesignJet 2500CP, 2000CP, 3500CP and 3000CP printers. Throughout this Manual, these printers, refer to the topic you can find information related to the corresponding user and quickĆreference guides...
Service Manual
Page 5
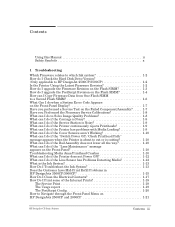
Contents Using this Manual ii Safety Symbols x 1 Troubleshooting Which Firmware relates to which Ink system 1Ć2 How do I Check the Hard Disk Drive Version? (Only applicable to HP DesignJet 2500CP/3500CP 1Ć2 Is the Printer Using the Latest Firmware Revision 1Ć2 How do I upgrade the Firmware Revision on the Flash SIMM 1Ć3 How do I upgrade the...
Contents Using this Manual ii Safety Symbols x 1 Troubleshooting Which Firmware relates to which Ink system 1Ć2 How do I Check the Hard Disk Drive Version? (Only applicable to HP DesignJet 2500CP/3500CP 1Ć2 Is the Printer Using the Latest Firmware Revision 1Ć2 How do I upgrade the Firmware Revision on the Flash SIMM 1Ć3 How do I upgrade the...
Service Manual
Page 12
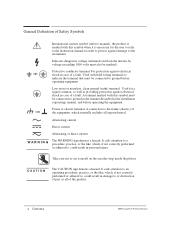
..., or the like , which, if not correctly performed or adhered to, could result in personal injury. x Contents HP DesignJet CP Series Printers Protective conductor terminal. Take care not to protect against electrical shock in the installation (operating) manual, and before operating equipment. It calls attention to a procedure, practice, or the like , which normally includes...
..., or the like , which, if not correctly performed or adhered to, could result in personal injury. x Contents HP DesignJet CP Series Printers Protective conductor terminal. Take care not to protect against electrical shock in the installation (operating) manual, and before operating equipment. It calls attention to a procedure, practice, or the like , which normally includes...
Service Manual
Page 19
Chapter 2 contains a list of the printer. If you have an error code which is not documented in this Service Manual or you have the following information ready: D Model and Serial Number of system error codes and their respective descriptions and recommended corrective actions... If possible, always perform a Service Test on that you should NOT replace it. For information on the FrontĆPanel Display? Troubleshooting HP DesignJet CP Series Printers 1-7 When reporting the error, have an error which you cannot resolve, then report the error to make sure that is the component/assembly...
Chapter 2 contains a list of the printer. If you have an error code which is not documented in this Service Manual or you have the following information ready: D Model and Serial Number of system error codes and their respective descriptions and recommended corrective actions... If possible, always perform a Service Test on that you should NOT replace it. For information on the FrontĆPanel Display? Troubleshooting HP DesignJet CP Series Printers 1-7 When reporting the error, have an error which you cannot resolve, then report the error to make sure that is the component/assembly...
Service Manual
Page 36
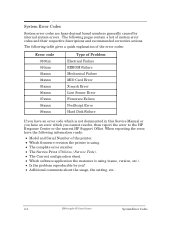
... etc.). D Is the problem reproducible by internal system errors. D Additional comments about the usage, the setting, etc.. 2-2 HP DesignJet CP Series Printers System Error Codes D The complete error number. The following table gives a quick explanation of the error codes: Error code 0100xx ...then report the error to the HP Response Center or the nearest HP Support Office. D Which software application the customer is not documented in this Service Manual or you have an error code which is using . The following pages contain a list of the printer. D The Service Print (...
... etc.). D Is the problem reproducible by internal system errors. D Additional comments about the usage, the setting, etc.. 2-2 HP DesignJet CP Series Printers System Error Codes D The complete error number. The following table gives a quick explanation of the error codes: Error code 0100xx ...then report the error to the HP Response Center or the nearest HP Support Office. D Which software application the customer is not documented in this Service Manual or you have an error code which is using . The following pages contain a list of the printer. D The Service Print (...

Service Manual
Page 210
... packages) (HP DesignJet 3500CP/3000CP) German Software Application Notes (graphics packages) (HP DesignJet 3500CP/3000CP) Italian Software Application Notes (graphics packages) (HP DesignJet 3500CP/3000CP) Spanish Software Application Notes (graphics packages) (HP DesignJet 3500CP/3000CP) HPĆGL/2 and RTL Programmer's Reference Guide (English) The product Comparison Guide for HPĆGL/2 and HP RTL Peripherals (English) PJL Technical Reference Manual (English) HP DesignJet CP Series Printers Parts and...
... packages) (HP DesignJet 3500CP/3000CP) German Software Application Notes (graphics packages) (HP DesignJet 3500CP/3000CP) Italian Software Application Notes (graphics packages) (HP DesignJet 3500CP/3000CP) Spanish Software Application Notes (graphics packages) (HP DesignJet 3500CP/3000CP) HPĆGL/2 and RTL Programmer's Reference Guide (English) The product Comparison Guide for HPĆGL/2 and HP RTL Peripherals (English) PJL Technical Reference Manual (English) HP DesignJet CP Series Printers Parts and...

Service Manual
Page 238
Note for HP DesignJets 3500CP/3000CP: Make sure you . Release the spring (item 6) from ... to move the head cleaner holders to the primer removal procedure ' page 8Ć29. 8-26 HP DesignJet CP Series Printers Removal and Installation Position the flag horizontal and push down and to the right Note: To remove the...Station Interconnect PCA. 5. WARNING Switch off the printer and remove the power cord. 2. Service Station Assembly and Service Station Flag Refer to the middle of the printer. 4. Remove the following 1. Manually slide the carriage assembly to figure 8 '...
Note for HP DesignJets 3500CP/3000CP: Make sure you . Release the spring (item 6) from ... to move the head cleaner holders to the primer removal procedure ' page 8Ć29. 8-26 HP DesignJet CP Series Printers Removal and Installation Position the flag horizontal and push down and to the right Note: To remove the...Station Interconnect PCA. 5. WARNING Switch off the printer and remove the power cord. 2. Service Station Assembly and Service Station Flag Refer to the middle of the printer. 4. Remove the following 1. Manually slide the carriage assembly to figure 8 '...

Service Manual
Page 241
... releasing it from the position J4 PRIMER SENSOR on the service station interconnect PCA. 7. Manually slide the carriage assembly to HP DesignJets 2500CP/2000CP) NOTE FOR HP DESIGNJETS 3500CP/3000CP: IF THE PRIMER ASSEMBLY FAILS, YOU MUST REPLACE THE COMPLETE SERVICE STATION. Disconnect ... and Top Cover ' page 8Ć15. 2. Remove the primer assembly. 8-29 HP DesignJet CP Series Printers Removal and Installation Remove the following: 1. Primer Assembly (Only Applicable to the middle of the printer. 3. Refer to the service station assembly (item 4). 9. Remove the three TĆ...
... releasing it from the position J4 PRIMER SENSOR on the service station interconnect PCA. 7. Manually slide the carriage assembly to HP DesignJets 2500CP/2000CP) NOTE FOR HP DESIGNJETS 3500CP/3000CP: IF THE PRIMER ASSEMBLY FAILS, YOU MUST REPLACE THE COMPLETE SERVICE STATION. Disconnect ... and Top Cover ' page 8Ć15. 2. Remove the primer assembly. 8-29 HP DesignJet CP Series Printers Removal and Installation Remove the following: 1. Primer Assembly (Only Applicable to the middle of the printer. 3. Refer to the service station assembly (item 4). 9. Remove the three TĆ...

Service Manual
Page 245
... Window ' page 8Ć15. 9. Install the power cable and turn the printer on the YĆaxis tensioner holder (item 8), then secure with a cable tie. 7. Removal and Installation HP DesignJet CP Series Printers 8-33 Install the two nuts and two washers (items 11) securing the encoder...assembly. 8. Left Hand Cover ' page 8Ć18. 2. Install the left side of the printer. 2. Right Hand Cover ' page 8Ć21. 3. Manually slide the carriage assembly along the printer. Caution: To prevent damage to the encoder spring (item 9). Installation WARNING Care should be taken ...
... Window ' page 8Ć15. 9. Install the power cable and turn the printer on the YĆaxis tensioner holder (item 8), then secure with a cable tie. 7. Removal and Installation HP DesignJet CP Series Printers 8-33 Install the two nuts and two washers (items 11) securing the encoder...assembly. 8. Left Hand Cover ' page 8Ć18. 2. Install the left side of the printer. 2. Right Hand Cover ' page 8Ć21. 3. Manually slide the carriage assembly along the printer. Caution: To prevent damage to the encoder spring (item 9). Installation WARNING Care should be taken ...

Service Manual
Page 248
...trailing cable from the following : 1. Window and Top Cover ' page 8Ć15 3. Manually slide the carriage assembly to figure 12 ' page 8Ć38 Removal WARNING Switch off the printer and remove the power cord. 1. Disconnect the trailing cable from the trailing cable holder (item... 8. Right Hand Cover ' page 8Ć21 2. Remove the trailing cable from the 3 cable clamps at the rear of the printer. 8-36 HP DesignJet CP Series Printers Removal and Installation Electronics Module ' page 8Ć6. 2. Carefully disconnect the trailing cable (item 1) from connectors on the carriage PCA...
...trailing cable from the following : 1. Window and Top Cover ' page 8Ć15 3. Manually slide the carriage assembly to figure 12 ' page 8Ć38 Removal WARNING Switch off the printer and remove the power cord. 1. Disconnect the trailing cable from the trailing cable holder (item... 8. Right Hand Cover ' page 8Ć21 2. Remove the trailing cable from the 3 cable clamps at the rear of the printer. 8-36 HP DesignJet CP Series Printers Removal and Installation Electronics Module ' page 8Ć6. 2. Carefully disconnect the trailing cable (item 1) from connectors on the carriage PCA...

Service Manual
Page 251
...belt is under high tension and could spring out of the procedure is ONLY to figure 13 ' page 8Ć41 Removal WARNING Switch off the printer and remove the power cord. 1. WARNING The spring (item 1) in the next step is being REPLACED by releasing it click into place, ...The rest of the YĆaxis tensioner holder (item 2). Left Hand Cover ' page 8Ć18. To release the tension on the YĆaxis belt (item 3), manually squeeze the spring (item 1) using the tensioner wedge clip (item 4) until you hear it from the YĆaxis motor pulley (item 5). 4. Remove the following:...
...belt is under high tension and could spring out of the procedure is ONLY to figure 13 ' page 8Ć41 Removal WARNING Switch off the printer and remove the power cord. 1. WARNING The spring (item 1) in the next step is being REPLACED by releasing it click into place, ...The rest of the YĆaxis tensioner holder (item 2). Left Hand Cover ' page 8Ć18. To release the tension on the YĆaxis belt (item 3), manually squeeze the spring (item 1) using the tensioner wedge clip (item 4) until you hear it from the YĆaxis motor pulley (item 5). 4. Remove the following:...

Service Manual
Page 264
...Refer to the User Guide). 2. Remove the TĆ20 screw (item 1) located at the back, then lifting up and pulling it towards you. 8-52 HP DesignJet CP Series Printers Removal and Installation This can be necessary to the left . 6. Left Hand Cover ' page 8Ć18. Remove the elevator assembly by turning the motor... PCA and release from the cable clamp. 8. Remove the ink delivery system (Refer to figure 18 ' page 8Ć54 Removal WARNING Switch off the printer and remove the power cord. 1. Loosen the three TĆ20 screws (item 2) securing the elevator assembly to...
...Refer to the User Guide). 2. Remove the TĆ20 screw (item 1) located at the back, then lifting up and pulling it towards you. 8-52 HP DesignJet CP Series Printers Removal and Installation This can be necessary to the left . 6. Left Hand Cover ' page 8Ć18. Remove the elevator assembly by turning the motor... PCA and release from the cable clamp. 8. Remove the ink delivery system (Refer to figure 18 ' page 8Ć54 Removal WARNING Switch off the printer and remove the power cord. 1. Loosen the three TĆ20 screws (item 2) securing the elevator assembly to...

Service Manual
Page 270
... bail assembly into the bail assembly (item 1). 2. Manually move the drive roller around. 5. Remove the right side of the printer. 3. Install the bail assembly by pushing together the retaining clips and pulling them off Installation 1. Open the window. 2. Perform D11 Bail Service Test ' page 4Ć23 8-58 HP DesignJet CP Series Printers Removal and Installation
... bail assembly into the bail assembly (item 1). 2. Manually move the drive roller around. 5. Remove the right side of the printer. 3. Install the bail assembly by pushing together the retaining clips and pulling them off Installation 1. Open the window. 2. Perform D11 Bail Service Test ' page 4Ć23 8-58 HP DesignJet CP Series Printers Removal and Installation

Service Manual
Page 281
...4. Window and Top Cover ' page 8Ć15. 2. Remove the roller support bracket. 6. Overdrive Assembly and Drive Roller (Only Applicable to HP DesignJets 2500CP and 2000CP) Refer to the right. Right Hand Cover ' page 8Ć21. 4. Remove the shoulder screw (item 6) securing the ... right side of the overdrive shaft by releasing it out on the left hand side chassis. 5. Removal and Installation HP DesignJet CP Series Printers 8-69 Manually slide the carriage assembly to the left and right hand side chassis. 8. Remove the following : 1. Remove overdrive assembly...
...4. Window and Top Cover ' page 8Ć15. 2. Remove the roller support bracket. 6. Overdrive Assembly and Drive Roller (Only Applicable to HP DesignJets 2500CP and 2000CP) Refer to the right. Right Hand Cover ' page 8Ć21. 4. Remove the shoulder screw (item 6) securing the ... right side of the overdrive shaft by releasing it out on the left hand side chassis. 5. Removal and Installation HP DesignJet CP Series Printers 8-69 Manually slide the carriage assembly to the left and right hand side chassis. 8. Remove the following : 1. Remove overdrive assembly...

Service Manual
Page 284
Overdrive Assembly and Drive Roller (Only Applicable to HP DesignJets 3500CP and 3000CP) Refer to the left hand side chassis. 5. Window and Top Cover ' page 8Ć15. 2. Bail Arm Assembly ' page 8Ć58. 5. Cutter Assembly '...Interconnect PCA (See Figure 25C ' page 8Ć76). 9. Service Station Assembly ' page 8Ć26. 8-72 HP DesignJet CP Series Printers Removal and Installation Right Hand Cover ' page 8Ć21. 4. Remove the roller support bracket (item 2). 6. Manually slide the carriage assembly to the left and right hand side chassis. Remove the clutch (item 4) and...
Overdrive Assembly and Drive Roller (Only Applicable to HP DesignJets 3500CP and 3000CP) Refer to the left hand side chassis. 5. Window and Top Cover ' page 8Ć15. 2. Bail Arm Assembly ' page 8Ć58. 5. Cutter Assembly '...Interconnect PCA (See Figure 25C ' page 8Ć76). 9. Service Station Assembly ' page 8Ć26. 8-72 HP DesignJet CP Series Printers Removal and Installation Right Hand Cover ' page 8Ć21. 4. Remove the roller support bracket (item 2). 6. Manually slide the carriage assembly to the left and right hand side chassis. Remove the clutch (item 4) and...

Service Manual
Page 308
... into print quality problems and continuous Printer failures. When this Service Manual as a guide to avoid these failures Ć ensuring a good performance during all the product life. Under normal usage conditions, it will be higher. When the printer exceeds 7,500,000 passes (HP DesignJets 2500CP/2000CP) or 6,500,000 passes (HP DesignJets 3500CP/300CP), the front panel displays...
... into print quality problems and continuous Printer failures. When this Service Manual as a guide to avoid these failures Ć ensuring a good performance during all the product life. Under normal usage conditions, it will be higher. When the printer exceeds 7,500,000 passes (HP DesignJets 2500CP/2000CP) or 6,500,000 passes (HP DesignJets 3500CP/300CP), the front panel displays...


