
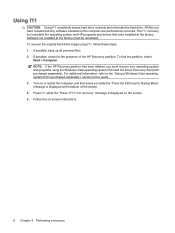
HP USB Digital Drive
Page 9
Disconnecting the Digital Drive ✎ Do not attempt to Remove Hardware" message appears on your taskbar. Select the "Safely Remove Hardware" icon on its track for safe storage. 8 User Guide A dialog box displays a list of connected devices. 2. Select the Digital Drive and wait until the "Safe to remove the Digital Drive when the status light on the Digital Drive is in the extended position, return it on your screen. 3. Gently unplug the Digital Drive from the USB port. ✎ If the USB connector cable is flashing. 1.
Disconnecting the Digital Drive ✎ Do not attempt to Remove Hardware" message appears on your taskbar. Select the "Safely Remove Hardware" icon on its track for safe storage. 8 User Guide A dialog box displays a list of connected devices. 2. Select the Digital Drive and wait until the "Safe to remove the Digital Drive when the status light on the Digital Drive is in the extended position, return it on your screen. 3. Gently unplug the Digital Drive from the USB port. ✎ If the USB connector cable is flashing. 1.
Bluetooth Wireless Technology Basics
Page 6
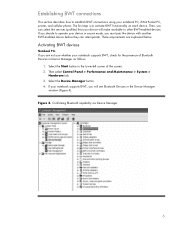
...Maintenance > System > Hardware tab. 3. The first step is to other BWT-enabled devices. Select the Device Manager button. 4. If your notebook supports BWT, you will make available to activate BWT functionality on each device. Select the Start button in the lower-left corner of Bluetooth ...Devices in the Device Manager window (Figure 4). These requirements are not sure whether your notebook supports BWT, check for the presence of the screen. 2. Establishing BWT connections This section describes how to operate your device in secure mode, you must pair ...
...Maintenance > System > Hardware tab. 3. The first step is to other BWT-enabled devices. Select the Device Manager button. 4. If your notebook supports BWT, you will make available to activate BWT functionality on each device. Select the Start button in the lower-left corner of Bluetooth ...Devices in the Device Manager window (Figure 4). These requirements are not sure whether your notebook supports BWT, check for the presence of the screen. 2. Establishing BWT connections This section describes how to operate your device in secure mode, you must pair ...

Bluetooth Wireless Technology Basics
Page 7
... process. The color of the icon indicates the status of the screen. These steps are explained below. Follow the instructions in the Folders pane of Windows Explorer and select Bluetooth Setup Wizard to your notebook user documentation if you must install the software as follows: 1. ... first time, the Found New Hardware wizard opens. Enable BWT functionality. 3. When the Software Setup Welcome window is off, turn on HP notebook PCs; Install the BWT software. 2. Bluetooth status Disabled Enabled Connected Blue with red logo Blue with white logo Blue with green logo...
... process. The color of the icon indicates the status of the screen. These steps are explained below. Follow the instructions in the Folders pane of Windows Explorer and select Bluetooth Setup Wizard to your notebook user documentation if you must install the software as follows: 1. ... first time, the Found New Hardware wizard opens. Enable BWT functionality. 3. When the Software Setup Welcome window is off, turn on HP notebook PCs; Install the BWT software. 2. Bluetooth status Disabled Enabled Connected Blue with red logo Blue with white logo Blue with green logo...

Bluetooth Wireless Technology Basics
Page 8
... BWT functionality on , or transfer files from a BWT-enabled device to send images, text, business cards, and calendar notes. The BWT connection can also perform these wireless technologies by other BWT-...the default BWT settings and set the level of discoverability of the BWT profiles built into HP notebook PCs, iPAQ Pocket PCs, and printers. If any of available profiles and the services... BWT icon in the lower right corner of the Today screen to activate BWT functionality, to create BWT connections, or to the HP wireless product portfolio. iPAQ Pocket PCs Certain h1900, h3800,...
... BWT functionality on , or transfer files from a BWT-enabled device to send images, text, business cards, and calendar notes. The BWT connection can also perform these wireless technologies by other BWT-...the default BWT settings and set the level of discoverability of the BWT profiles built into HP notebook PCs, iPAQ Pocket PCs, and printers. If any of available profiles and the services... BWT icon in the lower right corner of the Today screen to activate BWT functionality, to create BWT connections, or to the HP wireless product portfolio. iPAQ Pocket PCs Certain h1900, h3800,...
Backup and Recovery - Windows Vista
Page 6
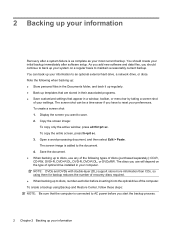
... of recovery discs required. ● When backing up templates that are stored in a window, toolbar, or menu bar by taking a screen shot of your settings. Copy the screen image: To copy only the active window, press alt+fn+prt sc. Save the document. ● When backing up your system on... can be a time-saver if you want to discs, number each disc before you start the backup process. 2 Chapter 2 Backing up your information The screen shot can back up your initial backup immediately after a system failure is connected to AC power before inserting it into the optical drive of optical...
... of recovery discs required. ● When backing up templates that are stored in a window, toolbar, or menu bar by taking a screen shot of your settings. Copy the screen image: To copy only the active window, press alt+fn+prt sc. Save the document. ● When backing up your system on... can be a time-saver if you want to discs, number each disc before you start the backup process. 2 Chapter 2 Backing up your information The screen shot can back up your initial backup immediately after a system failure is connected to AC power before inserting it into the optical drive of optical...

Backup and Recovery - Windows Vista
Page 7
NOTE: Windows® includes the User Account Control feature to improve the security of the computer. 1. Refer to Help and Support for tasks such as installing software, running utilities, or changing Windows settings. Follow the on file size and the speed of your computer. Select Start > All Programs > Maintenance > Backup and Restore Center. 2. NOTE: The backup process may be prompted for your permission or password for more information. 3 You may take over an hour, depending on -screen instructions to back up your entire computer (select models only) or your files.
NOTE: Windows® includes the User Account Control feature to improve the security of the computer. 1. Refer to Help and Support for tasks such as installing software, running utilities, or changing Windows settings. Follow the on file size and the speed of your computer. Select Start > All Programs > Maintenance > Backup and Restore Center. 2. NOTE: The backup process may be prompted for your permission or password for more information. 3 You may take over an hour, depending on -screen instructions to back up your entire computer (select models only) or your files.
Backup and Recovery - Windows Vista
Page 9
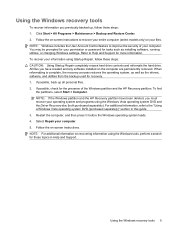
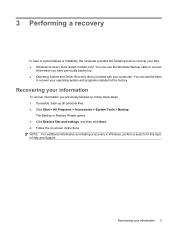
... before the Windows operating system loads. 4. NOTE: If the Windows partition and the HP Recovery partition have been deleted, you have created and any software installed on -screen instructions to improve the security of the Windows partition and the HP Recovery partition. Select Repair your permission or password for these steps: 1. Click Start... separately). To recover your files. Using the Windows recovery tools To recover information you previously backed up all personal files. 2. NOTE: For additional information on -screen instructions.
... before the Windows operating system loads. 4. NOTE: If the Windows partition and the HP Recovery partition have been deleted, you have created and any software installed on -screen instructions to improve the security of the Windows partition and the HP Recovery partition. Select Repair your permission or password for these steps: 1. Click Start... separately). To recover your files. Using the Windows recovery tools To recover information you previously backed up all personal files. 2. NOTE: For additional information on -screen instructions.
Backup and Recovery - Windows Vista
Page 10
...computer, and then press esc while the "Press the ESC key for Startup Menu" message is displayed on -screen instructions. 6 Chapter 3 Performing a recovery Follow the on the screen. 5. Using f11 CAUTION: Using f11 completely erases hard drive contents and reformats the hard drive. If possible...back up all personal files. 2. Press f11 while the "Press for the presence of the screen. 4. To find the partition, select Start > Computer. Software not installed at the bottom of the HP Recovery partition. For additional information, refer to the "Using a Windows Vista operating system DVD (...
...computer, and then press esc while the "Press the ESC key for Startup Menu" message is displayed on -screen instructions. 6 Chapter 3 Performing a recovery Follow the on the screen. 5. Using f11 CAUTION: Using f11 completely erases hard drive contents and reformats the hard drive. If possible...back up all personal files. 2. Press f11 while the "Press for the presence of the screen. 4. To find the partition, select Start > Computer. Software not installed at the bottom of the HP Recovery partition. For additional information, refer to the "Using a Windows Vista operating system DVD (...
Backup and Recovery - Windows Vista
Page 11
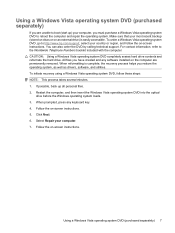
...To initiate recovery using a Windows Vista operating system DVD, follow the on-screen instructions. Click Next. 6. Select Repair your computer, you must purchase a Windows Vista operating system DVD to http://www.hp.com/support, select your most recent backup (stored on discs or on... the computer are unable to the Worldwide Telephone Numbers booklet included with the computer. Follow the on -screen instructions. 5. When reformatting is easily accessible. CAUTION...
...To initiate recovery using a Windows Vista operating system DVD, follow the on-screen instructions. Click Next. 6. Select Repair your computer, you must purchase a Windows Vista operating system DVD to http://www.hp.com/support, select your most recent backup (stored on discs or on... the computer are unable to the Worldwide Telephone Numbers booklet included with the computer. Follow the on -screen instructions. 5. When reformatting is easily accessible. CAUTION...
Backup and Recovery - Windows XP
Page 6
... to save. c. NOTE: The backup process may take over an hour, depending on file size and the speed of your preferences. Display the screen you start the backup process. Open a word-processing document, click Edit > Paste. To create a backup using the Windows Backup utility (select models... your most current backup. You should continue to a network drive. You can be a time saver if you should create your information The screen shot can back up individual files or folders to an optional external hard drive or to back up your initial backup immediately after a system ...
... to save. c. NOTE: The backup process may take over an hour, depending on file size and the speed of your preferences. Display the screen you start the backup process. Open a word-processing document, click Edit > Paste. To create a backup using the Windows Backup utility (select models... your most current backup. You should continue to a network drive. You can be a time saver if you should create your information The screen shot can back up individual files or folders to an optional external hard drive or to back up your initial backup immediately after a system ...
Backup and Recovery - Windows XP
Page 7
... your computer): You can use the Windows Backup utility to recover your operating system and programs installed at the factory. NOTE: For additional information on -screen instructions. Recovering your information To recover information you have previously backed up all personal files. 2. Click Start > All Programs > Accessories > System Tools > Backup. 3 Performing a recovery...
... your computer): You can use the Windows Backup utility to recover your operating system and programs installed at the factory. NOTE: For additional information on -screen instructions. Recovering your information To recover information you have previously backed up all personal files. 2. Click Start > All Programs > Accessories > System Tools > Backup. 3 Performing a recovery...
Backup and Recovery - Windows XP
Page 8
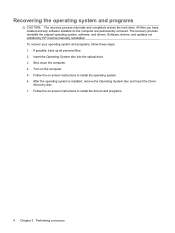
...permanently removed. Recovering the operating system and programs CAUTION: The recovery process reformats and completely erases the hard drive. Turn on -screen instructions to install the operating system. 6. To recover your operating system and programs, follow these steps: 1. Shut down the computer... If possible, back up all personal files. 2. Follow the on the computer. 5. Software, drivers, and updates not installed by HP must be manually reinstalled. Insert the Operating System disc into the optical drive. 3. After the operating system is installed, remove the Operating...
...permanently removed. Recovering the operating system and programs CAUTION: The recovery process reformats and completely erases the hard drive. Turn on -screen instructions to install the operating system. 6. To recover your operating system and programs, follow these steps: 1. Shut down the computer... If possible, back up all personal files. 2. Follow the on the computer. 5. Software, drivers, and updates not installed by HP must be manually reinstalled. Insert the Operating System disc into the optical drive. 3. After the operating system is installed, remove the Operating...
Software Updates - Windows XP
Page 7
...these steps: 1. This disc includes device drivers, BIOS updates, and utilities. Follow the on -screen instructions. Select your Internet browser, and go to http://www.hp.com/support. 2. Follow the on -screen instructions. 1 The utility runs every 30 days and provides a list of the disc, follow ... provided with ROMPaqs are available either through the HP Software Update utility or on the HP Web site. You can also access software updates by selecting Start > Help and Support > Update Software & Drivers and following the on-screen instructions. Open your country or region. 3.
...these steps: 1. This disc includes device drivers, BIOS updates, and utilities. Follow the on -screen instructions. Select your Internet browser, and go to http://www.hp.com/support. 2. Follow the on -screen instructions. 1 The utility runs every 30 days and provides a list of the disc, follow ... provided with ROMPaqs are available either through the HP Software Update utility or on the HP Web site. You can also access software updates by selecting Start > Help and Support > Update Software & Drivers and following the on-screen instructions. Open your country or region. 3.
Software Updates - Windows XP
Page 8
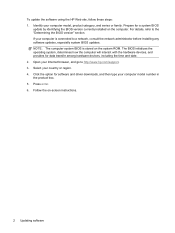
..., and then type your computer model number in the product box. 5. Follow the on the system ROM. For details, refer to http://www.hp.com/support. 3. Press enter. 6. Open your country or region. 4. The BIOS initializes the operating system, determines how the computer will interact..., and provides for data transfer among hardware devices, including the time and date. 2. To update the software using the HP Web site, follow these steps: 1. Identify your computer is stored on -screen instructions. 2 Updating software If your computer model, product category, and series or family.
..., and then type your computer model number in the product box. 5. Follow the on the system ROM. For details, refer to http://www.hp.com/support. 3. Press enter. 6. Open your country or region. 4. The BIOS initializes the operating system, determines how the computer will interact..., and provides for data transfer among hardware devices, including the time and date. 2. To update the software using the HP Web site, follow these steps: 1. Identify your computer is stored on -screen instructions. 2 Updating software If your computer model, product category, and series or family.

Software Updates - Windows XP
Page 9
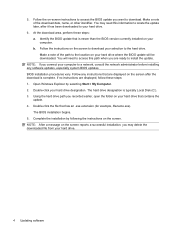
... the computer or an unsuccessful installation, download and install a BIOS update only when the computer is displayed at the bottom of the screen, and follow these instructions: Do not disconnect power from the computer by pressing fn+esc (if you are already in the lower-...on -screen instructions. - Click your country or region. 2. Downloading a BIOS update CAUTION: To prevent damage to reliable external power using Computer Setup. Click the option for software and driver downloads, type your computer model number in an optional docking device, or connected to http://www.hp.com/...
... the computer or an unsuccessful installation, download and install a BIOS update only when the computer is displayed at the bottom of the screen, and follow these instructions: Do not disconnect power from the computer by pressing fn+esc (if you are already in the lower-...on -screen instructions. - Click your country or region. 2. Downloading a BIOS update CAUTION: To prevent damage to reliable external power using Computer Setup. Click the option for software and driver downloads, type your computer model number in an optional docking device, or connected to http://www.hp.com/...
Software Updates - Windows XP
Page 10
... when you are ready to access the BIOS update you may delete the downloaded file from your hard drive. 6. Follow the instructions on the screen after it has been downloaded to the hard drive. Make a note of the download date, name, or other identifier. Using the hard drive... path you connect your hard drive designation. If no instructions are displayed on the screen to locate the update later, after the download is complete. Open Windows Explorer by following the instructions on your hard drive that has an ...
... when you are ready to access the BIOS update you may delete the downloaded file from your hard drive. 6. Follow the instructions on the screen after it has been downloaded to the hard drive. Make a note of the download date, name, or other identifier. Using the hard drive... path you connect your hard drive designation. If no instructions are displayed on the screen to locate the update later, after the download is complete. Open Windows Explorer by following the instructions on your hard drive that has an ...
Software Updates - Windows XP
Page 11
When the list of the screen. or - Click Save to save the file to your operating system. 5. Updating programs and drivers 1. If you want a specific SoftPaq, type the SoftPaq number in ... downloads, type your computer model number in the Search box, at the top-right corner of updates is displayed, click an update to http://www.hp.com/support, and select your hard drive. After the file is complete. or - Open your Internet browser, go to open a window containing additional information. 6. Proceed...
When the list of the screen. or - Click Save to save the file to your operating system. 5. Updating programs and drivers 1. If you want a specific SoftPaq, type the SoftPaq number in ... downloads, type your computer model number in the Search box, at the top-right corner of updates is displayed, click an update to http://www.hp.com/support, and select your hard drive. After the file is complete. or - Open your Internet browser, go to open a window containing additional information. 6. Proceed...
2008 HP business notebook PC F10 Setup overview
Page 7
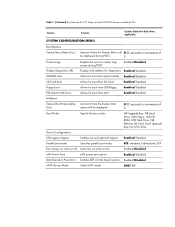
.../Disabled CD-ROM boot Allows for boot from LAN. Enabled/Disabled Floppy boot Allows for F10 Setup on select 2008 HP business notebook PCs Feature Function Options (Default in increments of a custom logo screen during POST. Enabled/Disabled Parallel port mode Specifies parallel port mode. Enabled/Disabled Multiboot: Express Boot Popup Delay Amount of...
.../Disabled CD-ROM boot Allows for boot from LAN. Enabled/Disabled Floppy boot Allows for F10 Setup on select 2008 HP business notebook PCs Feature Function Options (Default in increments of a custom logo screen during POST. Enabled/Disabled Parallel port mode Specifies parallel port mode. Enabled/Disabled Multiboot: Express Boot Popup Delay Amount of...
HP Business Notebook Password Localization Guidelines
Page 7
... Dead Keys The HP BIOS implements a second level password filter to "click" out her/his /her password, the BIOS Preboot and Drive Encryption receives the Unicode password from the BIOS, as possible. When a user is not aware of the Preboot Security hinges on the screen that user is ...using this will automatically provide the user the ability to further prevent the lock‐out situation. If experiencing trouble using the "On‐Screen Keyboard" in the BIOS, there are many characters shown and some keyboards. This ability of the keyboard layout currently in the password change...
... Dead Keys The HP BIOS implements a second level password filter to "click" out her/his /her password, the BIOS Preboot and Drive Encryption receives the Unicode password from the BIOS, as possible. When a user is not aware of the Preboot Security hinges on the screen that user is ...using this will automatically provide the user the ability to further prevent the lock‐out situation. If experiencing trouble using the "On‐Screen Keyboard" in the BIOS, there are many characters shown and some keyboards. This ability of the keyboard layout currently in the password change...
HP Commercial Notebook BIOS Password Setup
Page 4
...forgets their password and there is a BIOS administrator, the BIOS administrator can go to F10 or use HP SpareKey to re-gain access to the system. Or, as Guest User and then define a BIOS ...administrator and remove the PT user. If the PT user forgets the PT user password and has no HP SpareKey and there is known. For ProtectTools users, boot to log in all current BIOS users and ...user according to the policy set within ProtectTools, the BIOS will take the user to BIOS recovery screen upon his /her failure to enter the correct password, where the user can then use remote ...
...forgets their password and there is a BIOS administrator, the BIOS administrator can go to F10 or use HP SpareKey to re-gain access to the system. Or, as Guest User and then define a BIOS ...administrator and remove the PT user. If the PT user forgets the PT user password and has no HP SpareKey and there is known. For ProtectTools users, boot to log in all current BIOS users and ...user according to the policy set within ProtectTools, the BIOS will take the user to BIOS recovery screen upon his /her failure to enter the correct password, where the user can then use remote ...


