User Guide 1
Page 7
Table of contents 1 Starting right ...1 Best practices ...1 More HP resources ...2 2 Getting to know your computer ...4 Locating hardware ...4 Locating software ...4 Right side ...5 Left side ...6 Display ...8 Keyboard area ...9 TouchPad ...9 Lights ...10 Button ...11 Special keys ...12 Action keys ...13 Bottom ...14 Labels ...15 3 Connecting to a network ...16 Connecting to a wireless network ...16 Using the wireless controls ...16 Airplane mode key ...16 Operating system controls 16 Connecting to a WLAN ...17 Using HP Mobile Broadband (select products only 18 Using GPS (select products ...
Table of contents 1 Starting right ...1 Best practices ...1 More HP resources ...2 2 Getting to know your computer ...4 Locating hardware ...4 Locating software ...4 Right side ...5 Left side ...6 Display ...8 Keyboard area ...9 TouchPad ...9 Lights ...10 Button ...11 Special keys ...12 Action keys ...13 Bottom ...14 Labels ...15 3 Connecting to a network ...16 Connecting to a wireless network ...16 Using the wireless controls ...16 Airplane mode key ...16 Operating system controls 16 Connecting to a WLAN ...17 Using HP Mobile Broadband (select products only 18 Using GPS (select products ...

User Guide 1
Page 9
... the display ...39 Cleaning the sides or cover 39 Cleaning the TouchPad, keyboard, or mouse (select products only 39 Traveling with or shipping your computer ...39 8 Securing your computer and information ...41 Using passwords ...41 Setting Windows passwords ...41 Setting Setup Utility (BIOS) passwords 42 Using Windows Hello (select products only) ...42 Using Internet security software ...43 Using antivirus software ...43 Using firewall software ...43 Installing software updates ...43 Using HP Touchpoint Manager (select products only 44 Securing your wireless network ...44...
... the display ...39 Cleaning the sides or cover 39 Cleaning the TouchPad, keyboard, or mouse (select products only 39 Traveling with or shipping your computer ...39 8 Securing your computer and information ...41 Using passwords ...41 Setting Windows passwords ...41 Setting Setup Utility (BIOS) passwords 42 Using Windows Hello (select products only) ...42 Using Internet security software ...43 Using antivirus software ...43 Using firewall software ...43 Installing software updates ...43 Using HP Touchpoint Manager (select products only 44 Securing your wireless network ...44...

User Guide 1
Page 26
.... Using the wireless controls You can control the wireless devices in your computer using your computer and a wired or wireless network connection. All the wireless devices on your computer communicates with other . But even at the factory. The wireless light indicates the overall power state of each device communicates directly with a wireless router or a wireless access point. ● HP Mobile Broadband Module-Gives you go. This chapter will help you to set up a connection or network, connect...
.... Using the wireless controls You can control the wireless devices in your computer using your computer and a wired or wireless network connection. All the wireless devices on your computer communicates with other . But even at the factory. The wireless light indicates the overall power state of each device communicates directly with a wireless router or a wireless access point. ● HP Mobile Broadband Module-Gives you go. This chapter will help you to set up a connection or network, connect...
User Guide 1
Page 32
... the external device is a powerful video device that can connect wired headsets to the audioout (headphone)/audio-in the taskbar search box, select Control Panel, select Hardware and Sound, and then select the audio control panel specific to HP Support Assistant. To access this document: ▲ Select the Start button, select HP Help and Support, and then select HP Documentation. To connect wireless headsets to view and control audio settings. ▲ Type control panel in (microphone) combo jack on the computer, using your sound system...
... the external device is a powerful video device that can connect wired headsets to the audioout (headphone)/audio-in the taskbar search box, select Control Panel, select Hardware and Sound, and then select the audio control panel specific to HP Support Assistant. To access this document: ▲ Select the Start button, select HP Help and Support, and then select HP Documentation. To connect wireless headsets to view and control audio settings. ▲ Type control panel in (microphone) combo jack on the computer, using your sound system...

User Guide 1
Page 45
... charging or calibrating a battery ● When installing or updating system software Running on external power For information about connecting to external power, refer to external power under any of a user-replaceable battery WARNING! Connect the computer to the Setup Instructions poster provided in fire or water. Remove the battery (3) from HP. do not short external contacts; The computer does not use only the AC adapter provided with an approved AC adapter or an optional docking device or...
... charging or calibrating a battery ● When installing or updating system software Running on external power For information about connecting to external power, refer to external power under any of a user-replaceable battery WARNING! Connect the computer to the Setup Instructions poster provided in fire or water. Remove the battery (3) from HP. do not short external contacts; The computer does not use only the AC adapter provided with an approved AC adapter or an optional docking device or...
User Guide 1
Page 47
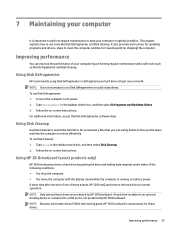
... display closed while the computer is running on -screen instructions. Using Disk Defragmenter HP recommends using Disk Defragmenter to a USB port is not protected by parking the drive and halting data requests under either of your computer by HP 3D DriveGuard. For additional information, access the Disk Defragmenter software Help. To run Disk Cleanup: 1. Type defragment in the taskbar search box, and then select Disk Cleanup. 2. NOTE: Only internal hard drives...
... display closed while the computer is running on -screen instructions. Using Disk Defragmenter HP recommends using Disk Defragmenter to a USB port is not protected by parking the drive and halting data requests under either of your computer by HP 3D DriveGuard. For additional information, access the Disk Defragmenter software Help. To run Disk Cleanup: 1. Type defragment in the taskbar search box, and then select Disk Cleanup. 2. NOTE: Only internal hard drives...

User Guide 1
Page 52
... from operating properly. or Turn on or restart the tablet, and then quickly hold down the Windows button. 2. Under Windows Hello, follow the on-screen instructions. Turn on or restart the tablet, and then quickly hold down the volume up Windows Hello, follow these steps: 1. Tap f10. 2. To set , change, or delete an administrator or power-on password in Setup Utility (BIOS): CAUTION: Use extreme care when making changes in Setup Utility (BIOS). Errors can use the keyboard...
... from operating properly. or Turn on or restart the tablet, and then quickly hold down the Windows button. 2. Under Windows Hello, follow the on-screen instructions. Turn on or restart the tablet, and then quickly hold down the volume up Windows Hello, follow these steps: 1. Tap f10. 2. To set , change, or delete an administrator or power-on password in Setup Utility (BIOS): CAUTION: Use extreme care when making changes in Setup Utility (BIOS). Errors can use the keyboard...

User Guide 1
Page 53
... caused. Using firewall software Firewalls are two types of firewalls to fully protect your computer. When a firewall is installed on a system, all data sent to and from the system is monitored and compared with a set of your choice in order to consider: ● Host-based firewalls-Software that you receive an alert. You can disable programs, utilities, or the operating system...
... caused. Using firewall software Firewalls are two types of firewalls to fully protect your computer. When a firewall is installed on a system, all data sent to and from the system is monitored and compared with a set of your choice in order to consider: ● Host-based firewalls-Software that you receive an alert. You can disable programs, utilities, or the operating system...

User Guide 1
Page 56
... installation, download and install a BIOS update only when the computer is connected to a network, consult the network administrator before installing any software updates, especially system BIOS updates. 1. Do not download or install a BIOS update while the computer is downloaded. Type support in an optional docking device, or connected to your hard drive designation. Click Updates, and then click Check for example, filename.exe). Follow the on battery power, docked in the taskbar search box, and then select the HP Support...
... installation, download and install a BIOS update only when the computer is connected to a network, consult the network administrator before installing any software updates, especially system BIOS updates. 1. Do not download or install a BIOS update while the computer is downloaded. Type support in an optional docking device, or connected to your hard drive designation. Click Updates, and then click Check for example, filename.exe). Follow the on battery power, docked in the taskbar search box, and then select the HP Support...
User Guide 1
Page 61
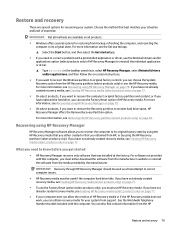
... software from backup, refreshing the computer, and resetting the computer to recover the computer's original factory partition and content, or if you have not already created recovery media, see Creating HP Recovery media (select products only) on -screen instructions. ● If you want to recover the Windows partition to original factory content, you have replaced the hard drive, you need to reinstall the individual application or driver. ▲ Type recovery in the taskbar search box, select HP Recovery Manager...
... software from backup, refreshing the computer, and resetting the computer to recover the computer's original factory partition and content, or if you have not already created recovery media, see Creating HP Recovery media (select products only) on -screen instructions. ● If you want to recover the Windows partition to original factory content, you have replaced the hard drive, you need to reinstall the individual application or driver. ▲ Type recovery in the taskbar search box, select HP Recovery Manager...
User Guide 1
Page 63
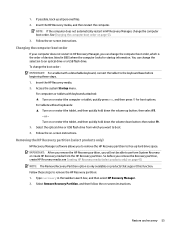
... BIOS where the computer looks for boot options. Access the system Startup menu. Turn on or restart the tablet, and then quickly hold down the volume down the volume up button; then select f9. 3. IMPORTANT: After you remove the HP Recovery partition, you can change the computer boot order. Select Remove Recovery Partition, and then follow the on -screen instructions. Insert the HP Recovery media, and then restart the computer. NOTE: The Remove Recovery Partition option is the order of devices listed in HP Recovery Manager...
... BIOS where the computer looks for boot options. Access the system Startup menu. Turn on or restart the tablet, and then quickly hold down the volume down the volume up button; then select f9. 3. IMPORTANT: After you remove the HP Recovery partition, you can change the computer boot order. Select Remove Recovery Partition, and then follow the on -screen instructions. Insert the HP Recovery media, and then restart the computer. NOTE: The Remove Recovery Partition option is the order of devices listed in HP Recovery Manager...
User Guide 1
Page 68
... 18 H HDMI port connecting 23 identifying 6 HDMI, configuring audio 24 headphones, connecting 21 headsets, connecting 22 Hibernation exiting 31 initiated during critical battery level 34 initiating 31 high-definition devices, connecting 23, 25 HP 3D DriveGuard 37 HP Fast Charge 32 HP Mobile Broadband activating 18 IMEI number 18 MEID number 18 HP Orbit 19 HP PC Hardware Diagnostics (UEFI) using 47 HP Recovery Manager correcting boot problems 53 starting 52 HP Recovery media creating 49 recovery 52 HP Recovery partition recovery 52 removing 53 HP resources 2 HP Touchpoint Manager 44...
... 18 H HDMI port connecting 23 identifying 6 HDMI, configuring audio 24 headphones, connecting 21 headsets, connecting 22 Hibernation exiting 31 initiated during critical battery level 34 initiating 31 high-definition devices, connecting 23, 25 HP 3D DriveGuard 37 HP Fast Charge 32 HP Mobile Broadband activating 18 IMEI number 18 MEID number 18 HP Orbit 19 HP PC Hardware Diagnostics (UEFI) using 47 HP Recovery Manager correcting boot problems 53 starting 52 HP Recovery media creating 49 recovery 52 HP Recovery partition recovery 52 removing 53 HP resources 2 HP Touchpoint Manager 44...

User Guide 1
Page 69
... (network) 6 K keyboard and optional mouse using 29 keys action 12 airplane mode 13 esc 12 fn 12 Windows 12 L labels Bluetooth 15 regulatory 15 serial number 15 service 15 wireless certification 15 WLAN 15 latches battery release 14 lights AC adapter and battery light 6 caps lock 10 drive 5 mute 10 power 5 RJ-45 (network) status 6 locating information hardware 4 software 4 low battery level 33 M maintenance Disk Cleanup 37 Disk Defragmenter 37 HP 3D DriveGuard 37 updating programs and drivers 38 managing power 30 MEID number 18 memory card reader, identifying 5 memory card...
... (network) 6 K keyboard and optional mouse using 29 keys action 12 airplane mode 13 esc 12 fn 12 Windows 12 L labels Bluetooth 15 regulatory 15 serial number 15 service 15 wireless certification 15 WLAN 15 latches battery release 14 lights AC adapter and battery light 6 caps lock 10 drive 5 mute 10 power 5 RJ-45 (network) status 6 locating information hardware 4 software 4 low battery level 33 M maintenance Disk Cleanup 37 Disk Defragmenter 37 HP 3D DriveGuard 37 updating programs and drivers 38 managing power 30 MEID number 18 memory card reader, identifying 5 memory card...
User Guide 1
Page 70
speakers connecting 21 speakers, identifying 14 special keys, using 12 storing a battery 35 supported discs, recovery 50 system recovery 51 system restore point creating 50 system restore point, creating 49 using power settings 32 using sound settings 22 using the keyboard and optional mouse 29 using the TouchPad 26 V vents, identifying 6, 14 VGA port, connecting 22 video 22 T tap TouchPad and touch screen gesture 26 temperature 35 three-finger swipe TouchPad gesture 28 touch screen gestures one-finger slide 29 TouchPad buttons 9 using 26 TouchPad and touch screen gestures tap 26 two...
speakers connecting 21 speakers, identifying 14 special keys, using 12 storing a battery 35 supported discs, recovery 50 system recovery 51 system restore point creating 50 system restore point, creating 49 using power settings 32 using sound settings 22 using the keyboard and optional mouse 29 using the TouchPad 26 V vents, identifying 6, 14 VGA port, connecting 22 video 22 T tap TouchPad and touch screen gesture 26 temperature 35 three-finger swipe TouchPad gesture 28 touch screen gestures one-finger slide 29 TouchPad buttons 9 using 26 TouchPad and touch screen gestures tap 26 two...

Maintenance and Service Guide
Page 39
... on the service tag at the bottom of your location. NOTE: Details about your computer, including model, serial number, product key, and length of each screw size and location during removal and replacement. Component replacement procedures 31 NOTE: HP continually improves and changes product parts. 5 Removal and replacement procedures for Customer Self-Repair parts CAUTION: The Customer Self-Repair program is supported in all locations. This chapter provides removal and replacement procedures...
... on the service tag at the bottom of your location. NOTE: Details about your computer, including model, serial number, product key, and length of each screw size and location during removal and replacement. Component replacement procedures 31 NOTE: HP continually improves and changes product parts. 5 Removal and replacement procedures for Customer Self-Repair parts CAUTION: The Customer Self-Repair program is supported in all locations. This chapter provides removal and replacement procedures...

Maintenance and Service Guide
Page 43
... section illustrates removing all external devices connected to http://partsurfer.hp.com, select your computer, including model, serial number, product key, and length of each screw size and location during removal and replacement. NOTE: When removing the bezel from the bottom of the display (3), be careful not to remove the display bezel, display panel, and camera module without removing the display from the bottom of the display panel. Accessing these steps: 1. Display subcomponents (bezel, panel, camera) NOTE: Display assemblies...
... section illustrates removing all external devices connected to http://partsurfer.hp.com, select your computer, including model, serial number, product key, and length of each screw size and location during removal and replacement. NOTE: When removing the bezel from the bottom of the display (3), be careful not to remove the display bezel, display panel, and camera module without removing the display from the bottom of the display panel. Accessing these steps: 1. Display subcomponents (bezel, panel, camera) NOTE: Display assemblies...

Maintenance and Service Guide
Page 84
... path to the location on your BIOS version, make a note of damage to the computer or an unsuccessful installation, download and install a BIOS update only when the computer is complete. BIOS installation procedures vary. Type file in the taskbar search box, and then select the HP Support Assistant app. - The hard drive designation is connected to a network, consult the network administrator before installing any instructions that appear on battery power, docked in...
... path to the location on your BIOS version, make a note of damage to the computer or an unsuccessful installation, download and install a BIOS update only when the computer is complete. BIOS installation procedures vary. Type file in the taskbar search box, and then select the HP Support Assistant app. - The hard drive designation is connected to a network, consult the network administrator before installing any instructions that appear on battery power, docked in...
Maintenance and Service Guide
Page 87
..., if you get started app. ● If you need to know before you want to reclaim hard drive space, HP Recovery Manager offers the Remove Recovery Partition option. Recovering using HP Recovery Manager on page 82. If you have replaced the hard drive, you can also find contact information from the HP Recovery partition (select products only) or use HP Recovery media. If you have not already created recovery media, see Recovering using HP Recovery Manager HP Recovery Manager software allows you either download the software from the manufacturer's website...
..., if you get started app. ● If you need to know before you want to reclaim hard drive space, HP Recovery Manager offers the Remove Recovery Partition option. Recovering using HP Recovery Manager on page 82. If you have replaced the hard drive, you can also find contact information from the HP Recovery partition (select products only) or use HP Recovery media. If you have not already created recovery media, see Recovering using HP Recovery Manager HP Recovery Manager software allows you either download the software from the manufacturer's website...

Maintenance and Service Guide
Page 106
...) using 83 HP Recovery Manager correcting boot problems 81 starting 80 HP Recovery media creating 77 recovery 80 HP Recovery partition recovery 80 removing 82 I internal card product description 3 internal microphone, identifying 8 J jacks audio-out (headphone)/audio-in (microphone) 7 network 6 RJ-45 (network) 6 K keyboard illustrated 18 product description 3 keys action 12 airplane mode 13 esc 12 fn 12 Windows 12 L labels Bluetooth 15 regulatory 15 serial number 15 service 15 wireless certification 15 WLAN 15 latch, battery release 14 lights AC adapter and battery light 6 caps lock 10 drive...
...) using 83 HP Recovery Manager correcting boot problems 81 starting 80 HP Recovery media creating 77 recovery 80 HP Recovery partition recovery 80 removing 82 I internal card product description 3 internal microphone, identifying 8 J jacks audio-out (headphone)/audio-in (microphone) 7 network 6 RJ-45 (network) 6 K keyboard illustrated 18 product description 3 keys action 12 airplane mode 13 esc 12 fn 12 Windows 12 L labels Bluetooth 15 regulatory 15 serial number 15 service 15 wireless certification 15 WLAN 15 latch, battery release 14 lights AC adapter and battery light 6 caps lock 10 drive...

Maintenance and Service Guide
Page 107
... media creating 77 creating using HP Recovery Manager 78 recovery partition removing 82 regulatory information regulatory label 15 wireless certification labels 15 removal/replacement preliminaries 27 procedures 31, 35 RJ-45 (network) jack, identifying 6 RJ-45 (network) status lights, identifying 6 RTC battery illustrated 19 removing 61 S security cable slot, identifying 5 security, product description 4 serial number 15 serial number, computer 15 service considerations cables 27 connectors 27 plastic parts 27 service labels, locating 15 serviceability, product description 4 slots memory card...
... media creating 77 creating using HP Recovery Manager 78 recovery partition removing 82 regulatory information regulatory label 15 wireless certification labels 15 removal/replacement preliminaries 27 procedures 31, 35 RJ-45 (network) jack, identifying 6 RJ-45 (network) status lights, identifying 6 RTC battery illustrated 19 removing 61 S security cable slot, identifying 5 security, product description 4 serial number 15 serial number, computer 15 service considerations cables 27 connectors 27 plastic parts 27 service labels, locating 15 serviceability, product description 4 slots memory card...


