Quick Setup Guide - Windows 8
Page 5
...Some features may not be construed as constituting an additional warranty. The information in this copyright protection technology must be liable for HP products and services are set forth in the express warranty statements accompanying such products and services. For worldwide support, go /contactHP....or encourage the use of Microsoft Corporation in the box. Box 200, Alexandra Post Office, Singapore 911507 When you may provide a printed HP Limited Warranty in printed format, you request a printed copy of this document is subject to : North America: Hewlett-Packard, MS POD...
...Some features may not be construed as constituting an additional warranty. The information in this copyright protection technology must be liable for HP products and services are set forth in the express warranty statements accompanying such products and services. For worldwide support, go /contactHP....or encourage the use of Microsoft Corporation in the box. Box 200, Alexandra Post Office, Singapore 911507 When you may provide a printed HP Limited Warranty in printed format, you request a printed copy of this document is subject to : North America: Hewlett-Packard, MS POD...
Quick Setup Guide - Windows 8
Page 7
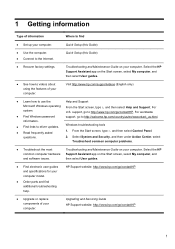
...guides and specifications for your computer model. ● Order parts and find ● Set up your computer. HP Support website: http://www.hp.com/go to http://welcome.hp.com/country/us/en/wwcontact_us.html. information. ● Find links to videos about using the features of ... Maintenance Guide on your computer. Windows troubleshooting tools 1. From the Start screen, type h, and then select Help and Support. Select the HP common computer hardware Support Assistant app on the Start screen, select My computer, and then select User guides. ● See how-to driver...
...guides and specifications for your computer model. ● Order parts and find ● Set up your computer. HP Support website: http://www.hp.com/go to http://welcome.hp.com/country/us/en/wwcontact_us.html. information. ● Find links to videos about using the features of ... Maintenance Guide on your computer. Windows troubleshooting tools 1. From the Start screen, type h, and then select Help and Support. Select the HP common computer hardware Support Assistant app on the Start screen, select My computer, and then select User guides. ● See how-to driver...
Quick Setup Guide - Windows 8
Page 8
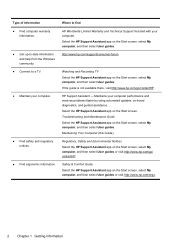
...select My computer, and then select User guides or visit http://www.hp.com/ergo. 2 Chapter 1 Getting information Maintaining Your Computer (this Guide) Regulatory, Safety and Environmental Notices Select the HP Support Assistant app on the Start screen, select My computer, and then... ● Find computer warranty information. ● Get up-to-date information and help from the Windows community. ● Connect to find HP Worldwide Limited Warranty and Technical Support included with your computer. Maintains your computer. ● Find safety and regulatory notices. ● Find ergonomic...
...select My computer, and then select User guides or visit http://www.hp.com/ergo. 2 Chapter 1 Getting information Maintaining Your Computer (this Guide) Regulatory, Safety and Environmental Notices Select the HP Support Assistant app on the Start screen, select My computer, and then... ● Find computer warranty information. ● Get up-to-date information and help from the Windows community. ● Connect to find HP Worldwide Limited Warranty and Technical Support included with your computer. Maintains your computer. ● Find safety and regulatory notices. ● Find ergonomic...
Quick Setup Guide - Windows 8
Page 9
...plug. If you move, check the voltage requirements for the country/region in which you purchased your computer is easily accessible at http://www.hp.com/ergo. 1. Connect the television cable or the telephone line cord to the surge protection device, and then connect the device to ...to the computer. 3. Find out what operating system and version your computer. To reduce the risk of electrical shock or damage to http://www.hp.com/go to your computer WARNING! a. These can increase the inside temperature, or can be heavy; The grounding plug is an important safety ...
...plug. If you move, check the voltage requirements for the country/region in which you purchased your computer is easily accessible at http://www.hp.com/ergo. 1. Connect the television cable or the telephone line cord to the surge protection device, and then connect the device to ...to the computer. 3. Find out what operating system and version your computer. To reduce the risk of electrical shock or damage to http://www.hp.com/go to your computer WARNING! a. These can increase the inside temperature, or can be heavy; The grounding plug is an important safety ...
Quick Setup Guide - Windows 8
Page 10
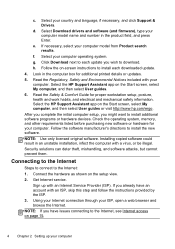
...Internet connection through your computer. g. Follow the on-screen instructions to install each update you already have issues connecting to download. Select the HP Support Assistant app on the Start screen, select My computer, and then select User guides or visit http://www...c. Read the Regulatory, Safety and Environmental Notices included with an ISP, skip this step and follow the instructions provided by the ISP. 3. Select the HP Support Assistant app on the Start screen, select My computer, and then select User guides. 6. Connect the hardware as shown on page 15. 4 Chapter...
...Internet connection through your computer. g. Follow the on-screen instructions to install each update you already have issues connecting to download. Select the HP Support Assistant app on the Start screen, select My computer, and then select User guides or visit http://www...c. Read the Regulatory, Safety and Environmental Notices included with an ISP, skip this step and follow the instructions provided by the ISP. 3. Select the HP Support Assistant app on the Start screen, select My computer, and then select User guides. 6. Connect the hardware as shown on page 15. 4 Chapter...
Quick Setup Guide - Windows 8
Page 11
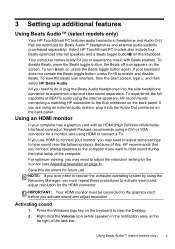
... 2. To disable Beats, press the Beats toggle button; To view the Beats user interface, from the Start screen, type b, and then select HP Beats Audio. Right-click the Volume icon (white speaker) in the notification area, at the far right of BEATS audio using an external audio system... side headphone connector to experience crisp and clear sound separation. 3 Setting up additional features Using Beats Audio™ (select models only) Your HP TouchSmart PC features audio connectors (headphone and Audio Out) that you connect analog speakers to the computer if you need to do is plug ...
... 2. To disable Beats, press the Beats toggle button; To view the Beats user interface, from the Start screen, type b, and then select HP Beats Audio. Right-click the Volume icon (white speaker) in the notification area, at the far right of BEATS audio using an external audio system... side headphone connector to experience crisp and clear sound separation. 3 Setting up additional features Using Beats Audio™ (select models only) Your HP TouchSmart PC features audio connectors (headphone and Audio Out) that you connect analog speakers to the computer if you need to do is plug ...
Quick Setup Guide - Windows 8
Page 12
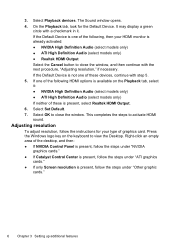
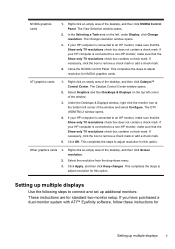
It may display a green circle with step 5. 5. If one of the following , then your HDMI monitor is present, follow the steps under "ATI graphics cards." ● If only Screen resolution is already activated: ● NVIDIA High Definition Audio (select models only) ● ATI High Definition Audio (select models only) ● Realtek HDMI Output Select the Cancel button to view the Desktop. On the Playback tab, look for your type of the following HDMI options is available on the keyboard to close the window. If the Default Device is present, select Realtek HDMI Output. 6....
It may display a green circle with step 5. 5. If one of the following , then your HDMI monitor is present, follow the steps under "ATI graphics cards." ● If only Screen resolution is already activated: ● NVIDIA High Definition Audio (select models only) ● ATI High Definition Audio (select models only) ● Realtek HDMI Output Select the Cancel button to view the Desktop. On the Playback tab, look for your type of the following HDMI options is available on the keyboard to close the window. If the Default Device is present, select Realtek HDMI Output. 6....
Quick Setup Guide - Windows 8
Page 13
...8482; Control Center. In the Selecting a Task area on the top left , under Display, click Change resolution. If your HP computer is connected to a non-HP monitor, make sure that the Show only TV resolutions check box contains a check mark. The Change resolution window opens. 3. Select... Graphics and then Desktops & Displays on the left corner of the window. 3. The View Selection window opens. 2. If your HP computer is connected to an HP monitor, make sure that the Show only TV resolutions check box does not contain a check mark. Click Apply, and then click ...
...8482; Control Center. In the Selecting a Task area on the top left , under Display, click Change resolution. If your HP computer is connected to a non-HP monitor, make sure that the Show only TV resolutions check box contains a check mark. The Change resolution window opens. 3. Select... Graphics and then Desktops & Displays on the left corner of the window. 3. The View Selection window opens. 2. If your HP computer is connected to an HP monitor, make sure that the Show only TV resolutions check box does not contain a check mark. Click Apply, and then click ...
Quick Setup Guide - Windows 8
Page 14
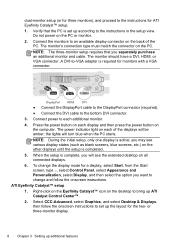
The monitor should have a DVI, HDMI, or VGA connector. A DVI-to-VGA adapter is required for the two- DisplayPort HDMI DVI ● Connect the DisplayPort cable to the DisplayPort connector (required). ● Connect the DVI cable to the instructions in the setup view. Press the power button on each display and then press the power button on all connected displays. 6. NOTE: The three-monitor setup requires that the PC is complete, you will turn blue when the PC starts. NOTE: During the initial setup, only one display is completed. 5. Select CCC-Advanced, select ...
The monitor should have a DVI, HDMI, or VGA connector. A DVI-to-VGA adapter is required for the two- DisplayPort HDMI DVI ● Connect the DisplayPort cable to the DisplayPort connector (required). ● Connect the DVI cable to the instructions in the setup view. Press the power button on each display and then press the power button on all connected displays. 6. NOTE: The three-monitor setup requires that the PC is complete, you will turn blue when the PC starts. NOTE: During the initial setup, only one display is completed. 5. Select CCC-Advanced, select ...

Quick Setup Guide - Windows 8
Page 15
... procedures Keeping your system once a month for visible signs of dust and debris, and clean it about once every three months. ● Visit http://www.hp.com/go/contactHP for example, the Ethernet and USB connectors). Keep these vents clean by using a small, battery-powered vacuum cleaner. (A battery-powered vacuum cleaner...
... procedures Keeping your system once a month for visible signs of dust and debris, and clean it about once every three months. ● Visit http://www.hp.com/go/contactHP for example, the Ethernet and USB connectors). Keep these vents clean by using a small, battery-powered vacuum cleaner. (A battery-powered vacuum cleaner...

Quick Setup Guide - Windows 8
Page 16
For more seconds to turn off the computer, and then press the Power button to restart the computer. 3. Computer does not start up Windows. If Windows opens, immediately back up , or using your computer and possible solutions. Ensure that the cables connecting the computer to be properly connected. If the display (monitor) is blank, the monitor might encounter while installing, starting up all important data to a backup hard disk drive. 4. 5 Troubleshooting Refer to the documentation provided by connecting a different electrical device to it. 10 Chapter 5 Troubleshooting...
For more seconds to turn off the computer, and then press the Power button to restart the computer. 3. Computer does not start up Windows. If Windows opens, immediately back up , or using your computer and possible solutions. Ensure that the cables connecting the computer to be properly connected. If the display (monitor) is blank, the monitor might encounter while installing, starting up all important data to a backup hard disk drive. 4. 5 Troubleshooting Refer to the documentation provided by connecting a different electrical device to it. 10 Chapter 5 Troubleshooting...
Quick Setup Guide - Windows 8
Page 17
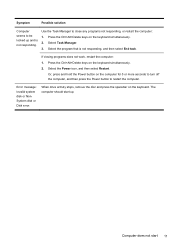
Press the Ctrl+Alt+Delete keys on the keyboard simultaneously. 2. Select Task Manager. 3. Press the Ctrl+Alt+Delete keys on the keyboard simultaneously. 2. The computer should start 11 If closing programs does not work, restart the computer: 1. Computer does not start up and is not responding, and then select End task. Select the program that is not responding. Select the Power icon, and then select Restart. When drive activity stops, remove the disc and press the spacebar on the computer for 5 or more seconds to turn off the computer, and then press the Power ...
Press the Ctrl+Alt+Delete keys on the keyboard simultaneously. 2. Select Task Manager. 3. Press the Ctrl+Alt+Delete keys on the keyboard simultaneously. 2. The computer should start 11 If closing programs does not work, restart the computer: 1. Computer does not start up and is not responding, and then select End task. Select the program that is not responding. Select the Power icon, and then select Restart. When drive activity stops, remove the disc and press the spacebar on the computer for 5 or more seconds to turn off the computer, and then press the Power ...
Quick Setup Guide - Windows 8
Page 18
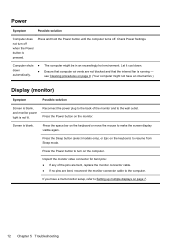
If you have an internal fan.) Display (monitor) Symptom Possible solution Screen is blank, and monitor power light is running - Computer shuts ● down . see Cleaning procedures on page 9. (Your computer might be in an exceedingly hot environment. Reconnect the power plug to the back of the pins are bent, replace the monitor connector cable. ● If no pins are not blocked and that computer air vents are bent, reconnect the monitor connector cable to the computer. Screen is pressed. Inspect the monitor video connector for bent pins: ● If any of the ...
If you have an internal fan.) Display (monitor) Symptom Possible solution Screen is blank, and monitor power light is running - Computer shuts ● down . see Cleaning procedures on page 9. (Your computer might be in an exceedingly hot environment. Reconnect the power plug to the back of the pins are bent, replace the monitor connector cable. ● If no pins are not blocked and that computer air vents are bent, reconnect the monitor connector cable to the computer. Screen is pressed. Inspect the monitor video connector for bent pins: ● If any of the ...
Quick Setup Guide - Windows 8
Page 19
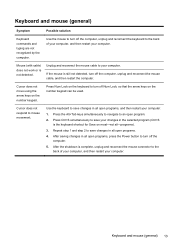
Press Ctrl+S simultaneously to the back of your computer, and then restart your computer. Keyboard and mouse (general) 13 Keyboard and mouse (general) Symptom Possible solution Keyboard commands and typing are not recognized by the computer. Mouse (with cable) does not work or is complete, unplug and reconnect the mouse connector to save your changes in all open programs, and then restart your computer. If the mouse is the keyboard shortcut for Save on most-not all open programs, press the Power button to the back of your computer, and then restart your computer....
Press Ctrl+S simultaneously to the back of your computer, and then restart your computer. Keyboard and mouse (general) 13 Keyboard and mouse (general) Symptom Possible solution Keyboard commands and typing are not recognized by the computer. Mouse (with cable) does not work or is complete, unplug and reconnect the mouse connector to save your changes in all open programs, and then restart your computer. If the mouse is the keyboard shortcut for Save on most-not all open programs, press the Power button to the back of your computer, and then restart your computer....
Quick Setup Guide - Windows 8
Page 20
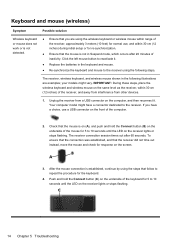
If you are examples; To ensure that the connection was established, and that the receiver did not time out instead, move the mouse and check for normal use a USB connector on the receiver lights or stops flashing. your models might have a choice, use , and within 30 cm (12 inches) of the keyboard for 5 to the receiver using the following illustrations are using the steps that the mouse is not in Suspend mode, which occurs after 60 seconds. Your computer model might vary. Check that the mouse is on (A), and push and hold the Connect button (C) on the underside of the ...
If you are examples; To ensure that the connection was established, and that the receiver did not time out instead, move the mouse and check for normal use a USB connector on the receiver lights or stops flashing. your models might have a choice, use , and within 30 cm (12 inches) of the keyboard for 5 to the receiver using the following illustrations are using the steps that the mouse is not in Suspend mode, which occurs after 60 seconds. Your computer model might vary. Check that the mouse is on (A), and push and hold the Connect button (C) on the underside of the ...
Quick Setup Guide - Windows 8
Page 21
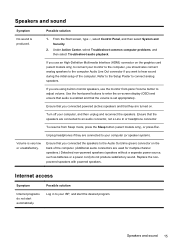
Under Action Center, select Troubleshoot common computer problems, and then select Troubleshoot audio playback. Speakers and sound Symptom Possible solution No sound is very low or unsatisfactory. Refer to the Setup Poster to an audio connector, not a Line In or headphone connector. Unplug headphones if they are turned on -screen display (OSD) and ensure that audio is enabled and that the volume is set appropriately. Ensure that the speakers are connected to enter the on . To resume from Sleep mode, press the Sleep button (select models only), or press Esc. ...
Under Action Center, select Troubleshoot common computer problems, and then select Troubleshoot audio playback. Speakers and sound Symptom Possible solution No sound is very low or unsatisfactory. Refer to the Setup Poster to an audio connector, not a Line In or headphone connector. Unplug headphones if they are turned on -screen display (OSD) and ensure that audio is enabled and that the volume is set appropriately. Ensure that the speakers are connected to enter the on . To resume from Sleep mode, press the Sleep button (select models only), or press Esc. ...
Quick Setup Guide - Windows 8
Page 22
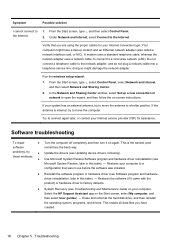
... turn it came with the product) or hardware driver to factory defaults. ● System Recovery (see Microsoft System Restore, later in this table). - Select the HP Support Assistant app on again. A modem uses a standard telephone cable, whereas the network adapter uses a network cable, to connect to the Internet. From the Start...
... turn it came with the product) or hardware driver to factory defaults. ● System Recovery (see Microsoft System Restore, later in this table). - Select the HP Support Assistant app on again. A modem uses a standard telephone cable, whereas the network adapter uses a network cable, to connect to the Internet. From the Start...
Quick Setup Guide - Windows 8
Page 23
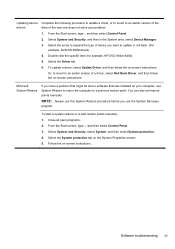
... computer to an earlier version of a driver, select Roll Back Driver, and then follow the on your problem: 1. Double-click the specific item (for example, HP DVD Writer 640b). 5. Close all open programs. 2. Select the System protection tab on -screen instructions. From the Start screen, type c and then select Control Panel...
... computer to an earlier version of a driver, select Roll Back Driver, and then follow the on your problem: 1. Double-click the specific item (for example, HP DVD Writer 640b). 5. Close all open programs. 2. Select the System protection tab on -screen instructions. From the Start screen, type c and then select Control Panel...

Quick Setup Guide - Windows 8
Page 24
Or check to be sure that the program is still available from where you can reinstall them by using the Recovery Manager: 1. To check the list of programs opens. From the Start screen, type r, and then select Recovery Manager. A list of installable programs in the Recovery Manager: 1. Choose the program you want to be sure you have finished reinstalling, restart the computer. NOTE: Do not use the Recovery Manager program to continue. 2. Before you uninstall a program, be sure that came on -screen instructions. 4. Select Next at the Welcome screen. 3. Select ...
Or check to be sure that the program is still available from where you can reinstall them by using the Recovery Manager: 1. To check the list of programs opens. From the Start screen, type r, and then select Recovery Manager. A list of installable programs in the Recovery Manager: 1. Choose the program you want to be sure you have finished reinstalling, restart the computer. NOTE: Do not use the Recovery Manager program to continue. 2. Before you uninstall a program, be sure that came on -screen instructions. 4. Select Next at the Welcome screen. 3. Select ...
Quick Setup Guide - Windows 8
Page 25
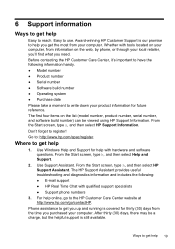
... 19 From the Start screen, type h, and then select Help and Support. 2. Ways to get help 1. Don't forget to the HP Customer Care Center website at http://www.hp.com/go to register! For help online, go /contactHP. Whether with hardware and software questions. Before contacting the...Software build number ● Operating system ● Purchase date Please take a moment to reach. Easy to : http://www.hp.com/apac/register. Go to use. Award-winning HP Customer Support is our promise to get the most from the time you up and running is still available. Phone assistance...
... 19 From the Start screen, type h, and then select Help and Support. 2. Ways to get help 1. Don't forget to the HP Customer Care Center website at http://www.hp.com/go to register! For help online, go /contactHP. Whether with hardware and software questions. Before contacting the...Software build number ● Operating system ● Purchase date Please take a moment to reach. Easy to : http://www.hp.com/apac/register. Go to use. Award-winning HP Customer Support is our promise to get the most from the time you up and running is still available. Phone assistance...