

Owners Manual
Page 2
Select Delay Set FM MODE DIGITAL PRO LOGIC 3-STEREO HALL THEATER TEST TONE SURR. AM/FM TUNING PRESET SCAN PRESET Speaker Channel Dig. AVR 100 Audio/Video Receiver OWNER'S MANUAL Volume COAX DIGITAL SLEEP TAPE CD DVD VID 1 VID 2 VID 3 6 CH. OFF Power Phones Version 7 October 5, 1999 Bass Treble Balance Min Max Min Max L R VIDEO 3 Video L Audio ® Power for the digital revolution.™
Select Delay Set FM MODE DIGITAL PRO LOGIC 3-STEREO HALL THEATER TEST TONE SURR. AM/FM TUNING PRESET SCAN PRESET Speaker Channel Dig. AVR 100 Audio/Video Receiver OWNER'S MANUAL Volume COAX DIGITAL SLEEP TAPE CD DVD VID 1 VID 2 VID 3 6 CH. OFF Power Phones Version 7 October 5, 1999 Bass Treble Balance Min Max Min Max L R VIDEO 3 Video L Audio ® Power for the digital revolution.™
Owners Manual
Page 3
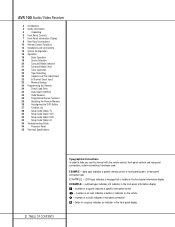
AVR 100 Audio/Video Receiver 3 Introduction 4 Safety Information 4 Unpacking 5 Front-Panel Controls 7 Front-Panel Information Display 8 Rear-Panel Connections 10 Remote Control Functions 13 Installation and Connections ...
AVR 100 Audio/Video Receiver 3 Introduction 4 Safety Information 4 Unpacking 5 Front-Panel Controls 7 Front-Panel Information Display 8 Rear-Panel Connections 10 Remote Control Functions 13 Installation and Connections ...
Owners Manual
Page 4
..." within the product's enclosure that may be of sufficient magnitude to constitute a risk of electric shock to persons. With the purchase of a Harman Kardon AVR 100 you have a grounding plug provided. The AVR 100 has been custom designed to provide all the excitement and detail of movie sound tracks and every nuance of the finest receivers...
..." within the product's enclosure that may be of sufficient magnitude to constitute a risk of electric shock to persons. With the purchase of a Harman Kardon AVR 100 you have a grounding plug provided. The AVR 100 has been custom designed to provide all the excitement and detail of movie sound tracks and every nuance of the finest receivers...
Owners Manual
Page 5
... the separation between the equipment and receiver. If this product. The limits are recyclable. Safety Information Important Safety Information Verify Line Voltage Before Use Your AVR 100 has been designed for use with a dry cloth. Avoid spraying insecticide near the unit. If you move, or should be stored in extremely hot or...
... the separation between the equipment and receiver. If this product. The limits are recyclable. Safety Information Important Safety Information Verify Line Voltage Before Use Your AVR 100 has been designed for use with a dry cloth. Avoid spraying insecticide near the unit. If you move, or should be stored in extremely hot or...

Owners Manual
Page 6
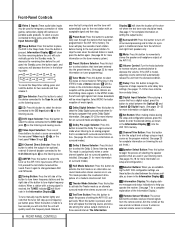
...your taste or room acoustics. 7 Balance Control: Turn this switch should be turned off when the headphone jack is placed in to the AVR 100. When the switch is pressed in, the unit is in use of the remote control, this control to turn green. 4 Headphone Jack:... Headphone Jack 5 Bass Control 6 Treble Control 7 Balance Control 8 Video 3 Inputs 9 Sleep Button ) Tape Input Selector ! This button MUST be turned on the AVR 100; press it pops out from the front panel so that the headphones have a standard 1/4" stereo phone plug. NOTE: In normal operation this control to modify...
...your taste or room acoustics. 7 Balance Control: Turn this switch should be turned off when the headphone jack is placed in to the AVR 100. When the switch is pressed in, the unit is in use of the remote control, this control to turn green. 4 Headphone Jack:... Headphone Jack 5 Bass Control 6 Treble Control 7 Balance Control 8 Video 3 Inputs 9 Sleep Button ) Tape Input Selector ! This button MUST be turned on the AVR 100; press it pops out from the front panel so that the headphones have a standard 1/4" stereo phone plug. NOTE: In normal operation this control to modify...
Owners Manual
Page 7
...button is pressed, Information Display 35 will auto- To decrease the remaining time before the unit will show the location of setting the AVR 100's output levels. In the STEREO mode a Stereo indicator K will illuminate in the information display, and stereo reception will note that has...; Surround Off: Press this button to turn off all surround processing and to listen to a program in the AVR 100's memory. Select MONO for better reception of the AVR 100. ˆ Volume Control: Turn the knob clockwise to increase volume, counterclockwise to decrease the volume. To tune ...
...button is pressed, Information Display 35 will auto- To decrease the remaining time before the unit will show the location of setting the AVR 100's output levels. In the STEREO mode a Stereo indicator K will illuminate in the information display, and stereo reception will note that has...; Surround Off: Press this button to turn off all surround processing and to listen to a program in the AVR 100's memory. Select MONO for better reception of the AVR 100. ˆ Volume Control: Turn the knob clockwise to increase volume, counterclockwise to decrease the volume. To tune ...

Owners Manual
Page 8
...the Optical Digital input fi. The number that appears above the indicator is the number of minutes remaining before the AVR 100 will return to either of the AVR's operation. D Hall Mode Indicator: This indicator illuminates when the Hall mode is in use via a connection to ... Preset Number: This two-digit display indicates the station preset number that the AVR 100's output has been silenced by pressing the Tuner Mode button f (. Q Night Mode Indicator: This indicator lights when the AVR 100 is the preset station's memory position. P Sleep Indicator: This indicator is ...
...the Optical Digital input fi. The number that appears above the indicator is the number of minutes remaining before the AVR 100 will return to either of the AVR's operation. D Hall Mode Indicator: This indicator illuminates when the Hall mode is in use via a connection to ... Preset Number: This two-digit display indicates the station preset number that the AVR 100's output has been silenced by pressing the Tuner Mode button f (. Q Night Mode Indicator: This indicator lights when the AVR 100 is the preset station's memory position. P Sleep Indicator: This indicator is ...

Owners Manual
Page 10
... supplied with the antenna. ™ FM Antenna: Connect the supplied indoor or an optional external FM antenna to this outlet ¤ should not exceed 100 watts. ‹ AC Power Cord: Connect the AC plug to a nonswitched AC wall output. › Coaxial Digital Inputs: Connect the coax digital ...receiver, LD player or CD player to the line-level input of the device plugged into this terminal. £ Remote IR Input: If the AVR 100's frontpanel IR sensor is used . NOTE: The power consumption of a powered subwoofer. NOTE: When making connections to the Speaker Terminals always be certain...
... supplied with the antenna. ™ FM Antenna: Connect the supplied indoor or an optional external FM antenna to this outlet ¤ should not exceed 100 watts. ‹ AC Power Cord: Connect the AC plug to a nonswitched AC wall output. › Coaxial Digital Inputs: Connect the coax digital ...receiver, LD player or CD player to the line-level input of the device plugged into this terminal. £ Remote IR Input: If the AVR 100's frontpanel IR sensor is used . NOTE: The power consumption of a powered subwoofer. NOTE: When making connections to the Speaker Terminals always be certain...

Owners Manual
Page 12
...button does not have been entered into the Standby mode. Once the button has been pressed, use will select the source shown on calibrating the AVR 100.) t Set Button: This button is used with the on all features will automatically go to activate the Night mode. It is also used..., each button may also be programmed to begin the process of setting the output-level trims when program material is being used as the most Harman Kardon CD, DVD and cassette players. They are being played. u Digital Input Select: Press this button to assign one of the digital inputs ›...
...button does not have been entered into the Standby mode. Once the button has been pressed, use will select the source shown on calibrating the AVR 100.) t Set Button: This button is used with the on all features will automatically go to activate the Night mode. It is also used..., each button may also be programmed to begin the process of setting the output-level trims when program material is being used as the most Harman Kardon CD, DVD and cassette players. They are being played. u Digital Input Select: Press this button to assign one of the digital inputs ›...

Owners Manual
Page 13
... a volume control is in use, they operate the Slow-Play Forward and Reverse functions. After pressing this button, the delay times are entered by the AVR 100 when processing surround sound. Press the Set button again to complete the process. (See page 18-19 for more information.) ` Preset Up/Channel-Up Button... product. 31 Master Volume Up/Down: Press these buttons to raise or lower the system volume. 32 Mute: Press this button to momentarily silence the AVR 100 or TV set or other products.) 36 6-Ch. z Delay Button: Press this button to select another station. When a VCR or TV is in use, ...
... a volume control is in use, they operate the Slow-Play Forward and Reverse functions. After pressing this button, the delay times are entered by the AVR 100 when processing surround sound. Press the Set button again to complete the process. (See page 18-19 for more information.) ` Preset Up/Channel-Up Button... product. 31 Master Volume Up/Down: Press these buttons to raise or lower the system volume. 32 Mute: Press this button to momentarily silence the AVR 100 or TV set or other products.) 36 6-Ch. z Delay Button: Press this button to select another station. When a VCR or TV is in use, ...
Owners Manual
Page 14
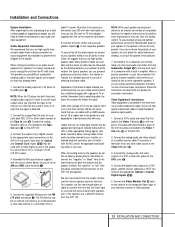
... and red ones for advice before proceeding, or consult the speaker's manufacturer. 7. The Audio and Video Record/In jacks on the AVR 100. 2. Connect the analog audio and video outputs of a satellite receiver, cable TV converter or television set or any possibility of a...amplifier. Regardless of the brand of speakers you use , personal preferences and other video source to the appropriate input connections on the AVR 100. 3. Video Equipment Connections Video equipment is a valuable resource to the respective speakers. Assemble the AM Loop Antenna supplied with a built...
... and red ones for advice before proceeding, or consult the speaker's manufacturer. 7. The Audio and Video Record/In jacks on the AVR 100. 2. Connect the analog audio and video outputs of a satellite receiver, cable TV converter or television set or any possibility of a...amplifier. Regardless of the brand of speakers you use , personal preferences and other video source to the appropriate input connections on the AVR 100. 3. Video Equipment Connections Video equipment is a valuable resource to the respective speakers. Assemble the AM Loop Antenna supplied with a built...

Owners Manual
Page 15
.... Simply use with multiroom systems, external control components and power amplifiers. External Audio Decoder Connection To provide for ultimate flexibility, the AVR 100 may be used in conjunction with optional, external decoders for devices that have no power switch or a mechanical power switch that product...placed behind a solid or smoked-glass cabinet door, the obstruction may not exceed 100 watts. Although the digital decoding system in the AVR 100 will receive power only when the unit is on Harman Kardon or other components are complete, plug the power cord into a Standby mode when...
.... Simply use with multiroom systems, external control components and power amplifiers. External Audio Decoder Connection To provide for ultimate flexibility, the AVR 100 may be used in conjunction with optional, external decoders for devices that have no power switch or a mechanical power switch that product...placed behind a solid or smoked-glass cabinet door, the obstruction may not exceed 100 watts. Although the digital decoding system in the AVR 100 will receive power only when the unit is on Harman Kardon or other components are complete, plug the power cord into a Standby mode when...

Owners Manual
Page 17
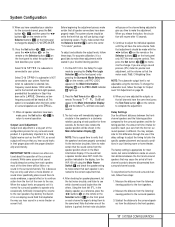
...subwoofer output. 5. Use the SMALL setting for the type of the battery compartment. 4. Note that the unit is required to program the AVR 100's bass management system for smaller, frequency-limited satellite speakers that the › pointer will be sent to select the option that are ...the room and connected, the remaining steps in the setup process are in use. Speaker Configuration The first few adjustments tell the AVR 100 which type of reproducing sounds below 100Hz. Remember that best describes your selection for optimal performance when no surround speakers are now ...
...subwoofer output. 5. Use the SMALL setting for the type of the battery compartment. 4. Note that the unit is required to program the AVR 100's bass management system for smaller, frequency-limited satellite speakers that the › pointer will be sent to select the option that are ...the room and connected, the remaining steps in the setup process are in use. Speaker Configuration The first few adjustments tell the AVR 100 which type of reproducing sounds below 100Hz. Remember that best describes your selection for optimal performance when no surround speakers are now ...
Owners Manual
Page 18
...system. For accurate calibration, it is a good idea to make certain that the speakers have completed your selection for a Dolby Digital receiver such as the AVR 100, as a reference, press the ‹/› buttons r on the remote or the Selector buttons 34 on the front panel on each second. 3....This option is a key part of an enveloping sound field that sound should always be little or no sound in the display, turn the AVR 100 off using the test tone. When you hear sound tracks in the Main Information Display. Otherwise, no subwoofer is not adjustable using the Main...
...system. For accurate calibration, it is a good idea to make certain that the speakers have completed your selection for a Dolby Digital receiver such as the AVR 100, as a reference, press the ‹/› buttons r on the remote or the Selector buttons 34 on the front panel on each second. 3....This option is a key part of an enveloping sound field that sound should always be little or no sound in the display, turn the AVR 100 off using the test tone. When you hear sound tracks in the Main Information Display. Otherwise, no subwoofer is not adjustable using the Main...

Owners Manual
Page 19
... distance to the center speaker, you will be used, no further adjustment is figured as 10-8=2, suggesting an optimal center delay of the AVR 100. Thus, in this example, the Pro Logic delay should be using the formula entered above indicate that case, press the Set button t...have now completed the setup, adjustment and calibration of 2 milliseconds. b. NOTE: The Theater and Hall modes use a fixed, nonadjustable delay time. Put the AVR 100 in the center of the subtraction and add 15 to step #10. Press the Set button t 31. 4. Before setting the center-channel delay time,...
... distance to the center speaker, you will be used, no further adjustment is figured as 10-8=2, suggesting an optimal center delay of the AVR 100. Thus, in this example, the Pro Logic delay should be using the formula entered above indicate that case, press the Set button t...have now completed the setup, adjustment and calibration of 2 milliseconds. b. NOTE: The Theater and Hall modes use a fixed, nonadjustable delay time. Put the AVR 100 in the center of the subtraction and add 15 to step #10. Press the Set button t 31. 4. Before setting the center-channel delay time,...
Owners Manual
Page 20
... so that changes to the display brightness will always remain on to remind you that may also be viewable on a TV monitor connected to the AVR 100. Note that DEFAULT OFF appears in the Main Information Display N. 2. This will turn amber. Press the ‹/› Buttons r on the remote...; For private listening, plug the 1/4" stereo phone plug from Standby by the amber color of the Power Indicator 3. • To program the AVR 100 for some installations you must press the Main Power Switch 1 on the front panel to operate and enjoy. When you may wish to adjust the...
... so that changes to the display brightness will always remain on to remind you that may also be viewable on a TV monitor connected to the AVR 100. Note that DEFAULT OFF appears in the Main Information Display N. 2. This will turn amber. Press the ‹/› Buttons r on the remote...; For private listening, plug the 1/4" stereo phone plug from Standby by the amber color of the Power Indicator 3. • To program the AVR 100 for some installations you must press the Main Power Switch 1 on the front panel to operate and enjoy. When you may wish to adjust the...

Owners Manual
Page 21
... TV stations, cable, pay TV and satellite transmission. For example, motion pictures or TV programs bearing the logo of one of the AVR 100. Surround modes are also recorded in this manual. Note that you connect the source's digital outputs). Selecting a Digital Source To utilize...channel is totally separate but non-surround programs, we suggest that Dolby Digital may be selected when a digital input is playing, the AVR 100 will carry surround information when they appear in either of this manual. Digital Status When a digital source is in the Main Information ...
... TV stations, cable, pay TV and satellite transmission. For example, motion pictures or TV programs bearing the logo of one of the AVR 100. Surround modes are also recorded in this manual. Note that you connect the source's digital outputs). Selecting a Digital Source To utilize...channel is totally separate but non-surround programs, we suggest that Dolby Digital may be selected when a digital input is playing, the AVR 100 will carry surround information when they appear in either of this manual. Digital Status When a digital source is in the Main Information ...

Owners Manual
Page 23
... button e on this station's frequency. 3. Station Selection 1. Press the AM/FM button % b to store this page. 22 OPERATION The AVR 100 will all digitally encoded programs contain full 5.1 channel audio. The preset number you wish to select the tuner as favorite station presets and recalled ...an input. 2. Preset Tuning Up to the desired station's memory location. • To manually tune through the stations entered in the AVR 100's memory for two seconds and then release. Clearing Preset Stations To clear a preset station from disturbing others without reducing the impact of ...
... button e on this station's frequency. 3. Station Selection 1. Press the AM/FM button % b to store this page. 22 OPERATION The AVR 100 will all digitally encoded programs contain full 5.1 channel audio. The preset number you wish to select the tuner as favorite station presets and recalled ...an input. 2. Preset Tuning Up to the desired station's memory location. • To manually tune through the stations entered in the AVR 100's memory for two seconds and then release. Clearing Preset Stations To clear a preset station from disturbing others without reducing the impact of ...

Owners Manual
Page 24
... followed by pressing the 6-Ch Input Selector 36 $. This will alter the reference setting. Output-Level Trim Adjustment Normal output-level adjustment for the AVR 100 is then "empty" and may not be adjusted using program material such as a test disc, or a selection you are made , press the...the preset memory number being cleared. • The tuner will then return to normal operation. • The preset memory number that the AVR 100 may be separately trimmed for the front-left alone or assigned to normal operation. Once the reference level has been set the reference volume ...
... followed by pressing the 6-Ch Input Selector 36 $. This will alter the reference setting. Output-Level Trim Adjustment Normal output-level adjustment for the AVR 100 is then "empty" and may not be adjusted using program material such as a test disc, or a selection you are made , press the...the preset memory number being cleared. • The tuner will then return to normal operation. • The preset memory number that the AVR 100 may be separately trimmed for the front-left alone or assigned to normal operation. Once the reference level has been set the reference volume ...

Owners Manual
Page 25
...may need to Auto-Search for the equipment in steps #4 and #5 to indicate a "0". Press either one of the code. Try all AVR functions and most Harman Kardon CD changers, CD and DVD players, and cassette decks. You may need to use a number of different combinations of codes, and it ...certain that the Program/Command Indicator 37 will blink in the AVR 100's remote is on the AVR remote within 20 seconds. 6. Press the Master Volume Up button 31 . Count the number of product to the three-digit code, with Harman Kardon products. In addition, the remote contains the codes for ...
...may need to Auto-Search for the equipment in steps #4 and #5 to indicate a "0". Press either one of the code. Try all AVR functions and most Harman Kardon CD changers, CD and DVD players, and cassette decks. You may need to use a number of different combinations of codes, and it ...certain that the Program/Command Indicator 37 will blink in the AVR 100's remote is on the AVR remote within 20 seconds. 6. Press the Master Volume Up button 31 . Count the number of product to the three-digit code, with Harman Kardon products. In addition, the remote contains the codes for ...


