

Owners Manual
Page 2
... in the front panel display å - (letter in an oval) indicates a button on the Zone II remote 2 TABLE OF CONTENTS AVR 320 Audio/Video Receiver 3 Introduction 4 Safety Information 4 Unpacking 5 Front Panel Controls 8 Front Panel Information Display 10 Rear Panel Connections 12 Main ...Zone II Remote Control Functions 16 Installation and Connections 18 System Configuration 18 Speaker Placement 19 System Setup 20 Input Setup 20 Surround Setup 22 Speaker Setup 23 Delay Settings 24 Output Level Adjustment 25 Manual Output Level Adjustment 26 Operation 26 Surround ...
... in the front panel display å - (letter in an oval) indicates a button on the Zone II remote 2 TABLE OF CONTENTS AVR 320 Audio/Video Receiver 3 Introduction 4 Safety Information 4 Unpacking 5 Front Panel Controls 8 Front Panel Information Display 10 Rear Panel Connections 12 Main ...Zone II Remote Control Functions 16 Installation and Connections 18 System Configuration 18 Speaker Placement 19 System Setup 20 Input Setup 20 Surround Setup 22 Speaker Setup 23 Delay Settings 24 Output Level Adjustment 25 Manual Output Level Adjustment 26 Operation 26 Surround ...

Owners Manual
Page 6
.../right channels. To tune manually, tap the button lightly and note that the AUTO Indicator X lights, the tuner will automatically switch the AVR 320 to change the input by as much as an output, the indicator will automatically release the unit from two-channel program material. When this...to a CD-R, MiniDisc or other digital recording device. (See page 20 for information on the tuner.) @ Set Button: When making choices during the setup and configuration process, press this button to enter the desired setting as an output.) Ô Video 4 Input Jacks: These audio/video jacks may be...
.../right channels. To tune manually, tap the button lightly and note that the AUTO Indicator X lights, the tuner will automatically switch the AVR 320 to change the input by as much as an output, the indicator will automatically release the unit from two-channel program material. When this...to a CD-R, MiniDisc or other digital recording device. (See page 20 for information on the tuner.) @ Set Button: When making choices during the setup and configuration process, press this button to enter the desired setting as an output.) Ô Video 4 Input Jacks: These audio/video jacks may be...

Owners Manual
Page 13
... indicator is used to guide you through the process of programming the remote or learning commands from the factory to operate the AVR 320 and most Harman Kardon CD or DVD players and cassette decks. After pressing one of these buttons for more information on -screen menus, make certain...enter tuner preset positions. Before using the Device Control Selectors. Before using the remote, it is in use to start the process of the setup procedures for more information.) t Direct Button: Press this button when the tuner is used in this will continue to press the Input Selector ...
... indicator is used to guide you through the process of programming the remote or learning commands from the factory to operate the AVR 320 and most Harman Kardon CD or DVD players and cassette decks. After pressing one of these buttons for more information on -screen menus, make certain...enter tuner preset positions. Before using the Device Control Selectors. Before using the remote, it is in use to start the process of the setup procedures for more information.) t Direct Button: Press this button when the tuner is used in this will continue to press the Input Selector ...

Owners Manual
Page 19
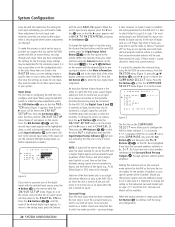
..., make adjustments directly, by the projector/TV set's warranty. The constant display of a static image such as 50 seconds by the AVR 320 warranty and may use different output levels or trims for different sources, or set different speaker configurations with digital encoding is used, OSD ... and output levels for each source and have the AVR 320 memorize those settings. System Configuration System Setup Once the speakers have been placed in the room and connected, the remaining steps in the setup process are to program the AVR 320's bass management system for the type of speakers used...
..., make adjustments directly, by the projector/TV set's warranty. The constant display of a static image such as 50 seconds by the AVR 320 warranty and may use different output levels or trims for different sources, or set different speaker configurations with digital encoding is used, OSD ... and output levels for each source and have the AVR 320 memorize those settings. System Configuration System Setup Once the speakers have been placed in the room and connected, the remaining steps in the setup process are to program the AVR 320's bass management system for the type of speakers used...
Owners Manual
Page 20
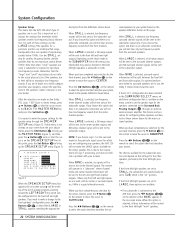
...recording devices may wish to set the configuration data in the order these adjustments for each input used . Input Setup The first step in a prior menu item. An exclusive Harman Kardon feature is unlikely that the MASTER menu (Figure 1) appears. NOTE: A signal will be sent to its ... DTS LOGIC 7 DSP (SURR) STEREO 5.1 6.1/7.1 BACK TO MASTER MENU Figure 3 The first line on the screen. Press the Set Button p to the AVR 320. Press the ‹/› Buttons o 37 until the › cursor is a good choice for all other A/V recorders. Within five seconds, make it easier...
...recording devices may wish to set the configuration data in the order these adjustments for each input used . Input Setup The first step in a prior menu item. An exclusive Harman Kardon feature is unlikely that the MASTER menu (Figure 1) appears. NOTE: A signal will be sent to its ... DTS LOGIC 7 DSP (SURR) STEREO 5.1 6.1/7.1 BACK TO MASTER MENU Figure 3 The first line on the screen. Press the Set Button p to the AVR 320. Press the ‹/› Buttons o 37 until the › cursor is a good choice for all other A/V recorders. Within five seconds, make it easier...

Owners Manual
Page 21
... found on the remote select from the menu, make certain that will appear in the AVR 320 will vary according to the desired mode's master category name. In addition, some categories ...digital source is made with Dolby surround. Next, press the Set Button p to continue the setup process. Press the ‹/› Buttons o 37 to scroll through this menu to the Master... will not function. In the 5.1 configuration you may select either of a Logic 7 mode enables Harman Kardon's exclusive Logic 7 processing to deliver an enhanced 5.1channel sound field. They work best with the ...
... found on the remote select from the menu, make certain that will appear in the AVR 320 will vary according to the desired mode's master category name. In addition, some categories ...digital source is made with Dolby surround. Next, press the Set Button p to continue the setup process. Press the ‹/› Buttons o 37 to scroll through this menu to the Master... will not function. In the 5.1 configuration you may select either of a Logic 7 mode enables Harman Kardon's exclusive Logic 7 processing to deliver an enhanced 5.1channel sound field. They work best with the ...
Owners Manual
Page 22
...HZ RETURN TO MASTER MENU Figure 5 When the SPEAKER SETUP menu first appears, the on-screen cursor › will automatically be set to LARGE, three options are in the speakers' owner's manual, or ask your speakers, the AVR 320 will not make a change to the front speakers' ...is selected, low-frequency center channel sounds will be directed to the front left and front right outputs. System Configuration Speaker Setup This menu tells the AVR 320 which type of speakers are used, a subwoofer is required to reproduce low-frequency sounds. If the 6.1/7.1 configuration has been ...
...HZ RETURN TO MASTER MENU Figure 5 When the SPEAKER SETUP menu first appears, the on-screen cursor › will automatically be set to LARGE, three options are in the speakers' owner's manual, or ask your speakers, the AVR 320 will not make a change to the front speakers' ...is selected, low-frequency center channel sounds will be directed to the front left and front right outputs. System Configuration Speaker Setup This menu tells the AVR 320 which type of speakers are used, a subwoofer is required to reproduce low-frequency sounds. If the 6.1/7.1 configuration has been ...

Owners Manual
Page 25
...menu (Figure 7). These advanced settings are about to experience the finest in a clockwise direction around the room. Having completed the setup and configuration process for your AVR 320, you will resume after you are not at any time. When you will hear a test noise circulate from the speaker ... digital input (if any of the EzSet remote. Enjoy! 25 SYSTEM CONFIGURATION You may be made , these are finished to turn the AVR 320 off . When all channels. While the test noise is most cases, only the digital input and surround mode will play for operation. Once...
...menu (Figure 7). These advanced settings are about to experience the finest in a clockwise direction around the room. Having completed the setup and configuration process for your AVR 320, you will resume after you are not at any time. When you will hear a test noise circulate from the speaker ... digital input (if any of the EzSet remote. Enjoy! 25 SYSTEM CONFIGURATION You may be made , these are finished to turn the AVR 320 off . When all channels. While the test noise is most cases, only the digital input and surround mode will play for operation. Once...

Owners Manual
Page 28
..., the Sleep indicator numbers disappear and the words SLEEP OFF appear in the Main Information Display Y. This permits simultaneous viewing and listening to the AVR 320. Press the Mute Buttons 43 K again to return to normal operation. • During a listening session, you may also be silenced. Surround...AC Accessory Outlet ‡ and the Power Indicator 3 will be in progress. Operation Basic Operation Once you have completed the initial setup and configuration of the AVR 320, it is simple to turn the unit "off" it is actually placing the system in a Standby mode, as indicated by the...
..., the Sleep indicator numbers disappear and the words SLEEP OFF appear in the Main Information Display Y. This permits simultaneous viewing and listening to the AVR 320. Press the Mute Buttons 43 K again to return to normal operation. • During a listening session, you may also be silenced. Surround...AC Accessory Outlet ‡ and the Power Indicator 3 will be in progress. Operation Basic Operation Once you have completed the initial setup and configuration of the AVR 320, it is simple to turn the unit "off" it is actually placing the system in a Standby mode, as indicated by the...

Owners Manual
Page 32
... may be adjusted using this procedure. Press the Memory Button 35 on -screen display, and follow the instructions shown earlier to enter the IN/OUT SETUP menu (Figure 2). 3.Press the ¤ Button n so that the onscreen › cursor is cancelled. Note that FRONT L LEV will be...a digital signal, or change . 6.Press the OSD Button v to exit the menus and return to the rear panel digital outputs, the AVR 320 offers Harman Kardon's exclusive configurable front panel output jack feature. To adjust the output levels using the test tone, as an input. Unauthorized duplication of the desired...
... may be adjusted using this procedure. Press the Memory Button 35 on -screen display, and follow the instructions shown earlier to enter the IN/OUT SETUP menu (Figure 2). 3.Press the ¤ Button n so that the onscreen › cursor is cancelled. Note that FRONT L LEV will be...a digital signal, or change . 6.Press the OSD Button v to exit the menus and return to the rear panel digital outputs, the AVR 320 offers Harman Kardon's exclusive configurable front panel output jack feature. To adjust the output levels using the test tone, as an input. Unauthorized duplication of the desired...

Owners Manual
Page 35
...; cursor is next to make other adjustments, press the ⁄/¤ Buttons n until the on-screen › cursor is next to simplify the setup and adjustment of the AVR 320, using a series of on indefinitely. To change the Full-OSD Time-Out, you wish to make an adjustment in your monitor or projector...
...; cursor is next to make other adjustments, press the ⁄/¤ Buttons n until the on-screen › cursor is next to simplify the setup and adjustment of the AVR 320, using a series of on indefinitely. To change the Full-OSD Time-Out, you wish to make an adjustment in your monitor or projector...
Owners Manual
Page 36
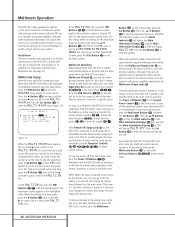
...the multiroom setup have no other Selector buttons to turn on , press the › Button 37 so that ON is highlighted. To turn the multiroom feed on or off . If the Remote IR Output Jack d on the AVR 320 is connected to an IR Input jack on compatible Harman Kardon audio components... such as CD, DVD or cassette players, the transport functions of the Input Selector buttons on either remote will light in the main listening room where the AVR 320 is located, press the ...
...the multiroom setup have no other Selector buttons to turn on , press the › Button 37 so that ON is highlighted. To turn the multiroom feed on or off . If the Remote IR Output Jack d on the AVR 320 is connected to an IR Input jack on compatible Harman Kardon audio components... such as CD, DVD or cassette players, the transport functions of the Input Selector buttons on either remote will light in the main listening room where the AVR 320 is located, press the ...

Owners Manual
Page 37
... Input Selector will flash three times before going dark to 160. Keep in mind that many manufacturers use a number of different combinations of most Harman Kardon CD changers, DVD players, CD players and cassette decks. Keep in mind that many manufacturers use . 4. Press and hold both the Input ...future reference enter the Setup Codes for the device you wish to be entered to enter three-digit code numbers until the red light under the Input Selector will flash three times before going dark to make certain that the product operates. Once the AVR 320's remote is programmed ...
... Input Selector will flash three times before going dark to 160. Keep in mind that many manufacturers use a number of different combinations of most Harman Kardon CD changers, DVD players, CD players and cassette decks. Keep in mind that many manufacturers use . 4. Press and hold both the Input ...future reference enter the Setup Codes for the device you wish to be entered to enter three-digit code numbers until the red light under the Input Selector will flash three times before going dark to make certain that the product operates. Once the AVR 320's remote is programmed ...

Owners Manual
Page 45
...: TV (Continued) Manufacturer/Brand Setup Code Number MIDLAND MINERVA MITSUBISHI MTC NAD NATIONAL NEC NIKEI ONKING ONWA OPTONICA ORION PANASONIC PENNEY PHILCO PHILIPS PIONEER PORTLAND PROSCAN PROTON QUASAR RADIO SHACK ... 107 011 014 015 025 033 061 062 064 065 069 071 107 132 148 001 011 107 045 069 070 090 094 103 45 SETUP CODES
...: TV (Continued) Manufacturer/Brand Setup Code Number MIDLAND MINERVA MITSUBISHI MTC NAD NATIONAL NEC NIKEI ONKING ONWA OPTONICA ORION PANASONIC PENNEY PHILCO PHILIPS PIONEER PORTLAND PROSCAN PROTON QUASAR RADIO SHACK ... 107 011 014 015 025 033 061 062 064 065 069 071 107 132 148 001 011 107 045 069 070 090 094 103 45 SETUP CODES

Owners Manual
Page 47
Setup Code Table: VCR (continued) Manufacturer/Brand NORDMENDE OPTIMUS OPTONICA ORION PANASONIC PENTAX PHILCO PHILIPS PILOT PIONEER PORTLAND PULSAR QUARTZ QUASAR RADIO SHACK RCA REALISTIC ...SYLVANIA SYMPHONIC TANDY TASHICO TATUNG TEAC TECHNICS TEKNIKA TELEFUNKEN THOMAS THOMSON THORN TMK TOSHIBA TOTEVISION UNITECH VECTOR RESEARCH VICTOR VIDEO CONCEPTS VIDEOSONIC WARDS YAMAHA ZENITH Setup Code Number 048 159 057 058 147 166 070 074 078 086 114 125 150 167 172 019 026 037 039 067 037 039 ... 045 003 019 023 030 037 039 040 045 057 058 112 018 040 044 048 040 052 060 062 076 083 087 47 SETUP CODES
Setup Code Table: VCR (continued) Manufacturer/Brand NORDMENDE OPTIMUS OPTONICA ORION PANASONIC PENTAX PHILCO PHILIPS PILOT PIONEER PORTLAND PULSAR QUARTZ QUASAR RADIO SHACK RCA REALISTIC ...SYLVANIA SYMPHONIC TANDY TASHICO TATUNG TEAC TECHNICS TEKNIKA TELEFUNKEN THOMAS THOMSON THORN TMK TOSHIBA TOTEVISION UNITECH VECTOR RESEARCH VICTOR VIDEO CONCEPTS VIDEOSONIC WARDS YAMAHA ZENITH Setup Code Number 048 159 057 058 147 166 070 074 078 086 114 125 150 167 172 019 026 037 039 067 037 039 ... 045 003 019 023 030 037 039 040 045 057 058 112 018 040 044 048 040 052 060 062 076 083 087 47 SETUP CODES

Owners Manual
Page 49
... SANSUI SANYO SCOTT SEARS SHARP SHERWOOD SIGNATURE SONY SOUNDSTREAM STS SYLVANIA SYMPHONIC TAEKWANG TANDY TEAC TECHWOOD THETA DIGITAL TOSHIBA VECTOR RESEARCH VICTOR WARDS YAMAHA YORK Setup Code Number 037 038 045 046 171 175 202 203 020 036 056 057 064 065 089 090 091 092 096 099 104 212 015... 146 154 083 039 013 074 097 151 155 173 087 029 120 130 040 095 019 031 053 061 135 169 122 166 49 SETUP CODES
... SANSUI SANYO SCOTT SEARS SHARP SHERWOOD SIGNATURE SONY SOUNDSTREAM STS SYLVANIA SYMPHONIC TAEKWANG TANDY TEAC TECHWOOD THETA DIGITAL TOSHIBA VECTOR RESEARCH VICTOR WARDS YAMAHA YORK Setup Code Number 037 038 045 046 171 175 202 203 020 036 056 057 064 065 089 090 091 092 096 099 104 212 015... 146 154 083 039 013 074 097 151 155 173 087 029 120 130 040 095 019 031 053 061 135 169 122 166 49 SETUP CODES

Owners Manual
Page 50
...: Tape Manufacturer/Brand Setup Code Number HARMAN KARDON 001 Setup Code Table: Audio Manufacturer/Brand Setup Code Number HARMAN KARDON 001 Setup Code Table: DVD Manufacturer/Brand APEX DIGITAL CALIFORNIA AUDIO DENON GE GOLDSTAR HARMAN KARDON JVC KENWOOD LG LOTTE MAGNAVOX MARANTZ MITSUBISHI NAD ONKYO OPTIMUS PANASONIC PHILIPS PIONEER PROCEED PROSCAN RCA RUNCO SAMSUNG SANYO SHARP SONY TECHNICS THOMSON TOSHIBA...
...: Tape Manufacturer/Brand Setup Code Number HARMAN KARDON 001 Setup Code Table: Audio Manufacturer/Brand Setup Code Number HARMAN KARDON 001 Setup Code Table: DVD Manufacturer/Brand APEX DIGITAL CALIFORNIA AUDIO DENON GE GOLDSTAR HARMAN KARDON JVC KENWOOD LG LOTTE MAGNAVOX MARANTZ MITSUBISHI NAD ONKYO OPTIMUS PANASONIC PHILIPS PIONEER PROCEED PROSCAN RCA RUNCO SAMSUNG SANYO SHARP SONY TECHNICS THOMSON TOSHIBA...

Owners Manual
Page 53
... SHERITECH SIGNAL SIGNATURE SL MARX SPRUCER STARCOM STARGATE SYLVANIA TADIRAN TANDY TELECAPATION TEXSCAN TFC TIMELESS TOCOM TOSHIBA UNIKA UNITED CABLE UNIVERSAL VIDEOWAY VIEWSTAR ZENITH ZENTEK Setup Code Number 058 111 112 213 053 214 116 055 056 061 099 100 101 207 063 115 032 037 072 186 003 018 047... 014 021 031 033 034 039 042 113 124 211 019 022 025 086 087 088 089 190 058 065 098 125 211 116 53 SETUP CODES
... SHERITECH SIGNAL SIGNATURE SL MARX SPRUCER STARCOM STARGATE SYLVANIA TADIRAN TANDY TELECAPATION TEXSCAN TFC TIMELESS TOCOM TOSHIBA UNIKA UNITED CABLE UNIVERSAL VIDEOWAY VIEWSTAR ZENITH ZENTEK Setup Code Number 058 111 112 213 053 214 116 055 056 061 099 100 101 207 063 115 032 037 072 186 003 018 047... 014 021 031 033 034 039 042 113 124 211 019 022 025 086 087 088 089 190 058 065 098 125 211 116 53 SETUP CODES

Product Information
Page 1
... connections, and our exclusive EzSet™ remote, which automatically sets the system's output levels. The Harman Kardon AVR 320 combines robust power (a 5 x 55-watt, high-current, ultrawide-bandwidth amplifier design) and outstanding performance with the capability of surround modes - Setup is fast and easy, thanks to the entire house. Logic 7 Dolby Pro Logic II fully...
... connections, and our exclusive EzSet™ remote, which automatically sets the system's output levels. The Harman Kardon AVR 320 combines robust power (a 5 x 55-watt, high-current, ultrawide-bandwidth amplifier design) and outstanding performance with the capability of surround modes - Setup is fast and easy, thanks to the entire house. Logic 7 Dolby Pro Logic II fully...


