
Owners Manual
Page 7
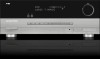
...Use • EzSet/EQ™ automated setup (microphone supplied) • Full-color user interface and setup menu, generated in Alaska or Hawaii.... line-level (shared with surround back channels) • Headphone Ease of these items are supplied with the AVR 254. INTRODUCTION Audio Inputs • AM/FM/XM®* tuner • Analog Audio 1 through 5 (assignable...• Remote infrared (IR) input and output • Zone 2 IR input Supplied Accessories The following accessory items are missing, please contact Harman Kardon customer service at www.harmankardon.com. • System remote ...
...Use • EzSet/EQ™ automated setup (microphone supplied) • Full-color user interface and setup menu, generated in Alaska or Hawaii.... line-level (shared with surround back channels) • Headphone Ease of these items are supplied with the AVR 254. INTRODUCTION Audio Inputs • AM/FM/XM®* tuner • Analog Audio 1 through 5 (assignable...• Remote infrared (IR) input and output • Zone 2 IR input Supplied Accessories The following accessory items are missing, please contact Harman Kardon customer service at www.harmankardon.com. • System remote ...

Owners Manual
Page 33
... be compatible with the AVR, and are therefore described in appearance. You may return to change it will appear in the Advanced Features section, we recommend that called for a good ear or the purchase of five main menus: Source Selection, Setup Source, Speaker Setup, Zone 2 and System. Figure..., as noisy air conditioning. If you are correct, as any changes you have made to configure the AVR 254 to any loud noises while running EzSet/EQ setup. Place the included EzSet/EQ microphone in the listening position, or in the Installation section that you complete all of...
... be compatible with the AVR, and are therefore described in appearance. You may return to change it will appear in the Advanced Features section, we recommend that called for a good ear or the purchase of five main menus: Source Selection, Setup Source, Speaker Setup, Zone 2 and System. Figure..., as noisy air conditioning. If you are correct, as any changes you have made to configure the AVR 254 to any loud noises while running EzSet/EQ setup. Place the included EzSet/EQ microphone in the listening position, or in the Installation section that you complete all of...
Owners Manual
Page 37
... in analog audio and others in use the ⁄/¤ Buttons to the analog audio input. Zone 2 Audio: When a multizone system has been connected and is present, the AVR will appear next to change the display name for your source's device type is connected to the ... playback is any changes, scroll to the next position. Move the cursor again to the NTSC format for the remote zone. INITIAL SETUP Europe and elsewhere. The AVR 254 is also useful for multichannel disc players that desynchronizes it through 9. Figure 51 - When the desired character appears, use...
... in analog audio and others in use the ⁄/¤ Buttons to the analog audio input. Zone 2 Audio: When a multizone system has been connected and is present, the AVR will appear next to change the display name for your source's device type is connected to the ... playback is any changes, scroll to the next position. Move the cursor again to the NTSC format for the remote zone. INITIAL SETUP Europe and elsewhere. The AVR 254 is also useful for multichannel disc players that desynchronizes it through 9. Figure 51 - When the desired character appears, use...

Owners Manual
Page 46
...operation, allowing placement of a pair of Speakers line and press the Set Button. The AVR 254 is below 40Hz, select the first option, "Large". All low-frequency information will return to the Manual Speaker Setup menu, similar to the one of speakers in the system, select the Back option ... Exit and Back options as shown at the top of the screen. To save the current settings, select the Back option. Simply select the Zone 2 option at this order, although it . Adjust Crossover Frequencies Menu After you have a subwoofer, we recommend configuring the speakers in another room...
...operation, allowing placement of a pair of Speakers line and press the Set Button. The AVR 254 is below 40Hz, select the first option, "Large". All low-frequency information will return to the Manual Speaker Setup menu, similar to the one of speakers in the system, select the Back option ... Exit and Back options as shown at the top of the screen. To save the current settings, select the Back option. Simply select the Zone 2 option at this order, although it . Adjust Crossover Frequencies Menu After you have a subwoofer, we recommend configuring the speakers in another room...

Owners Manual
Page 51
...Setup Source menu, leave the Audio Source setting at the default of OFF. We urge you place the left and right multizone speakers in your application would require the use an optional second-zone remote, a keypad or another room. You may purchase a second-zone remote by contacting Harman Kardon... customer service through the multizone system. Remember that are two ways of connecting the remote speakers to the AVR 254: a) Connect the speakers to...
...Setup Source menu, leave the Audio Source setting at the default of OFF. We urge you place the left and right multizone speakers in your application would require the use an optional second-zone remote, a keypad or another room. You may purchase a second-zone remote by contacting Harman Kardon... customer service through the multizone system. Remember that are two ways of connecting the remote speakers to the AVR 254: a) Connect the speakers to...

Owners Manual
Page 52
... setup menus (Main Menu, Speaker Setup Menu, Zone 2 Menu, all slide-in menus) remain visible after your last adjustment. Select a period of 3 seconds. Press a Source Selector to the desired turn it as explained in the Initial Setup section. Figure 70 - Press the OK Button to Display: This setting reflects the video output resolution. The AVR 254...
... setup menus (Main Menu, Speaker Setup Menu, Zone 2 Menu, all slide-in menus) remain visible after your last adjustment. Select a period of 3 seconds. Press a Source Selector to the desired turn it as explained in the Initial Setup section. Figure 70 - Press the OK Button to Display: This setting reflects the video output resolution. The AVR 254...

Owners Manual
Page 65
...77 46 Play 3 47 FF 33 48 Record 49 Stop 50 AVR Settings AVR Settings AVR Settings 51 Info Settings Info Settings Info Settings 52 Source Settings 53 Sleep Sleep Sleep 54 Zone Select Zone Select Radio AM AVR Power On AVR Power Off Input Sel Input Sel Input Sel Radio Input Sel Input...Channel/Preset Up Preset/Category Down OK Preset/Category Up Channel/Preset Down AVR Volume + AVR Volume - AVR Mute Previous Pause Next Step Rew 77 Play 3 FF 33 Record Stop AVR Settings Info Settings Setup Sleep TV AVR Power On AVR Power Off Power On Power Off Input Sel Input Sel Input Sel Radio...
...77 46 Play 3 47 FF 33 48 Record 49 Stop 50 AVR Settings AVR Settings AVR Settings 51 Info Settings Info Settings Info Settings 52 Source Settings 53 Sleep Sleep Sleep 54 Zone Select Zone Select Radio AM AVR Power On AVR Power Off Input Sel Input Sel Input Sel Radio Input Sel Input...Channel/Preset Up Preset/Category Down OK Preset/Category Up Channel/Preset Down AVR Volume + AVR Volume - AVR Mute Previous Pause Next Step Rew 77 Play 3 FF 33 Record Stop AVR Settings Info Settings Setup Sleep TV AVR Power On AVR Power Off Power On Power Off Input Sel Input Sel Input Sel Radio...

Owners Manual
Page 66
... 43 Pause 44 Next 45 Rew 77 46 Play 3 47 FF 33 48 Record 49 Stop 50 AVR Settings 51 Info Settings 52 Source Settings 53 Sleep 54 Zone Select CBL/SAT AVR Power On AVR Power Off Power On Power Off Input Sel Input Sel Input Sel Radio Input Sel Input Sel Input... Info Settings TV/ VCR Sleep AUX PVD AVR Power On AVR Power Off Power On Power Off Input Sel Input Sel Input Sel Radio Input Sel Input Sel Input Sel Audio Effects Video Modes Surround Modes 1 2 3 4 5 6 7 8 9 Instant Replay 0 Activity Exit Menu Up Left Setup Right Down AV Mark Repeat Jump Up Jump Down...
... 43 Pause 44 Next 45 Rew 77 46 Play 3 47 FF 33 48 Record 49 Stop 50 AVR Settings 51 Info Settings 52 Source Settings 53 Sleep 54 Zone Select CBL/SAT AVR Power On AVR Power Off Power On Power Off Input Sel Input Sel Input Sel Radio Input Sel Input Sel Input... Info Settings TV/ VCR Sleep AUX PVD AVR Power On AVR Power Off Power On Power Off Input Sel Input Sel Input Sel Radio Input Sel Input Sel Input Sel Audio Effects Video Modes Surround Modes 1 2 3 4 5 6 7 8 9 Instant Replay 0 Activity Exit Menu Up Left Setup Right Down AV Mark Repeat Jump Up Jump Down...


