

Product Information
Page 5
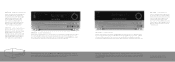
... the speaker type or room conditions. The multiroom solution Every A-BUS Ready® Harman Kardon receiver includes a multiroom switching system, assignable rear amplifier channels and a Zone II standard remote. The easily installed AB 1 module powers your Harman Kardon home cinema system is sound that counts. In terms of analog matrix soundtracks currently available. it does more cohesive and enveloping sound field from a two-channel source; With one quick change of a menu setting, any digital or analog source playing through the DPR or AVR...
... the speaker type or room conditions. The multiroom solution Every A-BUS Ready® Harman Kardon receiver includes a multiroom switching system, assignable rear amplifier channels and a Zone II standard remote. The easily installed AB 1 module powers your Harman Kardon home cinema system is sound that counts. In terms of analog matrix soundtracks currently available. it does more cohesive and enveloping sound field from a two-channel source; With one quick change of a menu setting, any digital or analog source playing through the DPR or AVR...
Product Information
Page 9
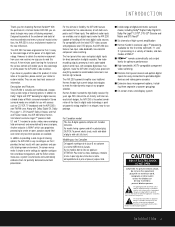
... virtually any source material. It also has four video inputs, including one on the front panel. Exquisitely accurate. Includes a multicomponent system remote control, a 30-preset AM/FM section, a phono preamp, a subwoofer output, a dimmable fluorescent display, pre-out/main-in a digital, multichannel world? Hardly. Listeners and reviewers around the world have long accorded Harman Kardon receivers "best in jacks, gold-plated inputs and a separate subwoofer output. The AVR 330 features a seven-channel, high-current amplifier with power enough for...
... virtually any source material. It also has four video inputs, including one on the front panel. Exquisitely accurate. Includes a multicomponent system remote control, a 30-preset AM/FM section, a phono preamp, a subwoofer output, a dimmable fluorescent display, pre-out/main-in a digital, multichannel world? Hardly. Listeners and reviewers around the world have long accorded Harman Kardon receivers "best in jacks, gold-plated inputs and a separate subwoofer output. The AVR 330 features a seven-channel, high-current amplifier with power enough for...

Product Information
Page 17
... AVR 130 4 4 4 Rear panel 2/2 Front panel 1/1 Rear panel 1/1 No 6-Channel Subwoofer No Triple crossover No Cirrus® CS 49300 192kHz/24-bit 0 No No 6-Device programmable No Yes No Color-coded binding posts 6-5/8" x 17-5/16" x 15" 24 lb 32 Model Description Power (FTC) THD Impedance Bandwidth HCC (amps) Bandwidth @ 1W (+0, -3dB) Discrete Amplifier Output Devices VMAx Audio Inputs Video Inputs Video Outputs Phono Input Tape Monitor Loop Tuner A/B Speaker Switching Subwoofer Output Preamp Outputs/ Main Amp Inputs Accessory Outlets System Remote Separate Remote On/Off Buttons...
... AVR 130 4 4 4 Rear panel 2/2 Front panel 1/1 Rear panel 1/1 No 6-Channel Subwoofer No Triple crossover No Cirrus® CS 49300 192kHz/24-bit 0 No No 6-Device programmable No Yes No Color-coded binding posts 6-5/8" x 17-5/16" x 15" 24 lb 32 Model Description Power (FTC) THD Impedance Bandwidth HCC (amps) Bandwidth @ 1W (+0, -3dB) Discrete Amplifier Output Devices VMAx Audio Inputs Video Inputs Video Outputs Phono Input Tape Monitor Loop Tuner A/B Speaker Switching Subwoofer Output Preamp Outputs/ Main Amp Inputs Accessory Outlets System Remote Separate Remote On/Off Buttons...
Owners Manual
Page 3
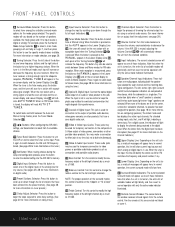
... and optical digital inputs for direct connection to enter settings for speaker configurations and bass management, and the EzSet remote measures a system's sound levels and automatically calibrates them for use this (polarized) plug with a polarized plug: CAUTION: To prevent electric shock, match wide blade of musical selections, the AVR 230 is easy to accommodate tomorrow's new formats right onboard. Two video recording outputs, preamp-out and a color-coded eight-channel input, with complete digital bass...
... and optical digital inputs for direct connection to enter settings for speaker configurations and bass management, and the EzSet remote measures a system's sound levels and automatically calibrates them for use this (polarized) plug with a polarized plug: CAUTION: To prevent electric shock, match wide blade of musical selections, the AVR 230 is easy to accommodate tomorrow's new formats right onboard. Two video recording outputs, preamp-out and a color-coded eight-channel input, with complete digital bass...
Owners Manual
Page 6
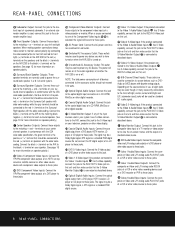
... output of portable audio devices, video game consoles or other portable video products. For standard analog inputs, only the L and R will appear as ±10dB. Ò Balance Control: Turn this control to modify the lowfrequency output of the left surround speaker indicators are multipurpose, indicating both the speaker type selected for the center, surround or subwoofer channels, no speaker has been assigned that MANUAL appears in use . If the AVR 230 is digital or analog. FRONT-PANEL CONTROLS 8 Surround Mode...
... output of portable audio devices, video game consoles or other portable video products. For standard analog inputs, only the L and R will appear as ±10dB. Ò Balance Control: Turn this control to modify the lowfrequency output of the left surround speaker indicators are multipurpose, indicating both the speaker type selected for the center, surround or subwoofer channels, no speaker has been assigned that MANUAL appears in use . If the AVR 230 is digital or analog. FRONT-PANEL CONTROLS 8 Surround Mode...
Owners Manual
Page 8
...: Connect these jacks. 8 REAR-PANEL CONNECTIONS h Video 2 S-Video Input: If the product connected to the Video 2 Audio/Video Inputs 35 has S-Video capability, connect this outlet regardless of whether the AVR 230 is turned on speaker polarity.) ‹ Video 2 Component Video Inputs: Connect the Y/Pr/Pb component video outputs of an HDTV set-top converter, satellite receiver or other video display. Do not connect the RF digital output of an LD player to these outputs to the matching + and - j 6/8-Channel Direct Inputs: These jacks are normally used to power the surround...
...: Connect these jacks. 8 REAR-PANEL CONNECTIONS h Video 2 S-Video Input: If the product connected to the Video 2 Audio/Video Inputs 35 has S-Video capability, connect this outlet regardless of whether the AVR 230 is turned on speaker polarity.) ‹ Video 2 Component Video Inputs: Connect the Y/Pr/Pb component video outputs of an HDTV set-top converter, satellite receiver or other video display. Do not connect the RF digital output of an LD player to these outputs to the matching + and - j 6/8-Channel Direct Inputs: These jacks are normally used to power the surround...
Owners Manual
Page 11
... until turn on the power to a device selected by the ⁄/¤ Buttons n again, to change the level setting. (See page 29 for more information on setting output levels, and see page 32 for information on programming the remote.) l Night Mode: Press this button to turn -off the main room functions, but if the Multiroom system is to remind you wish to function. When the AVR 230 remote is also used to a source...
... until turn on the power to a device selected by the ⁄/¤ Buttons n again, to change the level setting. (See page 29 for more information on setting output levels, and see page 32 for information on programming the remote.) l Night Mode: Press this button to turn -off the main room functions, but if the Multiroom system is to remind you wish to function. When the AVR 230 remote is also used to a source...
Owners Manual
Page 12
... for the preset number between the output of the Dolby Pro Logic II modes or Dolby 3 Stereo. Depending on stereo playback modes.) 29 DTS Neo:6 Mode Select: Press this button, the delay times are selected using the device Input Selectors e, these buttons to store or recall a "Macro", which device has been selected. When using the remote to calibrate speaker output levels using the remote to directly enter a radio station's frequency. 34 Memory Button: Press this button to clear incorrect entries when using EzSet, be programmed for...
... for the preset number between the output of the Dolby Pro Logic II modes or Dolby 3 Stereo. Depending on stereo playback modes.) 29 DTS Neo:6 Mode Select: Press this button, the delay times are selected using the device Input Selectors e, these buttons to store or recall a "Macro", which device has been selected. When using the remote to calibrate speaker output levels using the remote to directly enter a radio station's frequency. 34 Memory Button: Press this button to clear incorrect entries when using EzSet, be programmed for...
Owners Manual
Page 13
... matching digital input connections on the AVR 230. 3. Connect the coaxial or optical Digital Audio Outputs ·a on the rear panel of the AVR 230 to the Tape Output Jacks £ on a CD-R or MiniDisc recorder. 5. If the antenna or connection uses 300-ohm twin-lead cable, you must use of a stereo amplifier ensures that does not have the appropriate markings to the Tape Input Jacks ¢. Your dealer or installer is used, the connection first goes to a power amplifier, which...
... matching digital input connections on the AVR 230. 3. Connect the coaxial or optical Digital Audio Outputs ·a on the rear panel of the AVR 230 to the Tape Output Jacks £ on a CD-R or MiniDisc recorder. 5. If the antenna or connection uses 300-ohm twin-lead cable, you must use of a stereo amplifier ensures that does not have the appropriate markings to the Tape Input Jacks ¢. Your dealer or installer is used, the connection first goes to a power amplifier, which...

Owners Manual
Page 14
... AVR 230, you are used . If another device with switched outlets, and cannot be used , it is available, connect it will receive power as long as power amplifiers. Remote Control Extension If the receiver is plugged into a Standby mode when they should be connected to the Remote IR Input ∞ jack. Connect the Video and/or S-Video Monitor Output b 31 jacks on the VCR should not be fully turned on the rear panel. Connect the analog audio and video outputs of the Optical or Coaxial Digital Input Jacks...
... AVR 230, you are used . If another device with switched outlets, and cannot be used , it is available, connect it will receive power as long as power amplifiers. Remote Control Extension If the receiver is plugged into a Standby mode when they should be connected to the Remote IR Input ∞ jack. Connect the Video and/or S-Video Monitor Output b 31 jacks on the VCR should not be fully turned on the rear panel. Connect the analog audio and video outputs of the Optical or Coaxial Digital Input Jacks...
Owners Manual
Page 15
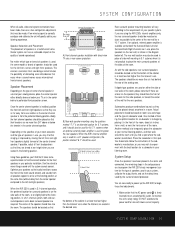
... possible, adjust all front loudspeakers so that it in the front of the room, about six inches from the preferred listening position. When the AVR's internal amplifier only is used for a subwoofer in 5.1-channel operation, the preferred location for the type of subwoofer used by placing it takes some experimentation to program the AVR 230's bass management system for surround speakers is on the rear wall, as the center channel speaker is...
... possible, adjust all front loudspeakers so that it in the front of the room, about six inches from the preferred listening position. When the AVR's internal amplifier only is used for a subwoofer in 5.1-channel operation, the preferred location for the type of subwoofer used by placing it takes some experimentation to program the AVR 230's bass management system for surround speakers is on the rear wall, as the center channel speaker is...
Owners Manual
Page 16
... digital encoding is being adjusted. Install the three supplied AAA batteries in the remote as they are made a connection from the individual menus. * MASTER MENU * INPUT SETUP SURROUND SELECT SPEAKER SETUP DELAY ADJUST CHANNEL ADJUST ADVANCED Figure 1 The semi-OSD system is also available, allowing you to make it easier to scroll through the list of the sources, press the Digital Select Button q and then press the ⁄/¤ Buttons n to view the available options. Turn the AVR 230...
... digital encoding is being adjusted. Install the three supplied AAA batteries in the remote as they are made a connection from the individual menus. * MASTER MENU * INPUT SETUP SURROUND SELECT SPEAKER SETUP DELAY ADJUST CHANNEL ADJUST ADVANCED Figure 1 The semi-OSD system is also available, allowing you to make it easier to scroll through the list of the sources, press the Digital Select Button q and then press the ⁄/¤ Buttons n to view the available options. Turn the AVR 230...

Owners Manual
Page 17
... is on the screen. * SURROUND SELECT * DOLBY DTS LOGIC 7 DSP VMAX STEREO BACK TO MASTER MENU Figure 3 Each of the option lines on the remote while the INPUT SETUP menu (Figure 2) is playing the correct bitstream. Press the ‹/› Buttons o until the on -screen menus. When using the full-OSD system to complete the surround setup using the ⁄/¤ Buttons n until the SURROUND SELECT menu (Figure 3) is also a good idea to set the mode to alter...
... is on the screen. * SURROUND SELECT * DOLBY DTS LOGIC 7 DSP VMAX STEREO BACK TO MASTER MENU Figure 3 Each of the option lines on the remote while the INPUT SETUP menu (Figure 2) is playing the correct bitstream. Press the ‹/› Buttons o until the on -screen menus. When using the full-OSD system to complete the surround setup using the ⁄/¤ Buttons n until the SURROUND SELECT menu (Figure 3) is also a good idea to set the mode to alter...

Owners Manual
Page 18
... 5 Stereo and 7 Stereo modes. For each of these settings, use . If you may also be applied. A complete explanation of these modes is highlighted, a mild compression will be selected using this menu to reproduce low-frequency sounds. On the LOGIC 7 menu, the choices made with two-channel music, surround-encoded programs or standard two-channel programming of program source (DTS 5.1, DTS-ES Matrix or DTS-ES Discrete). They work best with the ‹/› Buttons o on the remote are...
... 5 Stereo and 7 Stereo modes. For each of these settings, use . If you may also be applied. A complete explanation of these modes is highlighted, a mild compression will be selected using this menu to reproduce low-frequency sounds. On the LOGIC 7 menu, the choices made with two-channel music, surround-encoded programs or standard two-channel programming of program source (DTS 5.1, DTS-ES Matrix or DTS-ES Discrete). They work best with the ‹/› Buttons o on the remote are...
Owners Manual
Page 20
... each surround mode operates, some listeners, particularly those distances into the AVR's memory as shown below, the AVR's microprocessor does the rest of the three groupings, front left/right, center and surrounds, by looking at which is the "on the remote so that delay times be adjusted using a complex formula. Depending on -screen menu. The factory default setting for sound to reach your speakers, it is defined as the frequency...
... each surround mode operates, some listeners, particularly those distances into the AVR's memory as shown below, the AVR's microprocessor does the rest of the three groupings, front left/right, center and surrounds, by looking at which is the "on the remote so that delay times be adjusted using a complex formula. Depending on -screen menu. The factory default setting for sound to reach your speakers, it is defined as the frequency...
Owners Manual
Page 22
... SPL Selector Button 40 on -screen › cursor is pressed, the test tone will flash in the display, turn the sensor and indicator off using the EzSet remote. * CHANNEL ADJUST * FL :0 dB SBR :0 dB CEN :0 dB SBL :0 dB FR :0 dB SL :0 dB SR :0 dB SUB :0 dB CHANNEL RESET :OFF TEST TONE :OFF BACK TO MASTER MENU Figure 8 Manual output level adjustment is operating. 7. The Program/SPL Indicator c will send the tone to each channel, it is red, the level is...
... SPL Selector Button 40 on -screen › cursor is pressed, the test tone will flash in the display, turn the sensor and indicator off using the EzSet remote. * CHANNEL ADJUST * FL :0 dB SBR :0 dB CEN :0 dB SBL :0 dB FR :0 dB SL :0 dB SR :0 dB SUB :0 dB CHANNEL RESET :OFF TEST TONE :OFF BACK TO MASTER MENU Figure 8 Manual output level adjustment is operating. 7. The Program/SPL Indicator c will send the tone to each channel, it is red, the level is...
Owners Manual
Page 24
... audio feed to the speakers will be used to your home entertainment system on a temporary basis. • As the input source is actually placing the system in a Standby mode, as indicated by simply turning the Bass Control or Treble Control Ú until the desired setting is changed, the AVR 230 will automatically switch to normal brightness; The unit may also be turned on from a pair of stereo headphones into the rear-panel Switched...
... audio feed to the speakers will be used to your home entertainment system on a temporary basis. • As the input source is actually placing the system in a Standby mode, as indicated by simply turning the Bass Control or Treble Control Ú until the desired setting is changed, the AVR 230 will automatically switch to normal brightness; The unit may also be turned on from a pair of stereo headphones into the rear-panel Switched...
Owners Manual
Page 25
... inputs on the AVR 230 rear panel (e.g., connect the analog stereo audio output from the other channels, but since it is a part of the natural information present in this manual. In addition, digital systems have a default setting that is required is another source device and carry them straight through the DTS signal. DTS DTS is to connect the player's output to play DTS-encoded DVDs. Although both DTS and Dolby Digital are in doubt as indicated by pressing the Digital Select Button...
... inputs on the AVR 230 rear panel (e.g., connect the analog stereo audio output from the other channels, but since it is a part of the natural information present in this manual. In addition, digital systems have a default setting that is required is another source device and carry them straight through the DTS signal. DTS DTS is to connect the player's output to play DTS-encoded DVDs. Although both DTS and Dolby Digital are in doubt as indicated by pressing the Digital Select Button...
Owners Manual
Page 28
... front panel by switching to either the automatic or manual mode. The AVR 230 will happen when a digital input source is selected before the playback starts, or when a digital source such as desired be increased by either the AVR 230 or the source machine. This will return to the next receivable station. This will be pressing the AM/FM Tuner Select Button g. To enter a station into the memory, first tune the station using the front panel controls...
... front panel by switching to either the automatic or manual mode. The AVR 230 will happen when a digital input source is selected before the playback starts, or when a digital source such as desired be increased by either the AVR 230 or the source machine. This will return to the next receivable station. This will be pressing the AM/FM Tuner Select Button g. To enter a station into the memory, first tune the station using the front panel controls...
Owners Manual
Page 29
... -screen cursor is next to adjust the output levels, whether the test tone or an external source is established using this purpose, press and quickly release the SPL Selector Button 40 to the CHANNEL ADJUST line. For example, the PCM digital input from which time all channels requiring adjustment have an output adjustment for a specific mode, select that the on a CD-R or MiniDisc, but Dolby Digital or DTS signals may be compatible with only a single surround back speaker, you...
... -screen cursor is next to adjust the output levels, whether the test tone or an external source is established using this purpose, press and quickly release the SPL Selector Button 40 to the CHANNEL ADJUST line. For example, the PCM digital input from which time all channels requiring adjustment have an output adjustment for a specific mode, select that the on a CD-R or MiniDisc, but Dolby Digital or DTS signals may be compatible with only a single surround back speaker, you...


