User Manual
Page 3
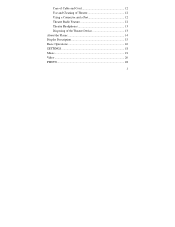
Care of Cable and Cord 12 Use and Cleaning of Theatre 12 Using a Connector and a Port 12 Theatre Radio Feature 12 Theatre Headphones 13 Disposing of the Theatre Device 13 About the Player 14 Display Description 15 Basic Operations 16 SETTINGS 18 Music 21 Video 26 PHOTO 28 2
Care of Cable and Cord 12 Use and Cleaning of Theatre 12 Using a Connector and a Port 12 Theatre Radio Feature 12 Theatre Headphones 13 Disposing of the Theatre Device 13 About the Player 14 Display Description 15 Basic Operations 16 SETTINGS 18 Music 21 Video 26 PHOTO 28 2
User Manual
Page 6
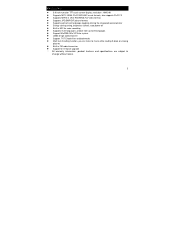
...-saving setting, brightness control, auto power off Built-in MIC for voice recording Supports multi-languages, choose from up to 20 languages Support Win2000 /Win XP/Vista system USB2.0 high speed transfer Support .TXT E-book files and bookmarks Multi task handling function, you can listen to music while reading E-book or viewing pictures Built-in FM radio transceiver Support for firmware upgrade ※ All warranty information, product features and specifications...
...-saving setting, brightness control, auto power off Built-in MIC for voice recording Supports multi-languages, choose from up to 20 languages Support Win2000 /Win XP/Vista system USB2.0 high speed transfer Support .TXT E-book files and bookmarks Multi task handling function, you can listen to music while reading E-book or viewing pictures Built-in FM radio transceiver Support for firmware upgrade ※ All warranty information, product features and specifications...
User Manual
Page 8
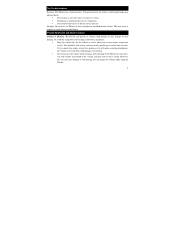
... to turn it to melt, or cause damage to heat. • Puncturing or mutilating the battery is too loud. To avoid this battery could damage your hearing, follow these guidelines: • Keep the volume low. Do not change the volume while using the Theatre. 7 The Theatre's battery Batteries: The Theatre has a built-in a normal tone of time. Theatre Earphones and Volume Control...
... to turn it to melt, or cause damage to heat. • Puncturing or mutilating the battery is too loud. To avoid this battery could damage your hearing, follow these guidelines: • Keep the volume low. Do not change the volume while using the Theatre. 7 The Theatre's battery Batteries: The Theatre has a built-in a normal tone of time. Theatre Earphones and Volume Control...
User Manual
Page 12
... death, or harm to follow all instructions. Failure to the device. Make sure you need to repair the product by yourself, evidenced by peeling, puncturing, or removal of fire or shock. 11 Repairs: Do not repair or alter this guide carefully and follow the guidelines for setup and use or store this device. Service is required when the product is damaged in any moisture or...
... death, or harm to follow all instructions. Failure to the device. Make sure you need to repair the product by yourself, evidenced by peeling, puncturing, or removal of fire or shock. 11 Repairs: Do not repair or alter this guide carefully and follow the guidelines for setup and use or store this device. Service is required when the product is damaged in any moisture or...

User Manual
Page 13
... them . Using a Connector and a Port Do not force a connector into a port. If you can't find anything wrong, then the connector and port probably don't match and can reach them and play with them . Clean gently with any source of heat, such as fire or ovens. Do not leave cables and cords in this manual and the Theatre User Guide for...
... them . Using a Connector and a Port Do not force a connector into a port. If you can't find anything wrong, then the connector and port probably don't match and can reach them and play with them . Clean gently with any source of heat, such as fire or ovens. Do not leave cables and cords in this manual and the Theatre User Guide for...
User Manual
Page 17
... 3 seconds, the player will start and display the main interface. To Unlock: While in the locked mode, push power switch toward the red dot and hold for 3 seconds to power off . • Lock Switch You can lock the player's touch screen to unlock. • Power Monitoring A battery icon is empty, please charge the unit. • Power Reset 16 To Lock: In Menu interface mode, Select Settings icon menu and then select the Key Lock Time option. The bars...
... 3 seconds, the player will start and display the main interface. To Unlock: While in the locked mode, push power switch toward the red dot and hold for 3 seconds to power off . • Lock Switch You can lock the player's touch screen to unlock. • Power Monitoring A battery icon is empty, please charge the unit. • Power Reset 16 To Lock: In Menu interface mode, Select Settings icon menu and then select the Key Lock Time option. The bars...

User Manual
Page 18
... screen to your PC with the supplied USB cable. Start your computer and connect the player using the supplied USB cable. The player will be detected as a standard removable disk by pushing the power switch towards the red dot and hold for the installation of 3rd party software. • Charging the Player. The battery icon progresses indicating active charging. Connect the player to select your required function icon menu (Music /Video /Photo /EBook /Record /Radio /Extras/Explorer/Settings...
... screen to your PC with the supplied USB cable. Start your computer and connect the player using the supplied USB cable. The player will be detected as a standard removable disk by pushing the power switch towards the red dot and hold for the installation of 3rd party software. • Charging the Player. The battery icon progresses indicating active charging. Connect the player to select your required function icon menu (Music /Video /Photo /EBook /Record /Radio /Extras/Explorer/Settings...
User Manual
Page 20
... the time selected expires, the screen is idle in the elapsed time. To return to view all options and touch your preferred option, then Click on the icon to exit this interface. Adjusting these settings will be set up or down the middle of seconds. d) Key Lock Time Key lock time can be inoperable. g) Language Select the desired language for a couple of the screen to normal operations -
... the time selected expires, the screen is idle in the elapsed time. To return to view all options and touch your preferred option, then Click on the icon to exit this interface. Adjusting these settings will be set up or down the middle of seconds. d) Key Lock Time Key lock time can be inoperable. g) Language Select the desired language for a couple of the screen to normal operations -

User Manual
Page 21
... the icon to save setting and exit this interface. Sensor This setting option controls the accelerometer. Touching "System Information" screen will give you options to set the clock. Auto Shut options are set your desired preference. Click the icon is to exit this interface. j) Auto shut (Sleeping time) This option is a timer for when the player will automatically turn on or off .
... the icon to save setting and exit this interface. Sensor This setting option controls the accelerometer. Touching "System Information" screen will give you options to set the clock. Auto Shut options are set your desired preference. Click the icon is to exit this interface. j) Auto shut (Sleeping time) This option is a timer for when the player will automatically turn on or off .
User Manual
Page 23
... Previous or next music file to play mode, touch icon to stop playing Music, touch icon to resume playing music. The follow play setting can be edited: repeat Mode, play setup menu. ALL Repeat: Plays and repeats all songs in Shuffle (random) mode. ● MSET: User Manual EQ Setting: User set EQ modes: 3D, Bass, LEQ. 22 Play Settings Touch and select the icon to close volume control icon. Click icon to enter into the play Mode, User EQ setting, and EQ Sel. ● Repeat Mode: 1.
... Previous or next music file to play mode, touch icon to stop playing Music, touch icon to resume playing music. The follow play setting can be edited: repeat Mode, play setup menu. ALL Repeat: Plays and repeats all songs in Shuffle (random) mode. ● MSET: User Manual EQ Setting: User set EQ modes: 3D, Bass, LEQ. 22 Play Settings Touch and select the icon to close volume control icon. Click icon to enter into the play Mode, User EQ setting, and EQ Sel. ● Repeat Mode: 1.

User Manual
Page 26
Please use the audio converter tool to convert and then copy to the player to the unit. The unit only supports 3.95, 3.97, 3.98, 3.99 versions of very special MP3/WMA encoded audio files may not play . Refer to your media converter/player's user manual to ensure the lyrics are transferred to play on the unit. Note 2: A very small number of APE files, compressed in normal and fast mode. 25 Note 1: The Theatre also supports lyrics.
Please use the audio converter tool to convert and then copy to the player to the unit. The unit only supports 3.95, 3.97, 3.98, 3.99 versions of very special MP3/WMA encoded audio files may not play . Refer to your media converter/player's user manual to ensure the lyrics are transferred to play on the unit. Note 2: A very small number of APE files, compressed in normal and fast mode. 25 Note 1: The Theatre also supports lyrics.
User Manual
Page 29
... enter the portrait mode. Select and touch preferred file for playback. rotate the unit counter-clockwise to enter the landscape mode and clockwise to display or hide toolbars. Note: A very small number of the screen to the player. 28 Drag up or down the middle of JPEG image files may not be supported by the player, Please use windows built-in the current...
... enter the portrait mode. Select and touch preferred file for playback. rotate the unit counter-clockwise to enter the landscape mode and clockwise to display or hide toolbars. Note: A very small number of the screen to the player. 28 Drag up or down the middle of JPEG image files may not be supported by the player, Please use windows built-in the current...

User Manual
Page 32
... to start voice recording. Touch the icon to the player. The icon will change to to confirm the start in ANSI code. a) The recorder will not be removed from file prior to being copied to continue voice recording. Note: This player supports files saved as ".TXT" or ".LRC" files in the "Ready" mode. Files with other formats will start of the screen to touch [Record] icon to the previous menu or directory. Record...
... to start voice recording. Touch the icon to the player. The icon will change to to confirm the start in ANSI code. a) The recorder will not be removed from file prior to being copied to continue voice recording. Note: This player supports files saved as ".TXT" or ".LRC" files in the "Ready" mode. Files with other formats will start of the screen to touch [Record] icon to the previous menu or directory. Record...
User Manual
Page 33
... radio interface. Radio From the main menu, scroll left or right of the screen to the previous menu without save. d) Recorded files can be played back using the Music Playback feature by hand: 32 c) When recording has been completed, touch icon to show the volume control icon, click on + or - c) Touch icon will show the save record files dialog box, touch YES to save, touch...
... radio interface. Radio From the main menu, scroll left or right of the screen to the previous menu without save. d) Recorded files can be played back using the Music Playback feature by hand: 32 c) When recording has been completed, touch icon to show the volume control icon, click on + or - c) Touch icon will show the save record files dialog box, touch YES to save, touch...
User Manual
Page 37
... next available drive letter by using the supplied USB cable to connect to the PC via USB port with standard portable storage function for Windows 2000/XP/Vista systems without the need for driver installation. After connecting the player to a PC. In the explorer interface, drag up or down the middle of the player. Charging time is too low, the player will display an "Online" mode icon. USB and Charge • USB Display Mode This player has...
... next available drive letter by using the supplied USB cable to connect to the PC via USB port with standard portable storage function for Windows 2000/XP/Vista systems without the need for driver installation. After connecting the player to a PC. In the explorer interface, drag up or down the middle of the player. Charging time is too low, the player will display an "Online" mode icon. USB and Charge • USB Display Mode This player has...
User Manual
Page 38
... and duration, Auto off settings, and battery condition. Insert the support disk supplied with the player into the CD-ROM drive. 2. Click Start -> Programs -> ArcSoft MediaConverter 3 -> MediaConverter3 to 3.5 hours for Video and 12 hours for 8 hours. Click the ArcSoft MediaConverter 3 button on the splash screen to install the conversion tool. (If the splash screen fails to appear automatically, browse the disk contents by using the Window® Explorer...
... and duration, Auto off settings, and battery condition. Insert the support disk supplied with the player into the CD-ROM drive. 2. Click Start -> Programs -> ArcSoft MediaConverter 3 -> MediaConverter3 to 3.5 hours for Video and 12 hours for 8 hours. Click the ArcSoft MediaConverter 3 button on the splash screen to install the conversion tool. (If the splash screen fails to appear automatically, browse the disk contents by using the Window® Explorer...

User Manual
Page 42
.... Users can download the HV3A firmware copy into the flash disc of installation. 5. You can download the latest firmware (Haier HV3A) at the download center of firmware update, all operate had been screened. From main Interface, touch [Settings] option to enter system setting interface, select Upgrade option to select YES option to the second interface of our website (http://www.haieramerica.com). 2. When enter to start. (Show as following picture). 4. When the firmware update...
.... Users can download the HV3A firmware copy into the flash disc of installation. 5. You can download the latest firmware (Haier HV3A) at the download center of firmware update, all operate had been screened. From main Interface, touch [Settings] option to enter system setting interface, select Upgrade option to select YES option to the second interface of our website (http://www.haieramerica.com). 2. When enter to start. (Show as following picture). 4. When the firmware update...
User Manual
Page 43
... the volume of the file attempting to be turned on during playback. 2. Note: During the installation, the power should not be played. 3. Confirm the earphone is damaged. Ensure that the computer is clean, foreign particles can be turned after charge, please contact with the USB cable. The damaged file might create serious noises or voice dithering. 42 Check if the earphone plug...
... the volume of the file attempting to be turned on during playback. 2. Note: During the installation, the power should not be played. 3. Confirm the earphone is damaged. Ensure that the computer is clean, foreign particles can be turned after charge, please contact with the USB cable. The damaged file might create serious noises or voice dithering. 42 Check if the earphone plug...
User Manual
Page 44
... player. • Play song No lyrics show. Please ensure that only files that are transferred to be downloaded. 1. Some file may need to be re encoded to the player. • Video files not playable. Make sure the proper connection between computer and player. 2. • Incorrect language displayed. Check if the USB cable is full. 3. Check if the memory is damaged and replace if necessary. • Audio files not playable. Set language...
... player. • Play song No lyrics show. Please ensure that only files that are transferred to be downloaded. 1. Some file may need to be re encoded to the player. • Video files not playable. Make sure the proper connection between computer and player. 2. • Incorrect language displayed. Check if the USB cable is full. 3. Check if the memory is damaged and replace if necessary. • Audio files not playable. Set language...
User Manual
Page 50
... to follow the instructions stated above may charge you for any private or personal files and data before you ship this product to a service center, make sure that is carefully packaged. The 49 HAIER DOES NOT HAVE ANY WARRANTY REGARDING ITS WARRANTY SERVICE(S). Remove or delete any work in diagnosing problem on the Theatre, or any separate content or software (whether or not...
... to follow the instructions stated above may charge you for any private or personal files and data before you ship this product to a service center, make sure that is carefully packaged. The 49 HAIER DOES NOT HAVE ANY WARRANTY REGARDING ITS WARRANTY SERVICE(S). Remove or delete any work in diagnosing problem on the Theatre, or any separate content or software (whether or not...


