Quick Start Guide
Page 23
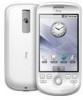
... Quick Start Guide 23 1. Welcome to Know the HTC Magic 26 4. Accessing Applications and Settings 35 10. Making Your First Call 37 11. Adding Contacts 38 12. Charging the Battery 29 6. Getting Around Your Phone 31 8. Using Wi-Fi 48 17. Entering Information 40 13. Sending a Text Message 46 15. Installing the SIM Card, Battery, and Storage Card...27 5. Sending a Multimedia Message 47 16. Sending Emails 49 18. Inside the Box 25 3. Getting to the HTC Magic Quick Start Guide...........25 2. Starting Up 30 7. Home Screen...
... Quick Start Guide 23 1. Welcome to Know the HTC Magic 26 4. Accessing Applications and Settings 35 10. Making Your First Call 37 11. Adding Contacts 38 12. Charging the Battery 29 6. Getting Around Your Phone 31 8. Using Wi-Fi 48 17. Entering Information 40 13. Sending a Text Message 46 15. Installing the SIM Card, Battery, and Storage Card...27 5. Sending a Multimedia Message 47 16. Sending Emails 49 18. Inside the Box 25 3. Getting to the HTC Magic Quick Start Guide...........25 2. Starting Up 30 7. Home Screen...
Quick Start Guide
Page 41
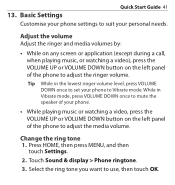
... media volumes by: • While on any screen or application (except during a call, when playing music, or watching a video), press the VOLUME UP or VOLUME DOWN button on the left panel of the phone to adjust the media volume. Change the ring tone 1. While in the lowest ringer volume level, press VOLUME DOWN once to use, then touch OK. Touch Sound & display > Phone ringtone. 3. Press HOME, then press MENU, and then touch Settings. 2. Basic Settings Customise your phone settings to suit your phone...
... media volumes by: • While on any screen or application (except during a call, when playing music, or watching a video), press the VOLUME UP or VOLUME DOWN button on the left panel of the phone to adjust the media volume. Change the ring tone 1. While in the lowest ringer volume level, press VOLUME DOWN once to use, then touch OK. Touch Sound & display > Phone ringtone. 3. Press HOME, then press MENU, and then touch Settings. 2. Basic Settings Customise your phone settings to suit your phone...

Quick Start Guide
Page 56
... status bar. 2. Copy your computer, navigate to the USB drive and open it. 4. 56 Quick Start Guide 23. Copying Multimedia Files to the storage card installed on your phone and the computer. Open the Notifications Panel (by your computer's operating system. 6. A notification icon appears in the Notifications Panel, touch USB connected and then touch Mount. 3. Disconnect the USB cable from your phone. 1. Connect the phone to the computer using Gallery or Music, copy pictures, music, and videos to Your Phone Before using the USB cable...
... status bar. 2. Copy your computer, navigate to the USB drive and open it. 4. 56 Quick Start Guide 23. Copying Multimedia Files to the storage card installed on your phone and the computer. Open the Notifications Panel (by your computer's operating system. 6. A notification icon appears in the Notifications Panel, touch USB connected and then touch Mount. 3. Disconnect the USB cable from your phone. 1. Connect the phone to the computer using Gallery or Music, copy pictures, music, and videos to Your Phone Before using the USB cable...

User Manual
Page 16
... the Volume 49 1.12 Using the Phone's Storage Card as a USB Drive 50 Chapter 2 - Using Phone Features 52 2.1 Making Calls...52 Calling using the Dialer...52 Calling a phone number in a text message 53 Calling a speed dial number 53 Calling a phone number in an email 54 Making an emergency call...54 2.2 Answering or Rejecting a Call 54 Answering an incoming call 54 Rejecting an incoming call...54 Muting the ringing sound...55 Rejecting a call and sending a text message 55 2.3 Using In-call Options 55 Handling multiple calls...55 Setting up a conference call 56...
... the Volume 49 1.12 Using the Phone's Storage Card as a USB Drive 50 Chapter 2 - Using Phone Features 52 2.1 Making Calls...52 Calling using the Dialer...52 Calling a phone number in a text message 53 Calling a speed dial number 53 Calling a phone number in an email 54 Making an emergency call...54 2.2 Answering or Rejecting a Call 54 Answering an incoming call 54 Rejecting an incoming call...54 Muting the ringing sound...55 Rejecting a call and sending a text message 55 2.3 Using In-call Options 55 Handling multiple calls...55 Setting up a conference call 56...

User Manual
Page 19
... 102 Opening a new browser window 103 Switching between browser windows 104 Finding text within a web page 104 Selecting links in web pages 105 Downloading web applications 106 Managing bookmarks...106 Setting Browser options...107 6.5 Using Bluetooth 108 Changing the phone name 109 Pairing and connecting a Bluetooth hands-free headset or car kit 109 Disconnecting a Bluetooth hands-free headset or car kit 110 Chapter 7 - Camera and Multimedia 112 7.1 Using Camera and Camcorder 112 Opening Camera...112 Closing Camera...113 Changing capture modes...
... 102 Opening a new browser window 103 Switching between browser windows 104 Finding text within a web page 104 Selecting links in web pages 105 Downloading web applications 106 Managing bookmarks...106 Setting Browser options...107 6.5 Using Bluetooth 108 Changing the phone name 109 Pairing and connecting a Bluetooth hands-free headset or car kit 109 Disconnecting a Bluetooth hands-free headset or car kit 110 Chapter 7 - Camera and Multimedia 112 7.1 Using Camera and Camcorder 112 Opening Camera...112 Closing Camera...113 Changing capture modes...
User Manual
Page 23
... and time 189 Display settings...189 Ringer settings...190 Phone services...191 Language settings...192 Social network settings...192 10.2 Protecting Your Phone 192 Protecting your SIM card with a PIN 192 Protecting your voice...188 Setting a voice clip as a ringtone 188 Renaming a voice clip...188 Chapter 10 - 23 Adding a stock quote or stock market index 184 Changing the list order ...185 Deleting an item...185 Adding the Stocks widget 185 9.9 Using Weather 185 Opening...
... and time 189 Display settings...189 Ringer settings...190 Phone services...191 Language settings...192 Social network settings...192 10.2 Protecting Your Phone 192 Protecting your SIM card with a PIN 192 Protecting your voice...188 Setting a voice clip as a ringtone 188 Renaming a voice clip...188 Chapter 10 - 23 Adding a stock quote or stock market index 184 Changing the list order ...185 Deleting an item...185 Adding the Stocks widget 185 9.9 Using Weather 185 Opening...

User Manual
Page 45
... storage card installed on hold New voicemail Compass needs orientation Upcoming event Uploading data Song is playing Waiting to computer via USB cable. Phone Basics 45 Notification icons These are the icons that may appear on the notifications area of the status bar: Icons that appear in this area New Google Mail/Gmail message More (not displayed) notifications New Microsoft Exchange ActiveSync or POP3/IMAP email Missed call New SMS/MMS Call in progress Problem with SMS/MMS delivery Call forwarding on New instant message Call...
... storage card installed on hold New voicemail Compass needs orientation Upcoming event Uploading data Song is playing Waiting to computer via USB cable. Phone Basics 45 Notification icons These are the icons that may appear on the notifications area of the status bar: Icons that appear in this area New Google Mail/Gmail message More (not displayed) notifications New Microsoft Exchange ActiveSync or POP3/IMAP email Missed call New SMS/MMS Call in progress Problem with SMS/MMS delivery Call forwarding on New instant message Call...

User Manual
Page 48
... screen. To open the Settings screen, do one of new programs. Check the available storage card and phone memory or reset the phone. See Chapter 10 for details. Set the date and time, time zone, and date or time format. 48 Phone Basics 1.10 Settings Control and customize phone settings on the Settings screen. See Chapter 6 for incoming calls. Manage your phone's wireless connections, such as Wi-Fi and Bluetooth, enable the Airplane mode, or set up call services such as voice mail, call forwarding, call and notification ring tones, or set onscreen keyboard options...
... screen. To open the Settings screen, do one of new programs. Check the available storage card and phone memory or reset the phone. See Chapter 10 for details. Set the date and time, time zone, and date or time format. 48 Phone Basics 1.10 Settings Control and customize phone settings on the Settings screen. See Chapter 6 for incoming calls. Manage your phone's wireless connections, such as Wi-Fi and Bluetooth, enable the Airplane mode, or set up call services such as voice mail, call forwarding, call and notification ring tones, or set onscreen keyboard options...

User Manual
Page 50
... transfer music, pictures, and other files from your computer to your phone's storage card, you select Mount, the phone will not be able to use some of the phone to the computer using the USB cable. To set the phone's storage card as a USB drive 1. A notification icon ( ) appears in this chapter to learn how to display the volume level. Open the Notifications panel. In the Notifications panel, tap USB connected and then tap Mount. Tap Sound & display > Media volume. 3. 50 Phone...
... transfer music, pictures, and other files from your computer to your phone's storage card, you select Mount, the phone will not be able to use some of the phone to the computer using the USB cable. To set the phone's storage card as a USB drive 1. A notification icon ( ) appears in this chapter to learn how to display the volume level. Open the Notifications panel. In the Notifications panel, tap USB connected and then tap Mount. Tap Sound & display > Media volume. 3. 50 Phone...

User Manual
Page 58
... view call history for this area to check who the caller was or view all your contacts list), edit the number before you miss a call, the missed call icon ( )appears in the title bar. Press CALL > MENU, and then tap Call history. 2. Use the Call History tab of the following: • Tap the name or number in your dialed numbers and received calls. 58 Using Phone Features 2.4 Using Call History When you redial, send a text message, or delete from call history. Tap to view the contact information (if the number...
... view call history for this area to check who the caller was or view all your contacts list), edit the number before you miss a call, the missed call icon ( )appears in the title bar. Press CALL > MENU, and then tap Call history. 2. Use the Call History tab of the following: • Tap the name or number in your dialed numbers and received calls. 58 Using Phone Features 2.4 Using Call History When you redial, send a text message, or delete from call history. Tap to view the contact information (if the number...

User Manual
Page 60
... Dialing Numbers Voicemail Clear voicemail notification Call forwarding Call barring Additional call settings Phone settings Cell broadcast Cell broadcast settings Description Restrict outgoing calls to open the phone settings menu, press HOME > MENU, and then tap Settings > Call settings. Specify another voice mail number aside from the voice mail number on your phone to block various categories of cell broadcast messages from your wireless service provider. If you have a notification of an unknown contact number when a call with this feature you want your SIM card. 60 Using...
... Dialing Numbers Voicemail Clear voicemail notification Call forwarding Call barring Additional call settings Phone settings Cell broadcast Cell broadcast settings Description Restrict outgoing calls to open the phone settings menu, press HOME > MENU, and then tap Settings > Call settings. Specify another voice mail number aside from the voice mail number on your phone to block various categories of cell broadcast messages from your wireless service provider. If you have a notification of an unknown contact number when a call with this feature you want your SIM card. 60 Using...

User Manual
Page 73
... work phone number, tap Call Work to call that contact, Facebook notifications, and more. For information, see Chapter 5. Shows your exchanged SMS messages with the contact directly by tapping any of the contact's phone numbers as a speed dial number. For more information about email, see "To add a contact to speed dial" in touch with the contact. The Contact Details screen has the following tabs: Tab Information Messages Email Information Email Albums Messages Updates and Call history events Functions Shows the information you have received...
... work phone number, tap Call Work to call that contact, Facebook notifications, and more. For information, see Chapter 5. Shows your exchanged SMS messages with the contact directly by tapping any of the contact's phone numbers as a speed dial number. For more information about email, see "To add a contact to speed dial" in touch with the contact. The Contact Details screen has the following tabs: Tab Information Messages Email Information Email Albums Messages Updates and Call history events Functions Shows the information you have received...

User Manual
Page 87
... a web page, tap the link to let you open the link in Browser or add the URL as a bookmark. • If a message contains a phone number, tap the message to open Dialer so you see exchanged messages (similar to the All messages screen from a contact (or a number) are listed in the All messages screen. To return to a chat program) with the latest message on top of the thread. Tap the Play button...
... a web page, tap the link to let you open the link in Browser or add the URL as a bookmark. • If a message contains a phone number, tap the message to open Dialer so you see exchanged messages (similar to the All messages screen from a contact (or a number) are listed in the All messages screen. To return to a chat program) with the latest message on top of the thread. Tap the Play button...
User Manual
Page 89
... message options On the All messages screen, press MENU and then tap Settings to view text messages stored on the delivery status of your message. Manage SIM card Tap to set the following : • To delete the entire thread, press MENU and then tap Delete. When prompted to your SIM card. You can also delete messages or copy these messages to confirm, tap OK. • To delete a message in receiving and sending messages. Service Center Displays the message service center number used...
... message options On the All messages screen, press MENU and then tap Settings to view text messages stored on the delivery status of your message. Manage SIM card Tap to set the following : • To delete the entire thread, press MENU and then tap Delete. When prompted to your SIM card. You can also delete messages or copy these messages to confirm, tap OK. • To delete a message in receiving and sending messages. Service Center Displays the message service center number used...

User Manual
Page 91
.... Enter the Email address and Password for details. 4. Requirement You can only add one Microsoft Exchange ActiveSync account on your phone. Enter the Exchange ActiveSync account details and then tap Next. Select the type of information you add an Exchange ActiveSync account on your phone. 5.2 Using Mail Exchanging Messages 91 The Mail application lets you add external POP3 or IMAP email accounts from popular web-based email service providers such as incoming/outgoing server settings before...
.... Enter the Email address and Password for details. 4. Requirement You can only add one Microsoft Exchange ActiveSync account on your phone. Enter the Exchange ActiveSync account details and then tap Next. Select the type of information you add an Exchange ActiveSync account on your phone. 5.2 Using Mail Exchanging Messages 91 The Mail application lets you add external POP3 or IMAP email accounts from popular web-based email service providers such as incoming/outgoing server settings before...

User Manual
Page 99
... window. A message box will not be prompted to enter the WEP key again, unless you reset your phone to its factory default settings. • Wi-Fi networks are self-discoverable, which means no additional steps are required for certain closed wireless networks. If Network notification in Wi-Fi settings is enabled, this wireless network. You need to enter the settings again if you want to connect to this icon appears in the status bar...
... window. A message box will not be prompted to enter the WEP key again, unless you reset your phone to its factory default settings. • Wi-Fi networks are self-discoverable, which means no additional steps are required for certain closed wireless networks. If Network notification in Wi-Fi settings is enabled, this wireless network. You need to enter the settings again if you want to connect to this icon appears in the status bar...

User Manual
Page 109
... a Bluetooth network. 1. You can connect your phone in the list, tap Scan for devices. Before you can use those devices to listen to music and send and/or receive calls. Consult the Bluetooth device's documentation to learn how to set to start to pair with your phone in the list to discoverable mode. Getting Connected 109 Changing the phone name The phone name identifies your phone to a Bluetooth hands-free headset or a Bluetooth car kit and use a Bluetooth hands-free...
... a Bluetooth network. 1. You can connect your phone in the list, tap Scan for devices. Before you can use those devices to listen to music and send and/or receive calls. Consult the Bluetooth device's documentation to learn how to set to start to pair with your phone in the list to discoverable mode. Getting Connected 109 Changing the phone name The phone name identifies your phone to a Bluetooth hands-free headset or a Bluetooth car kit and use a Bluetooth hands-free...

User Manual
Page 122
...; photo organizing service. 1. Tap Done. To send pictures using a messaging application 1. Compose your message and then tap Send. 122 Camera and Multimedia 4. To share a picture on Picasa You need to be signed in to a Google Account to be used. 5. Enter a Caption for each picture (if you want to share and then tap Next. Note If you selected Mail and you can upload the picture. 5. Tap Upload. Edit the file...
...; photo organizing service. 1. Tap Done. To send pictures using a messaging application 1. Compose your message and then tap Send. 122 Camera and Multimedia 4. To share a picture on Picasa You need to be signed in to a Google Account to be used. 5. Enter a Caption for each picture (if you want to share and then tap Next. Note If you selected Mail and you can upload the picture. 5. Tap Upload. Edit the file...

User Manual
Page 149
... a icon next to view your location. 8.5 Using Google Latitude Google Apps 149 Google Latitude™ user location service lets you agree with it, tap Agree & share. It also lets you can see their invitations. You must join Latitude, and then invite your friends to their names. • Add via email address. Sharing your locations After you join Latitude, you send instant messages and emails, make phone calls, and...
... a icon next to view your location. 8.5 Using Google Latitude Google Apps 149 Google Latitude™ user location service lets you agree with it, tap Agree & share. It also lets you can see their invitations. You must join Latitude, and then invite your friends to their names. • Add via email address. Sharing your locations After you join Latitude, you send instant messages and emails, make phone calls, and...

Quick Use Guide
Page 30
... email account 1. Note If the account type you want to the User Manual PDF. To access the email account you proceed. 3. Enter the Email address and Password for the email account such as incoming/outgoing server settings before you have created, press HOME, then touch the Applications tab, and then touch Mail. To learn how to compose emails, refer to set up is recommended that you get all pertinent information for the email account and then touch Next. 4. Enter...
... email account 1. Note If the account type you want to the User Manual PDF. To access the email account you proceed. 3. Enter the Email address and Password for the email account such as incoming/outgoing server settings before you have created, press HOME, then touch the Applications tab, and then touch Mail. To learn how to compose emails, refer to set up is recommended that you get all pertinent information for the email account and then touch Next. 4. Enter...


