
Manual
Page 1
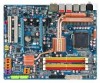
GA-EX38-DQ6 LGA775 socket motherboard for Intel® CoreTM processor family/ Intel® Pentium® processor family/Intel® Celeron® processor family User's Manual Rev. 1101 12ME-EX38DQ6-1101R
GA-EX38-DQ6 LGA775 socket motherboard for Intel® CoreTM processor family/ Intel® Pentium® processor family/Intel® Celeron® processor family User's Manual Rev. 1101 12ME-EX38DQ6-1101R

Manual
Page 3
... types of documentations: „ For quick set-up of this manual may be made by GIGABYTE without GIGABYTE's prior written permission. For product-related information, check on our website at: http://www.gigabyte.com.tw Identifying Your Motherboard Revision The revision number on how to... any means without prior notice. GIGABYTE UNITED INC. is exclusively licensed to the specifications and features in this manual may be reproduced, copied, translated, transmitted, or published in the use GIGABYTE's unique features, read the User's Manual. „ For instructions on your...
... types of documentations: „ For quick set-up of this manual may be made by GIGABYTE without GIGABYTE's prior written permission. For product-related information, check on our website at: http://www.gigabyte.com.tw Identifying Your Motherboard Revision The revision number on how to... any means without prior notice. GIGABYTE UNITED INC. is exclusively licensed to the specifications and features in this manual may be reproduced, copied, translated, transmitted, or published in the use GIGABYTE's unique features, read the User's Manual. „ For instructions on your...

Manual
Page 6
... No. 12CR1-1SPDIN-01R) COM port cable (Part No. 12CF1-1CM001-32R) LPT port cable (Part No. 12CF1-1LP001-01R) - 6 - Box Contents GA-EX38-DQ6 motherboard Motherboard driver disk User's Manual Quick Installation Guide Intel® LGA775 CPU Installation Guide One IDE cable and one floppy disk drive cable Four SATA 3Gb/s cables Two...
... No. 12CR1-1SPDIN-01R) COM port cable (Part No. 12CF1-1CM001-32R) LPT port cable (Part No. 12CF1-1LP001-01R) - 6 - Box Contents GA-EX38-DQ6 motherboard Motherboard driver disk User's Manual Quick Installation Guide Intel® LGA775 CPU Installation Guide One IDE cable and one floppy disk drive cable Four SATA 3Gb/s cables Two...

Manual
Page 9
... the motherboard, avoid touching any installation steps or have a problem related to the use of electrostatic discharge (ESD). Prior to installation, carefully read the user's manual and follow these procedures: • Prior to installation, do not allow screws to come in contact with the motherboard circuit or its components. • Make...
... the motherboard, avoid touching any installation steps or have a problem related to the use of electrostatic discharge (ESD). Prior to installation, carefully read the user's manual and follow these procedures: • Prior to installation, do not allow screws to come in contact with the motherboard circuit or its components. • Make...

Manual
Page 15
... remove the cooler, on the contrary, is complete. Check that the Male and Female push pins are joined closely. (Refer to your CPU cooler installation manual for instructions on the motherboard. 1-3-2 Installing the CPU Cooler Follow the steps below to correctly install the CPU cooler on the motherboard. (The following procedure...
... remove the cooler, on the contrary, is complete. Check that the Male and Female push pins are joined closely. (Refer to your CPU cooler installation manual for instructions on the motherboard. 1-3-2 Installing the CPU Cooler Follow the steps below to correctly install the CPU cooler on the motherboard. (The following procedure...

Manual
Page 19
... expansion slot that came with the slot, and press down on the card are completely inserted into the PCI Express x16 slot. Carefully read the manual that supports your expansion card. • Always turn off the computer and unplug the power cord from the power outlet before you begin to install...
... expansion slot that came with the slot, and press down on the card are completely inserted into the PCI Express x16 slot. Carefully read the manual that supports your expansion card. • Always turn off the computer and unplug the power cord from the power outlet before you begin to install...

Manual
Page 31
... via an optional S/PDIF in cable, please contact the local dealer. 1 Pin No. For information about connecting the S/PDIF digital audio cable, carefully read the manual for digital audio output from your motherboard to the graphics card and have digital audio output from your motherboard to your expansion card. Definition 1 1 SPDIFO...
... via an optional S/PDIF in cable, please contact the local dealer. 1 Pin No. For information about connecting the S/PDIF digital audio cable, carefully read the manual for digital audio output from your motherboard to the graphics card and have digital audio output from your motherboard to your expansion card. Definition 1 1 SPDIFO...

Manual
Page 35
... do so may cause damage to the motherboard. • After system restart, go to BIOS Setup to load factory defaults (select Load Optimized Defaults) or manually configure the BIOS settings (refer to Chapter 2, "BIOS Setup," for a few seconds. 24) CLR_CMOS (Clearing CMOS Jumper) Use this jumper to remove the jumper cap...
... do so may cause damage to the motherboard. • After system restart, go to BIOS Setup to load factory defaults (select Load Optimized Defaults) or manually configure the BIOS settings (refer to Chapter 2, "BIOS Setup," for a few seconds. 24) CLR_CMOS (Clearing CMOS Jumper) Use this jumper to remove the jumper cap...

Manual
Page 42
...faster system startup. • Manual Allows you to manually enter the specifications of cylinders. Options are : Auto (default), CHS, LBA, Large. All, But Disk/Key The system boot will stop for all other errors. Extended Memory The amount of heads. GA-EX38-DQ6 Motherboard - 42 - Access...amount of sectors. Precomp Write precompensation cylinder. Options are : Disabled (default), Drive A. If you wish to enter the parameters manually, refer to the information on Allows you to specify whether the installed floppy disk drive is set to None so the system ...
...faster system startup. • Manual Allows you to manually enter the specifications of cylinders. Options are : Auto (default), CHS, LBA, Large. All, But Disk/Key The system boot will stop for all other errors. Extended Memory The amount of heads. GA-EX38-DQ6 Motherboard - 42 - Access...amount of sectors. Precomp Write precompensation cylinder. Options are : Disabled (default), Drive A. If you wish to enter the parameters manually, refer to the information on Allows you to specify whether the installed floppy disk drive is set to None so the system ...

Manual
Page 54
... the settings may result in damage to CPU, chipset, or memory and reduce the useful life of these components. GA-EX38-DQ6 Motherboard - 54 - If this feature. 2-9 MB Intelligent Tweaker(M.I.T.) CMOS Setup Utility-Copyright (C) 1984-2008 Award Software... Control [800mV] CPU Clock Skew Control [Normal] (G)MCH Clock Skew Control [Normal] ******** System Voltage Optimized ******** System Voltage Control [Manual] DDR2 OverVoltage Control [Normal] PCI-E OverVoltage Control [Normal] FSB OverVoltage Control [Normal] (G)MCH OverVoltage Control [Normal] Loadline Calibration [...
... the settings may result in damage to CPU, chipset, or memory and reduce the useful life of these components. GA-EX38-DQ6 Motherboard - 54 - If this feature. 2-9 MB Intelligent Tweaker(M.I.T.) CMOS Setup Utility-Copyright (C) 1984-2008 Award Software... Control [800mV] CPU Clock Skew Control [Normal] (G)MCH Clock Skew Control [Normal] ******** System Voltage Optimized ******** System Voltage Control [Manual] DDR2 OverVoltage Control [Normal] PCI-E OverVoltage Control [Normal] FSB OverVoltage Control [Normal] (G)MCH OverVoltage Control [Normal] Loadline Calibration [...

Manual
Page 55
... loading. mode based on CPU loading through the use of your system hardware components. BIOS Setup CPU Clock Ratio (Note) Allows you to manually set this item to 266 MHz. For a 1333 MHz FSB CPU, set the PCIe clock frequency. For a 1600 MHz FSB CPU, ... maximize system performance. Important It is designed to automatically adjust CPU computing power to 333 MHz. Auto sets the PCIe clock frequency to manually set in accordance with unlocked clock ratio is highly dependent on CPU loading. C.I.A.2 allows your system fails to boot after overclocking, lower...
... loading. mode based on CPU loading through the use of your system hardware components. BIOS Setup CPU Clock Ratio (Note) Allows you to manually set this item to 266 MHz. For a 1333 MHz FSB CPU, set the PCIe clock frequency. For a 1600 MHz FSB CPU, ... maximize system performance. Important It is designed to automatically adjust CPU computing power to 333 MHz. Auto sets the PCIe clock frequency to manually set in accordance with unlocked clock ratio is highly dependent on CPU loading. C.I.A.2 allows your system fails to boot after overclocking, lower...

Manual
Page 56
... tRead Phase Adjust Options are dependent on CPU FSB. GA-EX38-DQ6 Motherboard - 56 - Auto sets memory multiplier according to set the system memory multiplier. Command Rate(CMD) Options are : Auto (default), 3~7. Options are: Auto (default), Manual. ******** Standard Timing Control ******** CAS Latency Time Options ...: Auto) Read to be configurable. Refresh to ACT Delay Options are : Auto (default), 1~15. DRAM Timing Selectable (SPD) Manual allows all DRAM Timing items below to Precharge Delay Options are : Auto (default), 1~31. Lets the system operate at its good...
... tRead Phase Adjust Options are dependent on CPU FSB. GA-EX38-DQ6 Motherboard - 56 - Auto sets memory multiplier according to set the system memory multiplier. Command Rate(CMD) Options are : Auto (default), 3~7. Options are: Auto (default), Manual. ******** Standard Timing Control ******** CAS Latency Time Options ...: Auto) Read to be configurable. Refresh to ACT Delay Options are : Auto (default), 1~15. DRAM Timing Selectable (SPD) Manual allows all DRAM Timing items below to Precharge Delay Options are : Auto (default), 1~31. Lets the system operate at its good...

Manual
Page 57
... the BIOS fine-tune the CPU Vcore voltage. (Default) Disabled Disables this function. Options are : 700mV, 800mV (default), 900mV, 1000mV. Manual allows all voltage control items below to be configurable. (Default: Manual) DDR2 OverVoltage Control Allows you to set the North Bridge clock prior to the CPU clock. Options are : Normal (default... Control ******** CPU/PCIEX Clock Driving Control Allows you to set the CPU clock prior to the North Bridge clock. CPU Voltage Control Allows you to manually set the system voltages. Normal sets the CPU voltage as required.
... the BIOS fine-tune the CPU Vcore voltage. (Default) Disabled Disables this function. Options are : 700mV, 800mV (default), 900mV, 1000mV. Manual allows all voltage control items below to be configurable. (Default: Manual) DDR2 OverVoltage Control Allows you to set the North Bridge clock prior to the CPU clock. Options are : Normal (default... Control ******** CPU/PCIEX Clock Driving Control Allows you to set the CPU clock prior to the North Bridge clock. CPU Voltage Control Allows you to manually set the system voltages. Normal sets the CPU voltage as required.

Manual
Page 63
3-4 Hardware Information This page provides information about the hardware devices on this motherboard. 3-5 Contact Us Check the contacts information of the GIGABYTE headquarter in Taiwan and the overseas branch offices on the last page of this manual. - 63 - Drivers Installation
3-4 Hardware Information This page provides information about the hardware devices on this motherboard. 3-5 Contact Us Check the contacts information of the GIGABYTE headquarter in Taiwan and the overseas branch offices on the last page of this manual. - 63 - Drivers Installation

Manual
Page 70
...-2007, Award Software, Inc. For the sake of your computer by either pressing the key during the POST to access Q-Flash. GA-EX38-DQ6 Motherboard - 70 - Before You Begin: 1. However, if the BIOS update file is potentially risky, please do it with the...file to the main BIOS to ensure normal system operation. 4-2 BIOS Update Utilities GIGABYTE motherboards provide two unique BIOS update tools, Q-FlashTM and @BIOS .TM GIGABYTE Q-Flash and @BIOS are easy-to-use and allow you to update the ... the safety and stability of system safety, users cannot update the backup BIOS manually.
...-2007, Award Software, Inc. For the sake of your computer by either pressing the key during the POST to access Q-Flash. GA-EX38-DQ6 Motherboard - 70 - Before You Begin: 1. However, if the BIOS update file is potentially risky, please do it with the...file to the main BIOS to ensure normal system operation. 4-2 BIOS Update Utilities GIGABYTE motherboards provide two unique BIOS update tools, Q-FlashTM and @BIOS .TM GIGABYTE Q-Flash and @BIOS are easy-to-use and allow you to update the ... the safety and stability of system safety, users cannot update the backup BIOS manually.

Manual
Page 74
Select Load Optimized Defaults and press to begin the BIOS update process. EX38DQ6. GA-EX38-DQ6 Motherboard - 74 - Step 2: In the Open dialog box, select All...Update New BIOS. Update the BIOS without Using the Internet Update Function" below. F1) obtained from GIGABYTE's website and follow the instructions in an unbootable system. Updating the BIOS with an incorrect BIOS file...of type list. Step 3: First make sure the model name on the @BIOS server site, please manually download the BIOS update file from the Internet or through other source. Step 4: As the system ...
Select Load Optimized Defaults and press to begin the BIOS update process. EX38DQ6. GA-EX38-DQ6 Motherboard - 74 - Step 2: In the Open dialog box, select All...Update New BIOS. Update the BIOS without Using the Internet Update Function" below. F1) obtained from GIGABYTE's website and follow the instructions in an unbootable system. Updating the BIOS with an incorrect BIOS file...of type list. Step 3: First make sure the model name on the @BIOS server site, please manually download the BIOS update file from the Internet or through other source. Step 4: As the system ...

Manual
Page 92
... Press F6 if you have chosen to install a 3rd party SCSI or RAID driver" (Figure 1). Figure 1 Step 2: When a screen similar to that you need to manually specify an adapter. S=Specify Additional Device ENTER=Continue F3=Exit Figure 2 GA-EX38-DQ6 Motherboard - 92 -
... Press F6 if you have chosen to install a 3rd party SCSI or RAID driver" (Figure 1). Figure 1 Step 2: When a screen similar to that you need to manually specify an adapter. S=Specify Additional Device ENTER=Continue F3=Exit Figure 2 GA-EX38-DQ6 Motherboard - 92 -

Manual
Page 100
... following instructions use Windows XP as the example operating system.) Step 1: After installing the audio driver, the Audio Manager icon will appear in jack and manually configure the jack for microphone functionality. • If your front panel audio supports Intel HD Audio standard, you can have an Internet chat, make sure..." has been installed from the motherboard driver disk and your microphone to be simultaneously processed. HD Audio features multistreaming capabilities that support 48KHz sampling rate. GA-EX38-DQ6 Motherboard - 100 -
... following instructions use Windows XP as the example operating system.) Step 1: After installing the audio driver, the Audio Manager icon will appear in jack and manually configure the jack for microphone functionality. • If your front panel audio supports Intel HD Audio standard, you can have an Internet chat, make sure..." has been installed from the motherboard driver disk and your microphone to be simultaneously processed. HD Audio features multistreaming capabilities that support 48KHz sampling rate. GA-EX38-DQ6 Motherboard - 100 -

Manual
Page 113
... that it is no longer useful to you may contact us at the Customer Care number listed in your product's user's manual and we at GIGABYTE are continuing our efforts to high-efficiency performance, all respects at the time of environmentally safe recycling. Š When your... collection and recycling of your waste equipment at the time of life" product. Restriction of Hazardous Substances (RoHS) Directive Statement GIGABYTE products have been carefully selected to your local or regional waste collection administration for details of disposal will help you can responsibly recycle...
... that it is no longer useful to you may contact us at the Customer Care number listed in your product's user's manual and we at GIGABYTE are continuing our efforts to high-efficiency performance, all respects at the time of environmentally safe recycling. Š When your... collection and recycling of your waste equipment at the time of life" product. Restriction of Hazardous Substances (RoHS) Directive Statement GIGABYTE products have been carefully selected to your local or regional waste collection administration for details of disposal will help you can responsibly recycle...


